-
11-pytorch-使用自己的数据集测试
b站小土堆pytorch教程学习笔记
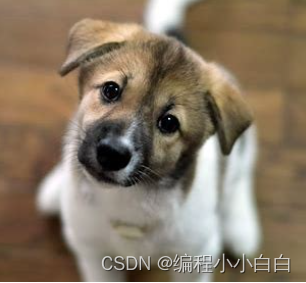
import torch import torchvision from PIL import Image from torch import nn img_path= '../imgs/dog.png' image=Image.open(img_path) print(image) # image=image.convert('RGB') transform=torchvision.transforms.Compose([torchvision.transforms.Resize((32,32)), torchvision.transforms.ToTensor()]) image=transform(image) print(image.shape) #加载模型 class Han(nn.Module): def __init__(self): super(Han, self).__init__() self.model = nn.Sequential( nn.Conv2d(3, 32, kernel_size=5, stride=1, padding=2), nn.MaxPool2d(2), nn.Conv2d(32, 32, kernel_size=5, stride=1, padding=2), nn.MaxPool2d(2), nn.Conv2d(32, 64, kernel_size=5, stride=1, padding=2), nn.MaxPool2d(2), nn.Flatten(), nn.Linear(64 * 4 * 4, 64), nn.Linear(64, 10) ) def forward(self, x): x = self.model(x) return x model=torch.load('../han_9.pth',map_location=torch.device('cpu'))#将GPU上运行的模型转移到CPU print(model) #对图片进行reshap image=torch.reshape(image,(-1,3,32,32)) #将模型转化为测试类型 model.eval() with torch.no_grad():#节约内存 output=model(image) print(output) print(output.argmax(1))- 1
- 2
- 3
- 4
- 5
- 6
- 7
- 8
- 9
- 10
- 11
- 12
- 13
- 14
- 15
- 16
- 17
- 18
- 19
- 20
- 21
- 22
- 23
- 24
- 25
- 26
- 27
- 28
- 29
- 30
- 31
- 32
- 33
- 34
- 35
- 36
- 37
- 38
- 39
- 40
- 41
- 42
- 43
- 44
- 45
- 46
- 47
- 48
- 49
torch.Size([3, 32, 32])
Han(
(model): Sequential(
(0): Conv2d(3, 32, kernel_size=(5, 5), stride=(1, 1), padding=(2, 2))
(1): MaxPool2d(kernel_size=2, stride=2, padding=0, dilation=1, ceil_mode=False)
(2): Conv2d(32, 32, kernel_size=(5, 5), stride=(1, 1), padding=(2, 2))
(3): MaxPool2d(kernel_size=2, stride=2, padding=0, dilation=1, ceil_mode=False)
(4): Conv2d(32, 64, kernel_size=(5, 5), stride=(1, 1), padding=(2, 2))
(5): MaxPool2d(kernel_size=2, stride=2, padding=0, dilation=1, ceil_mode=False)
(6): Flatten(start_dim=1, end_dim=-1)
(7): Linear(in_features=1024, out_features=64, bias=True)
(8): Linear(in_features=64, out_features=10, bias=True)
)
)
tensor([[-2.0302, -0.6256, 0.7483, 1.5765, 0.2651, 2.2243, -0.7037, -0.5262,
-1.4401, -0.6563]])
tensor([5])
Process finished with exit code 0
预测正确!

-
相关阅读:
基于标签量信息的联邦学习节点选择算法
@PostConstruct虽好,请勿乱用
计算机网络原理 谢希仁(第8版)第四章习题答案
定制你的【Spring Boot Starter】,加速开发效率
Python+Selenium- 环境搭建
neo4j
Clion 初始化 QT
音视频 - 视频编码原理
U盘重装系统,踩了很多坑后的总结
如何将Windows 10升级到Windows11 22H2?
- 原文地址:https://blog.csdn.net/weixin_45743760/article/details/136253467
