-
华为obs上传下载-Java版 2023-11-23
弄了半天,老师帮弄成功了,经过同意,分享到网上,希望能帮助更多人,至于怎么弄的,我也不知道。
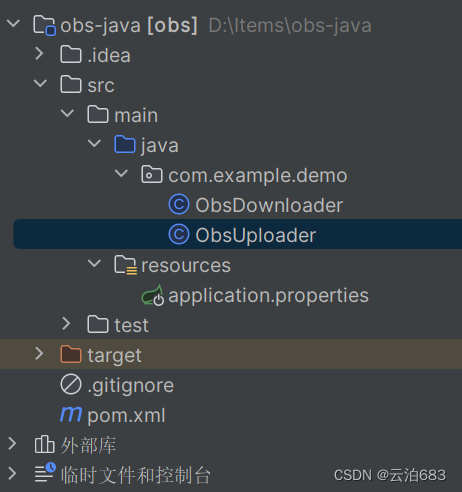
创建idea项目后,项目结构,对应文件没有的创一个
pom.xm
注意改Java版本,我的是11,然后重新mavan配置
- "1.0" encoding="UTF-8"?>
- <project xmlns="http://maven.apache.org/POM/4.0.0"
- xmlns:xsi="http://www.w3.org/2001/XMLSchema-instance"
- xsi:schemaLocation="http://maven.apache.org/POM/4.0.0 http://maven.apache.org/xsd/maven-4.0.0.xsd">
- <modelVersion>4.0.0modelVersion>
- <groupId>org.examplegroupId>
- <artifactId>obsartifactId>
- <version>1.0-SNAPSHOTversion>
- <properties>
- <maven.compiler.source>11maven.compiler.source>//修改java版本
- <maven.compiler.target>11maven.compiler.target>//修改java版本
- <project.build.sourceEncoding>UTF-8project.build.sourceEncoding>
- properties>
- <dependencies>
- <dependency>
- <groupId>com.huaweicloudgroupId>
- <artifactId>esdk-obs-java-bundleartifactId>
- <version>3.21.11version>
- dependency>
- <dependency>
- <groupId>org.springframework.bootgroupId>
- <artifactId>spring-boot-starter-webartifactId>
- <version>2.5.4version>
- dependency>
- <dependency>
- <groupId>org.springframework.bootgroupId>
- <artifactId>spring-boot-starter-data-jpaartifactId>
- <version>2.5.4version>
- dependency>
- dependencies>
- project>
application.properties
- # huawei ods
- huawei.obs.ak=修改成你的ak
- huawei.obs.sk=修改成你的sk
- # ???endPoint
- huawei.obs.upload.endPoint=endPoint.com
- # ???endPoint
- huawei.obs.access.endPoint=https://endPoint.com
- # ?
- huawei.obs.bucketName=obs-bucket-dev
ObsDownloader
修改对应参数,最后返回一个图片地址,访问查看。
- package com.example.demo;
- import com.obs.services.ObsClient;
- import com.obs.services.model.*;
- import java.io.File;
- public class ObsDownloader {
- public static void main(String[] args) {
- // 请替换成你的 Access Key 和 Secret Key
- String accessKey = "你的 Access Key";
- String secretKey = "你的Secret Key";
- // 请替换成你的 Endpoint
- String endpoint = "你的 Endpoint";
- // 请替换成你的桶名称
- String bucketName = "你的桶名称";
- // 本地文件路径,你的文件目录包含名字
- String filePath = "D:\\111.png";
- // OBS 对象存储路径,即上传后在桶中的文件路径,包含文件名
- String objectKey = "1/iii/111.png";
- // 创建 ObsClient
- ObsClient obsClient = new ObsClient(accessKey, secretKey, endpoint);
- TemporarySignatureRequest request = new TemporarySignatureRequest(HttpMethodEnum.GET, 3600);
- //设置桶名,一般都是写在配置里,这里直接赋值即可
- request.setBucketName(bucketName);
- //这里相当于设置你上传到obs的文件路
- request.setObjectKey(objectKey);
- TemporarySignatureResponse response = obsClient.createTemporarySignature(request);
- System.out.println(response.getSignedUrl());
- }
- }
ObsUploader
- package com.example.demo;
- import com.obs.services.ObsClient;
- import com.obs.services.model.PutObjectRequest;
- import com.obs.services.model.PutObjectResult;
- import java.io.File;
- public class ObsUploader {
- public static void main(String[] args) {
- // 请替换成你的 Access Key 和 Secret Key
- String accessKey = "你的 Access Key ";
- String secretKey = "你的Secret Key";
- // 请替换成你的 Endpoint
- String endpoint = "你的 Endpoint";
- // 请替换成你的桶名称
- String bucketName = "你的桶名称";
- // 本地文件路径
- String filePath = "D:\\111.png";
- // OBS 对象存储路径,即上传后在桶中的文件路径
- String objectKey = "1/iii/111.png";
- // 创建 ObsClient
- ObsClient obsClient = new ObsClient(accessKey, secretKey, endpoint);
- // 创建 PutObjectRequest 对象,设置桶名、对象名和本地文件路径
- PutObjectRequest putObjectRequest = new PutObjectRequest(bucketName, objectKey, new File(filePath));
- try {
- // 执行上传
- PutObjectResult putObjectResult = obsClient.putObject(putObjectRequest);
- // 打印上传成功信息
- System.out.println("File uploaded successfully. ETag: " + putObjectResult.getEtag());
- } catch (Exception e) {
- // 打印上传失败信息
- System.err.println("File upload failed. Error: " + e.getMessage());
- }
- }
- }
-
相关阅读:
深度学习入门(三十九)计算性能——分布式训练、参数服务器(TBC)
[附源码]Java计算机毕业设计SSM二手图书回收销售网站
GO编译时避免引入外部动态库的解决方法
如何在DBNet中加入新的主干网络
关于使用鼠标时间mouseMove拖拽元素及元素抖动的解决方案
springboot
导航【JDK源码分析】
SpringMVC入门
Transformers
lammps提取和保存data文件中力场参数的技巧
- 原文地址:https://blog.csdn.net/qq_70280303/article/details/134561184
