-
在Qt设计师(Qt Designer )控件面板加入自定义控件
目录
1. 问题的提出
在Qt开发中,经常利用Qt设计师(Qt Designer )把界面设计好,将界面放到ui文件中,将逻辑处理放到cpp文件中,这样可以做到界面和逻辑分离,便于维护和分工,如:让界面设计人员做界面,让开发人员实现逻辑。
Qt Designer提供功能常用的控件,如:编辑框、文本控件、组框等等,但有时还是不存在满足自己业务特定需求的控件,这时就需要自己开发,并插入到Qt Designer控件面板。如何在Qt Designer控件面板实现插入自定义的控件呢?
2. 本次开发环境说明
- Ubuntu 18.0.4。
- Qt 5.14.1。
- QtCreator 4.11.0。
3. 具体实现
如图选择‘其他项目’中的‘Qt设计师自定义控件’然后选择‘Choose’(也可双击‘Qt设计师自定义控件’选项)

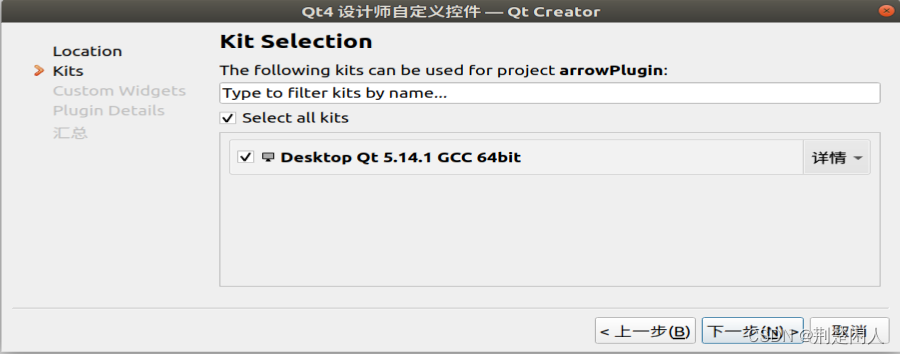
在框选位置输入项目名称,然后点击‘下一步’

注意:构建套件的版本类型需要与下图中‘帮助’列表中‘About Qt Creator’弹窗的信息版本一致
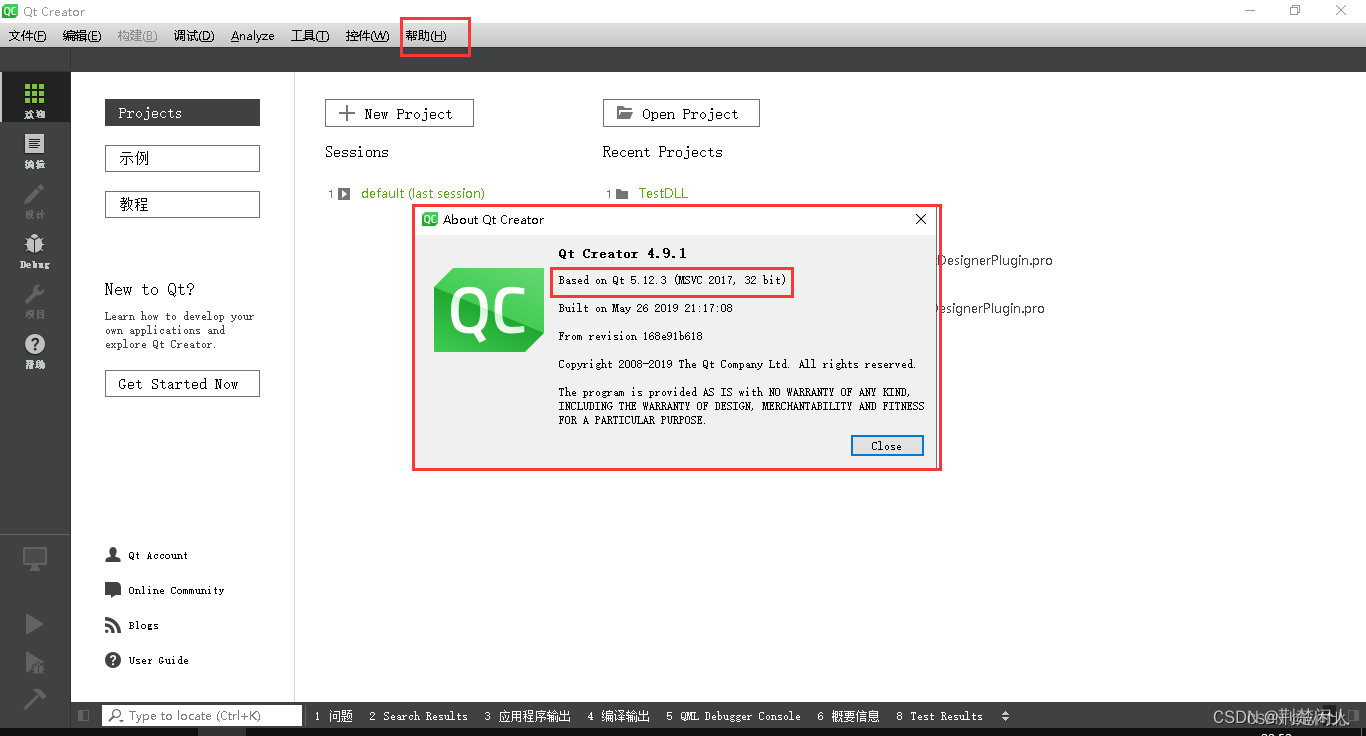
然后选择对应版本的构建套件下一步即可
双击“<新类>”节点,更改控件类名,右侧会根据控件类生成相关的文件(如果需要项目包含源码默认勾选内容即可),选择完成后,可直接点击‘下一步’到最后点击‘完成’


然后一直单击“下一步”直到完成。 完成后再从QWidget派生的子类的cpp和.h文件中添加如下代码:
- #ifndef ARROWPLUGIN_H
- #define ARROWPLUGIN_H
- #include
- class arrowPlugin : public QWidget
- {
- Q_OBJECT
- public:
- Q_PROPERTY(QColor brushcolor READ brushColor WRITE setBrushColor)
- Q_PROPERTY(QColor pencolor READ pencolor WRITE setPenColor)
- Q_PROPERTY(int penwidth READ penWidth WRITE setPenWidth)
- public:
- explicit arrowPlugin(QWidget *parent = nullptr);
- ~arrowPlugin();
- public:
- QColor pencolor() const;
- void setPenColor(const QColor&clr);
- QColor brushColor() const;
- void setBrushColor(const QColor&clr);
- int penWidth() const;
- void setPenWidth(int nWidth);
- private:
- virtual void paintEvent(QPaintEvent *event) override;
- private:
- int m_nPenWidth{1};
- QColor m_penColor{Qt::black};
- QColor m_brushColor{Qt::white};
- QPen* m_pPen{nullptr};
- QBrush* m_pBrush{nullptr};
- };
- #endif // ARROWPLUGIN_H
- #include "arrowplugin.h"
- #include
- arrowPlugin::arrowPlugin(QWidget *parent) :
- QWidget(parent)
- {
- setPenWidth(1);
- setPenColor(Qt::black);
- setBrushColor(Qt::white);
- }
- arrowPlugin::~arrowPlugin()
- {
- delete m_pPen;
- delete m_pBrush;
- }
- QColor arrowPlugin::pencolor() const
- {
- return m_penColor;
- }
- void arrowPlugin::setPenColor(const QColor&clr)
- {
- m_penColor = clr;
- if(nullptr == m_pPen)
- {
- m_pPen = new QPen();
- }
- m_pPen->setColor(clr);
- update();
- }
- QColor arrowPlugin::brushColor() const
- {
- return m_brushColor;
- }
- void arrowPlugin::setBrushColor(const QColor&clr)
- {
- m_brushColor = clr;
- if(nullptr == m_pBrush)
- {
- m_pBrush = new QBrush;
- }
- m_pBrush->setColor(m_brushColor);
- update();
- }
- int arrowPlugin::penWidth() const
- {
- return m_nPenWidth;
- }
- void arrowPlugin::setPenWidth(int nWidth)
- {
- m_nPenWidth = nWidth;
- if(nullptr == m_pPen)
- {
- m_pPen = new QPen();
- }
- m_pPen->setWidth(m_nPenWidth);
- update();
- }
- void arrowPlugin::paintEvent(QPaintEvent *event)
- {
- Q_UNUSED(event);
- QPainter painter(this);
- painter.setRenderHint(QPainter::Antialiasing);
- painter.setPen(*m_pPen);
- painter.setBrush(*m_pBrush);
- auto twicePenWidth = 2 * m_nPenWidth;
- // 减去2倍画笔宽,是为了防止画笔宽很大时,画到窗体边框上去了
- painter.drawEllipse(m_nPenWidth, m_nPenWidth, this->width() - twicePenWidth, this->height() - twicePenWidth);
- }
使用Qt的Release模式构建项目。构建完成后会默认在pro上级目录(如果没有更新构建目录的情况下)生成构建目录,在构建目录中的对应构建模式(Debug模式和Release模式)的同名文件夹中会包含库的相关文件(如下图)
 将库文件拷贝到对应的Qt安装目录中,如我将其拷贝到如下两个目录:
- /home/dansir/Qt5.14.1/5.14.1/gcc_64/plugins/designer
- /home/dansir/Qt5.14.1/Tools/QtCreator/lib/Qt/plugins/designer
注意:如果你是在Windows下用Visual Studio + Qt Visual Studio Tools开发,则需要将生成的dll和lib文件拷贝到如下两个目录:
- D:\Qt\Qt5.12.4\Tools\QtCreator\bin\plugins\designer
- D:\Qt\Qt5.12.4\5.12.4\msvc2017\plugins\designer
如下:


上述目录,请根据你本机实际更改。同理,拷贝到的目标文件夹需要与构建版本对应。
重启QtCreator,若是自定义插件添加成功,在Qt设计师中会自动生成‘自定义窗口部件’的模块,然后就可将自定义的插件当成普通项目使用,如下:

按如下步骤进行:
- 在设计师中拖动自定义的插件到窗体。
- 在设计师右侧控件属性面板更改控件的属性。
4. 注意的问题
如果在步骤3中,将生成的插件放到指定目录,重启QtCreator出现奔溃退出,则说明编写的自定义插件有异常,请排除该异常,则QtCreator就能起来了。
5. 参考链接
-
相关阅读:
【 java 面向对象】包装类的使用
MinIO 图片转文件的分界线RELEASE.2022-05-26T05-48-41Z
ES6 的 class 类和Typescript 的 class 类的区别
Eclipse安装使用UML插件
网络编码中的椭圆曲线多重签名方案
图论第二天|岛屿数量.深搜版、岛屿数量.广搜版、岛屿的最大面积、1020.飞地的数量
基于FPGA的电磁超声脉冲压缩检测系统 论文+源文件
二叉搜索树详讲
一、基础算法精讲:双指针
【Unity自制手册】Unity—Camera相机跟随的方法大全
- 原文地址:https://blog.csdn.net/danshiming/article/details/134383612