-
KubeSphere v3.4.0 部署K8S Docker + Prometheus + grafana
1、整体思路
- 将KubeSphere v3.3.0 安装包传输到其中一台机器
- 修改Linux主机名(选取3台,修改为master01、master02、master03)
- 官方文档安装
- 安装成功后,千万不要随意卸载,再次安装会失败
2、修改linux主机名
背景:一共7台机器,3台作为master,4台作为node
# 查看当前主机名 hostname # 修改主机名 hostnamectl set-hostname master01 hostnamectl set-hostname node01- 1
- 2
- 3
- 4
- 5
分别进入3台 master机器,修改主机名为master01、master02、master03
分别进入4从节点台机,修改主机名为noder01、node02、node033、 离线安装
kubesphere3.3.1 离线包链接
提取码:2333
–来自百度网盘超级会员V8的分享
参考地址:https://www.kubesphere.io/zh/docs/v3.4/installing-on-linux/introduction/air-gapped-installation/
config-sample.yaml 关键配置信息:apiVersion: kubekey.kubesphere.io/v1alpha2 kind: Cluster metadata: name: sample spec: hosts: - {name: master01, address: 192.168.10.101, internalAddress: 192.168.10.101, user: test, password: "1009"} - {name: master02, address: 192.168.10.102, internalAddress: 192.168.10.102, user: test, password: "1009"} - {name: master03, address: 192.168.10.103, internalAddress: 192.168.10.103, user: test, password: "1009"} - {name: node01, address: 192.168.10.104, internalAddress: 192.168.10.104, user: test, password: "1009"} roleGroups: # 必须3台master主机 etcd: - master01 - master02 - master03 # 选择1~3台master主机 control-plane: - master01 # 非master主机 worker: - node01 # 如需使用 kk 自动部署镜像仓库,请设置该主机组 (建议仓库与集群分离部署,减少相互影响) # 建议选择一个master主机 registry: - master01 controlPlaneEndpoint: ## Internal loadbalancer for apiservers # internalLoadbalancer: haproxy domain: lb.kubesphere.local address: "" port: 6443 kubernetes: version: v1.22.12 clusterName: cluster.local autoRenewCerts: true containerManager: docker etcd: type: kubekey network: plugin: calico kubePodsCIDR: 10.233.64.0/18 kubeServiceCIDR: 10.233.0.0/18 ## multus support. https://github.com/k8snetworkplumbingwg/multus-cni multusCNI: enabled: false # registry 里必须指定 type 类型为 harbor,否则默认安装 docker registry。 registry: type: harbor privateRegistry: "" namespaceOverride: "" registryMirrors: [] insecureRegistries: [] addons: []- 1
- 2
- 3
- 4
- 5
- 6
- 7
- 8
- 9
- 10
- 11
- 12
- 13
- 14
- 15
- 16
- 17
- 18
- 19
- 20
- 21
- 22
- 23
- 24
- 25
- 26
- 27
- 28
- 29
- 30
- 31
- 32
- 33
- 34
- 35
- 36
- 37
- 38
- 39
- 40
- 41
- 42
- 43
- 44
- 45
- 46
- 47
- 48
- 49
- 50
- 51
- 52
- 53
- 54
- 55
- 56
- 57
3.1 问题列表
3.1.1 问题1:不支持版本

** kubesphere 3.3.1对应 kubernetes版本是1.22.12**- 重要:registry 的type 设置成 harbor;address 和 internalAddress 设置成同样的ip

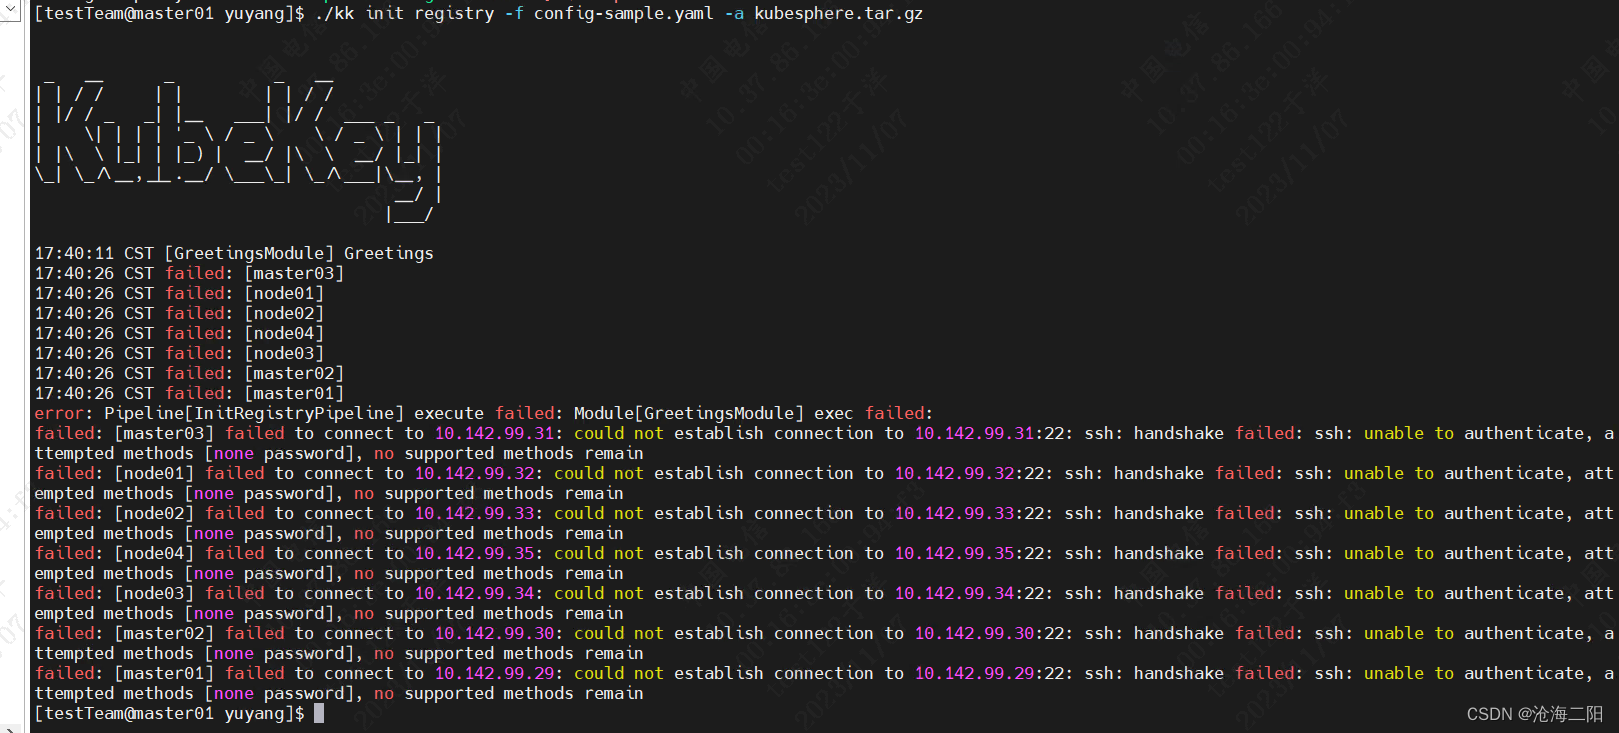
3.1.2 问题2: 需要设置对应ip的用户名密码
3.1.3 问题3: 创建harbor 提示 “未授权”

解决:
在config-sample.yaml 修改如下:... registry: type: harbor auths: "dockerhub.kubekey.local": username: admin password: Harbor12345 privateRegistry: "dockerhub.kubek:ey.local" namespaceOverride: "kubesphereio" registryMirrors: [] insecureRegistries: [] addons: []- 1
- 2
- 3
- 4
- 5
- 6
- 7
- 8
- 9
- 10
- 11
- 12
- 13
重要: 密码不能变,必须是Harbor12345
3.1.4 问题4:kubectl命令不生效
操作过程:
[root@master01 software]# cp kubectl: /usr/local/bin/kubectl cp: cannot stat ‘kubectl:’: No such file or directory # 找到kubectl安装路径 [root@master01 software]# whereis kubectl kubectl: /usr/local/bin/kubectl # 复制 /usr/local/bin/kubectl 到 /usr/bin/目录下 [root@master01 software]# cp /usr/local/bin/kubectl /usr/bin/ [root@master01 software]# kubectl logs -n kubesphere-system $(kubectl get pod -n kubesphere-system -l 'app in (ks-install, ks-installer)' -o jsonpath='{.items[0].metadata.name}') -f- 1
- 2
- 3
- 4
- 5
- 6
- 7
- 8
- 9
3.1.5 问题5:高可用配置
You must set the value of the LB address or enable the internal loadbalancer.

解决方法:修改config-sample.yaml 如下贴上的代码 三个点都做为master, 不开启loadbalancer会报错: 将 ## Internal loadbalancer for apiservers 下面这句放开即可 internalLoadbalancer: haproxy- 1
- 2
- 3
- 4
3.2 执行命令成功列表
- 将下载的 KubeKey 和制品 artifact 通过 U 盘等介质拷贝至离线环境安装节点。
- 执行以下命令创建离线集群配置文件:
./kk create config --with-kubesphere v3.3.1 --with-kubernetes v1.22.12 -f config-sample.yaml- 1

修改 config-sample.yaml 文件,3个master,4个node。kubernetes版本改为1.22.12.- 执行以下命令安装镜像仓库
./kk init registry -f config-sample.yaml -a kubesphere.tar.gz- 1

- 创建 Harbor 项目。
vim create_project_harbor.sh- 1
在harbor_projects 的 library 中添加自己的代码仓库,如testTeam
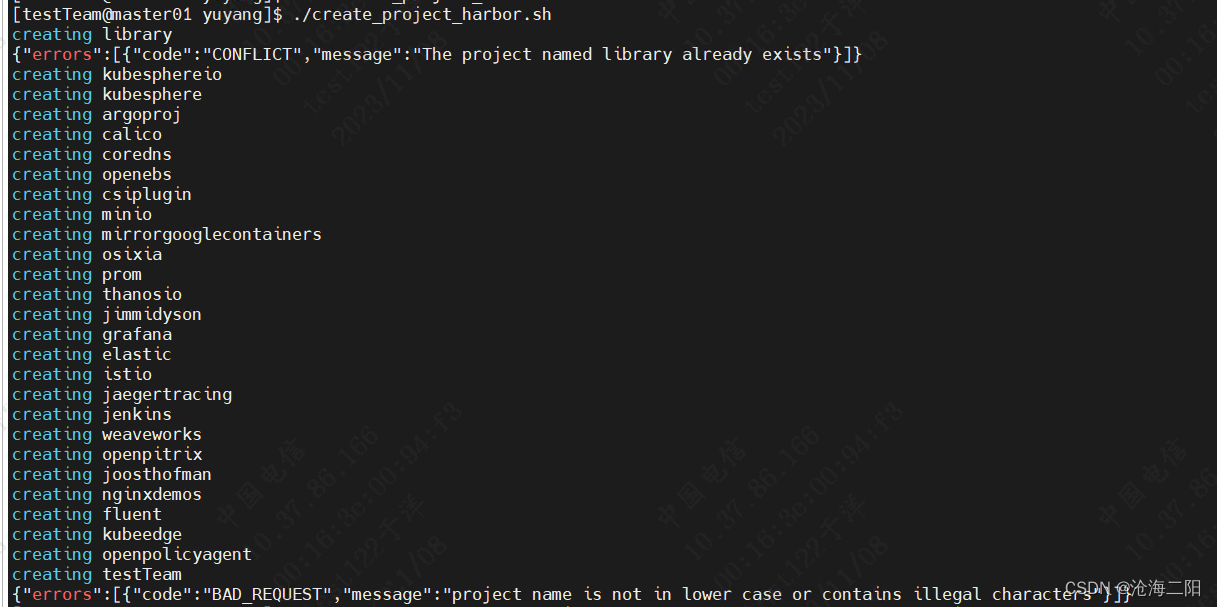
#!/usr/bin/env bash # Copyright 2018 The KubeSphere Authors. # # Licensed under the Apache License, Version 2.0 (the "License"); # you may not use this file except in compliance with the License. # You may obtain a copy of the License at # # http://www.apache.org/licenses/LICENSE-2.0 # # Unless required by applicable law or agreed to in writing, software # distributed under the License is distributed on an "AS IS" BASIS, # WITHOUT WARRANTIES OR CONDITIONS OF ANY KIND, either express or implied. # See the License for the specific language governing permissions and # limitations under the License. url="https://dockerhub.kubekey.local" #修改url的值为https://dockerhub.kubekey.local user="admin" passwd="Harbor12345" harbor_projects=(library kubesphereio kubesphere argoproj calico coredns openebs csiplugin minio mirrorgooglecontainers osixia prom thanosio jimmidyson grafana elastic istio jaegertracing jenkins weaveworks openpitrix joosthofman nginxdemos fluent kubeedge openpolicyagent testTeam ) for project in "${harbor_projects[@]}"; do echo "creating $project" curl -u "${user}:${passwd}" -X POST -H "Content-Type: application/json" "${url}/api/v2.0/projects" -d "{ \"project_name\": \"${project}\", \"public\": true}" -k #curl命令末尾加上 -k done- 1
- 2
- 3
- 4
- 5
- 6
- 7
- 8
- 9
- 10
- 11
- 12
- 13
- 14
- 15
- 16
- 17
- 18
- 19
- 20
- 21
- 22
- 23
- 24
- 25
- 26
- 27
- 28
- 29
- 30
- 31
- 32
- 33
- 34
- 35
- 36
- 37
- 38
- 39
- 40
- 41
- 42
- 43
- 44
- 45
- 46
- 47
- 48
- 49
- 50
- 51
- 52
- 53
- 54
- 55
- 56
- 57
- 58
- 59
- 60
- 61
- 62
- 63
- 64
- 65
- 66
- 67
- 68
- 69
- 70
- 71
- 72
- 73
- 74
- 75
- 76
- 77
- 78
- 79
- 80
- 81
- 82
- 83
- 84
- 85
- 86
- 87
- 88
- 89
- 90
- 91
- 92
- 93
- 94
- 95
- 96
- 97
- 98
- 99
- 100
- 101
- 102
- 103
- 104
- 105
- 106
执行创建Harbor脚本
chmod +x create_project_harbor.sh ./create_project_harbor.sh- 1
- 2
结果:
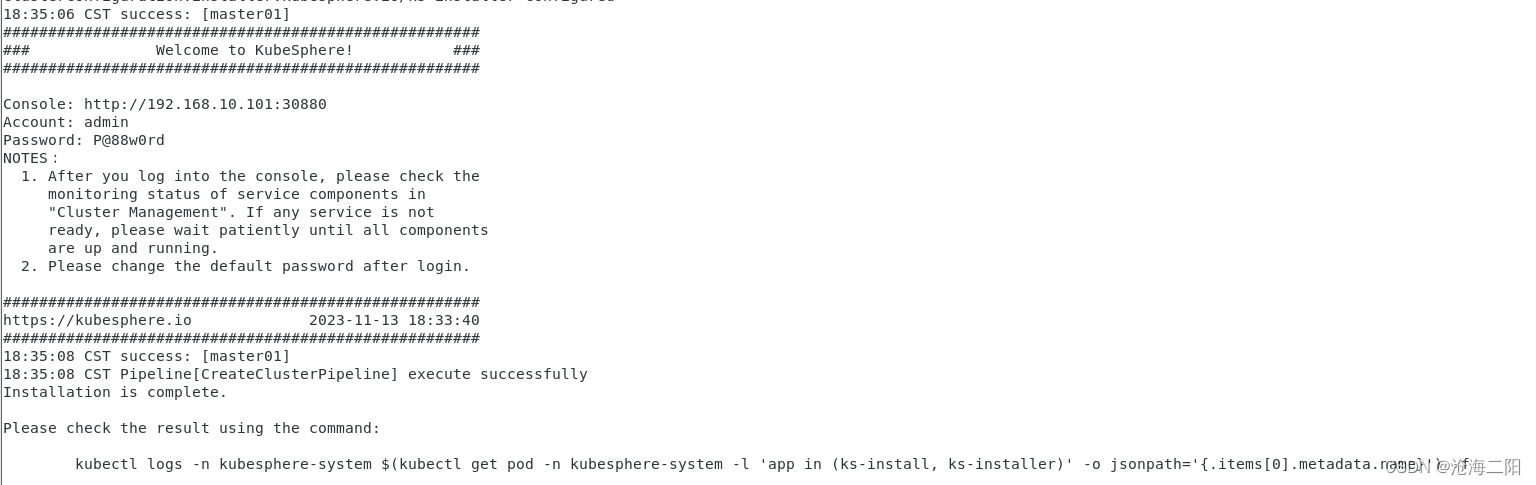
- 执行以下命令安装 KubeSphere 集群
kubectl logs -n kubesphere-system $(kubectl get pod -n kubesphere-system -l 'app in (ks-install, ks-installer)' -o jsonpath='{.items[0].metadata.name}') -f- 1

- 执行以下命令查看集群状态
cp /usr/local/bin/kubectl /usr/bin/- 1
kubectl logs -n kubesphere-system $(kubectl get pod -n kubesphere-system -l 'app in (ks-install, ks-installer)' -o jsonpath='{.items[0].metadata.name}') -f- 1
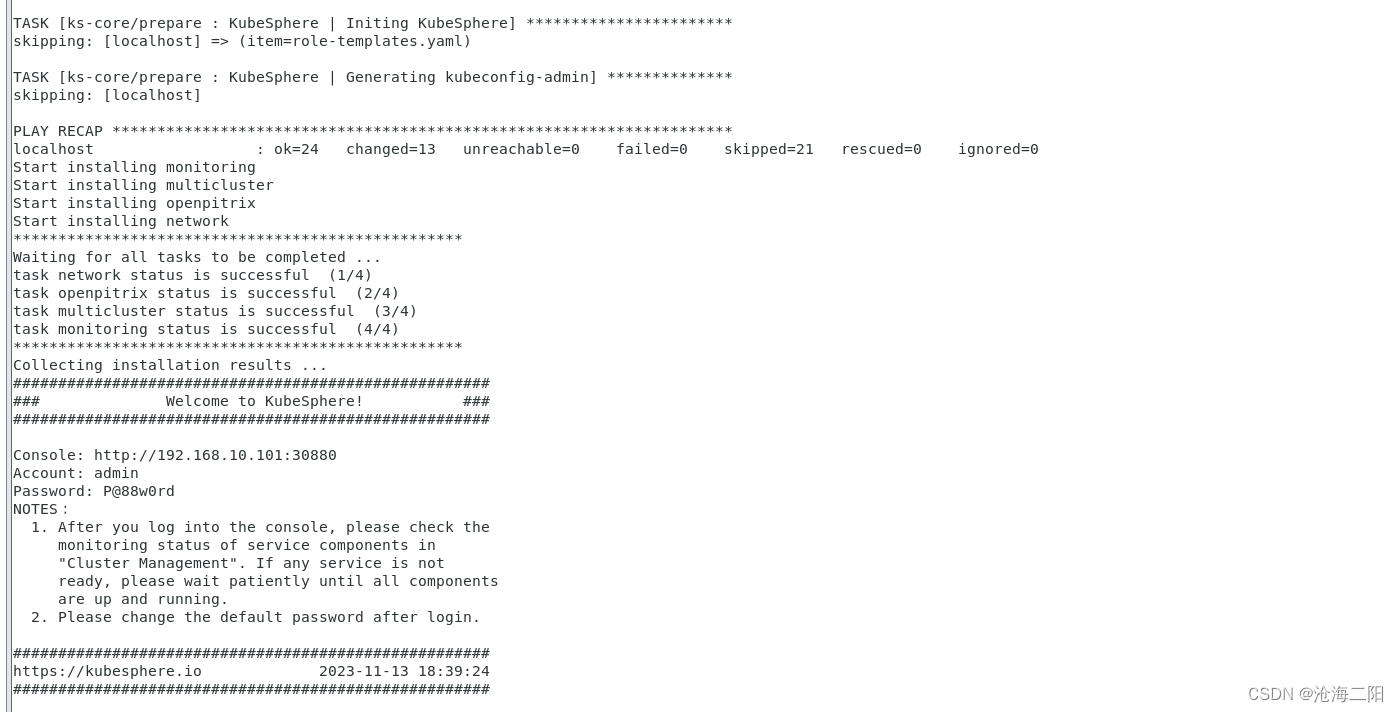
访问界面:

4. 添加节点
4.1 编辑config-sample.yaml 文件
如下图所示,在hosts和worker中添加
node05-gpu、node06-gpu、node07-gpu3台机器。

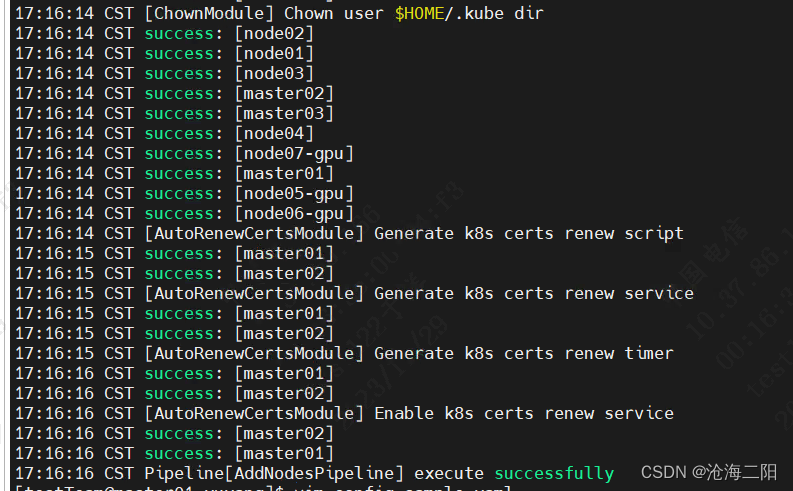
4.2 执行命令
./kk add nodes -f config-sample.yaml -a kubesphere.tar.gz --with-packages- 1
执行结果:
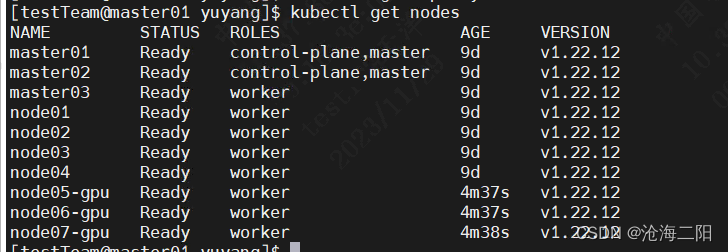
检查结果:kubectl get nodes- 1
-
相关阅读:
1773_把vim的tab键设置为4个空格显示
【无标题】超时超时超时超时超时
pytest+allure生成测试报告
15个小技巧,助你源码阅读事半功倍
【电子实验2】简单电子门铃
让你的相册变成私有云!Synology Photos 的公网访问功能指南
JMeter压力测试 5分钟让你学会如何并发压测接口
【100天精通Python】Day50:Python Web编程_Django框架从安装到使用
推演语言模型的大小与计算开销
Python 3 新特性:类型注解
- 原文地址:https://blog.csdn.net/weixin_39451323/article/details/134262797
