-
spring6-国际化:i18n | 数据校验:Validation
1、国际化:i18n

1.1、i18n概述
国际化也称作i18n,其来源是英文单词 internationalization的首末字符i和n,18为中间的字符数。由于软件发行可能面向多个国家,对于不同国家的用户,软件显示不同语言的过程就是国际化。通常来讲,软件中的国际化是通过配置文件来实现的,假设要支撑两种语言,那么就需要两个版本的配置文件。
1.2、Java国际化
(1)Java自身是支持国际化的,java.util.Locale用于指定当前用户所属的语言环境等信息,java.util.ResourceBundle用于查找绑定对应的资源文件。Locale包含了language信息和country信息,Locale创建默认locale对象时使用的静态方法:
/** * This method must be called only for creating the Locale.* * constants due to making shortcuts. */ private static Locale createConstant(String lang, String country) { BaseLocale base = BaseLocale.createInstance(lang, country); return getInstance(base, null); }- 1
- 2
- 3
- 4
- 5
- 6
- 7
- 8
(2)配置文件命名规则:
basename_language_country.properties
必须遵循以上的命名规则,java才会识别。其中,basename是必须的,语言和国家是可选的。这里存在一个优先级概念,如果同时提供了messages.properties和messages_zh_CN.propertes两个配置文件,如果提供的locale符合en_CN,那么优先查找messages_en_CN.propertes配置文件,如果没查找到,再查找messages.properties配置文件。最后,提示下,所有的配置文件必须放在classpath中,一般放在resources目录下(3)实验:演示Java国际化
第一步 创建子模块spring6-i18n,引入spring依赖

第二步 在resource目录下创建两个配置文件:messages_zh_CN.propertes和messages_en_GB.propertes

第三步 测试
package com.atguigu.spring6.javai18n; import java.nio.charset.StandardCharsets; import java.util.Locale; import java.util.ResourceBundle; public class Demo1 { public static void main(String[] args) { System.out.println(ResourceBundle.getBundle("messages", new Locale("en","GB")).getString("test")); System.out.println(ResourceBundle.getBundle("messages", new Locale("zh","CN")).getString("test")); } }- 1
- 2
- 3
- 4
- 5
- 6
- 7
- 8
- 9
- 10
- 11
- 12
- 13
- 14
- 15
- 16
1.3、Spring6国际化
1.3.1、MessageSource接口
spring中国际化是通过MessageSource这个接口来支持的
常见实现类
ResourceBundleMessageSource
这个是基于Java的ResourceBundle基础类实现,允许仅通过资源名加载国际化资源
ReloadableResourceBundleMessageSource
这个功能和第一个类的功能类似,多了定时刷新功能,允许在不重启系统的情况下,更新资源的信息
StaticMessageSource
它允许通过编程的方式提供国际化信息,一会我们可以通过这个来实现db中存储国际化信息的功能。
1.3.2、使用Spring6国际化
第一步 创建资源文件
国际化文件命名格式:基本名称 _ 语言 _ 国家.properties
{0},{1}这样内容,就是动态参数
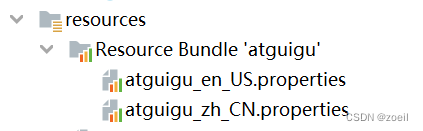
(1)创建atguigu_en_US.properties
www.atguigu.com=welcome {0},时间:{1}- 1
(2)创建atguigu_zh_CN.properties
www.atguigu.com=欢迎 {0},时间:{1}- 1
第二步 创建spring配置文件,配置MessageSource
<beans xmlns="http://www.springframework.org/schema/beans" xmlns:xsi="http://www.w3.org/2001/XMLSchema-instance" xsi:schemaLocation="http://www.springframework.org/schema/beans http://www.springframework.org/schema/beans/spring-beans.xsd"> <bean id="messageSource" class="org.springframework.context.support.ResourceBundleMessageSource"> <property name="basenames"> <list> <value>atguiguvalue> list> property> <property name="defaultEncoding"> <value>utf-8value> property> bean> beans>- 1
- 2
- 3
- 4
- 5
- 6
- 7
- 8
- 9
- 10
- 11
- 12
- 13
- 14
- 15
- 16
- 17
第三步 创建测试类
package com.atguigu.spring6.javai18n; import org.springframework.context.ApplicationContext; import org.springframework.context.annotation.AnnotationConfigApplicationContext; import org.springframework.context.support.ClassPathXmlApplicationContext; import java.util.Date; import java.util.Locale; public class Demo2 { public static void main(String[] args) { ApplicationContext context = new ClassPathXmlApplicationContext("beans.xml"); //传递动态参数,使用数组形式对应{0} {1}顺序 Object[] objs = new Object[]{"atguigu",new Date().toString()}; //www.atguigu.com为资源文件的key值, //objs为资源文件value值所需要的参数,Local.CHINA为国际化为语言 String str=context.getMessage("www.atguigu.com", objs, Locale.CHINA); System.out.println(str); } }- 1
- 2
- 3
- 4
- 5
- 6
- 7
- 8
- 9
- 10
- 11
- 12
- 13
- 14
- 15
- 16
- 17
- 18
- 19
- 20
- 21
- 22
- 23
2、数据校验:Validation

2.1、Spring Validation概述
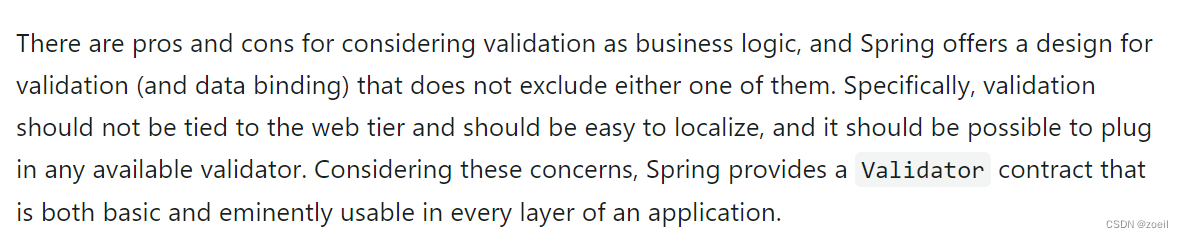
在开发中,我们经常遇到参数校验的需求,比如用户注册的时候,要校验用户名不能为空、用户名长度不超过20个字符、手机号是合法的手机号格式等等。如果使用普通方式,我们会把校验的代码和真正的业务处理逻辑耦合在一起,而且如果未来要新增一种校验逻辑也需要在修改多个地方。而spring validation允许通过注解的方式来定义对象校验规则,把校验和业务逻辑分离开,让代码编写更加方便。Spring Validation其实就是对Hibernate Validator进一步的封装,方便在Spring中使用。
在Spring中有多种校验的方式
第一种是通过实现org.springframework.validation.Validator接口,然后在代码中调用这个类
第二种是按照Bean Validation方式来进行校验,即通过注解的方式。
第三种是基于方法实现校验
除此之外,还可以实现自定义校验
2.2、实验一:通过Validator接口实现
第一步 创建子模块 spring6-validator

第二步 引入相关依赖
<dependencies> <dependency> <groupId>org.hibernate.validatorgroupId> <artifactId>hibernate-validatorartifactId> <version>7.0.5.Finalversion> dependency> <dependency> <groupId>org.glassfishgroupId> <artifactId>jakarta.elartifactId> <version>4.0.1version> dependency> dependencies>- 1
- 2
- 3
- 4
- 5
- 6
- 7
- 8
- 9
- 10
- 11
- 12
- 13
第三步 创建实体类,定义属性和方法
package com.atguigu.spring6.validation.method1; public class Person { private String name; private int age; public String getName() { return name; } public void setName(String name) { this.name = name; } public int getAge() { return age; } public void setAge(int age) { this.age = age; } }- 1
- 2
- 3
- 4
- 5
- 6
- 7
- 8
- 9
- 10
- 11
- 12
- 13
- 14
- 15
- 16
- 17
- 18
- 19
第四步 创建类实现Validator接口,实现接口方法指定校验规则
package com.atguigu.spring6.validation.method1; import org.springframework.validation.Errors; import org.springframework.validation.ValidationUtils; import org.springframework.validation.Validator; public class PersonValidator implements Validator { @Override public boolean supports(Class<?> clazz) { return Person.class.equals(clazz); } @Override public void validate(Object object, Errors errors) { ValidationUtils.rejectIfEmpty(errors, "name", "name.empty"); Person p = (Person) object; if (p.getAge() < 0) { errors.rejectValue("age", "error value < 0"); } else if (p.getAge() > 110) { errors.rejectValue("age", "error value too old"); } } }- 1
- 2
- 3
- 4
- 5
- 6
- 7
- 8
- 9
- 10
- 11
- 12
- 13
- 14
- 15
- 16
- 17
- 18
- 19
- 20
- 21
- 22
- 23
- 24
上面定义的类,其实就是实现接口中对应的方法,
supports方法用来表示此校验用在哪个类型上,
validate是设置校验逻辑的地点,其中ValidationUtils,是Spring封装的校验工具类,帮助快速实现校验。
第五步 使用上述Validator进行测试
package com.atguigu.spring6.validation.method1; import org.springframework.validation.BindingResult; import org.springframework.validation.DataBinder; public class TestMethod1 { public static void main(String[] args) { //创建person对象 Person person = new Person(); person.setName("lucy"); person.setAge(-1); // 创建Person对应的DataBinder DataBinder binder = new DataBinder(person); // 设置校验 binder.setValidator(new PersonValidator()); // 由于Person对象中的属性为空,所以校验不通过 binder.validate(); //输出结果 BindingResult results = binder.getBindingResult(); System.out.println(results.getAllErrors()); } }- 1
- 2
- 3
- 4
- 5
- 6
- 7
- 8
- 9
- 10
- 11
- 12
- 13
- 14
- 15
- 16
- 17
- 18
- 19
- 20
- 21
- 22
- 23
- 24
- 25
- 26
- 27
2.3、实验二:Bean Validation注解实现
使用Bean Validation校验方式,就是如何将Bean Validation需要使用的javax.validation.ValidatorFactory 和javax.validation.Validator注入到容器中。spring默认有一个实现类LocalValidatorFactoryBean,它实现了上面Bean Validation中的接口,并且也实现了org.springframework.validation.Validator接口。
第一步 创建配置类,配置LocalValidatorFactoryBean
@Configuration @ComponentScan("com.atguigu.spring6.validation.method2") public class ValidationConfig { @Bean public LocalValidatorFactoryBean validator() { return new LocalValidatorFactoryBean(); } }- 1
- 2
- 3
- 4
- 5
- 6
- 7
- 8
- 9
第二步 创建实体类,使用注解定义校验规则
package com.atguigu.spring6.validation.method2; import jakarta.validation.constraints.Max; import jakarta.validation.constraints.Min; import jakarta.validation.constraints.NotNull; public class User { @NotNull private String name; @Min(0) @Max(120) private int age; public String getName() { return name; } public void setName(String name) { this.name = name; } public int getAge() { return age; } public void setAge(int age) { this.age = age; } }- 1
- 2
- 3
- 4
- 5
- 6
- 7
- 8
- 9
- 10
- 11
- 12
- 13
- 14
- 15
- 16
- 17
- 18
- 19
- 20
- 21
- 22
- 23
- 24
- 25
- 26
- 27
- 28
常用注解说明
@NotNull 限制必须不为null
@NotEmpty 只作用于字符串类型,字符串不为空,并且长度不为0
@NotBlank 只作用于字符串类型,字符串不为空,并且trim()后不为空串
@DecimalMax(value) 限制必须为一个不大于指定值的数字
@DecimalMin(value) 限制必须为一个不小于指定值的数字
@Max(value) 限制必须为一个不大于指定值的数字
@Min(value) 限制必须为一个不小于指定值的数字
@Pattern(value) 限制必须符合指定的正则表达式
@Size(max,min) 限制字符长度必须在min到max之间
@Email 验证注解的元素值是Email,也可以通过正则表达式和flag指定自定义的email格式第三步 使用两种不同的校验器实现
(1)使用jakarta.validation.Validator校验
package com.atguigu.spring6.validation.method2; import jakarta.validation.ConstraintViolation; import jakarta.validation.Validator; import org.springframework.beans.factory.annotation.Autowired; import org.springframework.stereotype.Service; import java.util.Set; @Service public class MyService1 { @Autowired private Validator validator; public boolean validator(User user){ Set<ConstraintViolation<User>> sets = validator.validate(user); return sets.isEmpty(); } }- 1
- 2
- 3
- 4
- 5
- 6
- 7
- 8
- 9
- 10
- 11
- 12
- 13
- 14
- 15
- 16
- 17
- 18
- 19
- 20
(2)使用org.springframework.validation.Validator校验
package com.atguigu.spring6.validation.method2; import org.springframework.beans.factory.annotation.Autowired; import org.springframework.stereotype.Service; import org.springframework.validation.BindException; import org.springframework.validation.Validator; @Service public class MyService2 { @Autowired private Validator validator; public boolean validaPersonByValidator(User user) { BindException bindException = new BindException(user, user.getName()); validator.validate(user, bindException); return bindException.hasErrors(); } }- 1
- 2
- 3
- 4
- 5
- 6
- 7
- 8
- 9
- 10
- 11
- 12
- 13
- 14
- 15
- 16
- 17
- 18
- 19
第四步 测试
package com.atguigu.spring6.validation.method2; import org.junit.jupiter.api.Test; import org.springframework.context.ApplicationContext; import org.springframework.context.annotation.AnnotationConfigApplicationContext; public class TestMethod2 { @Test public void testMyService1() { ApplicationContext context = new AnnotationConfigApplicationContext(ValidationConfig.class); MyService1 myService = context.getBean(MyService1.class); User user = new User(); user.setAge(-1); boolean validator = myService.validator(user); System.out.println(validator); } @Test public void testMyService2() { ApplicationContext context = new AnnotationConfigApplicationContext(ValidationConfig.class); MyService2 myService = context.getBean(MyService2.class); User user = new User(); user.setName("lucy"); user.setAge(130); user.setAge(-1); boolean validator = myService.validaPersonByValidator(user); System.out.println(validator); } }- 1
- 2
- 3
- 4
- 5
- 6
- 7
- 8
- 9
- 10
- 11
- 12
- 13
- 14
- 15
- 16
- 17
- 18
- 19
- 20
- 21
- 22
- 23
- 24
- 25
- 26
- 27
- 28
- 29
- 30
2.4、实验三:基于方法实现校验
第一步 创建配置类,配置MethodValidationPostProcessor
package com.atguigu.spring6.validation.method3; import org.springframework.context.annotation.Bean; import org.springframework.context.annotation.ComponentScan; import org.springframework.context.annotation.Configuration; import org.springframework.validation.beanvalidation.LocalValidatorFactoryBean; import org.springframework.validation.beanvalidation.MethodValidationPostProcessor; @Configuration @ComponentScan("com.atguigu.spring6.validation.method3") public class ValidationConfig { @Bean public MethodValidationPostProcessor validationPostProcessor() { return new MethodValidationPostProcessor(); } }- 1
- 2
- 3
- 4
- 5
- 6
- 7
- 8
- 9
- 10
- 11
- 12
- 13
- 14
- 15
- 16
- 17
第二步 创建实体类,使用注解设置校验规则
package com.atguigu.spring6.validation.method3; import jakarta.validation.constraints.*; public class User { @NotNull private String name; @Min(0) @Max(120) private int age; @Pattern(regexp = "^1(3|4|5|7|8)\\d{9}$",message = "手机号码格式错误") @NotBlank(message = "手机号码不能为空") private String phone; public String getName() { return name; } public void setName(String name) { this.name = name; } public int getAge() { return age; } public void setAge(int age) { this.age = age; } public String getPhone() { return phone; } public void setPhone(String phone) { this.phone = phone; } }- 1
- 2
- 3
- 4
- 5
- 6
- 7
- 8
- 9
- 10
- 11
- 12
- 13
- 14
- 15
- 16
- 17
- 18
- 19
- 20
- 21
- 22
- 23
- 24
- 25
- 26
- 27
- 28
- 29
- 30
- 31
- 32
- 33
- 34
- 35
- 36
第三步 定义Service类,通过注解操作对象
package com.atguigu.spring6.validation.method3; import jakarta.validation.Valid; import jakarta.validation.constraints.NotNull; import org.springframework.stereotype.Service; import org.springframework.validation.annotation.Validated; @Service @Validated public class MyService { public String testParams(@NotNull @Valid User user) { return user.toString(); } }- 1
- 2
- 3
- 4
- 5
- 6
- 7
- 8
- 9
- 10
- 11
- 12
- 13
- 14
- 15
- 16
第四步 测试
package com.atguigu.spring6.validation.method3; import org.junit.jupiter.api.Test; import org.springframework.context.ApplicationContext; import org.springframework.context.annotation.AnnotationConfigApplicationContext; public class TestMethod3 { @Test public void testMyService1() { ApplicationContext context = new AnnotationConfigApplicationContext(ValidationConfig.class); MyService myService = context.getBean(MyService.class); User user = new User(); user.setAge(-1); myService.testParams(user); } }- 1
- 2
- 3
- 4
- 5
- 6
- 7
- 8
- 9
- 10
- 11
- 12
- 13
- 14
- 15
- 16
- 17
2.5、实验四:实现自定义校验
第一步 自定义校验注解
package com.atguigu.spring6.validation.method4; import jakarta.validation.Constraint; import jakarta.validation.Payload; import java.lang.annotation.*; @Target({ElementType.METHOD, ElementType.FIELD, ElementType.ANNOTATION_TYPE, ElementType.CONSTRUCTOR, ElementType.PARAMETER}) @Retention(RetentionPolicy.RUNTIME) @Documented @Constraint(validatedBy = {CannotBlankValidator.class}) public @interface CannotBlank { //默认错误消息 String message() default "不能包含空格"; //分组 Class<?>[] groups() default {}; //负载 Class<? extends Payload>[] payload() default {}; //指定多个时使用 @Target({ElementType.METHOD, ElementType.FIELD, ElementType.ANNOTATION_TYPE, ElementType.CONSTRUCTOR, ElementType.PARAMETER, ElementType.TYPE_USE}) @Retention(RetentionPolicy.RUNTIME) @Documented @interface List { CannotBlank[] value(); } }- 1
- 2
- 3
- 4
- 5
- 6
- 7
- 8
- 9
- 10
- 11
- 12
- 13
- 14
- 15
- 16
- 17
- 18
- 19
- 20
- 21
- 22
- 23
- 24
- 25
- 26
- 27
- 28
第二步 编写真正的校验类
package com.atguigu.spring6.validation.method4; import jakarta.validation.ConstraintValidator; import jakarta.validation.ConstraintValidatorContext; public class CannotBlankValidator implements ConstraintValidator<CannotBlank, String> { @Override public void initialize(CannotBlank constraintAnnotation) { } @Override public boolean isValid(String value, ConstraintValidatorContext context) { //null时不进行校验 if (value != null && value.contains(" ")) { //获取默认提示信息 String defaultConstraintMessageTemplate = context.getDefaultConstraintMessageTemplate(); System.out.println("default message :" + defaultConstraintMessageTemplate); //禁用默认提示信息 context.disableDefaultConstraintViolation(); //设置提示语 context.buildConstraintViolationWithTemplate("can not contains blank").addConstraintViolation(); return false; } return true; } }- 1
- 2
- 3
- 4
- 5
- 6
- 7
- 8
- 9
- 10
- 11
- 12
- 13
- 14
- 15
- 16
- 17
- 18
- 19
- 20
- 21
- 22
- 23
- 24
- 25
- 26
- 27
-
相关阅读:
代码随想录算法训练营Day 53 || 1143.最长公共子序列、1035.不相交的线、53. 最大子序和
云原生概述
C++深浅拷贝及简易string类实现
如何保护应用?可快速部署的WAF服务器分享
电脑软件:推荐一款非常强大的pdf阅读编辑软件
网络安全管理制度
2022年最新西藏建筑八大员(机械员)模拟考试题库及答案
修复vite中使用react提示Fast refresh only works when a file only exports components.
这几道SQL面试题秒杀大部分的0年工作经验的毕业生
芒果YOLOv8改进104:主干Backbone篇之DCNv3结构:即插即用|使用pytorch代码实现,并针对YOLOv8专门优化模块
- 原文地址:https://blog.csdn.net/m0_62946761/article/details/133978553