-
SpringBoot集成Lettuce客户端操作Redis
一、前言
spring-boot-starter-data-redis有两种实现 lettuce 和 jedis,spring boot 2的spring-boot-starter-data-redis中,默认使用的是lettuce作为redis客户端,也推荐使用lettuce,它与jedis的主要区别如下
- Jedis
- Jedis是同步的,不支持异步,Jedis客户端实例不是线程安全的,需要每个线程一个Jedis实例,所以一般通过连接池来使用Jedis.
- 优点
- 提供了比较全面的 Redis 操作特性的 API
- API 基本与 Redis 的指令一一对应,使用简单易理解
- 缺点
- 同步阻塞 IO
- 不支持异步
- 线程不安全
- Lettuce
- Lettuce是基于Netty框架的事件驱动的Redis客户端,其方法调用是异步的,Lettuce的API也是线程安全的,所以多个线程可以操作单个Lettuce连接来完成各种操作,同时Lettuce也支持连接池.
- 优点
- 线程安全
- 基于 Netty 框架的事件驱动的通信,支持异步和响应式编程
- 适用于分布式缓存
- 支持集群,Sentinel,管道和编码器等等功能
- 缺点
- API 更抽象,学习使用成本高,不过我们基本都使用的RedisTemplate来操作Redis,它抽象了Jedis或者Lettuce客户端,底层实现我们可以不用关心
二、基础集成配置(redis单节点)
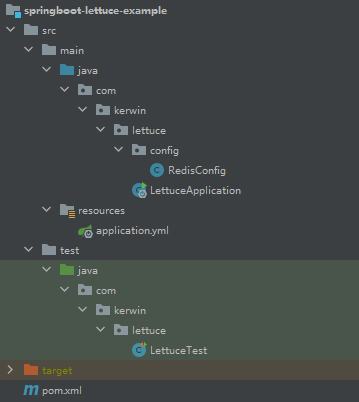
工程结构
2.1、POM
<parent> <groupId>org.springframework.boot</groupId> <artifactId>spring-boot-starter-parent</artifactId> <version>2.3.12.RELEASE</version> </parent> <dependencies> <dependency> <groupId>org.springframework.boot</groupId> <artifactId>spring-boot-starter</artifactId> </dependency> <!--springboot中的redis依赖--> <dependency> <groupId>org.springframework.boot</groupId> <artifactId>spring-boot-starter-data-redis</artifactId> </dependency> <!-- lettuce pool 缓存连接池--> <dependency> <groupId>org.apache.commons</groupId> <artifactId>commons-pool2</artifactId> </dependency> <!-- 使用jackson作为redis数据序列化 --> <dependency> <groupId>com.fasterxml.jackson.core</groupId> <artifactId>jackson-databind</artifactId> <version>2.11.4</version> </dependency> <!-- SpringBoot测试包 --> <dependency> <groupId>org.springframework.boot</groupId> <artifactId>spring-boot-starter-test</artifactId> <scope>test</scope> </dependency> </dependencies>- 1
- 2
- 3
- 4
- 5
- 6
- 7
- 8
- 9
- 10
- 11
- 12
- 13
- 14
- 15
- 16
- 17
- 18
- 19
- 20
- 21
- 22
- 23
- 24
- 25
- 26
- 27
- 28
- 29
- 30
- 31
- 32
- 33
- 34
2.2、添加配置文件application.yml
因为我们用的spring-boot-starter-data-redis包会自动配置redis连接,在配置文件中添加对应配置即可
spring: #redis配置信息 redis: ## Redis数据库索引(默认为0) database: 0 ## Redis服务器地址 host: 172.16.8.169 ## Redis服务器连接端口 port: 6379 ## Redis服务器连接密码(默认为空) password: 123456 ## 连接超时时间(毫秒) timeout: 1200 lettuce: pool: ## 连接池最大连接数(使用负值表示没有限制) max-active: 8 ## 连接池最大阻塞等待时间(使用负值表示没有限制) max-wait: -1 ## 连接池中的最大空闲连接 max-idle: 8 ## 连接池中的最小空闲连接 min-idle: 1- 1
- 2
- 3
- 4
- 5
- 6
- 7
- 8
- 9
- 10
- 11
- 12
- 13
- 14
- 15
- 16
- 17
- 18
- 19
- 20
- 21
- 22
- 23
2.3、编写配置文件
这里需要添加一个RedisTemplate的bean,设置这个RedisTemplate序列化方式为jackson
import com.fasterxml.jackson.annotation.JsonAutoDetect; import com.fasterxml.jackson.annotation.PropertyAccessor; import com.fasterxml.jackson.databind.ObjectMapper; import org.springframework.context.annotation.Bean; import org.springframework.context.annotation.Configuration; import org.springframework.data.redis.connection.RedisConnectionFactory; import org.springframework.data.redis.core.*; import org.springframework.data.redis.serializer.Jackson2JsonRedisSerializer; import org.springframework.data.redis.serializer.StringRedisSerializer; @Configuration public class RedisConfig{ /** * retemplate相关配置 */ @Bean public RedisTemplate<String, Object> redisTemplate(RedisConnectionFactory factory) { RedisTemplate<String, Object> template = new RedisTemplate<>(); // 配置连接工厂 template.setConnectionFactory(factory); //使用Jackson2JsonRedisSerializer来序列化和反序列化redis的value值(默认使用JDK的序列化方式) Jackson2JsonRedisSerializer jacksonSeial = new Jackson2JsonRedisSerializer(Object.class); ObjectMapper om = new ObjectMapper(); // 指定要序列化的域,field,get和set,以及修饰符范围,ANY是都有包括private和public om.setVisibility(PropertyAccessor.ALL, JsonAutoDetect.Visibility.ANY); // 指定序列化输入的类型,类必须是非final修饰的,final修饰的类,比如String,Integer等会跑出异常 om.enableDefaultTyping(ObjectMapper.DefaultTyping.NON_FINAL); jacksonSeial.setObjectMapper(om); // 值采用json序列化 template.setValueSerializer(jacksonSeial); //使用StringRedisSerializer来序列化和反序列化redis的key值 template.setKeySerializer(new StringRedisSerializer()); // 设置hash key 和value序列化模式 template.setHashKeySerializer(new StringRedisSerializer()); template.setHashValueSerializer(jacksonSeial); template.afterPropertiesSet(); return template; } }- 1
- 2
- 3
- 4
- 5
- 6
- 7
- 8
- 9
- 10
- 11
- 12
- 13
- 14
- 15
- 16
- 17
- 18
- 19
- 20
- 21
- 22
- 23
- 24
- 25
- 26
- 27
- 28
- 29
- 30
- 31
- 32
- 33
- 34
- 35
- 36
- 37
- 38
- 39
2.4、编写启动类
import org.springframework.boot.SpringApplication; import org.springframework.boot.autoconfigure.SpringBootApplication; @SpringBootApplication public class LettuceApplication { public static void main(String[] args) { SpringApplication.run(LettuceApplication.class); } }- 1
- 2
- 3
- 4
- 5
- 6
- 7
- 8
- 9
2.5、编写测试类测试是否连接成功
import org.junit.Test; import org.junit.runner.RunWith; import org.springframework.beans.factory.annotation.Autowired; import org.springframework.boot.test.context.SpringBootTest; import org.springframework.data.redis.core.RedisTemplate; import org.springframework.test.context.junit4.SpringRunner; @RunWith(SpringRunner.class) @SpringBootTest(classes = LettuceApplication.class) public class LettuceTest { @Autowired private RedisTemplate<String,Object> redisTemplate; @Test public void t1(){ String key = "key1"; System.out.println("插入数据到redis"); redisTemplate.opsForValue().set(key,"value1"); Object value = redisTemplate.opsForValue().get(key); System.out.println("从redis中获取到值为 "+value); Boolean delete = redisTemplate.delete(key); System.out.println("删除redis中值 "+delete); } }- 1
- 2
- 3
- 4
- 5
- 6
- 7
- 8
- 9
- 10
- 11
- 12
- 13
- 14
- 15
- 16
- 17
- 18
- 19
- 20
- 21
- 22
- 23
- Jedis
-
相关阅读:
H2数据库端口占用
基于SpringBoot的气象数据监测分析大屏
C++基础入门 函数
红队内网攻防渗透:内网渗透之内网对抗:隧道技术篇&防火墙组策略&ICMP&DNS&SMB协议&出网判断&C2上线&解决方案
Golang【Web 入门】 07 路由 - http.ServeMux
Linux shell编程学习笔记10:expr命令 和 算术运算
win 命令替代鼠标的操作
LYVE1抗体丨Relia Tech LYVE1抗体解决方案
初识java
【AutoSAR CAN】03 - 如何使用Davinci Configurator Pro工具配置CAN的波特率
- 原文地址:https://blog.csdn.net/weixin_44606481/article/details/133907103
