-
java部署linux系统
关闭防火墙
不管是windows还是linux,首先必须关闭防火墙。
- # linux添加8080端口
- firewall-cmd --zone=public --add-port=8080/tcp --permanent
- #删除80端口
- firewall-cmd --zone=public --remove-port=8080/tcp --permanent
- # 刷新使端口立即生效
- firewall-cmd --reload
JDK8安装
windows
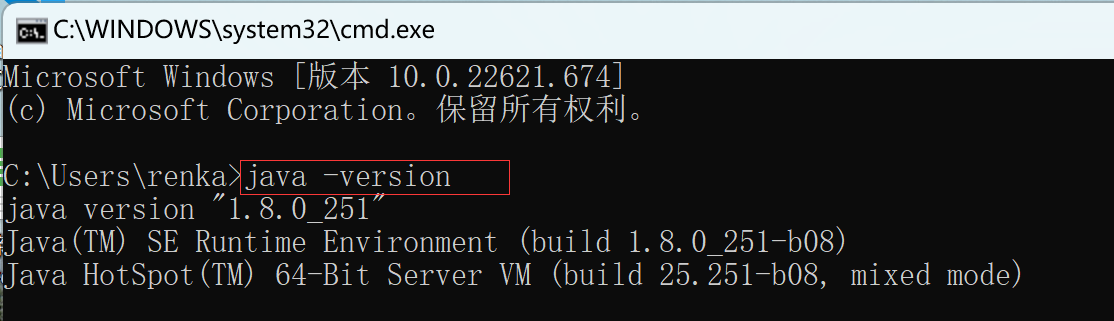
找到【jdk-8u251-windows-x64.exe】,然后双击,一直点击【下一步】就行,不需要做任何修改,也不要修改安装路径。安装结束后,使用【CMD】命令,然后输入【java -version】,然后回车。出现了下面的版本号就表示JDK8安装完成。
linux安装
- tar -zxvf jdk-8u144-linux-x64.tar.gz
- vim /etc/profile
- 在文本的最后一行粘贴如下:
- 注意JAVA_HOME=/usr/java/jdk1.8.0_144 就是你自己的目录
- #java environment
- export JAVA_HOME=/usr/java/jdk1.8.0_144
- export CLASSPATH=.:${JAVA_HOME}/jre/lib/rt.jar:${JAVA_HOME}/lib/dt.jar:${JAVA_HOME}/lib/tools.jar
- export PATH=$PATH:${JAVA_HOME}/bin
- 然后按esc,输入【:wq】
- 然后输入source /etc/profile
- 再次输入java -version
mysql修改用户名账号密码
- # 修改root账号密码
- set password for 'root'@'localhost'=password('Rays@145!');
- flush privileges;
- set password for 'root'@'%'=password('Rays@145!');
- flush privileges;
- # 创建新用户并且授权
- grant all privileges on *.* to 'ecs'@'%' identified by 'Rays@149!';
- flush privileges;
- # 如果修改或使用新的账号来连接canal,需要删除canal中的dat配置文件
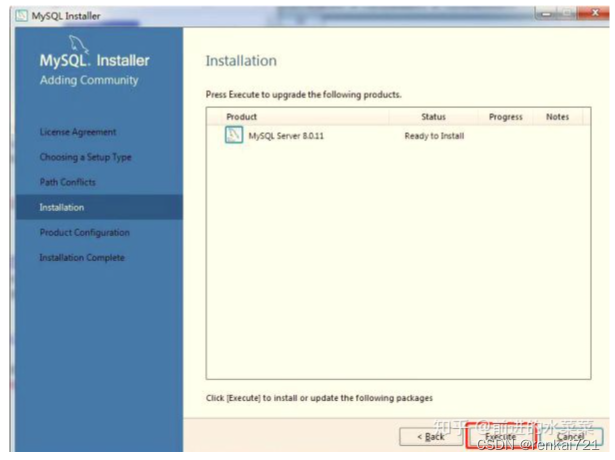
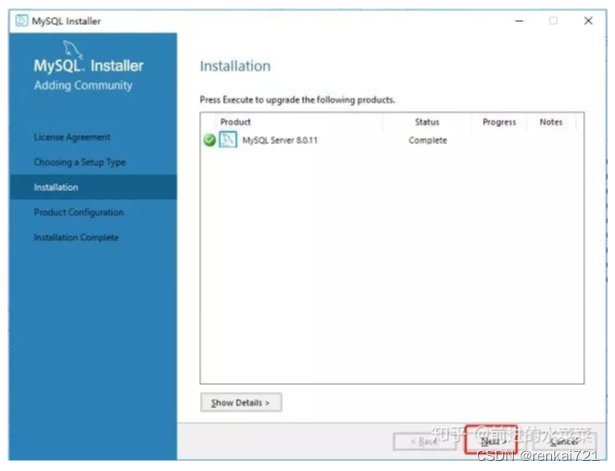
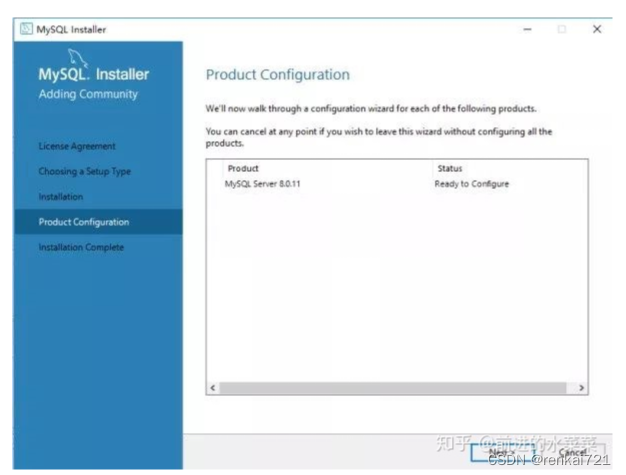
mysql安装
windows
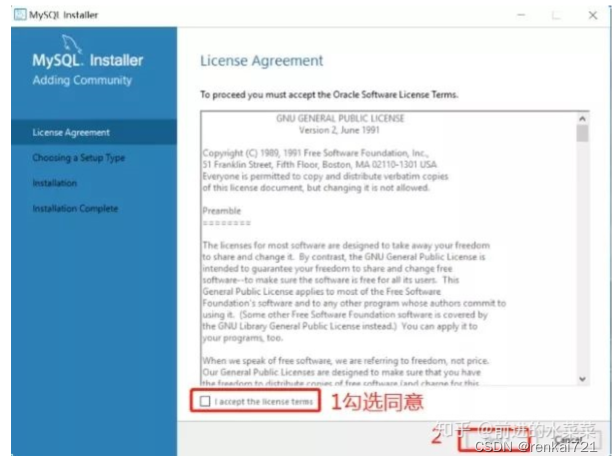
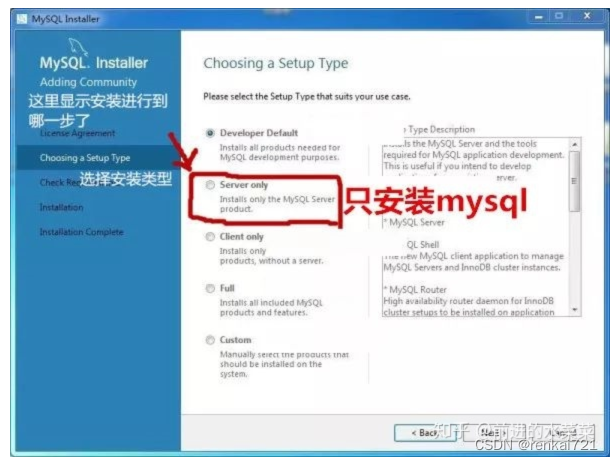
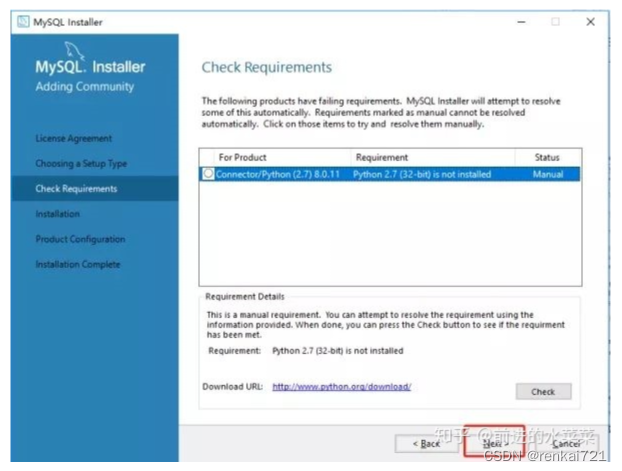
找到【mysql-installer-community-8.0.28.0.msi】,然后双击。
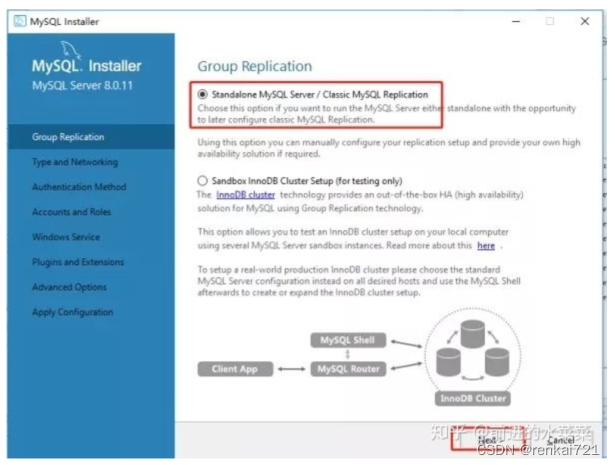

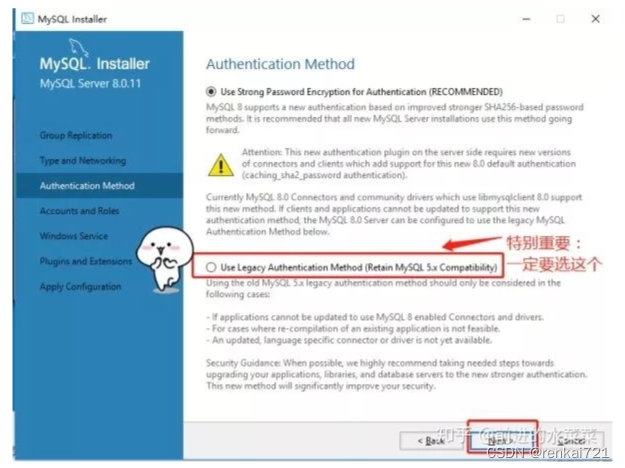
密码验证方式(Authentication Method)这一步很重要
第一个是强密码校验,mysql推荐使用最新的数据库和相关客户端,MySQL8换了加密插件,所以如果选第一种方式,很可能你的navicat等客户端连不上mysql8。
所以这里一定要选第二个(下图红框的地方),因为我们后面使用客户端navicat,它连接mysql数据库用的是就是这个加密算法,所以这一步很重要。(重要的事情说三遍)
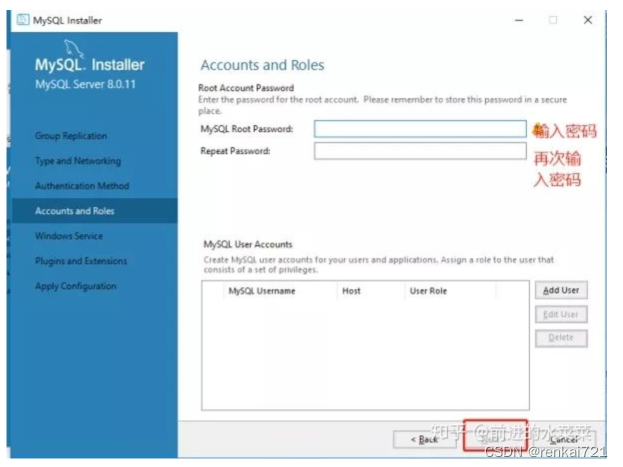
设置的密码为统一的密码,统一密码在文档顶部。
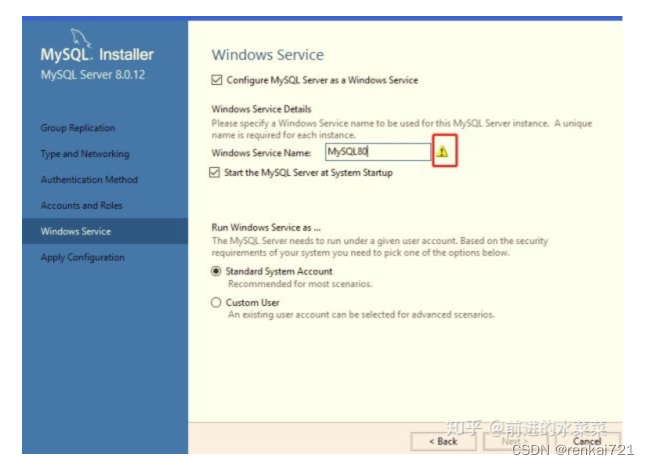
如果出现下图红框的警告,表示名称重复了,换个其他名称

linux安装
- sudo yum localinstall https://repo.mysql.com/mysql80-community-release-el7-1.noarch.rpm
- sudo yum install mysql-server
- sudo service mysqld start
- service mysqld status
- # 默认没有密码
- mysql -uroot -p
- 直接回车,然后输入命令 flush privileges
- ALTER USER 'root'@'localhost' IDENTIFIED BY 'Rays@135!';
- ALTER USER 'root'@'%' IDENTIFIED BY 'Rays@135!';
- # create user rrays@'%' identified by 'Rays@135!';
- GRANT ALL PRIVILEGES ON *.* TO rrays;
- flush privileges;
- sudo service mysqld stop
- 在etc下新建my.cnf文件,如果my.cnf已经存在不要删除,也不要修改已经有的配置,添加自己的配置在下面即可。
- vim /etc/my.cnf
- [mysqld]
- port=3306
- user=mysql
- ft_min_word_len=1
- innodb_ft_min_token_size=1
- ft_stopword_file=('')
- default-time-zone='+8:00'
- max_allowed_packet=500M
- character-set-server=utf8mb4
- default-storage-engine=INNODB
- default_authentication_plugin=mysql_native_password
- default-character-setVariable=utf8mb4
- max_connections=1000
- max_connect_errors=100
- max_user_connections=500
- lower_case_table_names=1
- interactive_timeout=1800
- wait_timeout=1800
- lock_wait_timeout=3600
- table_open_cache=128
- key_buffer_size=268435456
- sort_buffer_size=16777208
- table_cache=512M
- innodb_log_buffer_size=64M
- innodb_additional_mem_pool_size=60M
- innodb_thread_concurrency=14
- query_cache_size=4096M
- query_cache_min_res_unit=1048576
- innodb_buffer_pool_size=5G
- innodb_buffer_pool_instances=-1
- innodb_io_capacity=4500
- # 关闭mysql8的ssl,执行下面的语句,可以看到ssl是打开的
- SHOW VARIABLES LIKE '%ssl%';
- | have_openssl | YES |
- | have_ssl | YES |
- # 停止mysql服务
- $ service mysql stop
- 修改配置,找到自己安装的my.cnf文件,下面的路径只是demo
- File: /path/to/file/my.cnf
- # 增加skip_ssl
- skip_ssl
- # 注释掉disable_ssl
- # disable_ssl
- # 重启服务
- $ service mysql restart
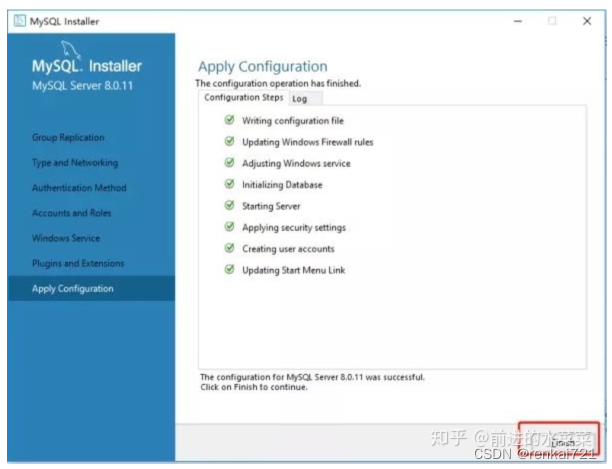
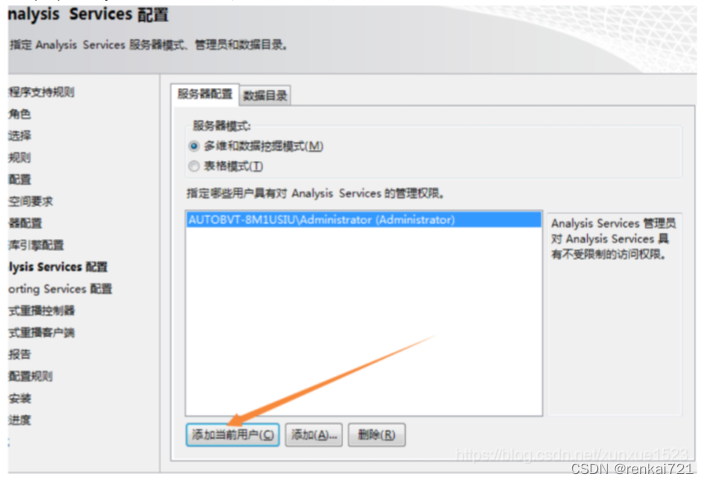
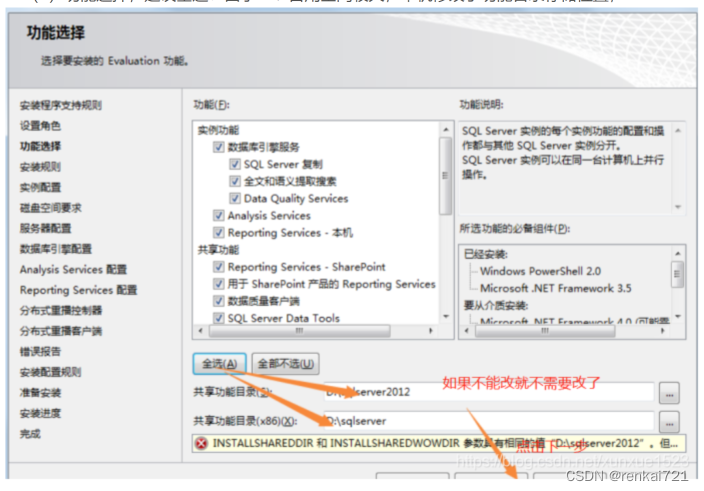
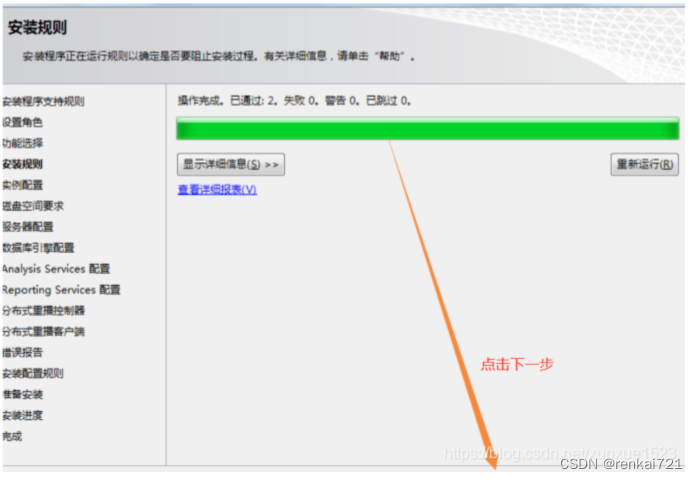
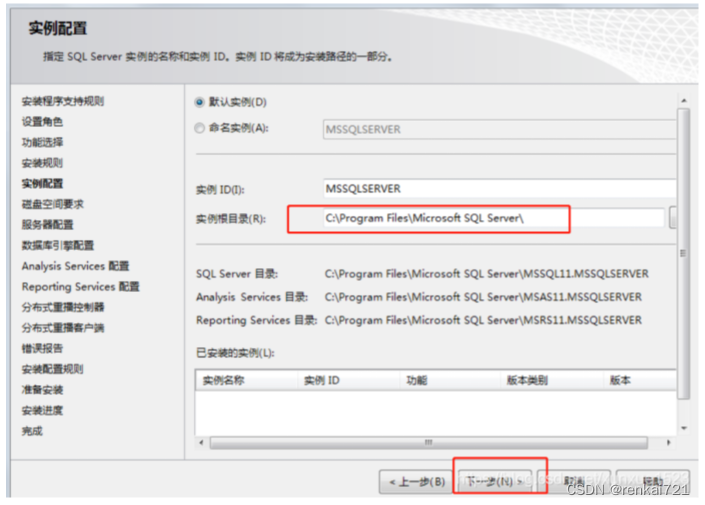
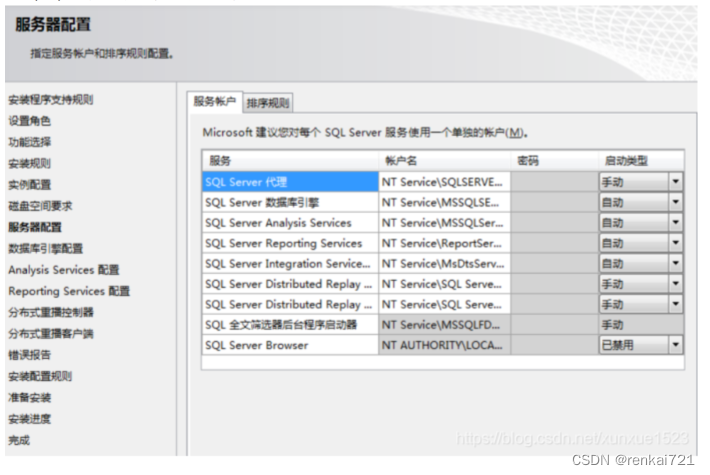
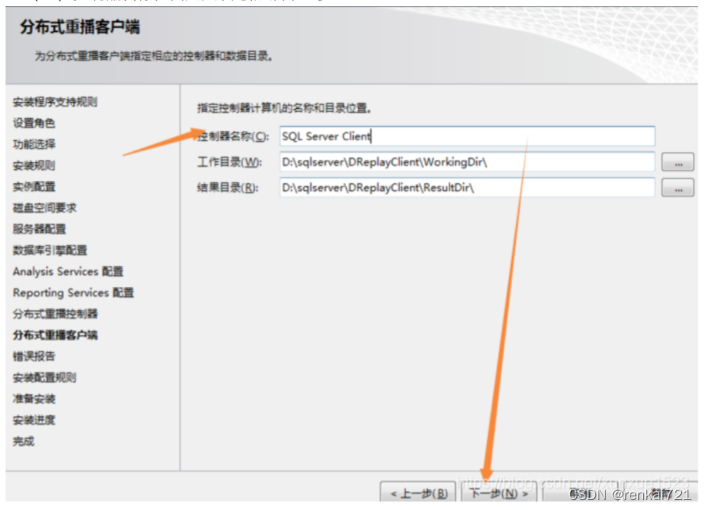
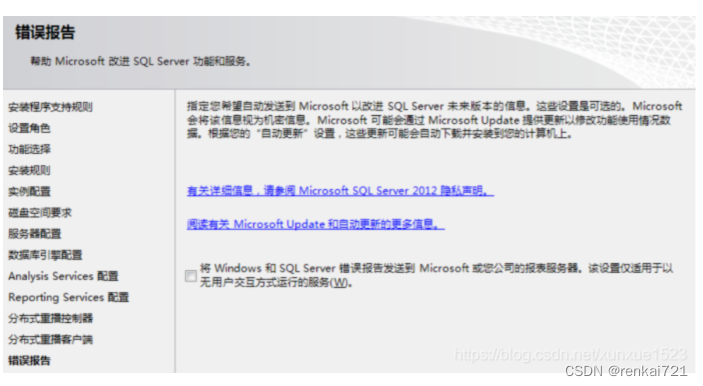
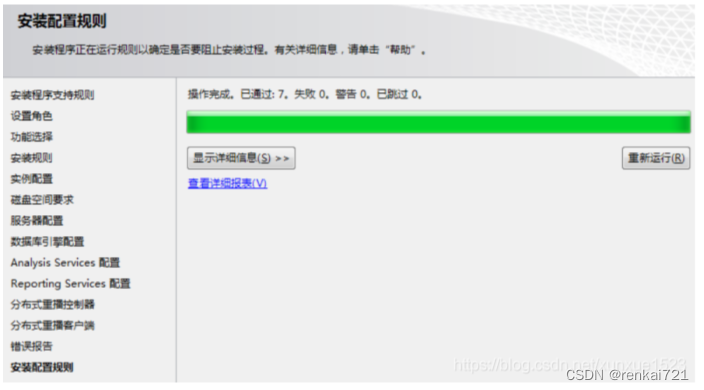
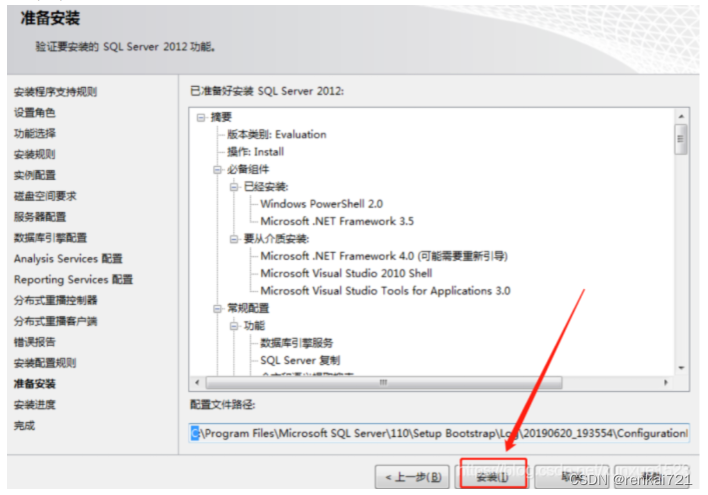
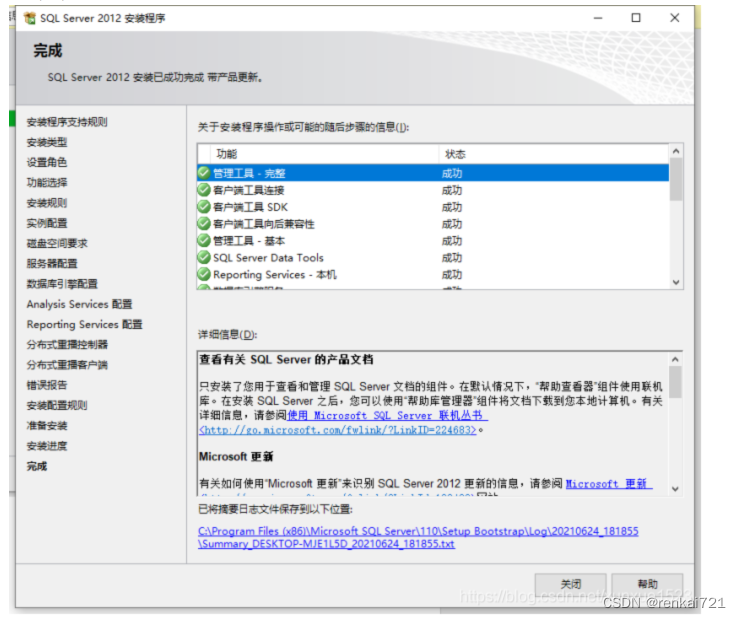
sqlserver安装
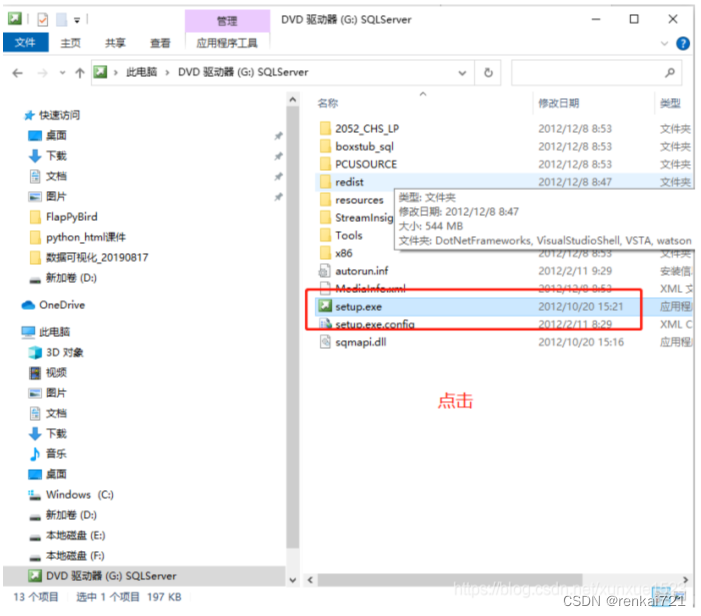
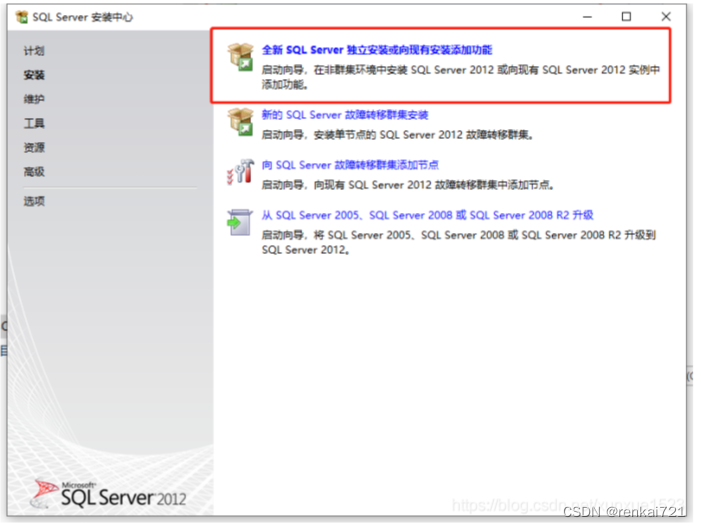
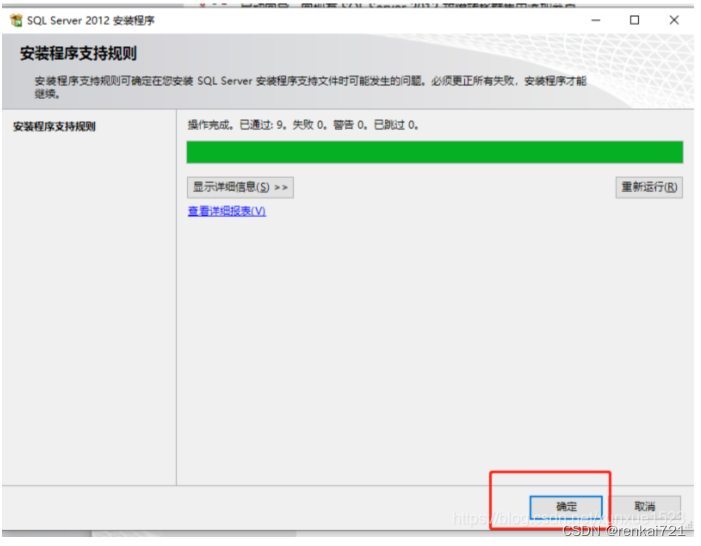
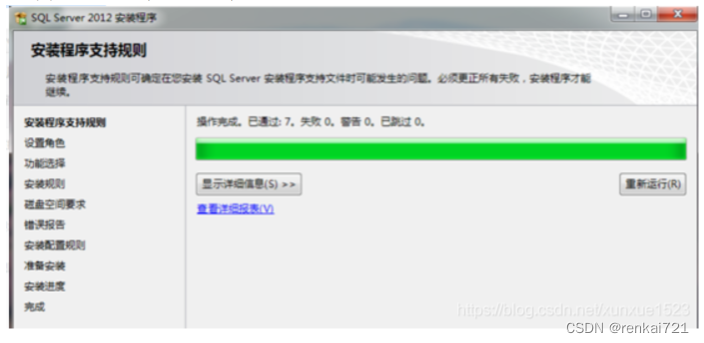

安装到指定的目录或者采用默认安装即可。
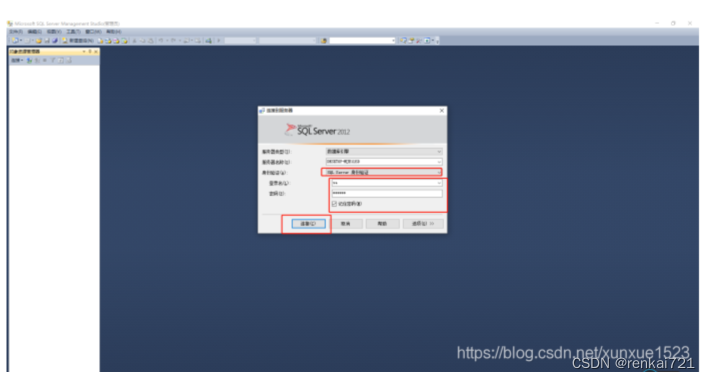
 密码请输入统一的密码
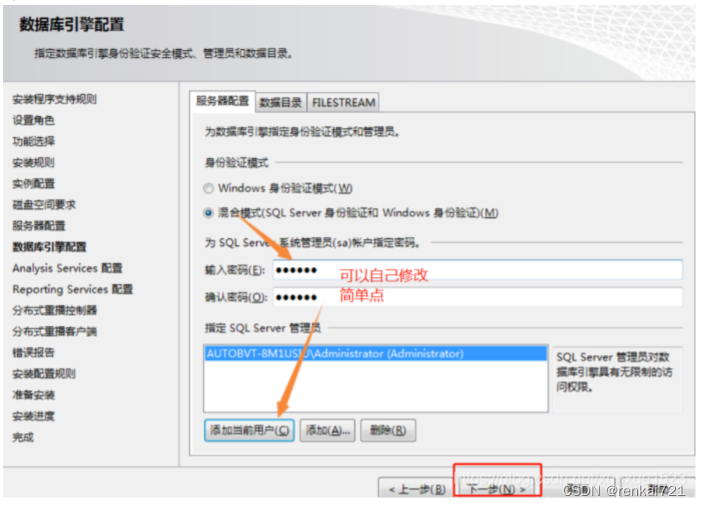
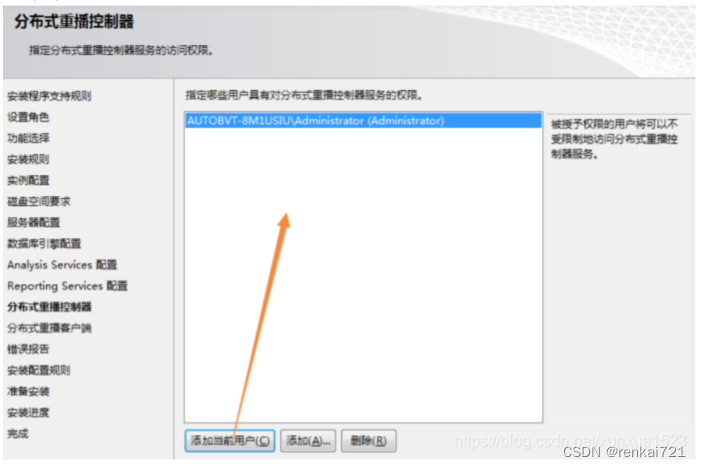
选择当前用户即可。


安装好之后连接MYSQL数据库,修改root账号连接为所有机器可连接。如果不修改,其它机器是无法通过root账号连接mysql的。
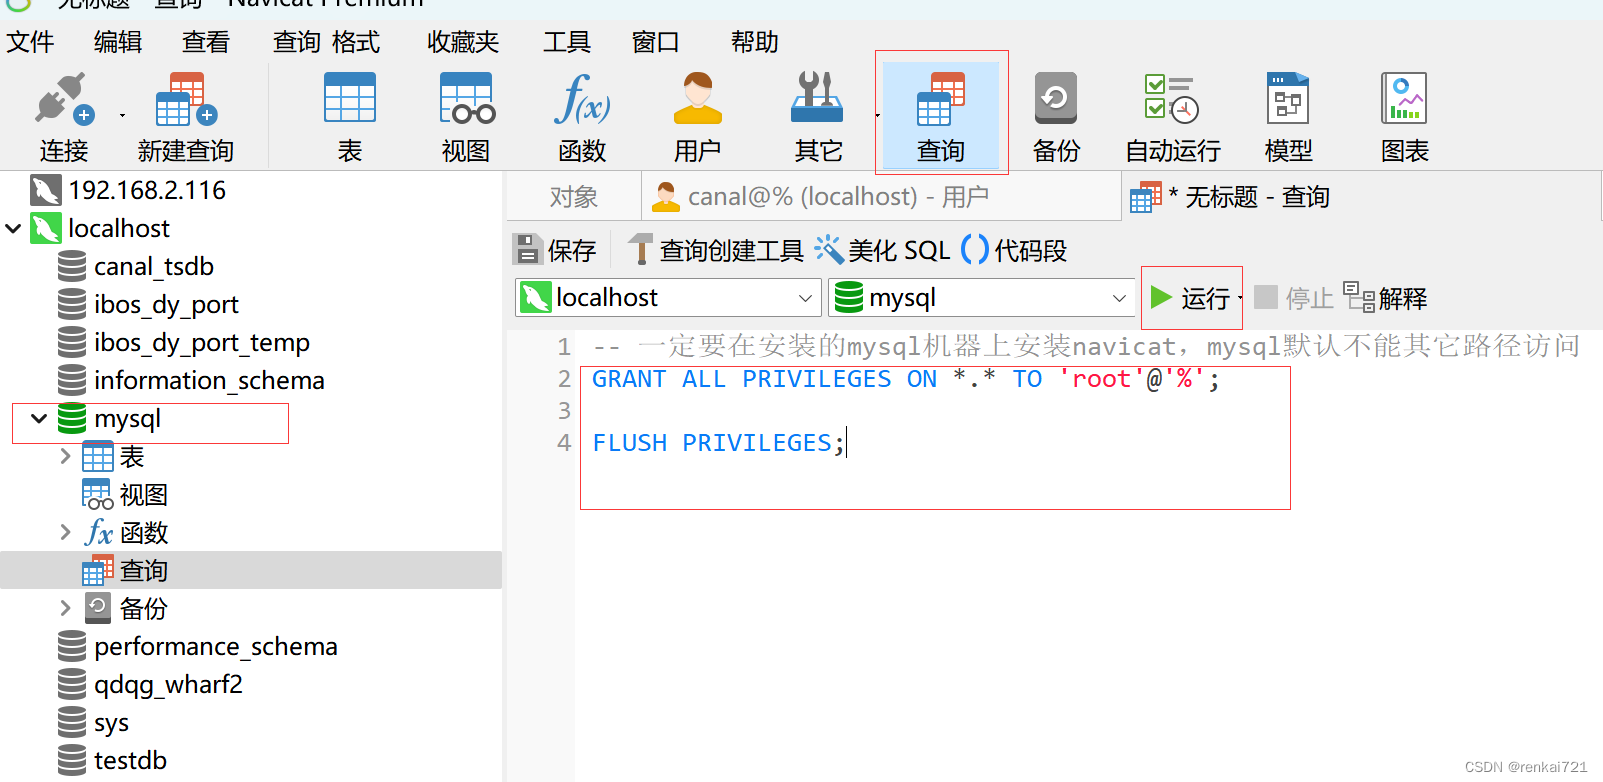
- -- 一定要在安装的mysql机器上安装navicat,mysql默认不能其它路径访问
- GRANT ALL PRIVILEGES ON *.* TO 'root'@'%';
- FLUSH PRIVILEGES;
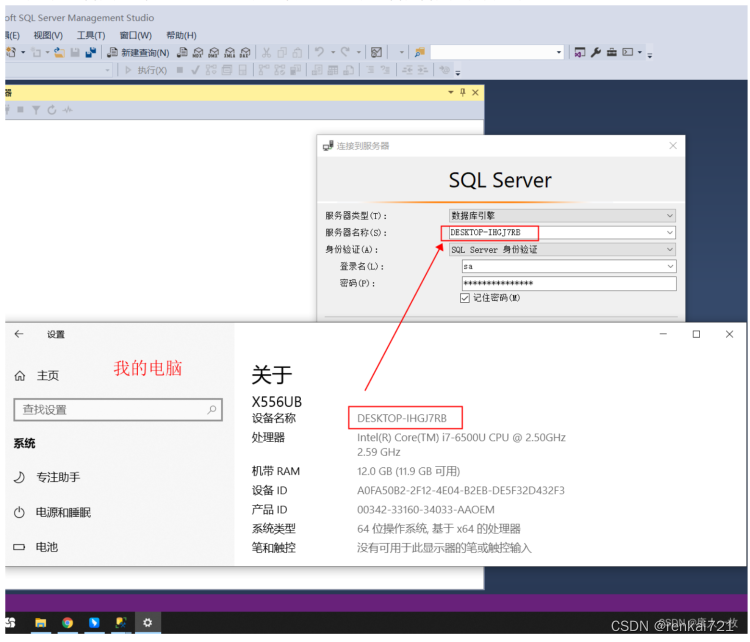
修改完之后,一定要使用navicat新建一个通过IP连接的连接来测试是否可以连接,比如在自己的电脑上,插上网线,保证自己的电脑和MYSQL所在的机器在同一个IP网段内。
canal-server安装
复制【canal-server-prod】文件夹到需要安装的地方。
然后打开【canal-server-prod\canal\conf\ecs\instance.properties】文件,txt编辑或者editplus或vscode工具都行。
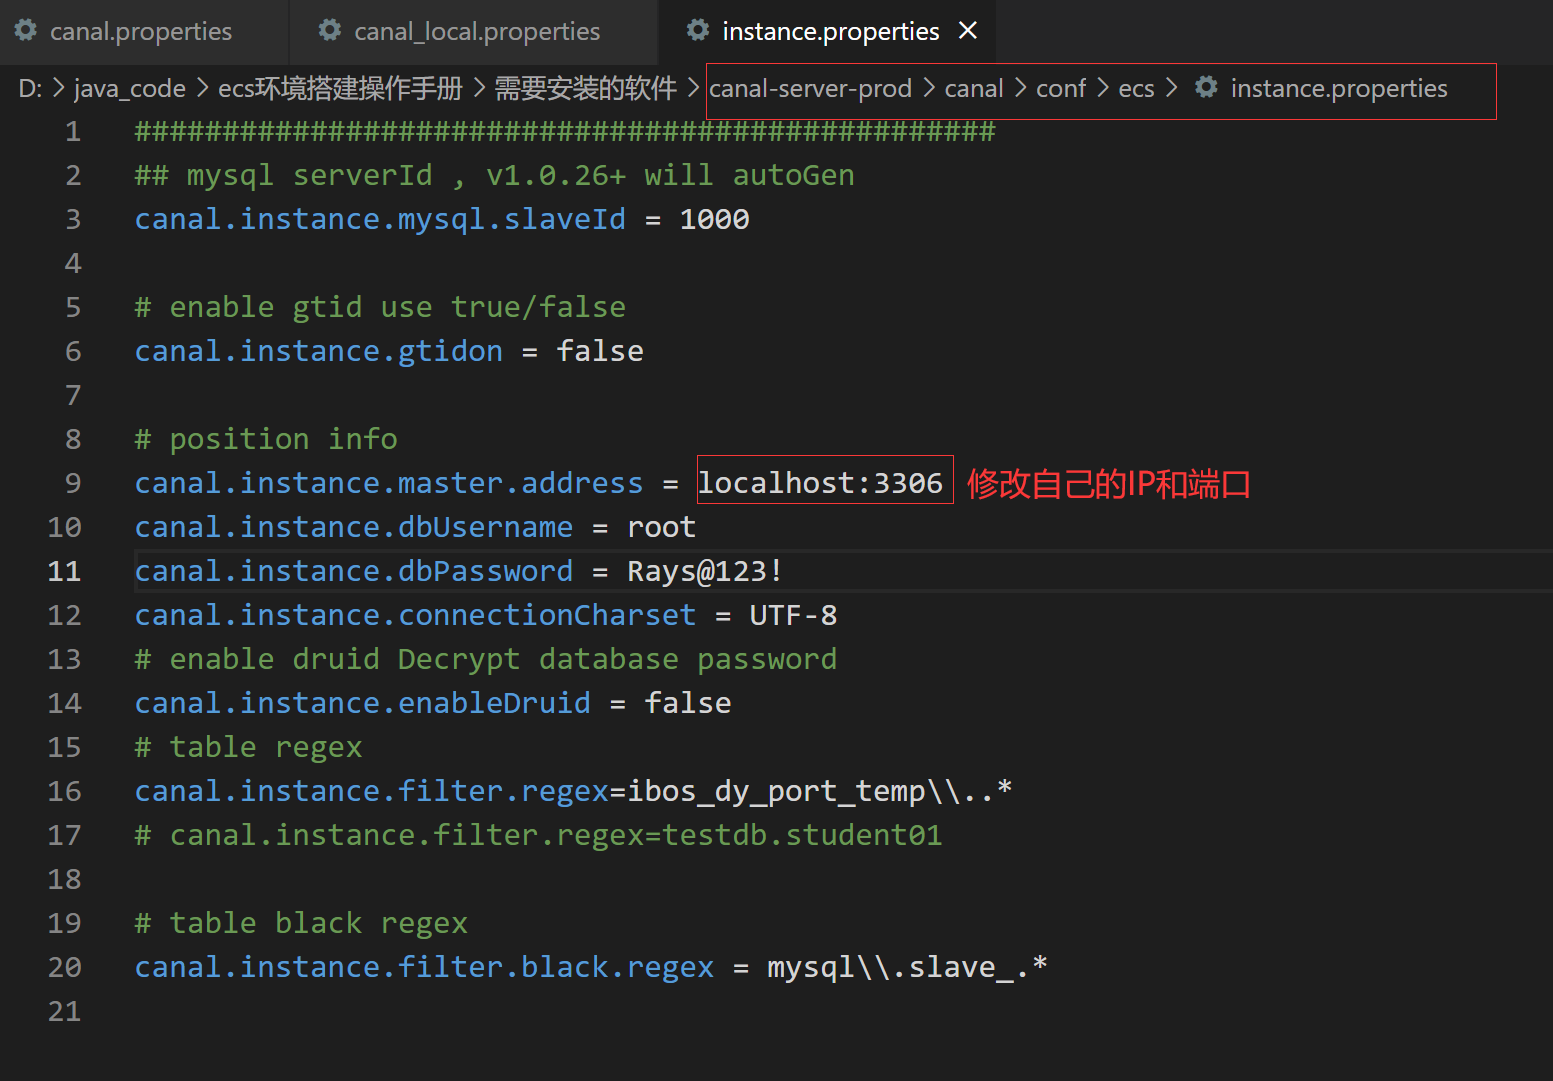
启动只需要双击【startup.bat】即可。数据库都没有导入前不要启动。

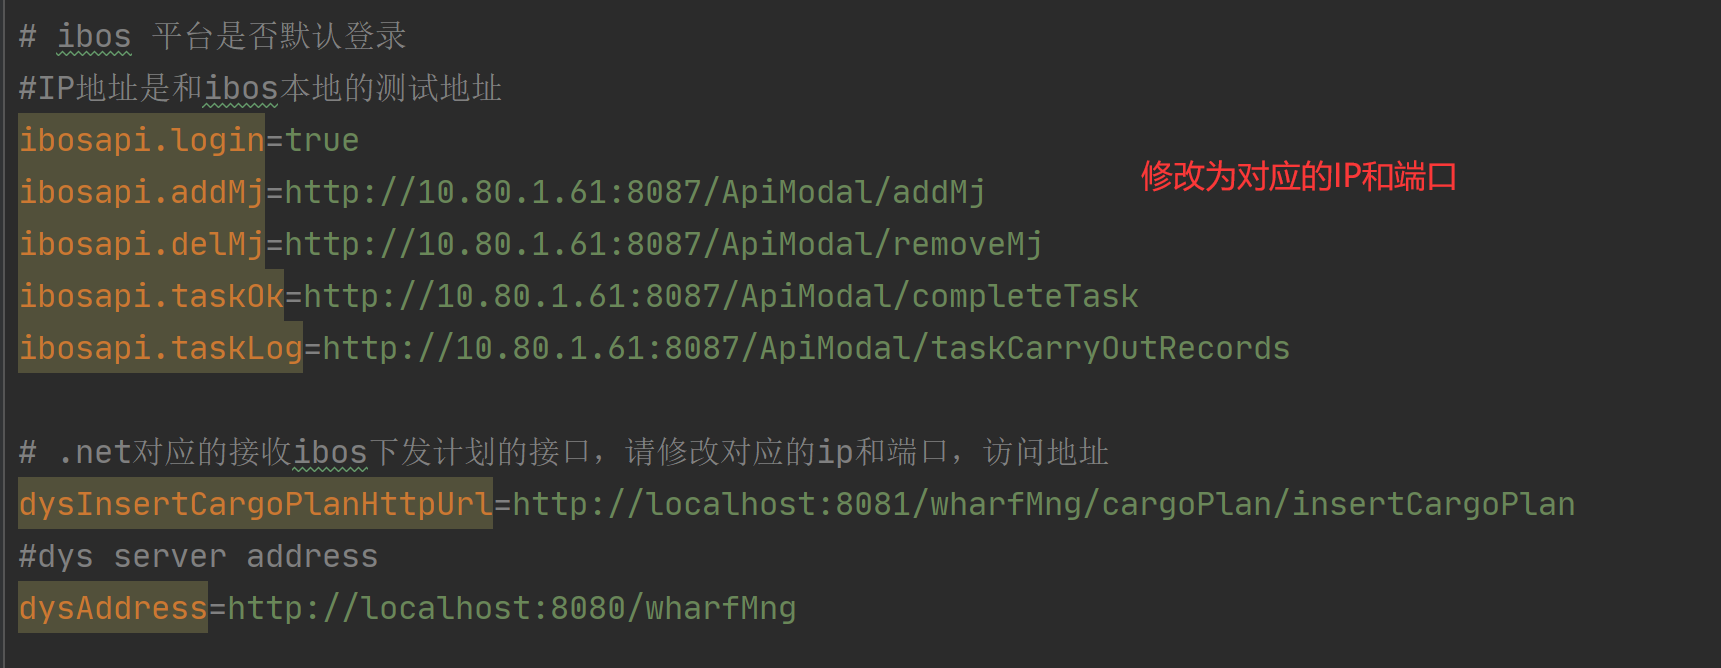
修改程序的配置文件

修改配置文件中的所有数据库和redis的连接地址,端口,密码。修改服务间的调用的IP
redis安装
windows
直接双击【Redis-x64-7.0.2.exe】就行,一步一步安装。
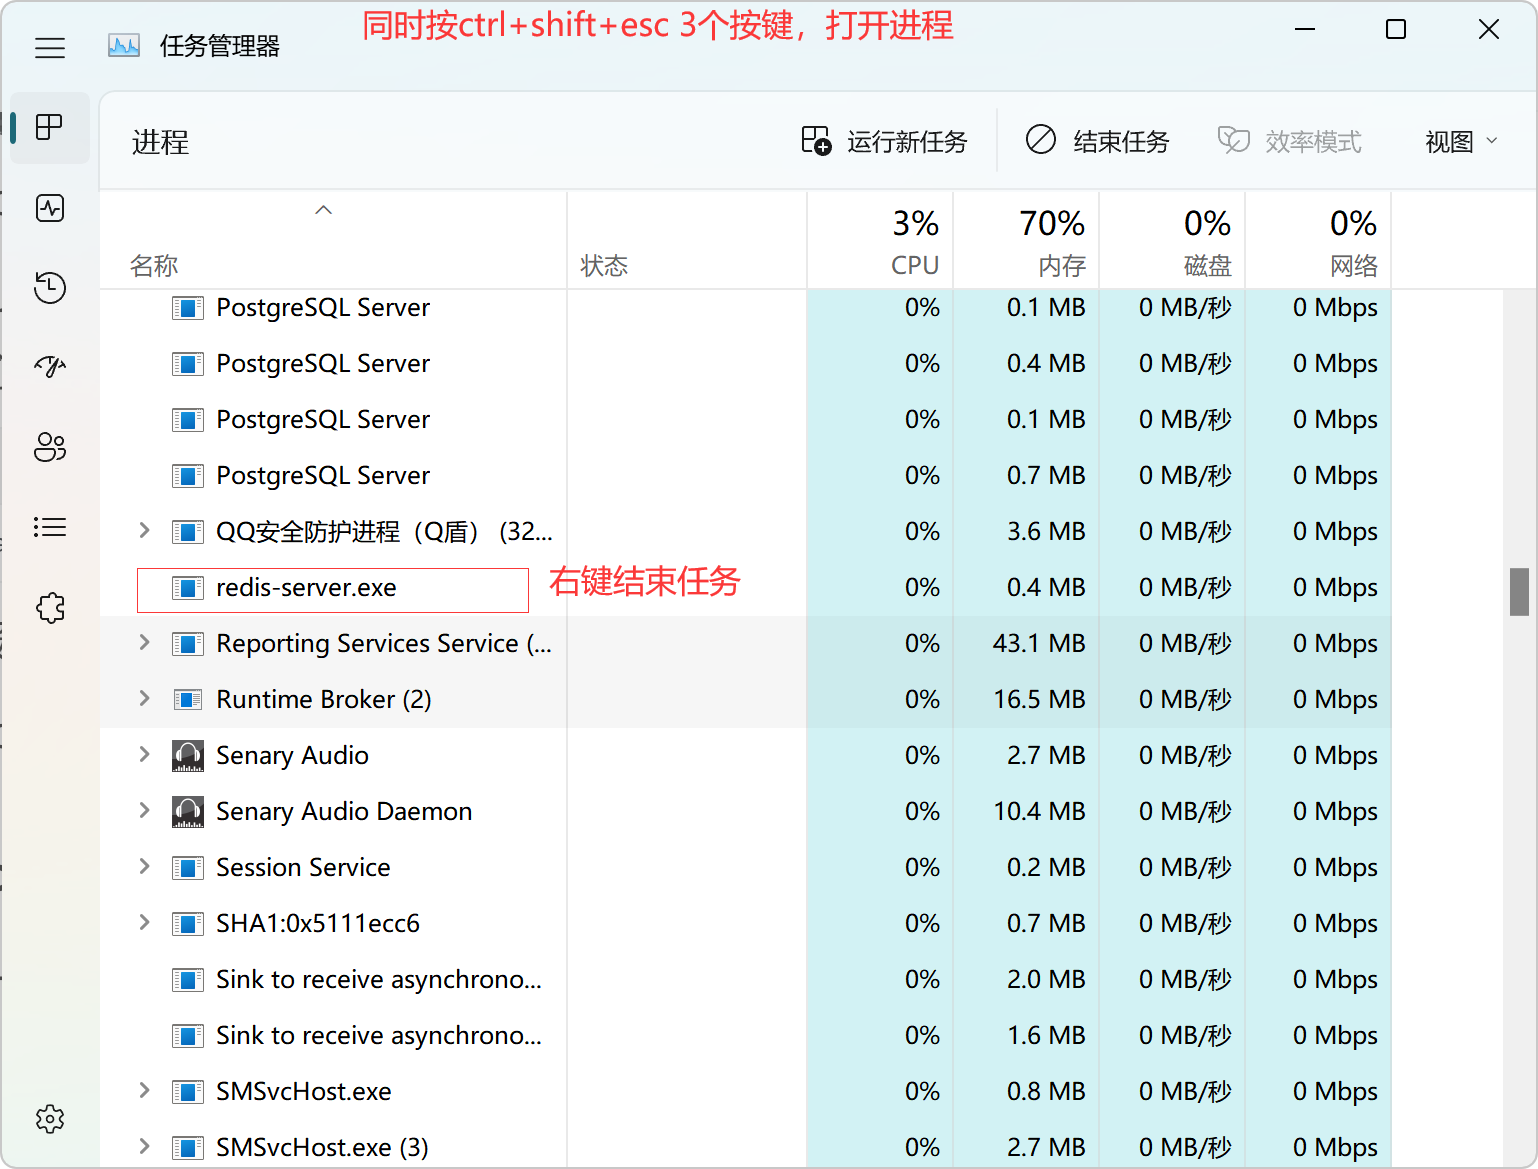
安装完成后不要启动,然后在进程中找到【redis-server.exe】,然后结束任务。如果没有忽略该步骤。
修改密码方法:--------------------------------必须修改密码
在计划任务中暂时停止Auto_Run_RedisServer【没有忽略】
在任务管理器中停止redis-server.exe进程
- # 以下2个文件都要修改
- # 修改安装文件中的conf文件(redis.windows-service.conf 和redis.windows.conf)中 905行
- # requirepass foobared
- # 将前面的#号移除即可实现设置密码的效果。如:
- requirepass Rays@123!
- # 则密码为Rays@123!
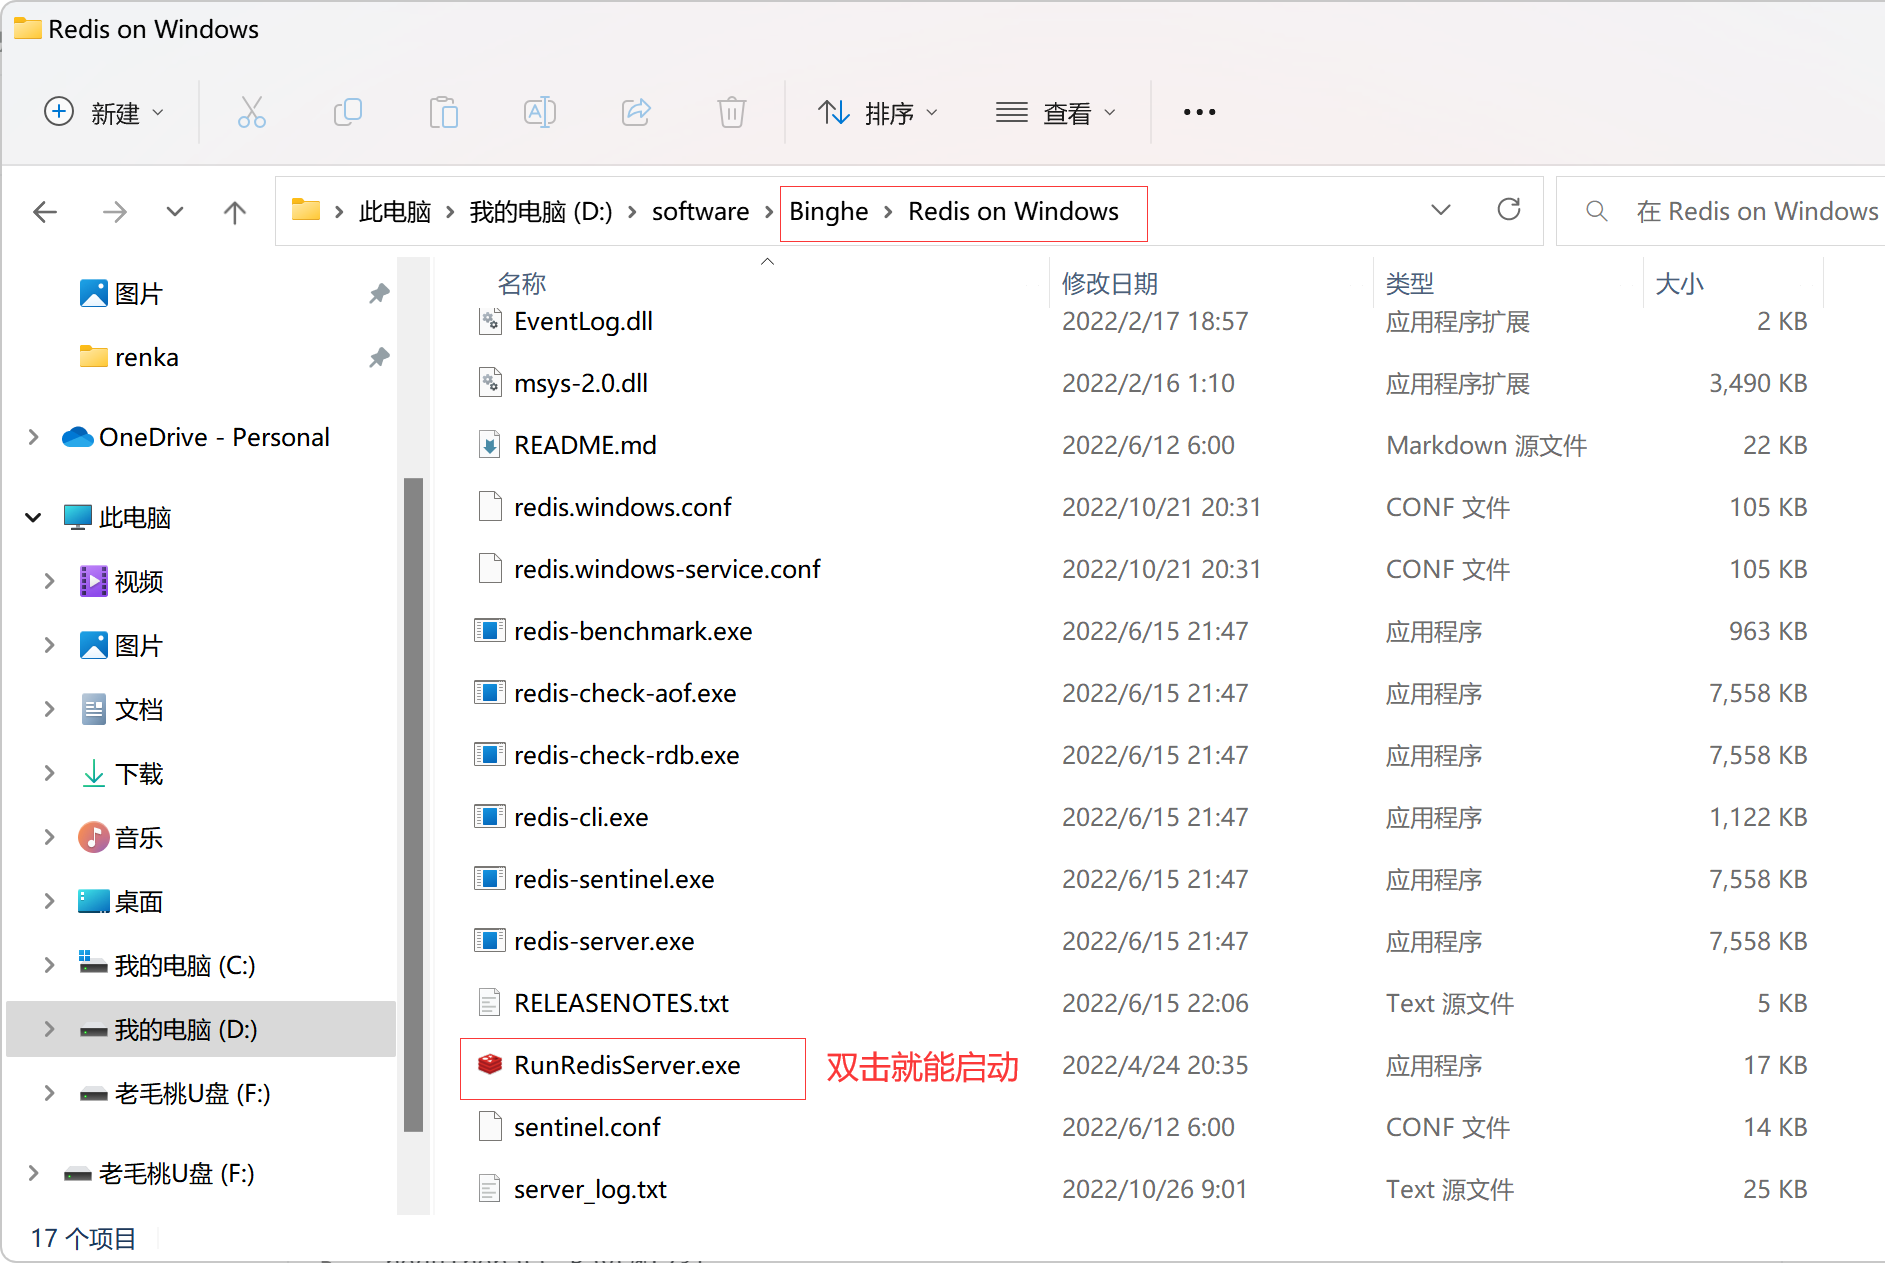
在计划任务中启用Auto_Run_RedisServer服务,如果没有该服务直接双击【RunRedisServer.exe】即可启动
至此,修改密码步骤完成。
redis客户端工具安装
双击【redisdesktop.exe】软件,一直按照提示安装即可,安装完成后记得连接redis,测试一下。
linux安装
- Redis下载地址:https://redis.io/download/,或者使用命令直接下载:
- cd /opt/software
- wget http://download.redis.io/releases/redis-7.0.6.tar.gz
- yum install gcc
- # 解压
- tar -zxvf redis-7.0.6.tar.gz
- cd redis-7.0.6
- # 编译安装
- make
- # 修改配置文件
- port 6380
- # 注释掉
- # bind 127.0.0.1
- pidfile /var/run/redis_6380.pid
- requirepass iot#2023!
- # 增加redis callback功能
- notify-keyspace-events Ex
- # 后台启动命令
- /opt/redis-7.0.6/src/redis-server /opt/redis-7.0.6/redis.conf --daemonize yes
- # 关闭命令
- pkill redis-server
- kill redis-server进程号
- # 查看进程id
- ps -ef|grep redis
- kill -9 进程id
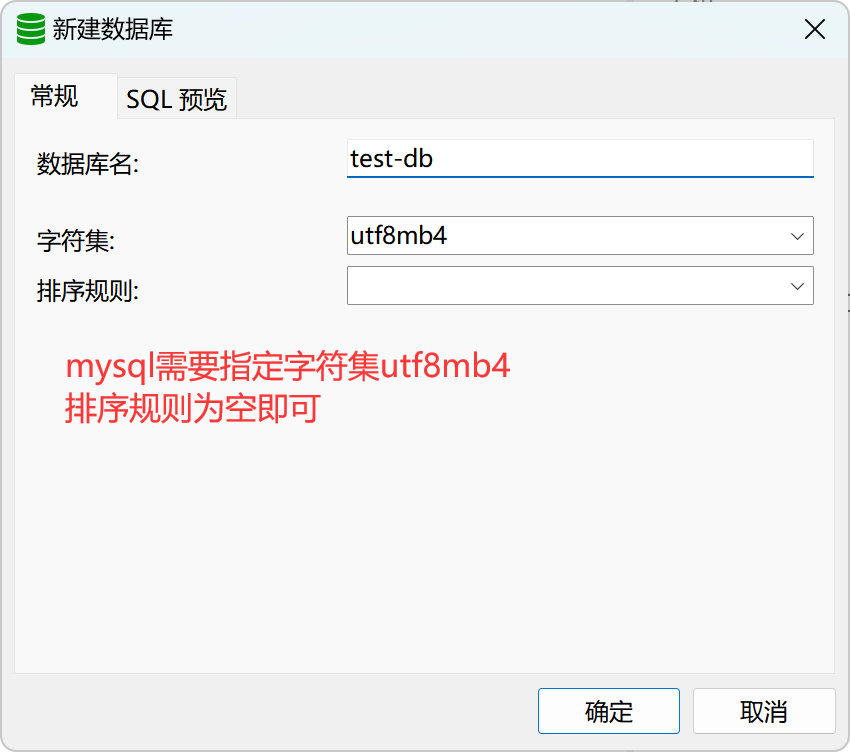
MYSQL新建数据库
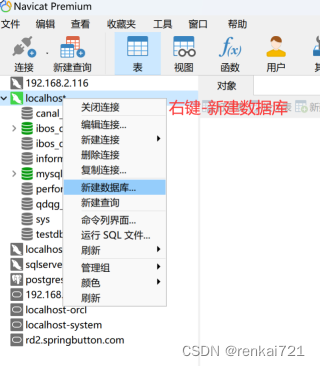
设置字符集
MYSQL导入数据库脚本
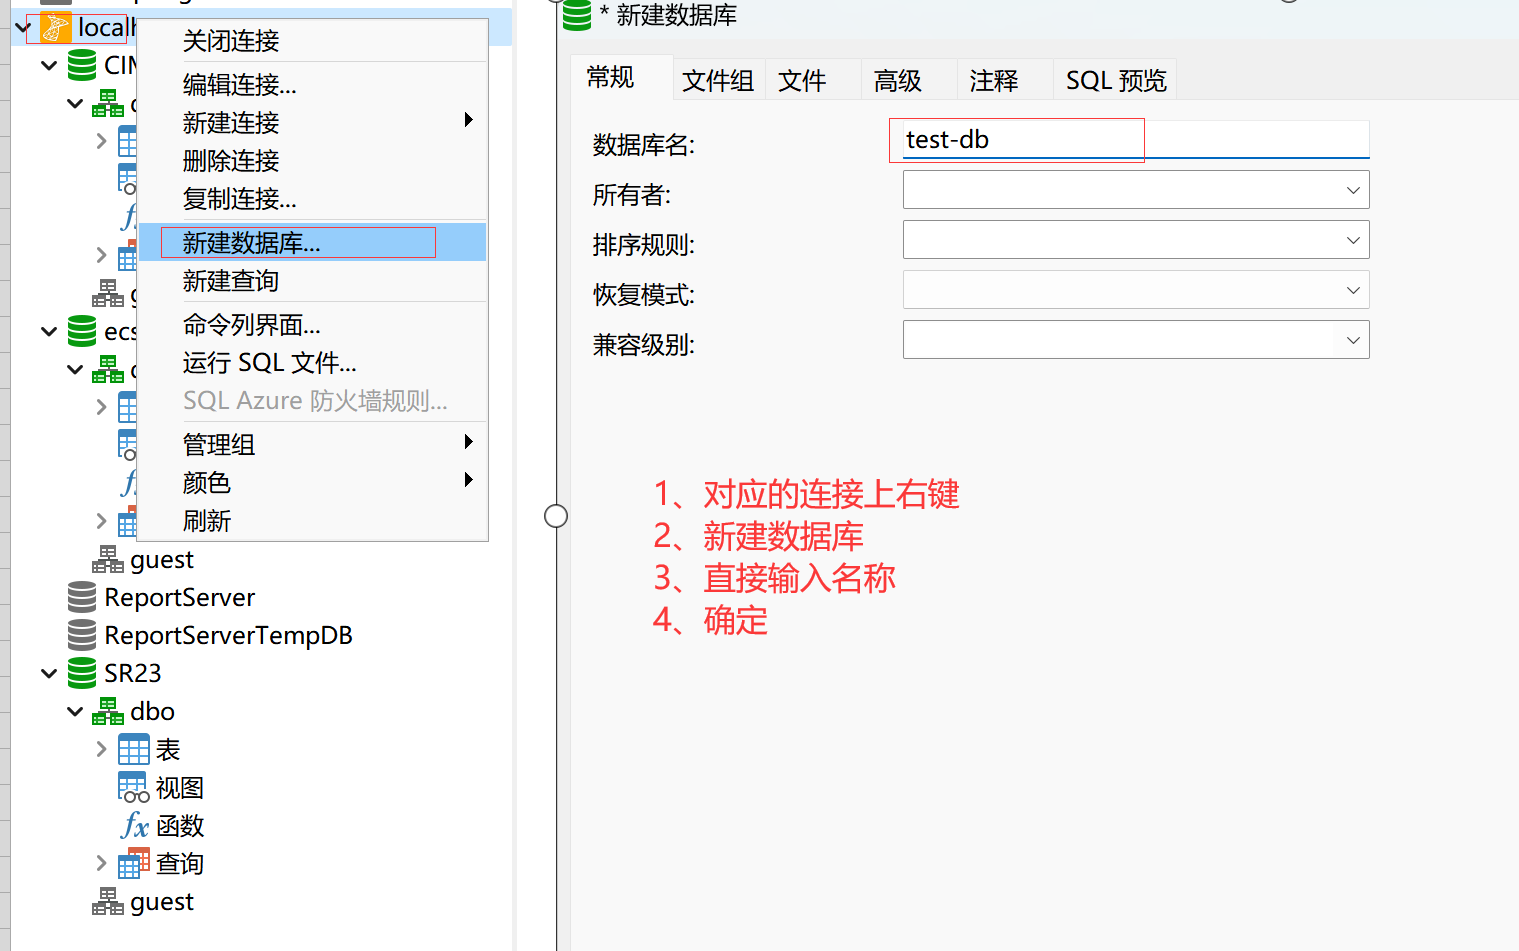
SQLSERVER新建数据库
应用程序打包部署
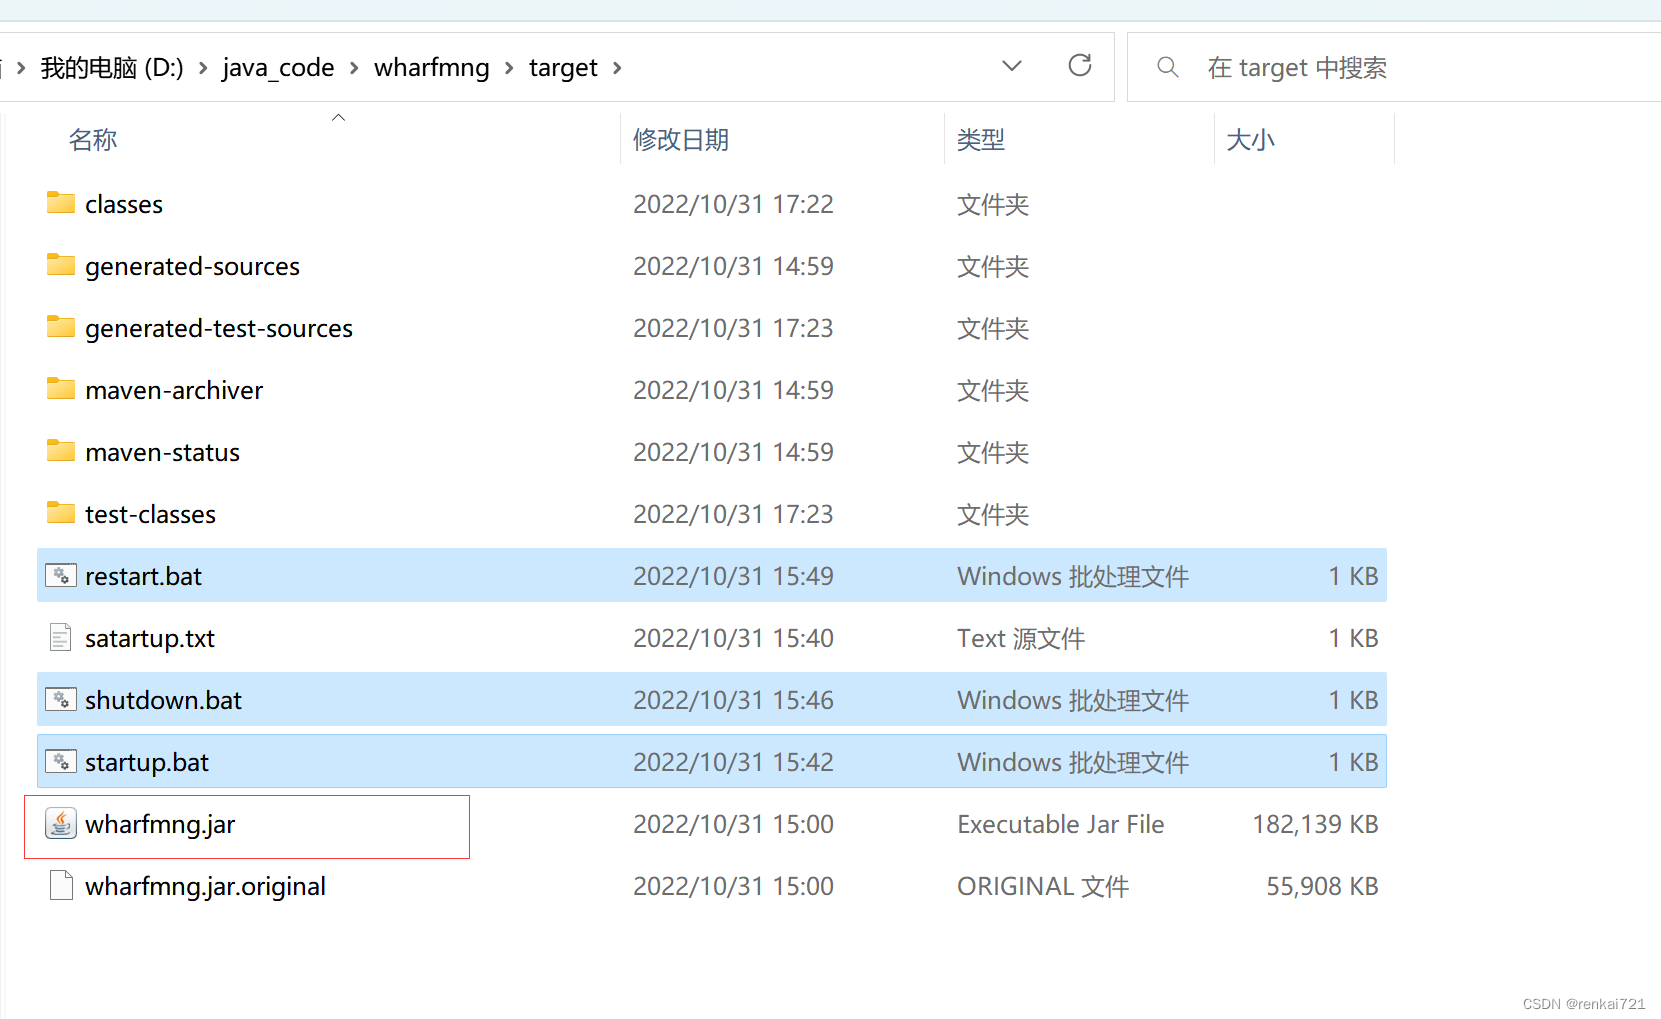
dys-server部署

打包后jar文件地址

Windows机器发布
进入到wharfIntf.jar所在的文件夹,在空白处右键,选择【在终端中打开】,然后输入启动命令,其中的test为自己需要启动连接的环境。
java -Xms512m -Xmx512m -XX:PermSize=128m -jar wharfIntf.jar --spring.profiles.active=test关闭服务
Windows关闭服务比较简单,直接关闭CMD窗口就行。
windows启动关闭命令
启动脚本
1、新建一个txt文件,把下面的命令复制进去
2、修改文件中对应的jar包名称和jar包路径
3、保存
4、将startup.txt文件修改为后缀为startup.bat文件
5、双击运行
6、不会有任何窗口弹出,都是后台隐藏式运行。
7、等待20秒到1分钟左右,打开浏览器输入http://ip:pot/项目名/test/welcome
8、如果看到有返回的json消息,说明项目启动成功。也可以查看启动日志。
- @echo off
- setlocal enabledelayedexpansion
- for /f "tokens=1" %%a in ('jps ^| findstr dyecs.jar') do taskkill /f /pid %%a
- start javaw -Xms512m -Xmx1024m -jar D:\server\dyecs.jar --spring.profiles.active=prod > D:\server\logs\dyecs.log 2>&1 &
- exit
停止脚本
只要修改7070为自己项目的端口号
- @echo off
- set port=7070
- for /f "tokens=1-5" %%i in ('netstat -ano^|findstr ":%port%"') do (
- echo kill the process %%m who use the port
- taskkill /pid %%m -t -f
- goto q
- )
- :q
重启脚本
注意修改端口号,项目名称,项目路径,启动环境
- @echo off
- set port=7070
- for /f "tokens=1-5" %%i in ('netstat -ano^|findstr ":%port%"') do (
- echo kill the process %%m who use the port
- taskkill /pid %%m -t -f
- goto start
- )
- :start
- START "wharfmng" javaw -Xms512m -Xmx512m -XX:PermSize=128m -jar D:/java_code/wharfmng/target/wharfmng.jar --spring.profiles.active=dev
备注
1、一般把这三个文件,放在和jar包同级目录
Linux启动命令脚本
启动命令
1、根据自己的项目地址,修改对应的路径和项目名称
2、把下面的命令复制到新建的startup.txt文件中,然后修改文件为startup.sh
3、把文件上传到需要的文件夹下,下文的demo中,需要把startup.sh文件保存在/home/wharfmng-server/startup.sh
4、上传完文件后,需要修改对应的文件夹和文件的权限为777
nohup java -jar -Xms512m -Xmx512m -XX:PermSize=128m /home/wharfmng-server/wharfmng-service/wharfmng.jar --spring.profiles.acive=prod >> /dev/null 2>&1 &5、给文件夹赋予777读写权限,只有第一次新建文件或文件夹,或者删除了文件,修改了文件名之后重新上传文件,都需要赋权777.
chmod -R 777 /home/wharfmng-server6、准备好之后,启动命令如下
sh /home/wharfmng-server/startup.sh7、查看日志
tail -f /home/wharfmng-server/logs/wahrfmng.log8、退出日志查看,直接同时按下Ctrl+C按键就行。
停止命令
- ps -ef|grep java回车
- root 54345 1 15 15:43 pts/0 00:03:08 java -Xms512m -Xmx512m -XX:Perm Size=128m -jar /home/wharfmng-server/wharfmng-service/wharfmng.jar --spring.profiles.active=prod
- #注意查看进程ID,ID每次都会变,不要关闭其它的项目
- #如果要关闭54345的进程
- kill -9 54345回车
结束
-----华丽的分割线,以下是凑字数,大家不用花时间看,快去改代码-----
-----华丽的分割线,以下是凑字数,大家不用花时间看,快去改代码-----
-----华丽的分割线,以下是凑字数,大家不用花时间看,快去改代码-----
- package cn.renkai721.bean.vo;
- import lombok.extern.slf4j.Slf4j;
- @Slf4j
- public class MakeUpTheWordCount {
- private String make_up_the_word_count_column_999999999_1;
- private String make_up_the_word_count_column_999999999_2;
- private String make_up_the_word_count_column_999999999_3;
- private String make_up_the_word_count_column_999999999_4;
- private String make_up_the_word_count_column_999999999_5;
- private String make_up_the_word_count_column_999999999_6;
- private String make_up_the_word_count_column_999999999_7;
- private String make_up_the_word_count_column_999999999_8;
- private String make_up_the_word_count_column_999999999_9;
- private String make_up_the_word_count_column_999999999_10;
- private String make_up_the_word_count_column_999999999_11;
- private String make_up_the_word_count_column_999999999_12;
- private String make_up_the_word_count_column_999999999_13;
- private String make_up_the_word_count_column_999999999_14;
- private String make_up_the_word_count_column_999999999_15;
- private String make_up_the_word_count_column_999999999_16;
- private String make_up_the_word_count_column_999999999_17;
- private String make_up_the_word_count_column_999999999_18;
- private String make_up_the_word_count_column_999999999_19;
- private String make_up_the_word_count_column_999999999_20;
- public String getMake_up_the_word_count_column_999999999_1() {
- return make_up_the_word_count_column_999999999_1;
- }
- public void setMake_up_the_word_count_column_999999999_1(String make_up_the_word_count_column_999999999_1) {
- this.make_up_the_word_count_column_999999999_1 = make_up_the_word_count_column_999999999_1;
- }
- public String getMake_up_the_word_count_column_999999999_2() {
- return make_up_the_word_count_column_999999999_2;
- }
- public void setMake_up_the_word_count_column_999999999_2(String make_up_the_word_count_column_999999999_2) {
- this.make_up_the_word_count_column_999999999_2 = make_up_the_word_count_column_999999999_2;
- }
- public String getMake_up_the_word_count_column_999999999_3() {
- return make_up_the_word_count_column_999999999_3;
- }
- public void setMake_up_the_word_count_column_999999999_3(String make_up_the_word_count_column_999999999_3) {
- this.make_up_the_word_count_column_999999999_3 = make_up_the_word_count_column_999999999_3;
- }
- public String getMake_up_the_word_count_column_999999999_4() {
- return make_up_the_word_count_column_999999999_4;
- }
- public void setMake_up_the_word_count_column_999999999_4(String make_up_the_word_count_column_999999999_4) {
- this.make_up_the_word_count_column_999999999_4 = make_up_the_word_count_column_999999999_4;
- }
- public String getMake_up_the_word_count_column_999999999_5() {
- return make_up_the_word_count_column_999999999_5;
- }
- public void setMake_up_the_word_count_column_999999999_5(String make_up_the_word_count_column_999999999_5) {
- this.make_up_the_word_count_column_999999999_5 = make_up_the_word_count_column_999999999_5;
- }
- public String getMake_up_the_word_count_column_999999999_6() {
- return make_up_the_word_count_column_999999999_6;
- }
- public void setMake_up_the_word_count_column_999999999_6(String make_up_the_word_count_column_999999999_6) {
- this.make_up_the_word_count_column_999999999_6 = make_up_the_word_count_column_999999999_6;
- }
- public String getMake_up_the_word_count_column_999999999_7() {
- return make_up_the_word_count_column_999999999_7;
- }
- public void setMake_up_the_word_count_column_999999999_7(String make_up_the_word_count_column_999999999_7) {
- this.make_up_the_word_count_column_999999999_7 = make_up_the_word_count_column_999999999_7;
- }
- public String getMake_up_the_word_count_column_999999999_8() {
- return make_up_the_word_count_column_999999999_8;
- }
- public void setMake_up_the_word_count_column_999999999_8(String make_up_the_word_count_column_999999999_8) {
- this.make_up_the_word_count_column_999999999_8 = make_up_the_word_count_column_999999999_8;
- }
- public String getMake_up_the_word_count_column_999999999_9() {
- return make_up_the_word_count_column_999999999_9;
- }
- public void setMake_up_the_word_count_column_999999999_9(String make_up_the_word_count_column_999999999_9) {
- this.make_up_the_word_count_column_999999999_9 = make_up_the_word_count_column_999999999_9;
- }
- public String getMake_up_the_word_count_column_999999999_10() {
- return make_up_the_word_count_column_999999999_10;
- }
- public void setMake_up_the_word_count_column_999999999_10(String make_up_the_word_count_column_999999999_10) {
- this.make_up_the_word_count_column_999999999_10 = make_up_the_word_count_column_999999999_10;
- }
- public String getMake_up_the_word_count_column_999999999_11() {
- return make_up_the_word_count_column_999999999_11;
- }
- public void setMake_up_the_word_count_column_999999999_11(String make_up_the_word_count_column_999999999_11) {
- this.make_up_the_word_count_column_999999999_11 = make_up_the_word_count_column_999999999_11;
- }
- public String getMake_up_the_word_count_column_999999999_12() {
- return make_up_the_word_count_column_999999999_12;
- }
- public void setMake_up_the_word_count_column_999999999_12(String make_up_the_word_count_column_999999999_12) {
- this.make_up_the_word_count_column_999999999_12 = make_up_the_word_count_column_999999999_12;
- }
- public String getMake_up_the_word_count_column_999999999_13() {
- return make_up_the_word_count_column_999999999_13;
- }
- public void setMake_up_the_word_count_column_999999999_13(String make_up_the_word_count_column_999999999_13) {
- this.make_up_the_word_count_column_999999999_13 = make_up_the_word_count_column_999999999_13;
- }
- public String getMake_up_the_word_count_column_999999999_14() {
- return make_up_the_word_count_column_999999999_14;
- }
- public void setMake_up_the_word_count_column_999999999_14(String make_up_the_word_count_column_999999999_14) {
- this.make_up_the_word_count_column_999999999_14 = make_up_the_word_count_column_999999999_14;
- }
- public String getMake_up_the_word_count_column_999999999_15() {
- return make_up_the_word_count_column_999999999_15;
- }
- public void setMake_up_the_word_count_column_999999999_15(String make_up_the_word_count_column_999999999_15) {
- this.make_up_the_word_count_column_999999999_15 = make_up_the_word_count_column_999999999_15;
- }
- public String getMake_up_the_word_count_column_999999999_16() {
- return make_up_the_word_count_column_999999999_16;
- }
- public void setMake_up_the_word_count_column_999999999_16(String make_up_the_word_count_column_999999999_16) {
- this.make_up_the_word_count_column_999999999_16 = make_up_the_word_count_column_999999999_16;
- }
- public String getMake_up_the_word_count_column_999999999_17() {
- return make_up_the_word_count_column_999999999_17;
- }
- public void setMake_up_the_word_count_column_999999999_17(String make_up_the_word_count_column_999999999_17) {
- this.make_up_the_word_count_column_999999999_17 = make_up_the_word_count_column_999999999_17;
- }
- public String getMake_up_the_word_count_column_999999999_18() {
- return make_up_the_word_count_column_999999999_18;
- }
- public void setMake_up_the_word_count_column_999999999_18(String make_up_the_word_count_column_999999999_18) {
- this.make_up_the_word_count_column_999999999_18 = make_up_the_word_count_column_999999999_18;
- }
- public String getMake_up_the_word_count_column_999999999_19() {
- return make_up_the_word_count_column_999999999_19;
- }
- public void setMake_up_the_word_count_column_999999999_19(String make_up_the_word_count_column_999999999_19) {
- this.make_up_the_word_count_column_999999999_19 = make_up_the_word_count_column_999999999_19;
- }
- public String getMake_up_the_word_count_column_999999999_20() {
- return make_up_the_word_count_column_999999999_20;
- }
- public void setMake_up_the_word_count_column_999999999_20(String make_up_the_word_count_column_999999999_20) {
- this.make_up_the_word_count_column_999999999_20 = make_up_the_word_count_column_999999999_20;
- }
- }
-
相关阅读:
wps屏幕录制怎么用?分享使用方法!
操作系统—内核态和用户态
java计算机毕业设计springboot+vue学生宿舍管理系统 elementui
Elasticsearch语法知多少之Boolean query
LeetCode739. Daily Temperatures——单调栈
springmvc有哪几种请求参数的方式呢?
AcWing 850. Dijkstra求最短路 II
mac安装python虚拟环境
SDL音视频渲染
OpenShift 4 - 从 FreeIPA/RHIdM 向 RHSSO 同步用户和组
- 原文地址:https://blog.csdn.net/renkai721/article/details/133881521