-
5.Python-使用XMLHttpRequest对象来发送Ajax请求
题记
使用XMLHttpRequest对象来发送Ajax请求,以下是一个简单的实例和操作过程。
安装flask模块
pip install flask
安装mysql.connector模块
pip install mysql-connector-python
编写app.py文件
app.py文件如下:
from flask import Flask, request, render_template import mysql.connector app = Flask(__name__) # 连接到MySQL数据库 db = mysql.connector.connect( host="localhost", user="root", password="123456", database="test" ) # 创建游标对象 cursor = db.cursor() # 创建表格(如果不存在) cursor.execute("CREATE TABLE IF NOT EXISTS students (id INT AUTO_INCREMENT PRIMARY KEY, name VARCHAR(255), age INT)") @app.route('/') def index(): return render_template('index111.html') @app.route('/add', methods=['POST']) def add(): name = request.form['name'] age = request.form['age'] # 向数据库插入数据 sql = "INSERT INTO students (name, age) VALUES (%s, %s)" values = (name, age) cursor.execute(sql, values) db.commit() return "数据已成功添加到数据库!" if __name__ == '__main__': app.run()- from flask import Flask, request, render_template
- import mysql.connector
- app = Flask(__name__)
- # 连接到MySQL数据库
- db = mysql.connector.connect(
- host="localhost",
- user="root",
- password="123456",
- database="test"
- )
- # 创建游标对象
- cursor = db.cursor()
- # 创建表格(如果不存在)
- cursor.execute("CREATE TABLE IF NOT EXISTS students (id INT AUTO_INCREMENT PRIMARY KEY, name VARCHAR(255), age INT)")
- @app.route('/')
- def index():
- return render_template('index111.html')
- @app.route('/add', methods=['POST'])
- def add():
- name = request.form['name']
- age = request.form['age']
- # 向数据库插入数据
- sql = "INSERT INTO students (name, age) VALUES (%s, %s)"
- values = (name, age)
- cursor.execute(sql, values)
- db.commit()
- return "数据已成功添加到数据库!"
- if __name__ == '__main__':
- app.run()
编写index.html
注意:index.html要放在templates文件夹下面
index.html文件如下:
    Add Student


    新增学生
- html>
- <html>
- <head>
- <title>Add Studenttitle>
- head>
- <body>
- <h1>新增学生h1>
- <form id="updateForm">
- <label for="name">姓名:label>
- <input type="text" id="name" name="name"><br><br>
- <label for="age">年龄:label>
- <input type="text" id="age" name="age"><br><br>
- <input type="button" value="Add" onclick="submitForm()">
- form>
- <script>
- //这段代码是一个 JavaScript 函数 submitForm(),用于处理表单的提交操作
- function submitForm() {
- // 这两行代码使用原生 JavaScript 获取表单中输入框的值。
- // 通过 getElementById() 方法选择具有相应 id 的元素,
- // 并使用 .value 属性获取输入框的值,将其存储在相应的变量中。
- var name = document.getElementById("name").value;
- var age = document.getElementById("age").value;
- //创建一个 XMLHttpRequest 对象,用于发送 Ajax 请求。
- var xhr = new XMLHttpRequest();
- //设置 Ajax 请求的方法、URL 和异步标志。
- // "POST" 表示使用 POST 方法发送请求,"/add" 是请求的目标 URL,true 表示使用异步方式发送请求。
- xhr.open("POST", "/add", true);
- //设置请求头的 Content-Type,指定请求的数据格式为 URL 编码形式。
- xhr.setRequestHeader("Content-Type", "application/x-www-form-urlencoded");
- //这是一个回调函数,用于处理 Ajax 请求的状态变化。
- // 当readyState变为 4(表示请求已完成)且status为 200(表示请求成功)时,会执行其中的代码
- xhr.onreadystatechange = function() {
- if (xhr.readyState === 4 && xhr.status === 200) {
- // 在这里处理Ajax响应
- console.log(xhr.responseText); // 打印响应内容
- }
- };
- // 构建要发送的数据字符串
- // 通过将姓名和年龄进行 URL 编码,并使用 + 连接符拼接成一个字符串。
- var data = "name=" + encodeURIComponent(name) + "&age=" + encodeURIComponent(age);
- //发送 Ajax 请求,并将数据字符串作为请求的主体发送到服务器。
- xhr.send(data);
- }
- script>
- body>
- html>
执行程序
启动命令:
python app.py
访问地址:
localhost:5000
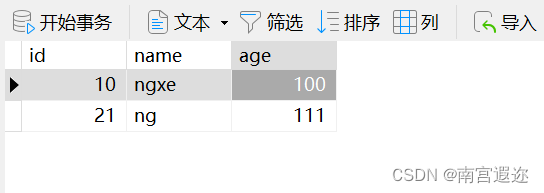
展示图


后记
觉得有用可以收藏或点赞!
-
相关阅读:
ios获取原生系统应用的包
《windows核心编程》第3章 内核对象
脚踏实地,步步高升丨吴高升学长采访录
Self-supervised Low Light Image Enhancement and Denoising 论文阅读笔记
将json数据转换为Python字典
【SQL引擎 - analyze.cpp分析(二)】
SpringBoot如何进行限流,老鸟们还可以这样玩
某大型国有银行 VMware 替换与轻量信创云底座转型实践 |信创专题
DataTableResponseEntity
FTX的前世今生:崛起、辉煌与崩塌
- 原文地址:https://blog.csdn.net/m0_70819559/article/details/133823921
