-
从零开始使用webpack搭建一个react项目
先做一个正常编译es6语法的webpack demo
1. 初始化package.json文件
npm init一路enter下去
2. 添加插件
- {
- "name": "demo",
- "version": "1.0.0",
- "description": "",
- "main": "index.js",
- "scripts": {
- "test": "echo \"Error: no test specified\" && exit 1",
- "devBuild": "cross-env NODE_ENV=development webpack --config build/webpack.config.js",
- "start:dev": "cross-env NODE_ENV=development webpack-dev-server --config build/webpack.config.js",
- "start:prod": "cross-env NODE_ENV=production webpack-dev-server --config build/webpack.config.js",
- "build": "cross-env NODE_ENV=production webpack --config build/webpack.config.js"
- },
- "keywords": [],
- "author": "",
- "license": "ISC",
- "devDependencies": {
- "@babel/core": "^7.0.0",
- "@babel/plugin-proposal-private-property-in-object": "^7.21.11",
- "@babel/preset-env": "^7.22.20",
- "@babel/preset-react": "^7.22.15",
- "@babel/preset-typescript": "^7.23.0",
- "@reduxjs/toolkit": "^1.9.7",
- "@types/react": "^18.2.27",
- "@types/react-dom": "^18.2.12",
- "autoprefixer": "^9.7.3",
- "axios": "^1.5.1",
- "babel-core": "^7.0.0-bridge.0",
- "babel-loader": "7",
- "babel-preset-env": "^1.7.0",
- "clean-webpack-plugin": "^3.0.0",
- "cross-env": "^7.0.3",
- "css-loader": "^3.2.1",
- "file-loader": "^5.0.2",
- "happypack": "^5.0.1",
- "html-webpack-plugin": "^3.2.0",
- "less": "^3.10.3",
- "less-loader": "5.0.0",
- "mini-css-extract-plugin": "^0.8.0",
- "optimize-css-assets-webpack-plugin": "^5.0.3",
- "postcss-loader": "^3.0.0",
- "react-redux": "^8.1.3",
- "redux": "^4.2.1",
- "redux-persist": "^6.0.0",
- "style-loader": "^1.0.1",
- "terser-webpack-plugin": "^2.2.2",
- "typescript": "^5.2.2",
- "url-loader": "^3.0.0",
- "webpack": "^4.41.2",
- "webpack-cli": "^3.3.10",
- "webpack-dev-server": "^3.9.0",
- "webpack-merge": "^4.2.2",
- "webpack-parallel-uglify-plugin": "^1.1.2"
- },
- "dependencies": {
- "antd": "^5.10.0",
- "lodash": "^4.17.15",
- "moment": "^2.24.0",
- "react": "^18.2.0",
- "react-dom": "^18.2.0"
- }
- }
注意: babel相关插件最好是同一个数字版本开头的, 比如7.xx.xx, 因为页面报babel-loader编译问题, 提示是版本不一致
另外因为我使用了redux, 复杂的项目可以使用它, 简单的项目context或者recoil就行了, 按需下载, 不需要的可以卸载
3. react多页配置
1) webpack.common.js拆分公共部分
- const path = require('path')
- const HtmlWebpackPlugin = require('html-webpack-plugin')
- const { srcPath, distPath } = require('./paths')
- module.exports = {
- entry: {
- index: path.join(srcPath, 'index.tsx'),
- other: path.join(srcPath, 'other.tsx')
- },
- resolve: {
- extensions: ['.tsx', '.ts', '.jsx', '.js']
- },
- module: {
- rules: [
- {
- test: /.(jsx?)|(ts?x?)$/,
- loader: ['babel-loader'],
- include: srcPath,
- exclude: /node_modules/
- },
- ]
- },
- plugins: [
- // 多入口 - 生成 index.html
- new HtmlWebpackPlugin({
- template: path.join(srcPath, 'index.html'),
- filename: 'index.html',
- // chunks 表示该页面要引用哪些 chunk (即上面的 index 和 other),默认全部引用
- chunks: ['index', 'vendor', 'common'] // 要考虑代码分割
- }),
- // 多入口 - 生成 other.html
- new HtmlWebpackPlugin({
- template: path.join(srcPath, 'other.html'),
- filename: 'other.html',
- chunks: ['other', 'common'] // 考虑代码分割
- })
- ]
- }
2) webpack.dev.js:
dev环境需要的webpack配置, 注意与webpack.common.js的逻辑进行合并
- const path = require('path')
- const webpack = require('webpack')
- const webpackCommonConf = require('./webpack.common.js')
- const { smart } = require('webpack-merge')
- const { srcPath, distPath } = require('./paths')
- module.exports = smart(webpackCommonConf, {
- mode: 'development',
- module: {
- rules: [
- // 直接引入图片 url
- {
- test: /\.(png|jpg|jpeg|gif)$/,
- use: 'file-loader'
- },
- {
- test: /\.css$/,
- // loader 的执行顺序是:从后往前
- loader: ['style-loader', 'css-loader', 'postcss-loader'] // 加了 postcss
- },
- {
- test: /\.less$/,
- // 增加 'less-loader' ,注意顺序
- loader: ['style-loader', 'css-loader', 'less-loader']
- }
- ]
- },
- plugins: [
- new webpack.DefinePlugin({
- // 'development'
- 'process.env': {
- NODE_ENV: JSON.stringify(process.env.NODE_ENV)
- }
- })
- ],
- devServer: {
- port: 8111,
- progress: true, // 显示打包的进度条
- contentBase: distPath, // 根目录
- open: true, // 自动打开浏览器
- compress: true, // 启动 gzip 压缩
- // 设置代理
- proxy: {
- // 将本地 /api/xxx 代理到 localhost:3000/api/xxx
- '/api': 'http://localhost:8000',
- // 将本地 /api2/xxx 代理到 localhost:3000/xxx
- '/api2': {
- target: 'http://localhost:8111',
- pathRewrite: {
- '/api2': ''
- }
- }
- }
- }
- })
3) webpack.production.js:
production环境需要的webpack配置, ,注意与webpack.common.js的逻辑进行合并
- const path = require('path')
- const webpack = require('webpack')
- const { smart } = require('webpack-merge')
- const { CleanWebpackPlugin } = require('clean-webpack-plugin')
- const MiniCssExtractPlugin = require('mini-css-extract-plugin')
- const TerserJSPlugin = require('terser-webpack-plugin')
- const OptimizeCSSAssetsPlugin = require('optimize-css-assets-webpack-plugin')
- const webpackCommonConf = require('./webpack.common.js')
- const { srcPath, distPath } = require('./paths')
- module.exports = smart(webpackCommonConf, {
- mode: 'production',
- output: {
- // filename: 'bundle.[contentHash:8].js', // 打包代码时,加上 hash 戳
- filename: '[name].[contentHash:8].js', // name 即多入口时 entry 的 key
- path: distPath,
- // publicPath: 'http://cdn.abc.com' // 修改所有静态文件 url 的前缀(如 cdn 域名),这里暂时用不到
- },
- module: {
- rules: [
- // 图片 - 考虑 base64 编码的情况
- {
- test: /\.(png|jpg|jpeg|gif)$/,
- use: {
- loader: 'url-loader',
- options: {
- // 小于 5kb 的图片用 base64 格式产出
- // 否则,依然延用 file-loader 的形式,产出 url 格式
- limit: 5 * 1024,
- // 打包到 img 目录下
- outputPath: '/img1/',
- // 设置图片的 cdn 地址(也可以统一在外面的 output 中设置,那将作用于所有静态资源)
- // publicPath: 'http://cdn.abc.com'
- }
- }
- },
- // 抽离 css
- {
- test: /\.css$/,
- loader: [
- MiniCssExtractPlugin.loader, // 注意,这里不再用 style-loader
- 'css-loader',
- 'postcss-loader'
- ]
- },
- // 抽离 less
- {
- test: /\.less$/,
- loader: [
- MiniCssExtractPlugin.loader, // 注意,这里不再用 style-loader
- 'css-loader',
- 'less-loader',
- 'postcss-loader'
- ]
- }
- ]
- },
- plugins: [
- new CleanWebpackPlugin(), // 会默认清空 output.path 文件夹
- new webpack.DefinePlugin({
- 'process.env': {
- NODE_ENV: JSON.stringify(process.env.NODE_ENV)
- }
- }),
- // 抽离 css 文件
- new MiniCssExtractPlugin({
- filename: 'css/main.[contentHash:8].css'
- })
- ],
- optimization: {
- // 压缩 css
- minimizer: [new TerserJSPlugin({}), new OptimizeCSSAssetsPlugin({})],
- // 分割代码块
- splitChunks: {
- chunks: 'all',
- /**
- * initial 入口 chunk,对于异步导入的文件不处理
- async 异步 chunk,只对异步导入的文件处理
- all 全部 chunk
- */
- // 缓存分组
- cacheGroups: {
- // 第三方模块
- vendor: {
- name: 'vendor', // chunk 名称
- priority: 1, // 权限更高,优先抽离,重要!!!
- test: /node_modules/,
- minSize: 0, // 大小限制
- minChunks: 1 // 最少复用过几次
- },
- // 公共的模块
- common: {
- name: 'common', // chunk 名称
- priority: 0, // 优先级
- minSize: 0, // 公共模块的大小限制
- minChunks: 2 // 公共模块最少复用过几次
- }
- }
- }
- }
- })
4) 可以再加一个webpack.config.js文件:
根据环境判断是使用webpack.dev.js还是webpack.production.js
- const prodConfig = require('./webpack.prod.js');
- const webpackConfig = process.env.NODE_ENV !== 'development' ? prodConfig : () => import('./webpack.dev.js');
- module.exports = webpackConfig;
5) 在package.json添加如下命令:
- "scripts": {
- "test": "echo \"Error: no test specified\" && exit 1",
- "dev": "cross-env NODE_ENV=development webpack-dev-server --config build/webpack.config.js",
- "buil:debv": "cross-env NODE_ENV=development webpack --config build/webpack.config.js",
- "build": "cross-env NODE_ENV=production webpack --config build/webpack.config.js"
- },
cross-env改变process.env.NODE_ENV的值, 在控制台可以打印出来
console.log(process.env.NODE_ENV);
4. 新建index.html, index.tsx, other.html, other.tsx文件
index.tsx文件
- // index.tsx
- import React from 'react'
- import ReactDOM from 'react-dom/client'
- /**
- * 不加后缀.tsx的配置: 在module.exports对象中追加=>
- * resolve: {
- extensions: ['.js', '.jsx', '.tsx', '.ts']
- },
- */
- import App from './App';
- const root = ReactDOM.createRoot(document.getElementById('root') as HTMLElement)
- // v18 的新方法
- root.render(<App />)
index.html
- <!DOCTYPE html>
- <html lang="en">
- <head>
- <meta charset="UTF-8">
- <meta name="viewport" content="width=device-width, initial-scale=1.0">
- <meta http-equiv="X-UA-Compatible" content="ie=edge">
- <title>webpack demo</title>
- </head>
- <body>
- <p>webpack demo</p>
- <div id="root"></div>
- </body>
- </html>
other.tsx和other.html差不多一样按react要求写, 写出差异页面能够看出是不同页面就行
5. 新建.babelrc文件
- {
- "presets": [
- "@babel/preset-react",
- "@babel/preset-typescript",
- ],
- "plugins": []
- }
6. 新建postcss.config.js文件
- module.exports = {
- plugins: [require('autoprefixer')]
- }
7. 新建tsconfig文件
- {
- "compilerOptions": {
- "target": "es5",
- "lib": [
- "dom",
- "dom.iterable",
- "esnext"
- ],
- "allowJs": true,
- "skipLibCheck": true,
- "esModuleInterop": true,
- "allowSyntheticDefaultImports": true,
- "strict": true,
- "forceConsistentCasingInFileNames": true,
- "module": "esnext",
- "moduleResolution": "node",
- "resolveJsonModule": true,
- "isolatedModules": true,
- "noEmit": true,
- "jsx": "react-jsx",
- "noImplicitAny": false
- },
- "include": [
- "src"
- ]
- }
5. Test组件
- import React, { useEffect, useState } from "react";
- import _ from "lodash";
- const Test = () => {
- const [data, setData] = useState({ a: "hello world" });
- useEffect(() => {
- setData({ a: "gggg" });
- console.log("process", process.env.NODE_ENV, process.env);
- }, []);
- return <div>{_.get(data, "a")}</div>;
- };
- export default Test;
6. 在App.tsx组件中引入Test组件测试效果
- import React, { Suspense, lazy } from "react";
- import { Spin } from "antd";
- import Test from "./Test";
- const App: React.FC = () => {
- return (
- <Suspense fallback={<Spin />}>
- <Test />
- </Suspense>
- );
- };
- export default App;
index.html效果图如下:

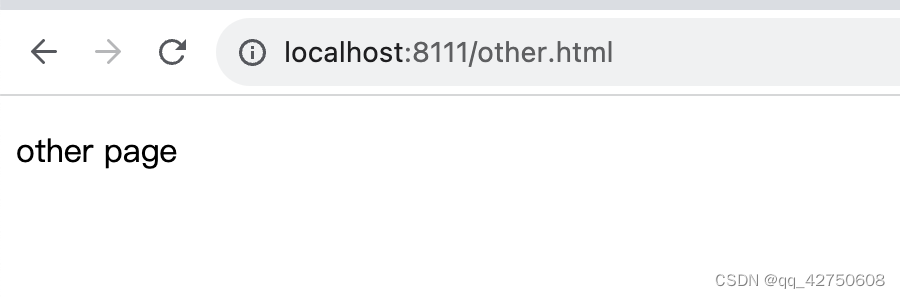
other.html效果图如下:
-
相关阅读:
【SQL刷题】DAY16----SQL高级联结专项练习
资本+商业模式+中国制造的出海跨境电商,走向世界!(Starday)
设计模式-原型模式
我的NVIDIA开发者之旅——CUDA编程基础——并行矩阵乘法
七天接手react项目 系列 —— state&事件处理&ref
Java项目防止SQL注入的几种方案
1.1 异步相关概念:初步了解
Golang goroutine MPG模式浅析
面试现场!月薪3w+的这些数据挖掘SQL面试题你都掌握了吗? ⛵
Hive学习(待续)
- 原文地址:https://blog.csdn.net/qq_42750608/article/details/133774421
