-
Docker开启远程访问+idea配置docker+dockerfile发布java项目
一、docker开启远程访问
1.编辑docker服务文件
vim /usr/lib/systemd/system/docker.service- 1
docker.service原文件如下:[Unit] Description=Docker Application Container Engine Documentation=https://docs.docker.com After=network-online.target docker.socket firewalld.service containerd.service time-set.target Wants=network-online.target containerd.service Requires=docker.socket [Service] Type=notify # the default is not to use systemd for cgroups because the delegate issues still # exists and systemd currently does not support the cgroup feature set required # for containers run by docker ExecStart=/usr/bin/dockerd -H fd:// --containerd=/run/containerd/containerd.sock ExecReload=/bin/kill -s HUP $MAINPID TimeoutStartSec=0 RestartSec=2 Restart=always # Note that StartLimit* options were moved from "Service" to "Unit" in systemd 229. # Both the old, and new location are accepted by systemd 229 and up, so using the old location # to make them work for either version of systemd. StartLimitBurst=3 # Note that StartLimitInterval was renamed to StartLimitIntervalSec in systemd 230. # Both the old, and new name are accepted by systemd 230 and up, so using the old name to make # this option work for either version of systemd. StartLimitInterval=60s # Having non-zero Limit*s causes performance problems due to accounting overhead # in the kernel. We recommend using cgroups to do container-local accounting. LimitNOFILE=infinity LimitNPROC=infinity LimitCORE=infinity # Comment TasksMax if your systemd version does not support it. # Only systemd 226 and above support this option. TasksMax=infinity # set delegate yes so that systemd does not reset the cgroups of docker containers Delegate=yes # kill only the docker process, not all processes in the cgroup KillMode=process OOMScoreAdjust=-500 [Install] WantedBy=multi-user.target- 1
- 2
- 3
- 4
- 5
- 6
- 7
- 8
- 9
- 10
- 11
- 12
- 13
- 14
- 15
- 16
- 17
- 18
- 19
- 20
- 21
- 22
- 23
- 24
- 25
- 26
- 27
- 28
- 29
- 30
- 31
- 32
- 33
- 34
- 35
- 36
- 37
- 38
- 39
- 40
- 41
- 42
- 43
- 44
- 45
- 46
- 47
- 48
找到
ExecStart头添加代码如图所示:-H tcp://0.0.0.0- 1
添加完成,如下图标记

2.重启docker的daemon服务
systemctl daemon-reload- 1
3.重启docker服务
systemctl restart docker- 1
4.开启防火墙指定端口:2375
firewall-cmd --zone=public --add-port=2375/tcp --permanent- 1
5.重启防火墙
firewall-cmd --reload- 1
6.进入浏览器中访问:
http://ip:2375/version如图所示

能够访问到该页面说明已经开启了远程访问。二、idea配置docker
1.进入idea,进入目录:
File-Settings-Plugins搜索:docker,并安装:如图: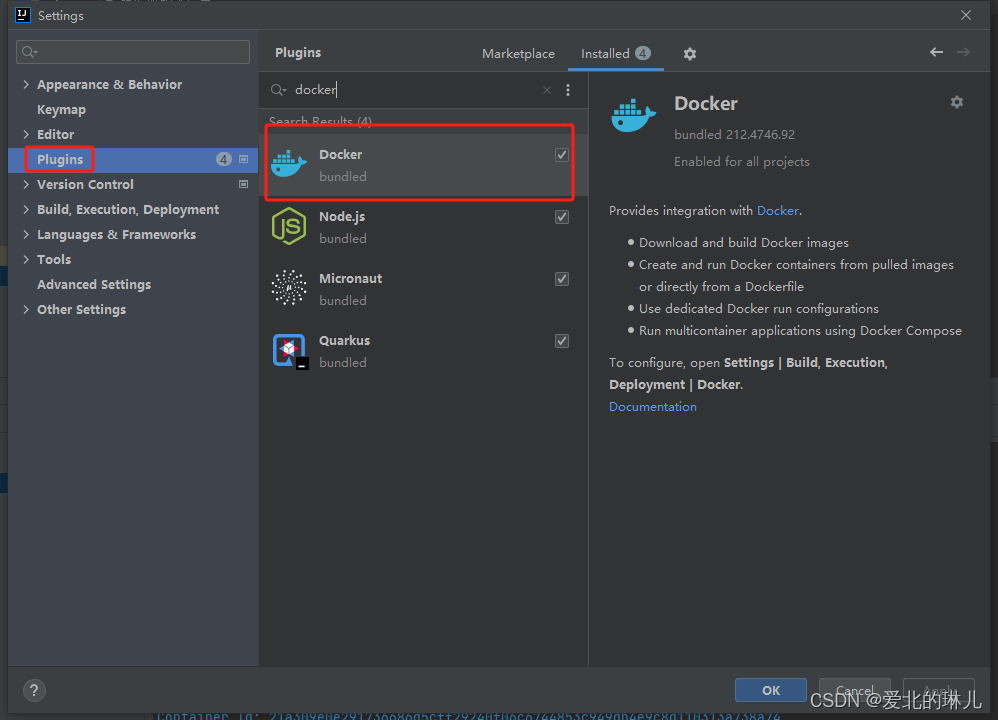
2.配置docker,进入目录:
File-Settings-Build,Execution,Deployment如图:

Engine API URL:tcp://ip:2375- 1
最后点击
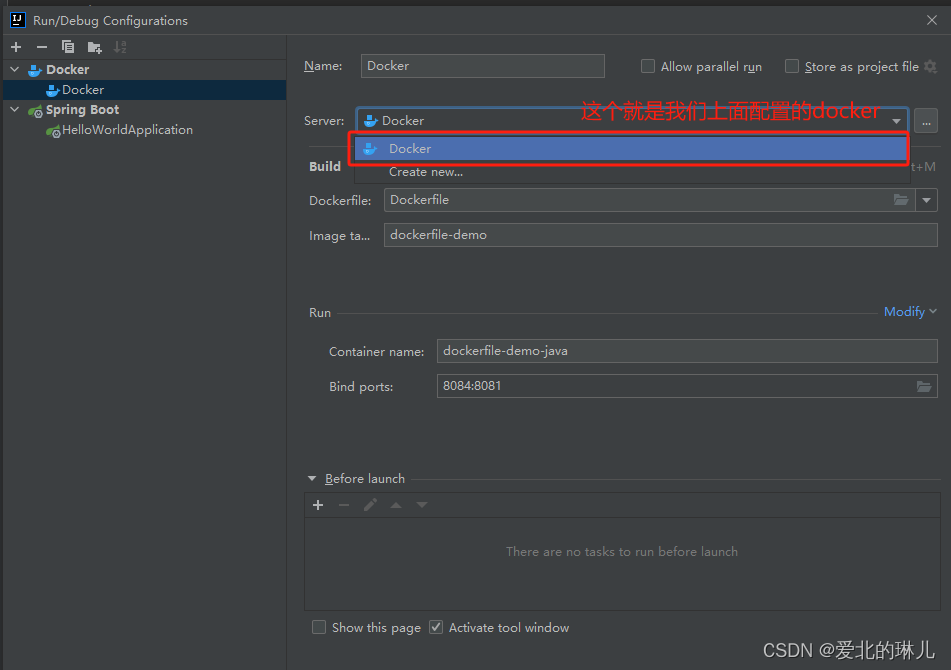
Apply,再点击ok3.在配置docker部署时就可以选择以上添加的docker了
如图:

三、编写一个java Demo,使用dockerfile部署
项目工程如下:

代码展示:HelloWorldController.javapackage com.hcl.helloworld.controller; import org.springframework.web.bind.annotation.GetMapping; import org.springframework.web.bind.annotation.RequestMapping; import org.springframework.web.bind.annotation.RestController; @RestController @RequestMapping("hello") public class HelloWorldController { @GetMapping("world") public String hello(){ return "蜉蝣之羽,衣裳楚楚。
"+ "心之忧矣,於我归处?
" + "蜉蝣之翼,采采衣服。
" + "心之忧矣,於我归息?
" + "蜉蝣掘阅,麻衣如雪。
" + "心之忧矣,於我归说?"; } }- 1
- 2
- 3
- 4
- 5
- 6
- 7
- 8
- 9
- 10
- 11
- 12
- 13
- 14
- 15
- 16
- 17
- 18
- 19
- 20
代码展示:
HelloWorldApplication.javapackage com.hcl.helloworld; import org.springframework.boot.SpringApplication; import org.springframework.boot.autoconfigure.SpringBootApplication; @SpringBootApplication public class HelloWorldApplication { public static void main(String[] args) { SpringApplication.run(HelloWorldApplication.class, args); } }- 1
- 2
- 3
- 4
- 5
- 6
- 7
- 8
- 9
- 10
- 11
- 12
- 13
代码展示:
application.yamlserver: port: 8081- 1
- 2
代码展示:
Dockerfile# 指定环境镜像作为该容器的基础环境,如springboot应用最起码得有jdk环境 FROM openjdk:8 # 执行维护者信息 MAINTAINER abliner # 创建一个存放工程的目录 RUN mkdir -p /data/project-bak ADD target/hello-world-0.0.1-SNAPSHOT.jar /data/project-bak/hello-world-0.0.1-SNAPSHOT.jar # 对外暴露的端口 EXPOSE 8084 # 执行启动 ENTRYPOINT ["/bin/sh","-c","java -jar /data/project-bak/hello-world-0.0.1-SNAPSHOT.jar"]- 1
- 2
- 3
- 4
- 5
- 6
- 7
- 8
- 9
- 10
- 11
- 12
- 13
- 14
- 15
- 16
四、开始配置
1.进入配置,如图:

2.添加docker,选择Dockerfile如图:

3.如图

最后点击Apply再点击ok。
注意:dockerfile中对外暴露的端口也就是上面配置的端口“8084”开启防火墙的一定要去开放端口,否则无法访问。如果是阿里云上面则也要配置打开该端口。4.idea打包项目,先clear再package,保证是最新的包
如图:
5.启动
如图:
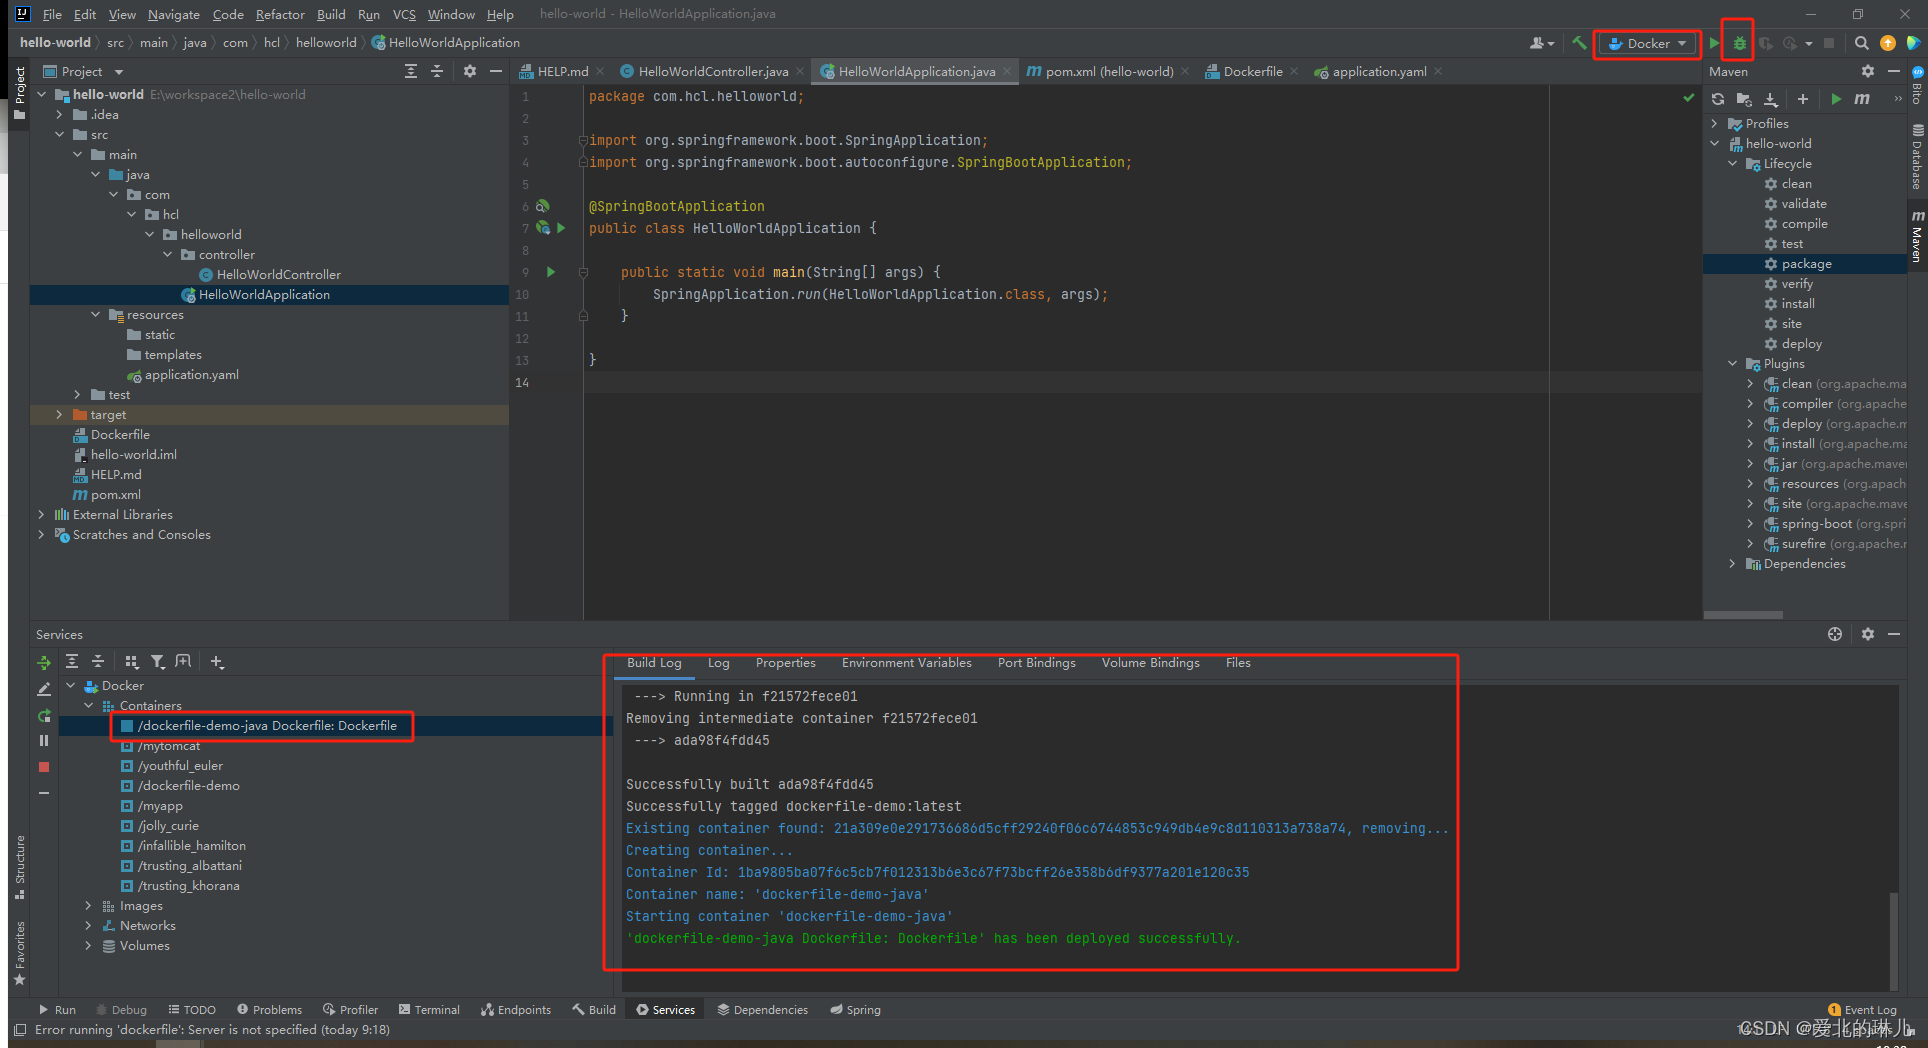
6.访问

-
相关阅读:
ZYNQ多通道数据采集与LWIP传输系统
【CSharp】无符号短整型数组ushort[]转化为IntPtr
他做国外LEAD,用了一年时间,把所有房贷都还清了
Codeforces Round #833 (Div. 2)
消息中间件篇之RabbitMQ-消息不丢失
win11家庭版安装Docker启动一直Starting the Docker Engine...
编写java程序模拟简单的计算器
初学phar反序列化
计算机视觉(YOLO算法系类)—V1
ardupilot 偏航旋转反扭力
- 原文地址:https://blog.csdn.net/qq_42991839/article/details/133784059
