-
【iOS】Fastlane一键打包上传到TestFlight、蒲公英
前言
- 废话不多说,能知道fastlane的,代表您已经对fastlane的用处有了初步了解,并且想使用在自己项目中,本文只适用于iOS项目的fastlane配置(Android端未验证),直接开始配置。
一、准备
- Ruby环境,CocoaPods环境, 蒲公英官网
- 打正式包上传testflight过程中需要输入密码,对于开启了双重认证的账户需要去 ,申请专属密码app专属密码申请
- iOS开发必须要知道的基础开发环境配置,终端执行pod env

- 登录蒲公英,获取api_key,复制备用
二、探索
一、Fastlane配置
1、Fastlane安装
- 终端执行以下命令以安装Fastlane
需要配置的安装:
sudo gem install fastlane- 1
- 快速安装:
sudo gem install fastlane -NV- 1
执行完成后出现以下字样即为安装成功

2、Fastlane更新
以下两种终端更新Fastlane方式,使用一种即可:
- 方式一:
bundle update fastlane- 1
- 方式二:
fastlane update_fastlane- 1
3、Fastlane卸载
- 终端执行以下命令来卸载Fastlane
sudo gem unstall fastlane- 1
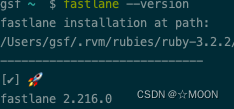
4、查看Fastlane版本
- 执行以下命令查看Fastlane版本,以验证
fastlane --version- 1
5、查看Fastlane位置
which fastlane- 1
6、Fastlane初始化
- 终端cd到项目工程根目录下,执行以下命令,来初始化fastlane
fastlane init- 1
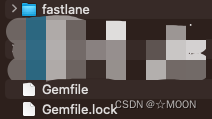
- 项目工程里会创建出fastlane文件夹、Gemfile和Gemfile.lock
- 在fastlane init过程中有些需要输入开发者账号密码,后续可通过以下命令重新登录账号。
fastlane cert create- 1
二、Fastlane安装蒲公英插件
- 终端执行以下命令来安装蒲公英插件
fastlane add_plugin pgyer- 1
- 执行过程中出现以下内容,是为了在Gemfile文件里面写入Pluginfile内容,输入y按回车
Plugin 'fastlane-plugin-pgyer' was added to './fastlane/Pluginfile' [10:08:29]: It looks like fastlane plugins are not yet set up for this project. [10:08:29]: fastlane will modify your existing Gemfile at path 'Gemfile' [10:08:29]: This change is necessary for fastlane plugins to work [10:08:29]: Should fastlane modify the Gemfile at path 'Gemfile' for you? (y/n)- 1
- 2
- 3
- 4
- 5
- 出现以下内容即为安装蒲公英插件成功

三、Fastlane文件编辑
1、Gemfile文件
一般安装好蒲公英插件和fastlane初始化后会默认生成
source "https://rubygems.org" gem "fastlane" gem "cocoapods" plugins_path = File.join(File.dirname(__FILE__), 'fastlane', 'Pluginfile') eval_gemfile(plugins_path) if File.exist?(plugins_path)- 1
- 2
- 3
- 4
- 5
- 6
- 7
- 8
2、Appfile文件
一般安装好蒲公英插件和fastlane初始化后会默认生成,可以按需求修改,个人的Apple ID方便接收AppStore上传及审核信息
app_identifier("com.xxx.xxx") #app的bundleID apple_id("xxx@xxx.com") #个人的Apple ID,邮箱 itc_team_id("xxxxxx") #App Store的团队ID App Store Connect Team ID team_id("xxxxxx") #团队ID Developer Portal Team ID branch ENV['xxxxxx'] #分支 # For more information about the Appfile, see: # https://docs.fastlane.tools/advanced/#appfile- 1
- 2
- 3
- 4
- 5
- 6
- 7
- 8
- 9
3、Fastfile文件
Fastfile文件为核心配置文件,需要编辑打包流程到信息,每一个功能块由 ==lane: xxx do ==开头 end 结尾
1、递增build号
定义一个递增build号的函数,添加到Fastfile中
def updateProjectBuildNumber currentTime = Time.new.strftime("%Y%m%d") build = get_build_number() if build.include?"#{currentTime}." # => 为当天版本 计算迭代版本号 lastStr = build[build.length-2..build.length-1] lastNum = lastStr.to_i lastNum = lastNum + 1 lastStr = lastNum.to_s if lastNum < 10 lastStr = lastStr.insert(0,"0") end build = "#{currentTime}.#{lastStr}" else # => 非当天版本 build 号重置 build = "#{currentTime}.01" end puts("*************| 更新build #{build} |*************") # => 更改项目 build 号 increment_build_number( build_number: "#{build}" ) end- 1
- 2
- 3
- 4
- 5
- 6
- 7
- 8
- 9
- 10
- 11
- 12
- 13
- 14
- 15
- 16
- 17
- 18
- 19
- 20
- 21
- 22
- 23
- 24
2、任务配置
- 以下为任务配置信息仅供参考(请切换为属于你的专属信息):
#fastlane版本号 fastlane_version "2.216.0" #打包平台 default_platform :ios #指定项目的scheme名称 ---- 修改 scheme="xxx" #蒲公英api_key和user_key ---- 修改 api_key="xxx" user_key="xxx" # 任务脚本 platform :ios do desc "以 development 方式打包并上传到蒲公英" lane :test_beta do puts "以 development 方式打包" gym( # 指定打包所使用的输出方式 (可选: app-store, package, ad-hoc, enterprise, development) export_method: "development", # 指定项目的 scheme 名称 scheme: "xxx", # 指定输出的文件夹地址 output_directory: "./archive/test_beta/" + Time.new.strftime("%Y-%m-%d-%H:%M:%S"), ) puts "上传 ipa 包到蒲公英" pgyer( # 蒲公英 API KEY api_key: "xxx", # 蒲公英 USER KEY user_key: "xxx" ) end desc "以 ad-hoc 方式打包并上传到蒲公英" lane :beta do puts "自动生成 Provisioning Profiles 文件" sigh( # 指定输出的文件夹地址 output_path: "./archive/sign", # 是否为 AdHoc 证书(设为 false 或不写默认为 AppStore 证书) adhoc: true ) puts "以 ad-hoc 方式打包" gym( # 指定打包所使用的输出方式 (可选: app-store, package, ad-hoc, enterprise, development) export_method: "ad-hoc", # 指定项目的 scheme 名称 scheme: "xxx", # 指定输出的文件夹地址 output_directory: "./archive/beta/" + Time.new.strftime("%Y-%m-%d-%H:%M:%S"), # 指定打包方式 (可选: Release, Debug) configuration: "Release" ) puts "上传 ipa 包到蒲公英" pgyer( # 蒲公英 API KEY api_key: "xxx", # 蒲公英 USER KEY user_key: "xxx" ) end desc "以 app-store 方式打包并上传到 iTunes Connect" lane :release do puts "自动生成 Provisioning Profiles 文件" sigh( # 指定输出的文件夹地址 output_path: "./archive/sign" ) puts "以 app-store 方式打包" gym( # 指定打包所使用的输出方式 (可选: app-store, package, ad-hoc, enterprise, development) export_method: "app-store", # 指定项目的 scheme 名称 scheme: "xxx", # 指定输出的文件夹地址 output_directory: "./archive/release/" + Time.new.strftime("%Y-%m-%d-%H:%M:%S"), # 指定打包方式 (可选: Release, Debug) configuration: "Release" ) puts "上传 ipa 包到 iTunes Connect" deliver( # 跳过截图上传 skip_screenshots: true, # 跳过元数据上传 skip_metadata: true, # 跳过审核直接上传 force: true ) end end- 1
- 2
- 3
- 4
- 5
- 6
- 7
- 8
- 9
- 10
- 11
- 12
- 13
- 14
- 15
- 16
- 17
- 18
- 19
- 20
- 21
- 22
- 23
- 24
- 25
- 26
- 27
- 28
- 29
- 30
- 31
- 32
- 33
- 34
- 35
- 36
- 37
- 38
- 39
- 40
- 41
- 42
- 43
- 44
- 45
- 46
- 47
- 48
- 49
- 50
- 51
- 52
- 53
- 54
- 55
- 56
- 57
- 58
- 59
- 60
- 61
- 62
- 63
- 64
- 65
- 66
- 67
- 68
- 69
- 70
- 71
- 72
- 73
- 74
- 75
- 76
- 77
- 78
- 79
- 80
- 81
- 82
- 83
- 84
- 85
- 86
- 87
- 88
- 89
- 90
以上配置完成就可以在本地终端进行打包了,
- export_method是在Fastlane工具中使用的命令,指定导出iOS应用存档的方法,以及可用的配置文件和签名证书。
以下是几种导出存档方法:- app-store:提交到应用商店的存档
- development:用于开发目的的存档
- ad-hoc:用于分发给有权限的设备或用户的存档
- enterprise:公司内部网络分发的存档
- configuration构建方式:分Release和Debug
- scheme:

- output_directory:输出文件夹地址
- desc、puts:信息描述
打开终端进入到项目fastlane文件夹上一级,输入以下命令即可打一个以 development 方式打包并上传到蒲公英的包。
fastlane test_beta- 1
4、Pluginfile文件
一般安装好蒲公英插件后会默认生成
# Autogenerated by fastlane # # Ensure this file is checked in to source control! gem 'fastlane-plugin-pgyer'- 1
- 2
- 3
- 4
- 5
四、项目工程配置Fastlane
1、递增版本号配置
- 修改Build Settings中的Versioning配置,Current Project Version随便填一个,Versioning System选择Apple Generic

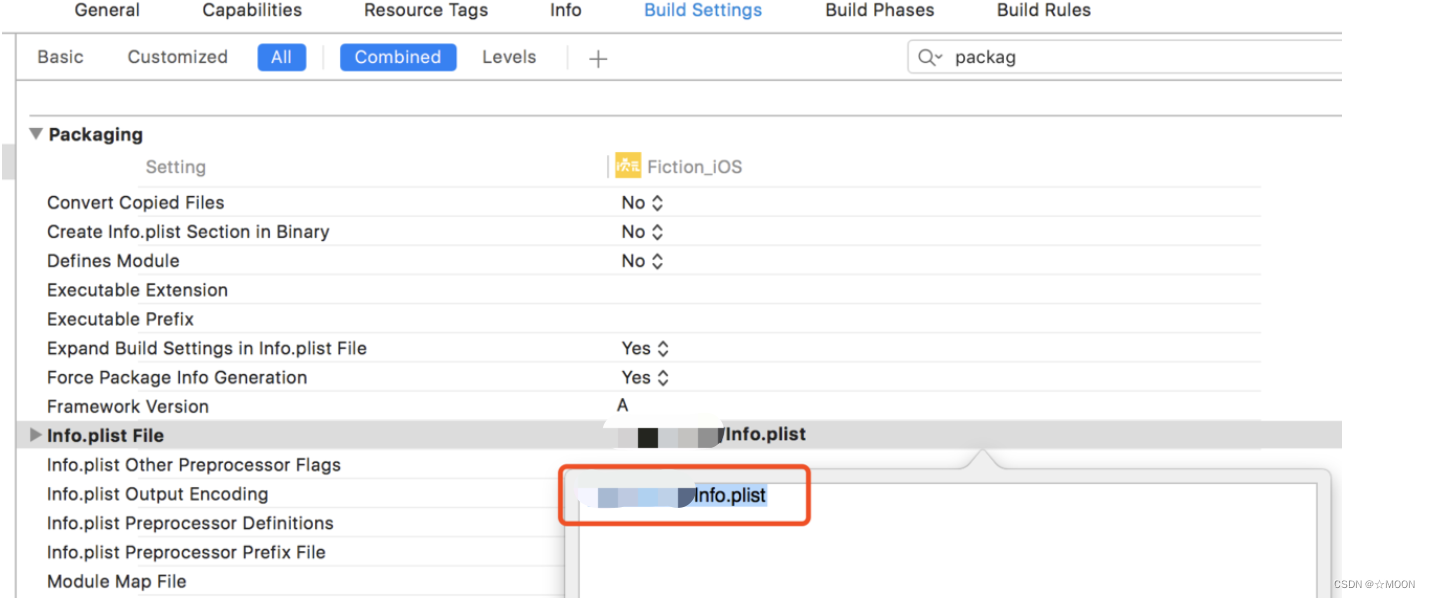
2、修改info.plist File路径
把项目工程中所有的info.plist文件的路径中带有SRCROOT的路径全部改成相对路径,要不然会报错。
五、Fastlane执行
做 fastlane 命令的时候都是在项目的根目录下进行的,打开终端进入到项目fastlane文件夹上一级。
- 1,获取到所有的 lane
fastlane lanes- 1
2、账号权限
- 1,Adding a Credential(添加凭证)
//输入命令:
fastlane fastlane-credentials add --username felix@krausefx.com- 1
- 2
//会自动要求输入密码:App-Specific Passwords
Password: *********(这里就是要输入刚刚生成的App-Specific Passwords)如果手动输入错误:请执行以下命令:删除账号,再重复添加凭证,完成添加
- 2,Removing a Credential(移除凭证)
fastlane fastlane-credentials remove --username felix@krausefx.com- 1
//password has been deleted.
三、总结
工具的使用没有什么技术含量,想研究fastlane代码可参考github
四、常见问题归纳
- 1,账号权限问题,重复一下上面账号权限模块,移除凭证,添加凭证的命令步骤
[!] Error uploading ipa file: [Application Loader Error Output]: Error uploading '/var/folders/sp/_4jyc68d0hvbm70nm50ljvvw0000gp/T/3a982536-cad1-483e-8b64-5c74740a168f.ipa'. [Application Loader Error Output]: Unable to upload archive. Failed to get authorization for username 'xxx@126.com' and password. ( [Application Loader Error Output]: The call to the altool completed with a non-zero exit status: 1. This indicates a failure.- 1
- 2
- 3
- 4
-
相关阅读:
【EMQX】2.1.2 为什么选择EMQ X
线上机器 swap 过高导致告警
2022就业季|Spring认证教你,如何使用 Spring 构建 REST 服务(四)
node.js医院预约挂号系统的设计与实现毕业设计源码141041
MySQL高级SQL语句(一)
小唐源代码搜索引擎上线,可搜索28种程序语言源代码,源码来自123万个star数量超过100的github项目
I.MX6U-驱动开发-1-第一个linux驱动(字符读写)
[Redis-实战] 企业常用的缓存使用方案(查询、更新、击穿、穿透、雪崩) 附源码
ssl 层在握手阶段报错 mbedtls_ssl_handshake returned -0xffff8880
笔试强训(二)
- 原文地址:https://blog.csdn.net/MOON_YZM/article/details/133694401
