-
qt开发从入门到实战2
以下是本人学习笔记
原视频:最新QT从入门到实战完整版|传智教育练习示例
设计一个按钮,点击时弹出新窗口,再次点击时新窗口关闭
// exercise QWidget* second_window = new QWidget(); QPushButton* btn3 = new QPushButton("open", this); btn3->move(0, 100); connect(btn3, &QPushButton::clicked, second_window, [=](){ if(btn3->text() == "open"){ second_window->show(); second_window->resize(100, 100); btn3->setText("close"); }else if(btn3->text() == "close"){ second_window->close(); btn3->setText("open"); } });- 1
- 2
- 3
- 4
- 5
- 6
- 7
- 8
- 9
- 10
- 11
- 12
- 13
- 14
注意:加入窗口和加入对象树是两个不同的概念
一、窗口中的基础部件
1.创建菜单栏
讲解见注释
// 创建菜单栏 // 菜单栏最多只有一个 // menuBar构造函数已经把自身加入对象树了 QMenuBar* bar = menuBar(); // 将菜单栏放入窗口 setMenuBar(bar); // 创建菜单 QMenu* fileMenu = bar->addMenu("file"); QMenu* editMenu = bar->addMenu("edit"); // 创建菜单项 QAction* newAction = fileMenu->addAction("new"); // 添加分隔线 fileMenu->addSeparator(); QAction* openAction = fileMenu->addAction("open");- 1
- 2
- 3
- 4
- 5
- 6
- 7
- 8
- 9
- 10
- 11
- 12
- 13
- 14
2.创建工具栏
// 工具栏可以有多个 QToolBar* toolBar = new QToolBar(this); // 加入对象树 // 加入窗口和加入对象树是两个不同的概念 addToolBar(Qt::LeftToolBarArea ,toolBar); // 加入窗口 // 设置工具栏是否可以移动(相当于总开关) toolBar->setMovable(false); // 设置工具栏只可以左右停靠 toolBar->setAllowedAreas(Qt::LeftToolBarArea | Qt::RightToolBarArea); toolBar->setFloatable(false); // 设置工具栏内容 // 相当于工具栏和菜单栏公用的功能 toolBar->addAction(newAction); toolBar->addAction(openAction); // 工具栏中添加控件 QPushButton* btn = new QPushButton("aa", this); toolBar->addWidget(btn);- 1
- 2
- 3
- 4
- 5
- 6
- 7
- 8
- 9
- 10
- 11
- 12
- 13
- 14
- 15
- 16
3.创建状态栏
// 状态栏最多只有一个 QStatusBar* stBar = statusBar(); // 将状态栏放入窗口 setStatusBar(stBar); // 放标签控件 QLabel* label1 = new QLabel("tips", this); stBar->addWidget(label1); QLabel* label2 = new QLabel("right tips", this); // right labels stBar->addPermanentWidget(label2);- 1
- 2
- 3
- 4
- 5
- 6
- 7
- 8
- 9
- 10
4.创建铆接部件(浮动窗口)+中心部件
// 创建铆接部件(浮动窗口):可以有多个 QDockWidget* dockWidget = new QDockWidget("float", this); // 浮动窗口的位置是相对于核心部件的位置而言的(在核心部件的上/下/左/右) addDockWidget(Qt::TopDockWidgetArea, dockWidget); // 设置后期停靠区域:只允许上下 dockWidget->setAllowedAreas(Qt::TopDockWidgetArea | Qt::BottomDockWidgetArea);- 1
- 2
- 3
- 4
- 5
- 6
5.创建中心部件
// 设置中心部件:只有一个 QTextEdit* edit = new QTextEdit(this); setCentralWidget(edit);- 1
- 2
- 3
0.无代码版
创建项目时勾选创建ui界面,之后在ui中手动拖拽部件(手动狗头)
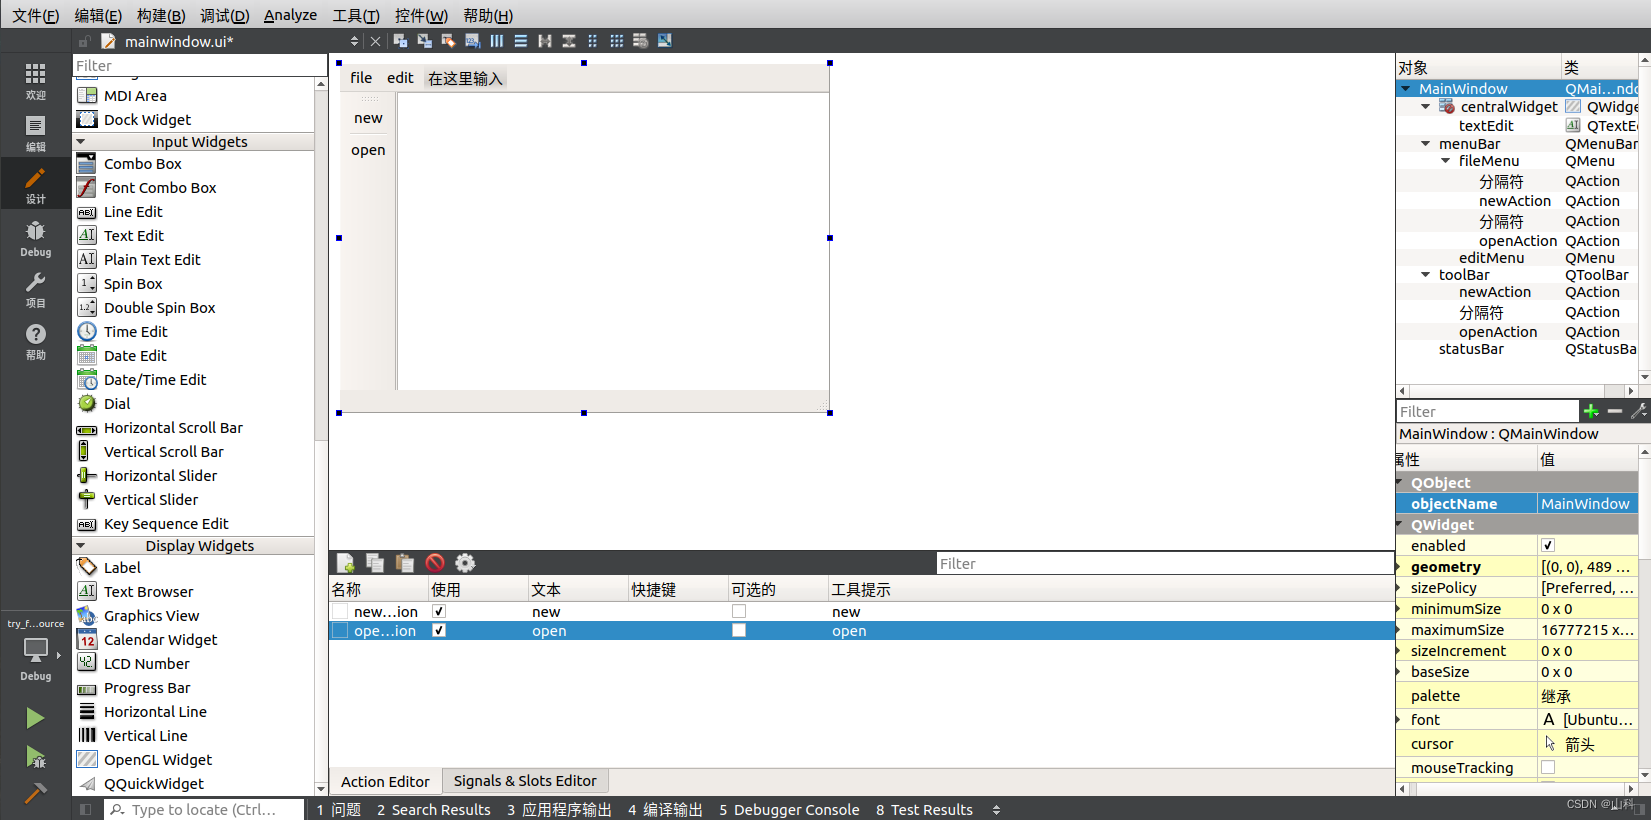
二、资源文件的添加
利用无代码方式进行控件的布局后,添加的部件在源文件中可以通过ui找到
- 寻找到项目文件位置,将需要用的资源放在项目文件夹中,代码里使用相对路径
- 在Qt项目中,右击项目->添加新文件
- 选择qt->qt resource file(最终生成.qrc文件)
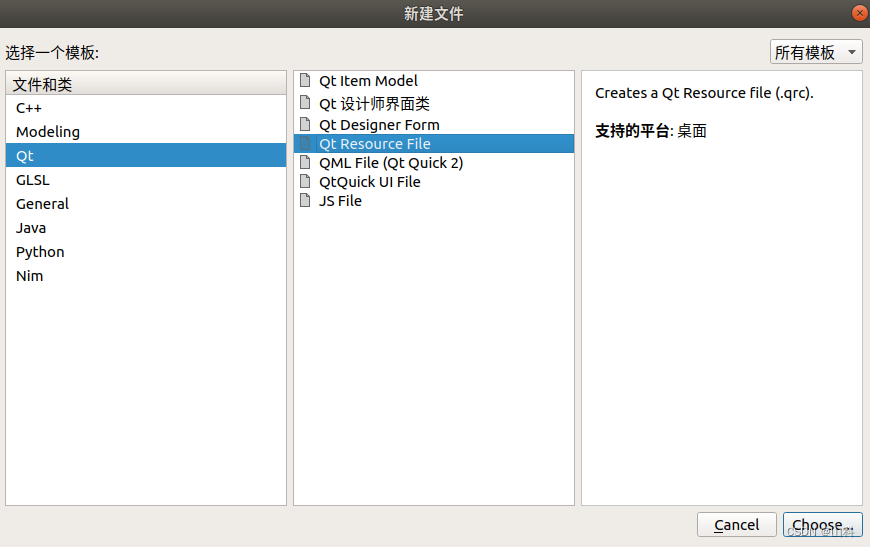
- 命名后默认选项即可
- 添加前缀(仅作区分用)
- 添加文件:全选之前加入项目文件夹的图片即可
注意:
- 从res.qrc切出后,双击文件无法唤起页面,需要右击res.qrc->open in editor
- 图片资源必须得是png格式,不然会不显示图片
三、对话框
1.模态/非模态对话框
// 点击新建按钮,弹出一个对话框 connect(ui->newAction, &QAction::triggered, [=](){ // 对话框分类 // 1.模态对话框:不可以对其他窗口进行操作 // 2.非模态对话框:可以对其他窗口进行操作 // 模态创建(阻塞) QDialog dlg1(this); dlg1.resize(200, 100); // 在模态对话框关闭之前,程序会一直在此阻塞 dlg1.exec(); qDebug() << "模态创建"; }); connect(ui->openAction, &QAction::triggered, [=](){ // 非模态对话框创建 // 以下方式创建会让对话框在离开匿名函数时就被销毁 // QDialog dlg2(this); // dlg2.show(); // 将对话框创建在堆上即可 QDialog* dlg2 = new QDialog(this); dlg2->resize(200, 100); dlg2->show(); // 使其在关闭时删除对象(因为默认只有在主窗口关闭时,所有对象才会被销毁) dlg2->setAttribute(Qt::WA_DeleteOnClose); qDebug() << "非模态对话框创建"; });- 1
- 2
- 3
- 4
- 5
- 6
- 7
- 8
- 9
- 10
- 11
- 12
- 13
- 14
- 15
- 16
- 17
- 18
- 19
- 20
- 21
- 22
- 23
- 24
- 25
- 26
2.标准对话框
标准对话框是Qt内置的用于简化开发的一系列对话框
消息对话框// 错误对话框 QMessageBox::critical(this, "critical", "error"); // 信息对话框 QMessageBox::information(this, "information", "some info"); // 提问对话框(父亲, 标题, 内容, 按钮类型, 与回车关联的按钮) // 返回值是standarButton类型 if(QMessageBox::Save == QMessageBox::question(this, "question", "Q?", QMessageBox::Cancel | QMessageBox::Save, QMessageBox::Save)) { qDebug() << "save something"; }else { qDebug() << "cancel"; } // 警告对话框 QMessageBox::warning(this, "warning", "stop!");- 1
- 2
- 3
- 4
- 5
- 6
- 7
- 8
- 9
- 10
- 11
- 12
- 13
- 14
- 15
tips:静态对象可以通过①创建对象访问②直接通过类名访问
其他对话框
// 其他对话框 // 文件对话框(parent, title, default path, filter file) QString filePath = QFileDialog::getOpenFileName(this, "open files", "/home", "*.txt"); qDebug() << filePath; // 字体对话框 bool flag; QFont font = QFontDialog::getFont(&flag, QFont("console", 36)); qDebug() << font; // 颜色对话框(上面两种有warning) // QColor color = QColorDialog::getColor(QColor(255, 255, 255)); // QColor color = QColorDialog::getColor(Qt::red, this); QColor color(0, 0, 0); QColorDialog colorDialog(color, this); colorDialog.setOption(QColorDialog::DontUseNativeDialog); if( colorDialog.exec() == QDialog::Accepted ) { // 获取当前选中的颜色 color = colorDialog.currentColor(); qDebug() << color; }- 1
- 2
- 3
- 4
- 5
- 6
- 7
- 8
- 9
- 10
- 11
- 12
- 13
- 14
- 15
- 16
- 17
- 18
- 19
- 20
- 21
- 22
3.未完待续
p23
-
相关阅读:
Spring Cloud实战 |分布式系统的流量控制、熔断降级组件Sentinel如何使用
S32Kxxx bootloader之UDS bootloader
目标检测——day45 基于水平边界框上滑动顶点的多朝向目标检测
html入门综合练习
固定式工业RFID读写器有哪些特点?如何选型?
助力企业前行——Scala&Spark最佳实践课程
【Linux】基本操作指令汇总(不完全)
秋招面经第八弹:网易二面-数据开发工程师
Linux环境变量配置说明(配置jdk为例-摘录自尚硅谷技术文档)
一文了解函数设计的最佳实践
- 原文地址:https://blog.csdn.net/weixin_50497501/article/details/127501158
