-
Python如何优雅地可视化目标检测框
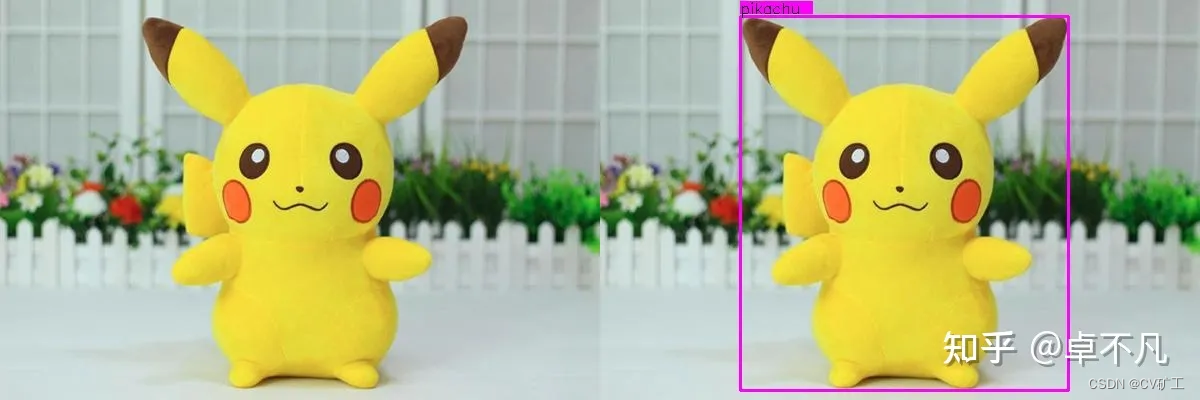
读入图像
img_name = './pikachu.jpg' img = cv2.imread(img_name) box = [ 140, 16,468,390, "pikachu"] box_color = (255,0,255) cv2.rectangle(img, (box[0], box[1]), (box[2], box[3]), color=box_color, thickness=2)- 1
- 2
- 3
- 4
- 5

标签美化
接下来我们来给矩形框添加标签,我们观察上述画图函数,注意最后一个参数thickness,
如果此值等于-1,那么将对矩形框执行填充效果.
基于此,我们来写标签美化代码,如下:def draw_label_type(draw_img,bbox,label_color): label = str(bbox[-1]) labelSize = cv2.getTextSize(label + '0', cv2.FONT_HERSHEY_SIMPLEX, 0.5, 2)[0] if bbox[1] - labelSize[1] - 3 < 0: cv2.rectangle(draw_img, (bbox[0], bbox[1] + 2), (bbox[0] + labelSize[0], bbox[1] + labelSize[1] + 3), color=label_color, thickness=-1 ) cv2.putText(draw_img, label, (bbox[0], bbox[1] + labelSize + 3), cv2.FONT_HERSHEY_SIMPLEX, 0.5, (0, 0, 0), thickness=1 ) else: cv2.rectangle(draw_img, (bbox[0], bbox[1] - labelSize[1] - 3), (bbox[0] + labelSize[0], bbox[1] - 3), color=label_color, thickness=-1 ) cv2.putText(draw_img, label, (bbox[0], bbox[1] - 3), cv2.FONT_HERSHEY_SIMPLEX, 0.5, (0, 0, 0), thickness=1 )- 1
- 2
- 3
- 4
- 5
- 6
- 7
- 8
- 9
- 10
- 11
- 12
- 13
- 14
- 15
- 16
- 17
- 18
- 19
- 20
- 21
- 22
- 23
- 24
- 25
- 26
- 27
- 28
- 29
- 30
- 31
上述代码中, 首先计算标签文本的大小, 然后据标签文本大小进行矩形填充, 最后使用函数cv2.putText 来画出对应的标签文本.
运行效果如下:
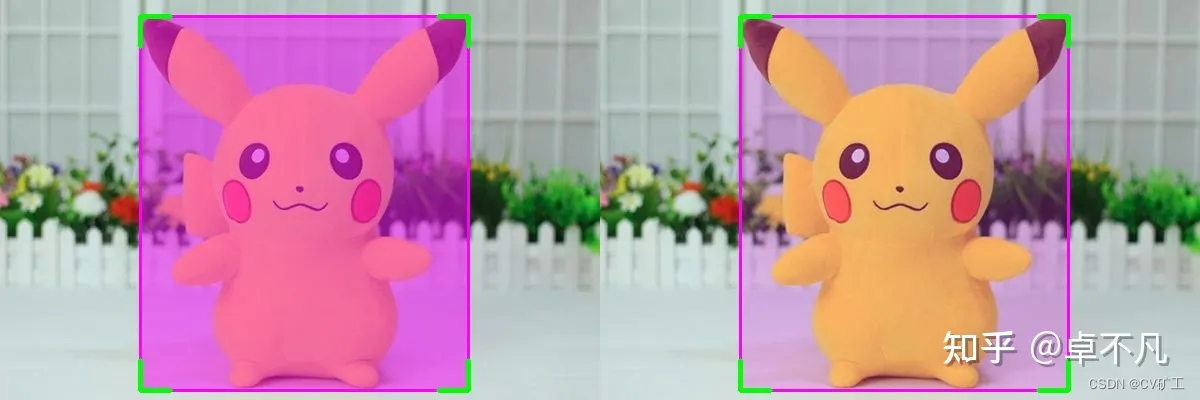
角点美化
上述添加完标签后,由于标签框和目标矩形框颜色一致,边界处不太容易区分,这里添加对角点美化的代码,代码如下:
def draw_box_corner(draw_img,bbox,length,corner_color): # Top Left cv2.line(draw_img, (bbox[0], bbox[1]), (bbox[0] + length, bbox[1]), corner_color, thickness=3) cv2.line(draw_img, (bbox[0], bbox[1]), (bbox[0], bbox[1] + length), corner_color, thickness=3) # Top Right cv2.line(draw_img, (bbox[2], bbox[1]), (bbox[2] - length, bbox[1]), corner_color, thickness=3) cv2.line(draw_img, (bbox[2], bbox[1]), (bbox[2], bbox[1] + length), corner_color, thickness=3) # Bottom Left cv2.line(draw_img, (bbox[0], bbox[3]), (bbox[0] + length, bbox[3]), corner_color, thickness=3) cv2.line(draw_img, (bbox[0], bbox[3]), (bbox[0], bbox[3] - length), corner_color, thickness=3) # Bottom Right cv2.line(draw_img, (bbox[2], bbox[3]), (bbox[2] - length, bbox[3]), corner_color, thickness=3) cv2.line(draw_img, (bbox[2], bbox[3]), (bbox[2], bbox[3] - length), corner_color, thickness=3)- 1
- 2
- 3
- 4
- 5
- 6
- 7
- 8
- 9
- 10
- 11
- 12
- 13

透明效果实现
通过cv2.rectangle 函数设置 thickness, 我们可以得到填充后的图像,进而利用opencv中的 cv2.add_weight 函数可以实现透明效果.
alpha = 0.8 gamma = 0 out_img = cv2.addWeighted(img,alpha,draw_img,1-alpha,gamma)- 1
- 2
- 3
-
相关阅读:
java毕业设计网上购物商城系统研发mybatis+源码+调试部署+系统+数据库+lw
vue项目实现table表格竖向
VUE day_10(7.28)Vue3学子项目详细版
设计模式-工厂模式
VueRouter 源码解析
迷宫生成与路径规划算法-Python3.8-附Github代码
一些shell编程技巧
JS事件循环
C++入门之缺省参数与函数重载
《知识点累积》Vue2.x
- 原文地址:https://blog.csdn.net/ZauberC/article/details/133386877