-
视屏点播项目
项目背景
大家应该在电脑上刷过视频吧,这个项目就是模拟一下我们刷视频的整个流程,我们要做的是一个类似B站的网页,这里面包含视频的上传修改和观看以及删除,注意我这个是一个简易版本的,在后面我会做一个升级,增加其他的功能.
基本原理
下面我们说一下我们项目的基本原理.我们这里做的是服务器客户端类型的项目.当客户端发起请求之后,我们服务端分析请求,看他是做什么的,例如请求资源,还是推送资源,我们对每一个请求都做一个处理让后把响应发送给客户端.
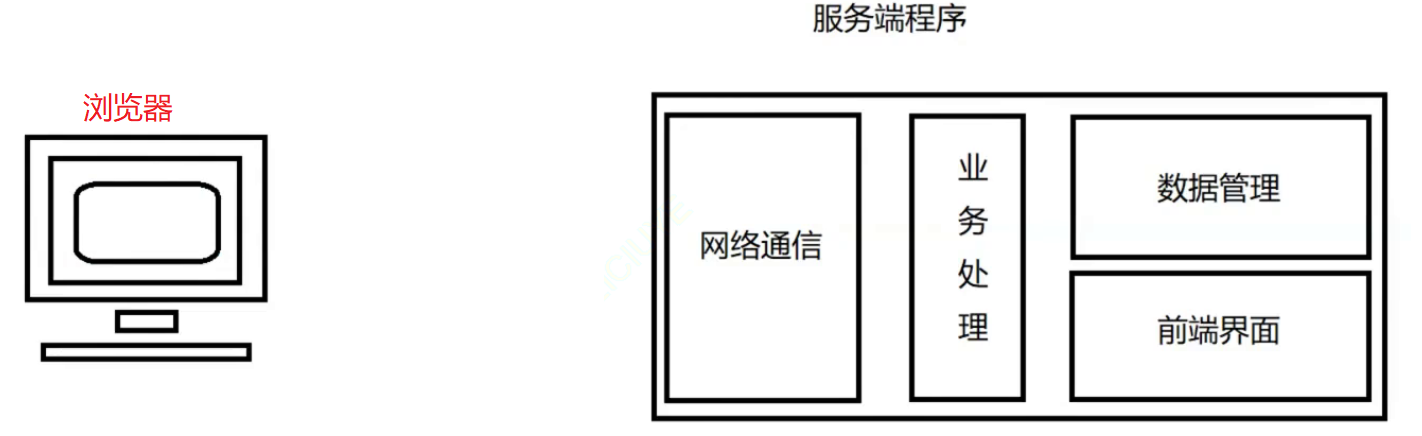
服务端程序负责功能
- 针对客户端上传的视频文件以及封面进行存储
- 针对客户端上传的视频完成增删查改内容
- 支持浏览器进行视频观看内容
服务端功能模块划分
- 数据管理模块: 负责针对客户端上传的视频信息进行管理
- 网络通信模块: 搭建网络服务器,与客户端进行通信
- 业务处理模块: 针对客户端的请求处理各项业务并进行相应
- 前端界面模块: 完成前端浏览器上的各个html页面,并支持增删改查及其观看功能
技术栈与环境
这里说下我们的技术栈与环境.
技术栈
- 后端: C/C++, C++11,STL, Jsoncpp, cpp-httplib, MySQL
- 前端: html5,css,js、jQuery, Ajax
环境
- Centos7虚拟机,vim,gcc(g++),Makefile,Vscode
环境准备
环境准备包含下面几个方面的内容,我的服务器是centos 7系列的.
- 编译器的升级
- 三方库的下载
Gcc 升级7.3版本
[qkj@Qkj ~]$ sudo yum install centos-release-scl-rh centos-release-scl [qkj@Qkj ~]$ sudo yum install devtoolset-7-gcc devtoolset-7-gcc-c++ [qkj@Qkj ~]$ source /opt/rh/devtoolset-7/enable [qkj@Qkj ~]$ echo "source /opt/rh/devtoolset-7/enable" >> ~/.bashrc [qkj@Qkj ~]$ gcc -v Using built-in specs. COLLECT_GCC=gcc COLLECT_LTO_WRAPPER=/opt/rh/devtoolset-8/root/usr/libexec/gcc/x86_64-redhat-linux/8/lto-wrapper Target: x86_64-redhat-linux Configured with: ../configure --enable-bootstrap --enable-languages=c,c++,fortran,lto --prefix=/opt/rh/devtoolset-8/root/usr --mandir=/opt/rh/devtoolset-8/root/usr/share/man --infodir=/opt/rh/devtoolset-8/root/usr/share/info --with-bugurl=http://bugzilla.redhat.com/bugzilla --enable-shared --enable-threads=posix --enable-checking=release --enable-multilib --with-system-zlib --enable-__cxa_atexit --disable-libunwind-exceptions --enable-gnu-unique-object --enable-linker-build-id --with-gcc-major-version-only --with-linker-hash-style=gnu --with-default-libstdcxx-abi=gcc4-compatible --enable-plugin --enable-initfini-array --with-isl=/builddir/build/BUILD/gcc-8.3.1-20190311/obj-x86_64-redhat-linux/isl-install --disable-libmpx --enable-gnu-indirect-function --with-tune=generic --with-arch_32=x86-64 --build=x86_64-redhat-linux Thread model: posix gcc version 8.3.1 20190311 (Red Hat 8.3.1-3) (GCC) [qkj@Qkj ~]$- 1
- 2
- 3
- 4
- 5
- 6
- 7
- 8
- 9
- 10
- 11
- 12
- 13
- 14
安装Jsoncpp库
[qkj@Qkj ~]$ sudo yum install epel-release [qkj@Qkj ~]$ sudo yum install jsoncpp-devel [qkj@Qkj ~]$ ll /usr/include/jsoncpp/json/ total 80 -rw-r--r-- 1 root root 2203 Jul 23 2015 assertions.h -rw-r--r-- 1 root root 662 Jul 23 2015 autolink.h -rw-r--r-- 1 root root 3860 Jul 23 2015 config.h -rw-r--r-- 1 root root 1509 Jul 23 2015 features.h -rw-r--r-- 1 root root 758 Jul 23 2015 forwards.h -rw-r--r-- 1 root root 420 Jul 23 2015 json.h -rw-r--r-- 1 root root 11482 Jul 23 2015 reader.h -rw-r--r-- 1 root root 26101 Jul 23 2015 value.h -rw-r--r-- 1 root root 509 Jul 23 2015 version.h -rw-r--r-- 1 root root 10298 Jul 23 2015 writer.h [qkj@Qkj ~]$- 1
- 2
- 3
- 4
- 5
- 6
- 7
- 8
- 9
- 10
- 11
- 12
- 13
- 14
- 15
下载httplib库
[qkj@Qkj ~]$ git clone https://github.com/yhirose/cpp-httplib.git- 1
MySQL数据库
安装与卸载中,用户全部切换成为root,一旦 安装,普通用户能使用的 初期练习,mysql不进行用户管理,全部使用root进行,尽快适应mysql语句,后面学了用户管理,在考虑新建普通用户
卸载旧环境
首先检测我们系统是否存在mariadb在运行存在,这个也是一个数据库,是MySQL的分支.如果存在这个软件,那么按照下面的步骤停止服务.
[root@Qkj ~]# ps ajx |grep mariadb # 先检查是否有mariadb存在 13134 14844 14843 13134 pts/0 14843 S+ 1005 0:00 grep --color=auto mariadb 19010 19187 19010 19010 ? -1 Sl 27 16:55 /usr/libexec/mysqld --basedir=/usr --datadir=/var/lib/mysql --plugin-dir=/usr/lib64/mysql/plugin --log-error=/var/log/mariadb/mariadb.log --pid-file=/var/run/mariadb/mariadb.pid--socket=/var/lib/mysql/mysql.sock [root@Qkj ~]# systemctl stop mariadb.service # 停止mariadb 服务 ==== AUTHENTICATING FOR org.freedesktop.systemd1.manage-units === Authentication is required to manage system services or units. Authenticating as: root Password: ==== AUTHENTICATION COMPLETE === [root@Qkj ~]# ps axj |grep mariadb # 停止完成 13134 14976 14975 13134 pts/0 14975 S+ 1005 0:00 grep --color=auto mariadb- 1
- 2
- 3
- 4
- 5
- 6
- 7
- 8
- 9
- 10
- 11
下面我们继续检测我们mariadb是否存在.
[root@Qkj ~]# rpm -qa | grep mariadb # 或者使用这个指令rpm -qa | grep mysql ....- 1
- 2
如果出现了这样的结果.
[root@Qkj ~]# rpm -qa | grep mysql mysql-community-common-5.7.41-1.el7.x86_64 mysql-community-server-5.7.41-1.el7.x86_64 mysql57-community-release-el7-11.noarch mysql-community-client-5.7.41-1.el7.x86_64 mysql-community-libs-5.7.41-1.el7.x86_64- 1
- 2
- 3
- 4
- 5
- 6
那么此时我们需要卸载这些安装包.下面我们说两个方式.
可以一个一个删除.
#卸载显示出来的mariadb/mysql安装包 [whb@VM-0-3-centos ~]$ sudo yum remove mysql-community-common-5.7.41-1.el7.x86_64- 1
- 2
也可以通过一个指令,一次性删除所有的安装包.
获取MySQL数据库yum源
下面我们开始获得官方的yum源.这里我们有官网.
获取mysql官方yum源 http://repo.mysql.com/- 1
我们进入之后,然后我们发现他的页面实在是太简单了.
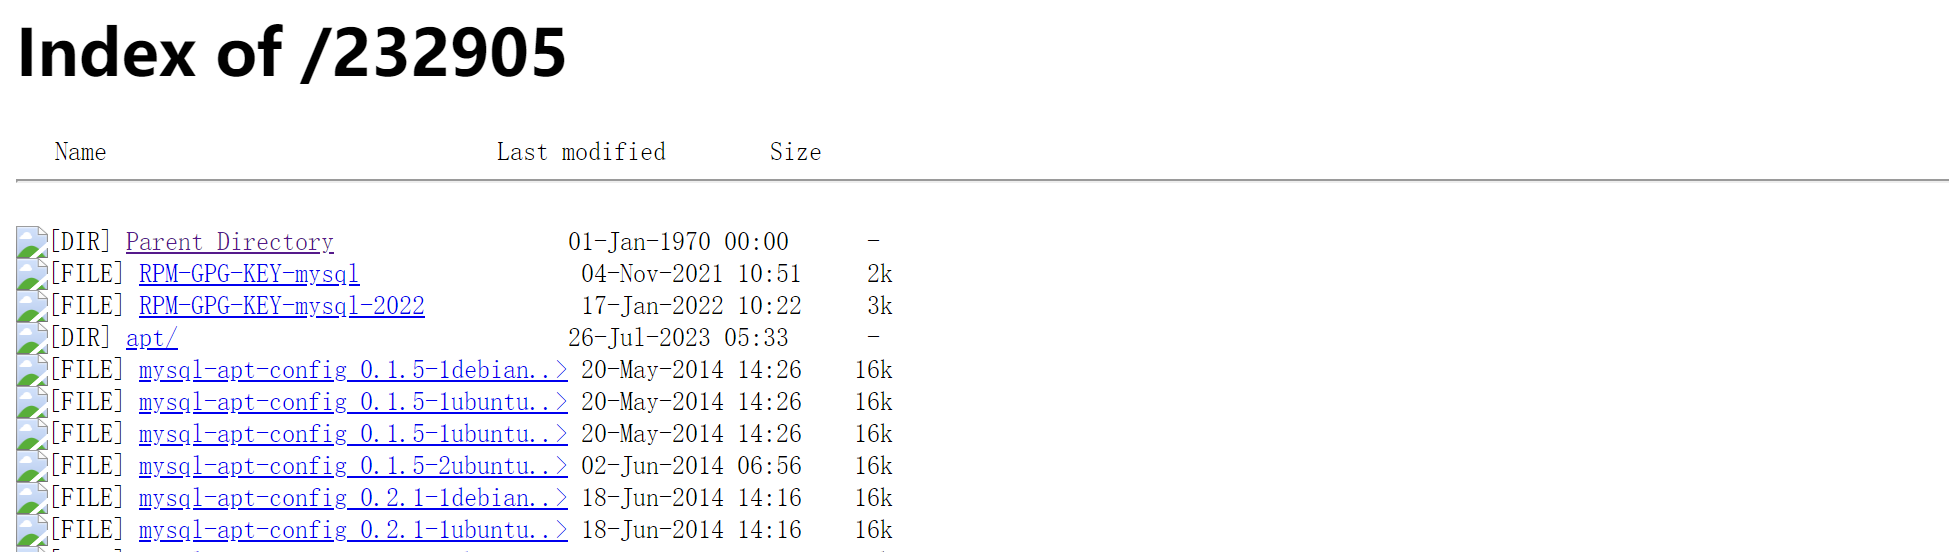
这里我们右键,选择查看网页源代码,此时我们这里详细一些.
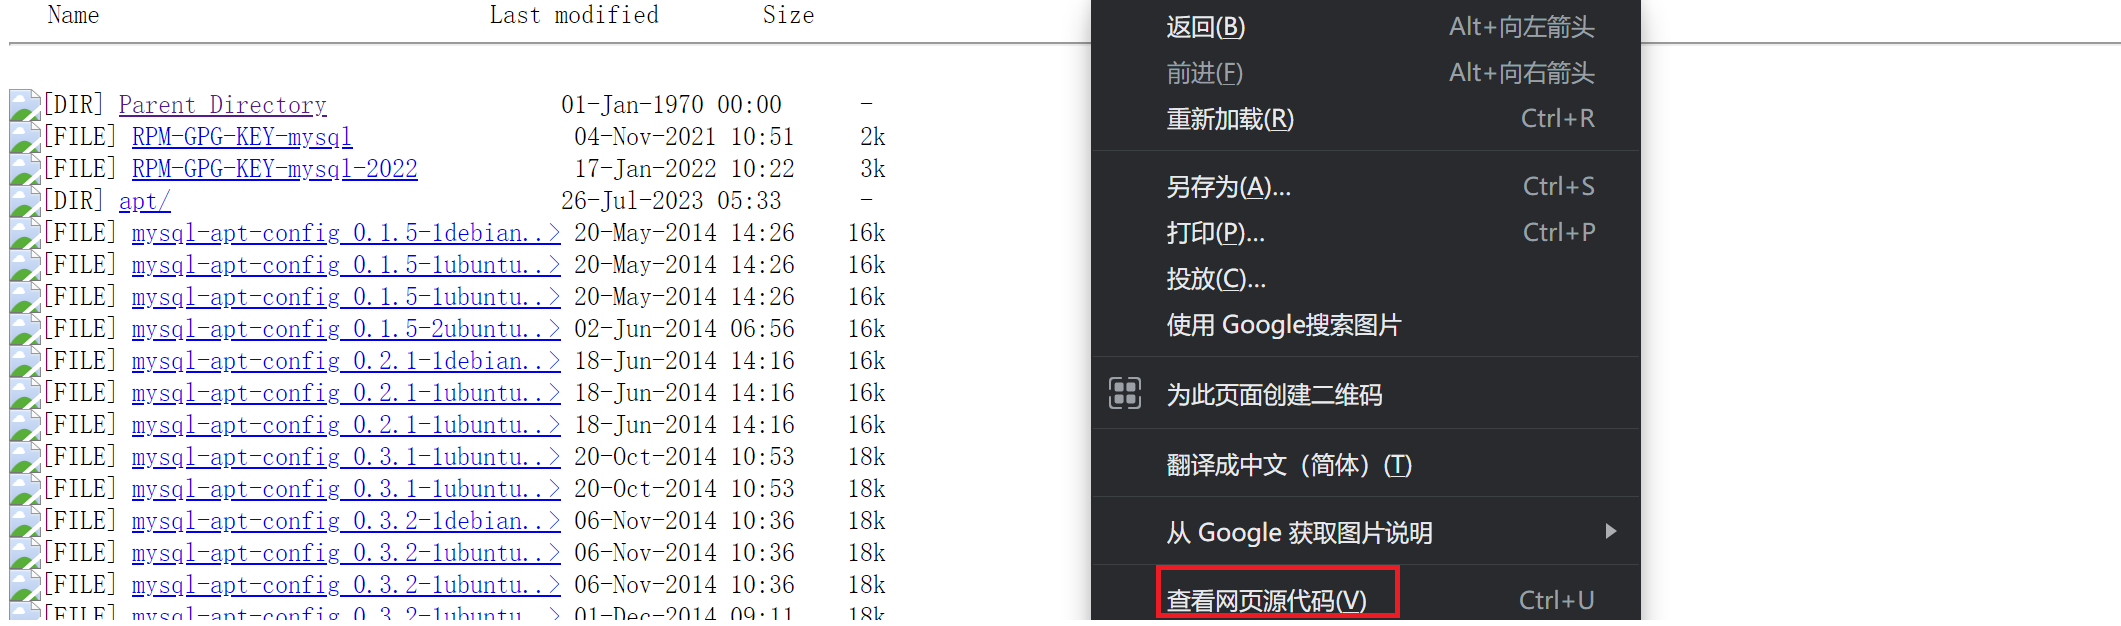
我们这里会发现,此时这里有太多的版本了,此时我们需要关注我们红色的框里面的内容.

让后我们查看一下我们系统的版本.
[root@Qkj ~]# cat /etc/redhat-release CentOS Linux release 7.9.2009 (Core) [root@Qkj ~]#- 1
- 2
- 3
我们发现自己的版本是CentOS 7版本,这里我们选择这一类的.

这里需要注意的,我们是7.9版本的,我们最好选择7.9以上的,例如7.10.如果没有7.10,可以去下载这个el7.rpm文件.我们把他下载到Windows,让拖到我们服务器上就可以了.
[root@Qkj mysql]# rz -E [root@Qkj mysql]# ll total 28 -rw-r--r-- 1 root root 25548 Sep 12 14:58 mysql57-community-release-el7-10.noarch.rpm [root@Qkj mysql]#- 1
- 2
- 3
- 4
- 5
- 6
安装
下面我们可以查看本地的yum源.我的应该和大家的不同.
[root@Qkj mysql]# ls /etc/yum.repos.d/ -al total 32 drwxr-xr-x. 2 root root 4096 Sep 1 00:43 . drwxr-xr-x. 73 root root 4096 Sep 12 14:42 .. -rw-r--r-- 1 root root 2523 Sep 1 00:34 CentOS-Base.repo -rw-r--r-- 1 root root 675 Sep 1 00:33 CentOS-Base.repo.backup -rw-r--r-- 1 root root 971 Oct 29 2018 CentOS-SCLo-scl-rh.repo -rw-r--r-- 1 root root 230 Sep 1 00:10 epel.repo -rw-r--r-- 1 root root 1358 Sep 5 2021 epel.repo.rpmnew -rw-r--r-- 1 root root 1457 Sep 5 2021 epel-testing.repo [root@Qkj mysql]#- 1
- 2
- 3
- 4
- 5
- 6
- 7
- 8
- 9
- 10
- 11
下面我们开始安装.
[root@Qkj mysql]# rpm -Uvh mysql57-community-release-el7-10.noarch.rpm warning: mysql57-community-release-el7-10.noarch.rpm: Header V3 DSA/SHA1 Signature, key ID 5072e1f5: NOKEY Preparing... ################################# [100%] Updating / installing... 1:mysql57-community-release-el7-10 ################################# [100%] [root@Qkj mysql]#- 1
- 2
- 3
- 4
- 5
- 6
安装结束后,我们继续查看我们的yum源.
[root@Qkj mysql]# ls /etc/yum.repos.d/ -al total 40 drwxr-xr-x. 2 root root 4096 Sep 12 15:02 . drwxr-xr-x. 73 root root 4096 Sep 12 14:42 .. -rw-r--r-- 1 root root 2523 Sep 1 00:34 CentOS-Base.repo -rw-r--r-- 1 root root 675 Sep 1 00:33 CentOS-Base.repo.backup -rw-r--r-- 1 root root 971 Oct 29 2018 CentOS-SCLo-scl-rh.repo -rw-r--r-- 1 root root 230 Sep 1 00:10 epel.repo -rw-r--r-- 1 root root 1358 Sep 5 2021 epel.repo.rpmnew -rw-r--r-- 1 root root 1457 Sep 5 2021 epel-testing.repo -rw-r--r-- 1 root root 1627 Apr 5 2017 mysql-community.repo -rw-r--r-- 1 root root 1663 Apr 5 2017 mysql-community-source.repo [root@Qkj mysql]#- 1
- 2
- 3
- 4
- 5
- 6
- 7
- 8
- 9
- 10
- 11
- 12
- 13
这里可以检测一下我们的yum源是不是可以使用.
[root@Qkj mysql]# yum list |grep mysql mysql57-community-release.noarch el7-10 installed akonadi-mysql.x86_64 1.9.2-4.el7 base anope-mysql.x86_64 2.0.14-1.el7 epel apr-util-mysql.x86_64 1.5.2-6.el7_9.1 updates calligra-kexi-driver-mysql.x86_64 2.9.10-2.el7 epel collectd-mysql.x86_64 5.8.1-1.el7 epel dmlite-plugins-mysql.x86_64 1.15.2-15.el7 epel dovecot-mysql.x86_64 1:2.2.36-8.el7 base dpm-copy-server-mysql.x86_64 1.13.0-1.el7 epel dpm-name-server-mysql.x86_64 1.13.0-1.el7 epel ....- 1
- 2
- 3
- 4
- 5
- 6
- 7
- 8
- 9
- 10
- 11
- 12
下面我们就可以安装我们的MySQL了.
安装服务端
下面我们开始安装MySQL的服务端,直接执行下面的指令.
[root@Qkj mysql]# sudo yum install -y mysql-community-server- 1
但是如果我们出现了安装错误,我们例如下面的情况.
#安装遇到秘钥过期的问题: #Failing package is: mysql-community-client-5.7.39-1.el7.x86_64 #GPG Keys are configured as: file:///etc/pki/rpm-gpg/RPM-GPG-KEY-mysql #解决方案: [root@Qkj mysql]# rpm --import https://repo.mysql.com/RPM-GPG-KEY-mysql-2022- 1
- 2
- 3
- 4
- 5
安装客户端
注意,如果我们执行了上面的指令,我们的客户端已经安装了.

查看配置文件
安装完成之后,我们去查看一下我们的配置文件.需要保证这两个文件是存在的.
[root@Qkj mysql]# ls /etc/my.cnf # 这是配置文件 /etc/my.cnf [root@Qkj mysql]# ls /var/lib/mysql # 这是我们数据存储的文件 auto.cnf client-cert.pem ibdata1 ibtmp1 mysql.sock.lock public_key.pem sys ca-key.pem client-key.pem ib_logfile0 mysql performance_schema server-cert.pem t1_db ca.pem ib_buffer_pool ib_logfile1 mysql.sock private_key.pem server-key.pem [root@Qkj mysql]#- 1
- 2
- 3
- 4
- 5
- 6
- 7
启动服务
在我们安装好了MySQL之后,这里我们就可以启动服务了.
[root@Qkj mysql]# systemctl start mysqld.service ==== AUTHENTICATING FOR org.freedesktop.systemd1.manage-units === Authentication is required to manage system services or units. Authenticating as: root Password: ==== AUTHENTICATION COMPLETE === [root@Qkj mysql]# ps axj |grep mysqld 1 1579 1578 1578 ? -1 Sl 27 0:01 /usr/sbin/mysqld --daemonize --pid-file=/var/run/mysqld/mysqld.pid 1513 1608 1607 1481 pts/0 1607 S+ 0 0:00 grep --color=auto mysqld [root@Qkj mysql]#- 1
- 2
- 3
- 4
- 5
- 6
- 7
- 8
- 9
- 10
登陆MySQL
注意,MySQL支持密码登陆,不过这里我们先暂时不说.我们这里使用两个方式登陆,总有一个方法可行的.
直接使用MySQL客户端登陆,如果不行,那么就使用下一个方法.
如果你安装的最新的mysql,没有所谓的临时密码,root默认没有密码 # 试着直接client登陆一下- 1
- 2
我们这里修改配置文件,然后重启服务,注意,一定要重启,在最后一行
[root@Qkj mysql]# vim /etc/my.cnf- 1

[qukangjie@localhost ~]$ mysql -uroot Welcome to the MySQL monitor. Commands end with ; or \g. Your MySQL connection id is 2 Server version: 5.7.41 MySQL Community Server (GPL) Copyright (c) 2000, 2023, Oracle and/or its affiliates. Oracle is a registered trademark of Oracle Corporation and/or its affiliates. Other names may be trademarks of their respective owners. Type 'help;' or '\h' for help. Type '\c' to clear the current input statement. mysql>- 1
- 2
- 3
- 4
- 5
- 6
- 7
- 8
- 9
- 10
- 11
- 12
- 13
- 14
设置开机自启
我们这里可以设置MySQL服务开机自启动.
[root@Qkj mysql]# systemctl enable mysqld [root@Qkj mysql]# systemctl daemon-reload- 1
- 2
配置文件
我们配置文件的修改主要分为两个方面.
修改编码格式
这里我们要修改编码格式.
[root@Qkj mysql]# vim /etc/my.cnf- 1

修改存储引擎
[root@Qkj mysql]# vim /etc/my.cnf- 1
数据库管理系统如何存储数据,如何为存储的数据建立索引和如何更新,查询数据等技术的实现方法,就是我们的存储引擎,这里我们使用innodb.

常见问题
如果我们已经配置好了编码,但是我们还是不支持中文,我们确保你在终端命令行中可以输入中文
[root@Qkj mysql]# env |grep LANG LANG=en_US.UTF-8 [root@Qkj mysql]#- 1
- 2
- 3
第三方库认识
在正式开始之前,我们需要一些前置的知识,这里我们要学习下面几个东西
- jsoncpp库认识和学习
- http-lib库的认识
jsoncpp库认识和学习
json 是一种数据交换格式,采用完全独立于编程语言的文本格式来存储和表示数据。例如:小明同学的学生信息.
char name = "小明"; int age = 18; float score[3] = {88.5, 99, 58}; 则json这种数据交换格式是将这多种数据对象组织成为一个字符串: [ { "姓名" : "小明", "年龄" : 18, "成绩" : [88.5, 99, 58] }, { "姓名" : "小黑", "年龄" : 18, "成绩" : [88.5, 99, 58] } ]- 1
- 2
- 3
- 4
- 5
- 6
- 7
- 8
- 9
- 10
- 11
- 12
- 13
- 14
- 15
- 16
我们这里分析一下,我们可以把我们的信息看作一个结构体,其中[]就是一个数组.{}是一个结构体,里面是我们内容,以键值对的形式经行存储.
json 数据类型:对象,数组,字符串,数字
对象:使用花括号{} 括起来的表示一个对象。
数组:使用中括号[] 括起来的表示一个数组。
字符串:使用常规双引号"" 括起来的表示一个字符串
数字:包括整形和浮点型,直接使用。jsoncpp 库用于实现json 格式的序列化和反序列化,完成将多个数据对象组织成为json 格式字符串,以及将json格式字符串解析得到多个数据对象的功能。
//Json数据对象类 class Json::Value { Value &operator=(const Value &other); //Value重载了[]和=,因此所有的赋值和获取数据都可以通过 Value& operator[](const std::string& key);//简单的方式完成 val["姓名"] = "小明"; Value& operator[](const char* key); Value removeMember(const char* key);//移除元素 const Value& operator[](ArrayIndex index) const; //val["成绩"][0] Value& append(const Value& value);//添加数组元素val["成绩"].append(88); ArrayIndex size() const;//获取数组元素个数 val["成绩"].size(); std::string asString() const;//转string string name = val["name"].asString(); const char* asCString() const;//转char* char *name = val["name"].asCString(); Int asInt() const;//转int int age = val["age"].asInt(); float asFloat() const;//转float bool asBool() const;//转 bool };- 1
- 2
- 3
- 4
- 5
- 6
- 7
- 8
- 9
- 10
- 11
- 12
- 13
- 14
- 15
- 16
Json数据对象类,这里可以认为他是一个KV类型的结构,其中V可以可以理解为一个数组.
序列化
这个是我们序列化的类,里面最重要的就是write函数,我们发现FastWriter和StyledWriter都继承了抽象类Writer并且都重写了write纯虚函数.
//json序列化类,低版本用这个更简单 class JSON_API Writer { virtual std::string write(const Value& root) = 0; } class JSON_API FastWriter : public Writer { virtual std::string write(const Value& root); } class JSON_API StyledWriter : public Writer { virtual std::string write(const Value& root); }- 1
- 2
- 3
- 4
- 5
- 6
- 7
- 8
- 9
- 10
解释一些我们
class JSON_API Writer的命名格式,为何这里是JSON_API Writer,实际上我们看一下源码就可以知道了,这里JSON_API只是一个简单的宏.
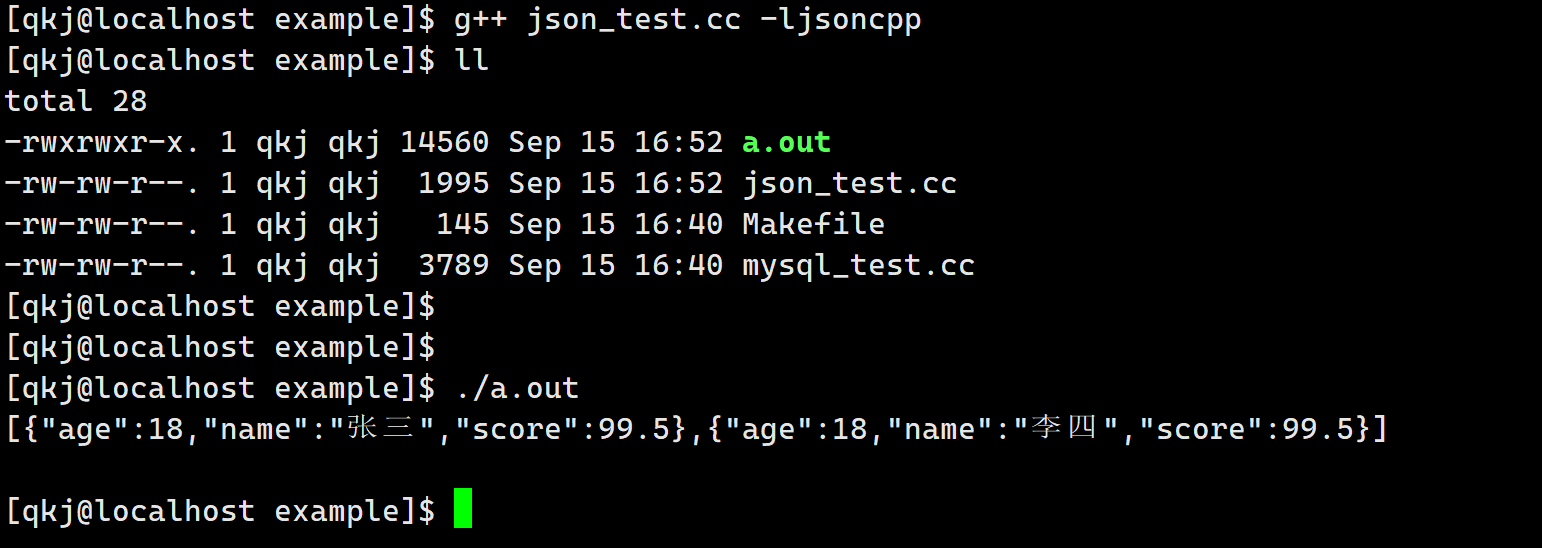
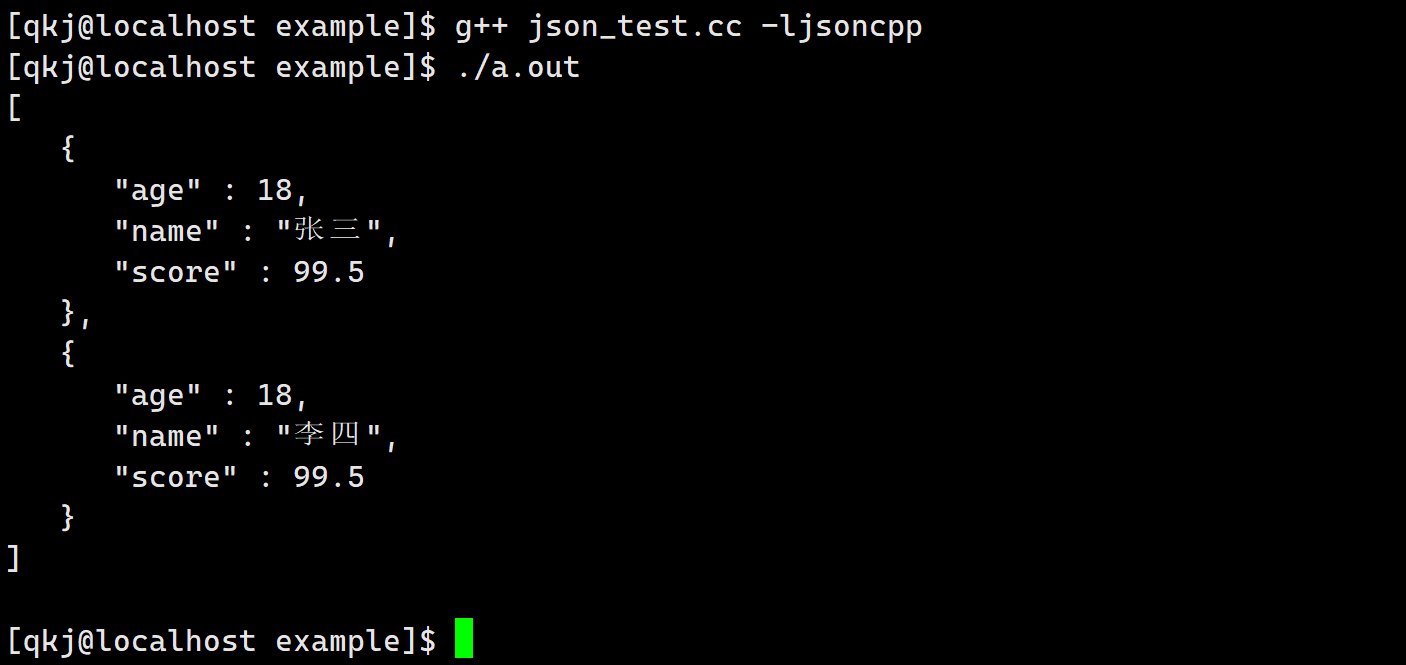
下面我们使用一下,我们的逻辑应该是实例化一个Value对象,然后把这个对象给序列化.
#include#include #include using namespace std; int main() { Json::Value root; string name1 = "张三"; int age1 = 18; double socre1 = 99.5; Json::Value v1; v1["name"] = name1; v1["age"] = age1; v1["score"] = socre1; string name2 = "李四"; int age2 = 18; double socre2 = 99.5; Json::Value v2; v2["name"] = name2; v2["age"] = age2; v2["score"] = socre2; root.append(v1); root.append(v2); Json::FastWriter writer; cout << writer.write(root) << endl; return 0; } - 1
- 2
- 3
- 4
- 5
- 6
- 7
- 8
- 9
- 10
- 11
- 12
- 13
- 14
- 15
- 16
- 17
- 18
- 19
- 20
- 21
- 22
- 23
- 24
- 25
- 26
- 27
- 28
- 29
- 30
- 31
StyledWriter这个类打印的结果比较美观一些.int main() { Json::Value root; string name1 = "张三"; int age1 = 18; double socre1 = 99.5; Json::Value v1; v1["name"] = name1; v1["age"] = age1; v1["score"] = socre1; string name2 = "李四"; int age2 = 18; double socre2 = 99.5; Json::Value v2; v2["name"] = name2; v2["age"] = age2; v2["score"] = socre2; root.append(v1); root.append(v2); // Json::FastWriter writer; Json::StyledWriter writer; cout << writer.write(root) << endl; return 0; }- 1
- 2
- 3
- 4
- 5
- 6
- 7
- 8
- 9
- 10
- 11
- 12
- 13
- 14
- 15
- 16
- 17
- 18
- 19
- 20
- 21
- 22
- 23
- 24
- 25
- 26
- 27
- 28
上面使用比较简单,不过它是低版本的,如果用低版本的接口可能会有警告,那么此时我们需要使用高版本的.
//json序列化类,高版本推荐,如果用低版本的接口可能会有警告 class JSON_API StreamWriter { virtual int write(Value const& root, std::ostream* sout) = 0; } class JSON_API StreamWriterBuilder : public StreamWriter::Factory { virtual StreamWriter* newStreamWriter() const; }- 1
- 2
- 3
- 4
- 5
- 6
- 7
int main() { // 序列化 -- 高版本 Json::StreamWriterBuilder swb; // 他的作用就是new出来一个对象,可以实现多态 std::unique_ptr<Json::StreamWriter> sw(swb.newStreamWriter()); return 0; }- 1
- 2
- 3
- 4
- 5
- 6
- 7
- 8
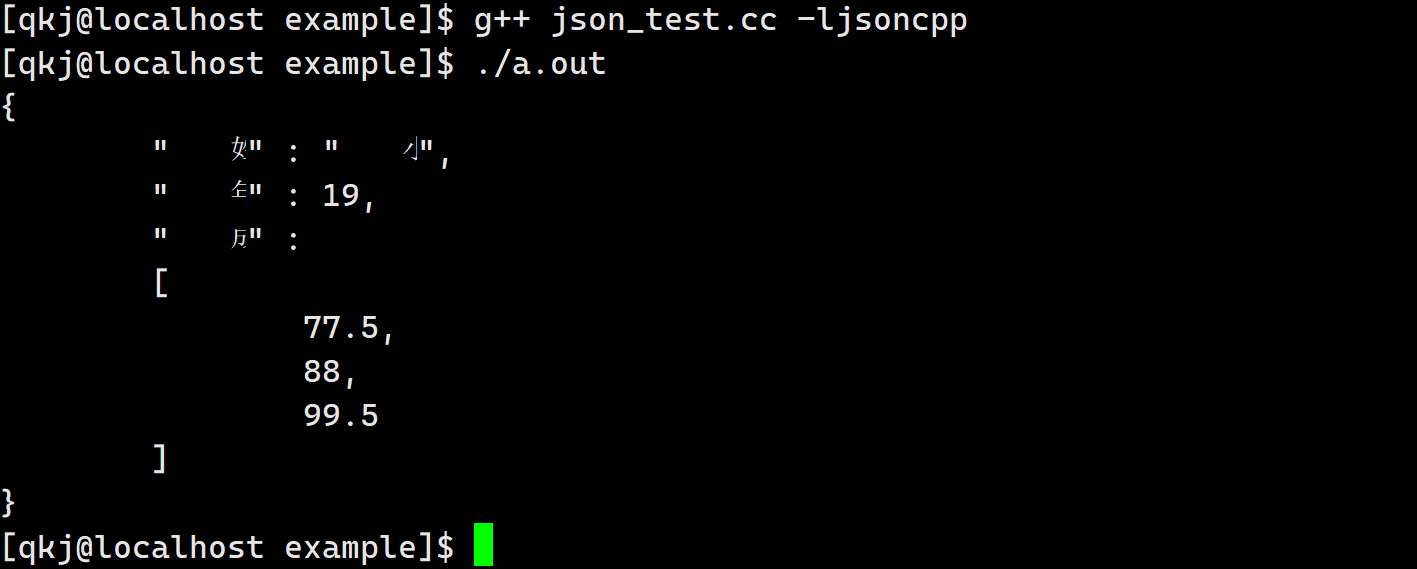
下面看一下我们的序列化是具体如何使用的.
int main() { const char *name = "小明"; int age = 19; float score[] = {77.5, 88, 99.5}; // 构造对象 Json::Value val; val["姓名"] = name; val["年龄"] = 19; val["成绩"].append(score[0]); val["成绩"].append(score[1]); val["成绩"].append(score[2]); // 序列化 -- 高版本 Json::StreamWriterBuilder swb; std::unique_ptr<Json::StreamWriter> sw(swb.newStreamWriter()); std::stringstream ss; int ret = sw->write(val, &ss); if (ret != 0) { std::cout << "write failed!\n"; return -1; } std::cout << ss.str() << std::endl; return 0; }- 1
- 2
- 3
- 4
- 5
- 6
- 7
- 8
- 9
- 10
- 11
- 12
- 13
- 14
- 15
- 16
- 17
- 18
- 19
- 20
- 21
- 22
- 23
- 24
- 25
- 26
- 27
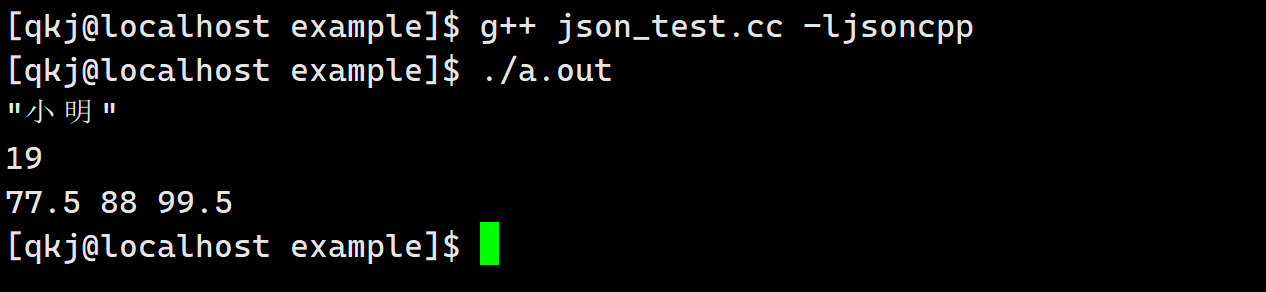
反序列化
这里是低版本的.
//json反序列化类,低版本用起来更简单 class JSON_API Reader { bool parse(const std::string& document, Value& root, bool collectComments = true); }- 1
- 2
- 3
- 4
#include#include #include #include #include int main() { const char *name = "小明"; int age = 19; float score[] = {77.5, 88, 99.5}; // 构造对象 Json::Value val; val["姓名"] = name; val["年龄"] = 19; val["成绩"].append(score[0]); val["成绩"].append(score[1]); val["成绩"].append(score[2]); // 序列化 Json::Writer *wr = new Json::StyledWriter; std::string str = wr->write(val); // 反序列化 Json::Value val2; Json::Reader read; read.parse(str, val2); // 打印结果 std::cout << val2["姓名"] << std::endl; std::cout << val2["年龄"].asInt() << std::endl; int sz = val2["成绩"].size(); for (int i = 0; i < sz; i++) { std::cout << val2["成绩"][i].asFloat() << " "; } std::cout << std::endl; return 0; } - 1
- 2
- 3
- 4
- 5
- 6
- 7
- 8
- 9
- 10
- 11
- 12
- 13
- 14
- 15
- 16
- 17
- 18
- 19
- 20
- 21
- 22
- 23
- 24
- 25
- 26
- 27
- 28
- 29
- 30
- 31
- 32
- 33
- 34
- 35
- 36
- 37
- 38
- 39
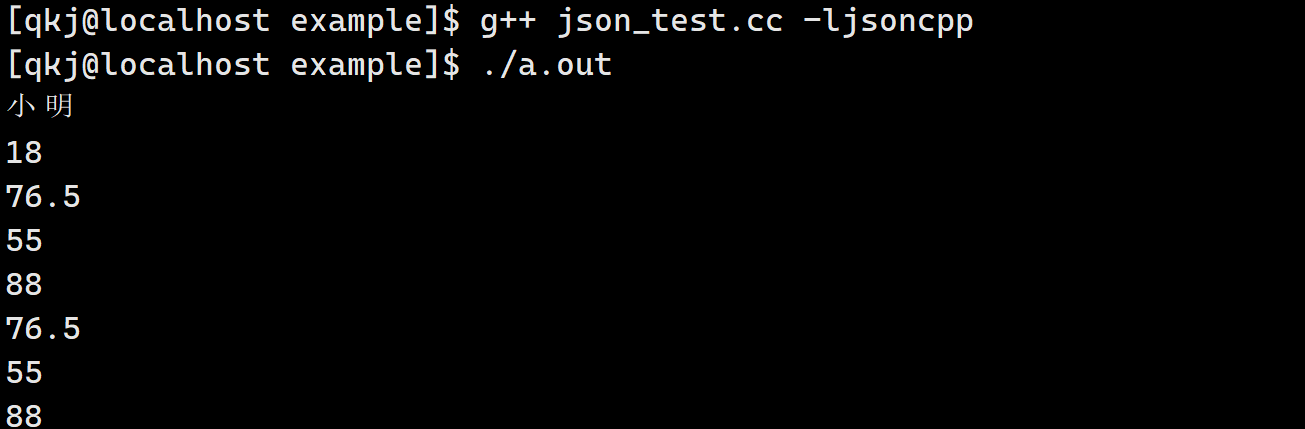
同样的,这个是低版本的,我们也是需要学习一下高版本的.
int main() { std::string str = R"({"姓名":"小明", "年龄":18, "成绩":[76.5, 55, 88]})"; // 这个是允许的 Json::Value root; Json::CharReaderBuilder crb; std::unique_ptr<Json::CharReader> cr(crb.newCharReader()); std::string err; cr->parse(str.c_str(), str.c_str() + str.size(), &root, &err); std::cout << root["姓名"].asString() << std::endl; std::cout << root["年龄"].asInt() << std::endl; int sz = root["成绩"].size(); for (int i = 0; i < sz; i++) { std::cout << root["成绩"][i].asFloat() << std::endl; } for (auto it = root["成绩"].begin(); it != root["成绩"].end(); it++) { std::cout << it->asFloat() << std::endl; } return 0; }- 1
- 2
- 3
- 4
- 5
- 6
- 7
- 8
- 9
- 10
- 11
- 12
- 13
- 14
- 15
- 16
- 17
- 18
- 19
- 20
- 21
- 22
- 23
- 24
- 25
MySQL API认识
我们这里使用MySQL的API,直接通过代码链接我们的MySQL.下面我们用一下.
#include#include using namespace std; int main() { cout << "版本: " << mysql_get_client_info() << endl; return 0; - 1
- 2
- 3
- 4
- 5
- 6
- 7
- 8
- 9
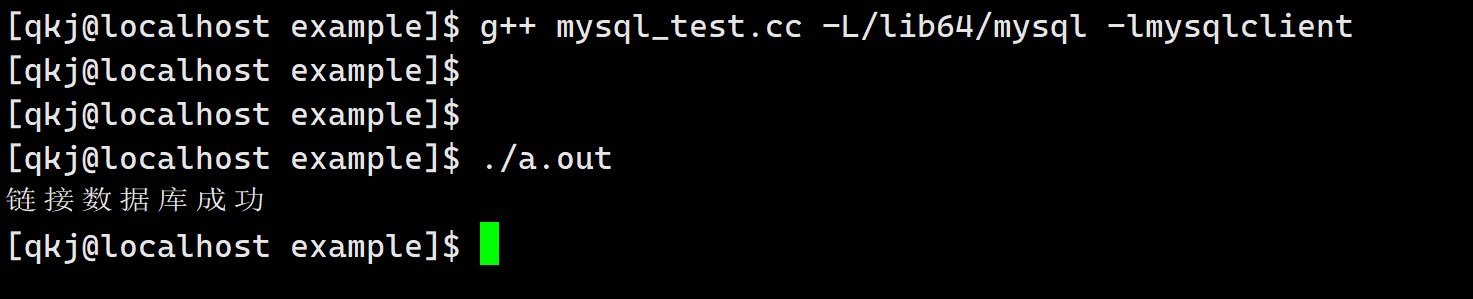
这里直接演示.
[qkj@localhost example]$ g++ mysql_test.cc -L/lib64/mysql -lmysqlclient [qkj@localhost example]$ ./a.out 版本: 5.7.43 [qkj@localhost example]$- 1
- 2
- 3
- 4
访问数据库
访问数据库的第一步,我们首先要创建一个句柄.
int main() { // cout << "版本: " << mysql_get_client_info() << endl; MYSQL *msql = mysql_init(nullptr); if (nullptr == msql) { return 0; } mysql_close(msql); return 0; }- 1
- 2
- 3
- 4
- 5
- 6
- 7
- 8
- 9
- 10
- 11
- 12
- 13
当我们创建好句柄之后,这里我们就可以链接我们的MySQL了,这是一个函数.
MYSQL * STDCALL mysql_real_connect(MYSQL *mysql, const char *host, const char *user, const char *passwd, const char *db, unsigned int port, const char *unix_socket, unsigned long clientflag);- 1
- 2
- 3
- 4
- 5
- 6
- 7
下面说一下这些参数.
- mysql: 就是我们的句柄
- host: 我们要连接服务器的IP地址
- user: 用户名
- passwd: 密码
- db: 数据库名
- unix_socket: 不关心,直接为null
- clientflag: 不关心,直接为0
下面我们链接一下,注意要设置字符集.
int main() { MYSQL *msql = mysql_init(nullptr); if (nullptr == msql) { cerr << "创建句柄失败" << endl; return 0; } // 1 . 登录认证 if (mysql_real_connect(msql, host.c_str(), user.c_str(), password.c_str(), db.c_str(), port, nullptr, 0) == nullptr) { cerr << "链接数据库失败" << endl; } cerr << "链接数据库成功" << endl; // 2. 设置字符集 mysql_set_character_set(msql, "utf8"); mysql_close(msql); return 0; }- 1
- 2
- 3
- 4
- 5
- 6
- 7
- 8
- 9
- 10
- 11
- 12
- 13
- 14
- 15
- 16
- 17
- 18
- 19
- 20
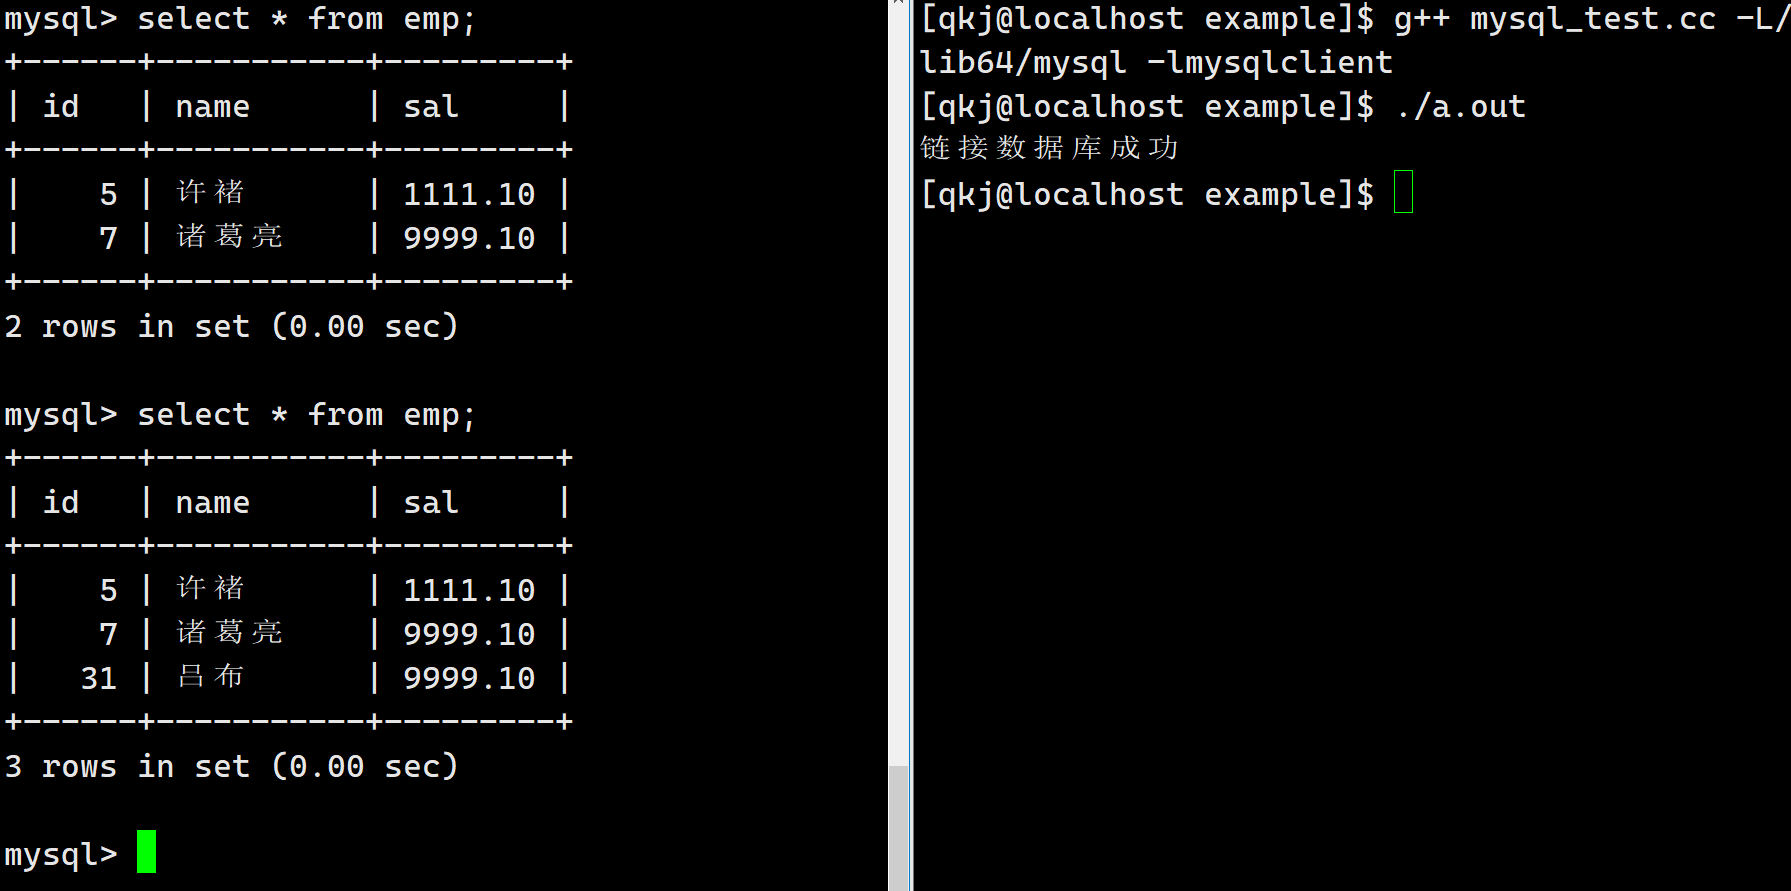
当我们链接上数据库的时候,此时我们就可以使用sql语句了,这里非常简答.
int main() { MYSQL *msql = mysql_init(nullptr); if (nullptr == msql) { cerr << "创建句柄失败" << endl; return 0; } // 1 . 登录认证 if (mysql_real_connect(msql, host.c_str(), user.c_str(), password.c_str(), db.c_str(), port, nullptr, 0) == nullptr) { cerr << "链接数据库失败" << endl; } cerr << "链接数据库成功" << endl; // 2. 设置字符集 mysql_set_character_set(msql, "utf8"); string sql = "insert emp values (31, '吕布', 9999.10)"; // 3. sql操作 int n = mysql_query(msql, sql.c_str()); mysql_close(msql); return 0; }- 1
- 2
- 3
- 4
- 5
- 6
- 7
- 8
- 9
- 10
- 11
- 12
- 13
- 14
- 15
- 16
- 17
- 18
- 19
- 20
- 21
- 22
- 23
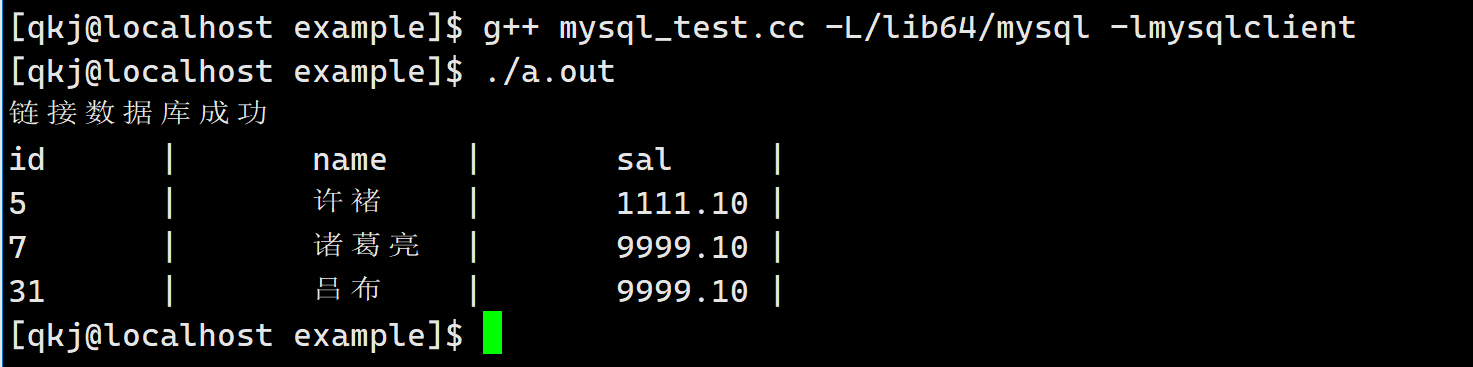
后面我们所有的SQL语句都可以这样做,这里唯一存在一个小的问题,就是我们插入,删除,修改都可以,但是这里测查找就有问题了.此时我们需要继续认识一下接口.对于select而言,我们所有的结果都被保存好了,此时我们手动拿出来就可以了.
#include#include using namespace std; string host = "127.0.0.1"; string user = "root"; string password; string db = "test_vi_db"; uint16_t port = 3306; int main() { MYSQL *msql = mysql_init(nullptr); if (nullptr == msql) { cerr << "创建句柄失败" << endl; return 0; } // 1 . 登录认证 if (mysql_real_connect(msql, host.c_str(), user.c_str(), password.c_str(), db.c_str(), port, nullptr, 0) == nullptr) { cerr << "链接数据库失败" << endl; } cerr << "链接数据库成功" << endl; // 2. 设置字符集 mysql_set_character_set(msql, "utf8"); // string sql = "insert emp values (31, '吕布', 9999.10)"; string sql = "select * from emp"; // 3. sql操作 int n = mysql_query(msql, sql.c_str()); if (0 == n) { // sql语句执行成功 MYSQL_RES *res = mysql_store_result(msql); // 所有的结果 int row = mysql_num_rows(res); int fields = mysql_num_fields(res); MYSQL_FIELD *field = mysql_fetch_fields(res); // 得到所有的字段名 int i = 0; for (; i < fields; i++) { cout << field[i].name << "\t|\t"; } cout << endl; MYSQL_ROW line; for (int i = 0; i < row; i++) { line = mysql_fetch_row(res); // 得到一行数据 for (int j = 0; j < fields; j++) { // 解析每一行 cout << line[j] << "\t|\t"; } cout << endl; } } mysql_close(msql); return 0; } - 1
- 2
- 3
- 4
- 5
- 6
- 7
- 8
- 9
- 10
- 11
- 12
- 13
- 14
- 15
- 16
- 17
- 18
- 19
- 20
- 21
- 22
- 23
- 24
- 25
- 26
- 27
- 28
- 29
- 30
- 31
- 32
- 33
- 34
- 35
- 36
- 37
- 38
- 39
- 40
- 41
- 42
- 43
- 44
- 45
- 46
- 47
- 48
- 49
- 50
- 51
- 52
- 53
- 54
- 55
- 56
- 57
- 58
- 59
- 60
- 61
- 62
httplib库认识
httplib 库,一个C++11 单文件头的跨平台HTTP/HTTPS 库。安装起来非常容易。只需包含httplib.h 在你的代码中即可。httplib 库实际上是用于搭建一个简单的http 服务器或者客户端的库,这种第三方网络库,可以让我们免去搭建服务器或客户端的时间,把更多的精力投入到具体的业务处理中,提高开发效率。
namespace httplib { struct MultipartFormData { std::string name; std::string content; std::string filename; std::string content_type; }; using MultipartFormDataItems = std::vector<MultipartFormData>; struct Request { std::string method; // 存放请求方法 std::string path; // 存放请求资源路径 Headers headers; // 存放头部字段的键值对map std::string body; // 存放请求正文 // for server std::string version; // 存放协议版本 Params params; // 存放url中查询字符串 key=val&key=val的 键值对map MultipartFormDataMap files; // 存放文件上传时,正文中的文件信息 Ranges ranges; bool has_header(const char *key) const; // 判断是否有某个头部字段 std::string get_header_value(const char *key, size_t id = 0) const; // 获取头部字段值 void set_header(const char *key, const char *val); // 设置头部字段 bool has_file(const char *key) const; // 文件上传中判断是否有某个文件的信息 MultipartFormData get_file_value(const char *key) const; // 获取指定的文件信息 }; struct Response { std::string version; // 存放协议版本 int status = -1; // 存放响应状态码 std::string reason; Headers headers; // 存放响应头部字段键值对的map std::string body; // 存放响应正文 std::string location; // Redirect location重定向位置 void set_header(const char *key, const char *val); // 添加头部字段到headers中 void set_content(const std::string &s, const char *content_type); // 添加正文到body中 void set_redirect(const std::string &url, int status = 302); // 设置全套的重定向信息 }; class Server { using Handler = std::function<void(const Request &, Response &)>; // 函数指针类型 using Handlers = std::vector<std::pair<std::regex, Handler>>; // 存放请求-处理函数映射 std::function<TaskQueue *(void)> new_task_queue; // 线程池 Server &Get(const std::string &pattern, Handler handler); // 添加指定GET方法的处理映射 Server &Post(const std::string &pattern, Handler handler); Server &Put(const std::string &pattern, Handler handler); Server &Patch(const std::string &pattern, Handler handler); Server &Delete(const std::string &pattern, Handler handler); Server &Options(const std::string &pattern, Handler handler); bool listen(const char *host, int port, int socket_flags = 0); // 开始服务器监听 bool set_mount_point(const std::string &mount_point, const std::string &dir, Headers headers = Headers()); // 设置http服务器静态资源根目录 }; }- 1
- 2
- 3
- 4
- 5
- 6
- 7
- 8
- 9
- 10
- 11
- 12
- 13
- 14
- 15
- 16
- 17
- 18
- 19
- 20
- 21
- 22
- 23
- 24
- 25
- 26
- 27
- 28
- 29
- 30
- 31
- 32
- 33
- 34
- 35
- 36
- 37
- 38
- 39
- 40
- 41
- 42
- 43
- 44
- 45
- 46
- 47
- 48
- 49
- 50
- 51
- 52
- 53
- 54
- 55
这里的用法简单,但是我们需要认识一下这里的接口.这里有几个比较重要的函数,可以让我们认识httplib的处理流程.这里重点认识一下Server类.
- Handler: 函数指针
- Handlers: 一个数组,保存的正则表达式,保存的是请求信息,后面的函数指针是对应的处理函数.
- new_task_queue: 线程池,处理任务
- set_mount_point: 设置根目录
- listen: 启动服务器
- Get: 这些接口就是给我们Handlers添加信息
下面我们使用他来简单的测试一下.我们直接使用它.
<html> <head> <meta content="text/html; charset=utf-8" http-equiv="content-type" /> head> <body> <h1>Hello Bith1> <form action="/multipart" method="post" enctype="multipart/form-data"> <input type="file" name="file1"> <input type="submit" value="上传"> form> body> html>- 1
- 2
- 3
- 4
- 5
- 6
- 7
- 8
- 9
- 10
- 11
- 12
- 13
- 14
- 15
#include#include #include "../cpp-httplib/httplib.h" using namespace httplib; void HelloBit(const Request &rep, Response &rsp) { rsp.body = "hello bit"; rsp.status = 200; } void Numbers(const Request &rep, Response &rsp) { // 这个是捕捉的数据 /numbers/123 -> matches[0] = "/numbers/123" matches[1] = "123" std::string num = rep.matches[1]; rsp.set_content(num, "text/plain"); // 设置正文 rsp.status = 200; } void Multipart(const Request &rep, Response &rsp) { // 文件上传的的 if (rep.has_file("file1") == false) { rsp.status = 400; return; } MultipartFormData file = rep.get_file_value("file1"); std::cout << file.filename << std::endl; // 区域文件名称 std::cout << file.content << std::endl; // 区域文件内容 rsp.status = 200; } int main() { Server server; // 设置静态根目录 另外一个用法 server.set_mount_point("/", "./www"); // 条件请求 server.Get("/hi", HelloBit); // 正则表达式 ,在正则表达式中 // \d 表示数字, // + 表示一次或者多次 // ()--表示捕捉数据s server.Get("/numbers/(\\d+)", Numbers); server.Post("/multipart", Multipart); server.listen("0.0.0.0", 8081); return 0; } - 1
- 2
- 3
- 4
- 5
- 6
- 7
- 8
- 9
- 10
- 11
- 12
- 13
- 14
- 15
- 16
- 17
- 18
- 19
- 20
- 21
- 22
- 23
- 24
- 25
- 26
- 27
- 28
- 29
- 30
- 31
- 32
- 33
- 34
- 35
- 36
- 37
- 38
- 39
- 40
- 41
- 42
- 43
- 44
- 45
- 46
- 47
- 48
- 49
- 50
- 51
- 52
- 53
- 54
- 55
这是请求动态的.

这是请求静态的.

这里我一点上串,这是因为我们的这里是二进制文件,所有的乱码,不过我们不用担心.
项目开始
下面我们正式开始编写我们的项目代码.
文件工具类
在视频点播系统中因为涉及到文件上传,需要对上传的文件进行备份存储,因此首先设计封装文件操作类,这个类封装完毕之后,则在任意模块中对文件进行操作时都将变的简单化
- 获取文件大小(属性)
- 判断文件是否存在
- 向文件写入数据
- 从文件读取数据
- 针对目录文件多一个创建目录
[qkj@localhost source]$ touch util.hpp- 1
这里我们看框架.
namespace aod { class FileUtil { public: FileUtil(const std::string &name) : _name(name) { } public: /// @brief 针对目录是创建目录 /// @return bool CreateDirectory() {} /// @brief 向文件中写入数据 /// @param body /// @return bool SetContent(const std::string &body) { } /// @brief 获取文件数据到body中 /// @param body /// @return bool GetContent(std::string *body) { } /// @brief 获取文件大小 /// @return std::size_t Size() { } /// @brief 判断文件是否存在 /// @return bool Exists() { } private: std::string _name; // 文件路径名称 }; }- 1
- 2
- 3
- 4
- 5
- 6
- 7
- 8
- 9
- 10
- 11
- 12
- 13
- 14
- 15
- 16
- 17
- 18
- 19
- 20
- 21
- 22
- 23
- 24
- 25
- 26
- 27
- 28
- 29
- 30
- 31
- 32
- 33
- 34
- 35
- 36
- 37
- 38
- 39
- 40
- 41
- 42
- 43
- 44
- 45
- 46
实现
这里我们一个一个的实现.
如何判断文件存在,这里存在一个接口.
int access(const char *pathname, int mode);- 1
那么这里就可以使用它了.
bool Exists() { // F_OK 检测是否存在,存在返回0,不存在返回-1,并且错误码被设置 int ret = access(_name.c_str(), F_OK); if (ret != 0) { std::cout << "文件不存在" << std::endl; return false; } return true; }- 1
- 2
- 3
- 4
- 5
- 6
- 7
- 8
- 9
- 10
- 11
拿到文件的大小
int stat(const char *restrict path, struct stat *restrict buf);- 1
std::size_t Size() { if (Exists() == false) return 0; // 获取文件的属性信息 struct stat st; // 保存文件属性信息的 int ret = stat(_name.c_str(), &st); if (ret != 0) { return 0; } // 这里成功了 // long int 就是一个 长整型 return st.st_size; }- 1
- 2
- 3
- 4
- 5
- 6
- 7
- 8
- 9
- 10
- 11
- 12
- 13
- 14
- 15
- 16
读取数据
bool GetContent(std::string *body) { std::ifstream ifs; ifs.open(_name, std::ios::binary); // 二进制方式打开 if (ifs.is_open() == false) { std::cerr << "打开文件 " << _name << "失败" << std::endl; return false; } // 开始读取文件的数据 std::size_t flen = Size(); body->resize(flen); ifs.read(&((*body)[0]), flen); // 禁止使用 c_str() 这是const if (ifs.good() == false) { std::cerr << "读取文件失败" << std::endl; ifs.close(); return false; } ifs.close(); return true; }- 1
- 2
- 3
- 4
- 5
- 6
- 7
- 8
- 9
- 10
- 11
- 12
- 13
- 14
- 15
- 16
- 17
- 18
- 19
- 20
- 21
- 22
- 23
写文件
bool SetContent(const std::string &body) { std::ofstream ofs; ofs.open(_name, std::ios::binary); // 二进制方式打开 if (ofs.is_open() == false) { std::cerr << "打开文件 " << _name << "失败" << std::endl; return false; } ofs.write(body.c_str(), body.size()); if (ofs.good() == false) { std::cerr << "保存文件失败" << std::endl; ofs.close(); return false; } ofs.close(); return true; }- 1
- 2
- 3
- 4
- 5
- 6
- 7
- 8
- 9
- 10
- 11
- 12
- 13
- 14
- 15
- 16
- 17
- 18
- 19
- 20
- 21
- 22
创建一个文件.
bool CreateDirectory() { if (Exists() == true) return true; mkdir(_name.c_str(), 0777); return true; }- 1
- 2
- 3
- 4
- 5
- 6
- 7
- 8
- 9
测试
下面我们开始测试.
[qkj@localhost source]$ touch aod.cpp- 1
这是测试
void FileTset() { aod::FileUtil("./www").CreateDirectory(); aod::FileUtil("./www/index.html").SetContent("aaaaaaaaaaaaaaaaaaaaaaa"); std::string body; aod::FileUtil("./www/index.html").GetContent(&body); std::cout << body << std::endl; std::cout << aod::FileUtil("./www/index.html").Size() << std::endl; } int main() { FileTset(); return 0; }- 1
- 2
- 3
- 4
- 5
- 6
- 7
- 8
- 9
- 10
- 11
- 12
- 13
- 14
下面是我们的Makefile
aod:aod.cpp g++ -std=c++11 -o $@ $^ .PHONY:clean clean: rm -f aod- 1
- 2
- 3
- 4
- 5
[qkj@localhost source]$ make g++ -std=c++11 -o aod aod.cpp [qkj@localhost source]$ ll total 44 -rwxrwxr-x. 1 qkj qkj 20176 Sep 15 20:36 aod -rw-rw-r--. 1 qkj qkj 2930 Sep 15 20:34 aod.cpp -rw-rw-r--. 1 qkj qkj 69 Sep 15 20:36 Makefile -rw-rw-r--. 1 qkj qkj 8253 Sep 15 20:32 server.hpp -rw-rw-r--. 1 qkj qkj 3811 Sep 15 20:27 util.hpp [qkj@localhost source]$ ./aod 文件不存在 aaaaaaaaaaaaaaaaaaaaaaa 23 [qkj@localhost source]$ ll total 44 -rwxrwxr-x. 1 qkj qkj 20176 Sep 15 20:36 aod -rw-rw-r--. 1 qkj qkj 2930 Sep 15 20:34 aod.cpp -rw-rw-r--. 1 qkj qkj 69 Sep 15 20:36 Makefile -rw-rw-r--. 1 qkj qkj 8253 Sep 15 20:32 server.hpp -rw-rw-r--. 1 qkj qkj 3811 Sep 15 20:27 util.hpp drwxrwxr-x. 2 qkj qkj 24 Sep 15 20:37 www [qkj@localhost source]$ cat www/index.html aaaaaaaaaaaaaaaaaaaaaaa[qkj@localhost source]$- 1
- 2
- 3
- 4
- 5
- 6
- 7
- 8
- 9
- 10
- 11
- 12
- 13
- 14
- 15
- 16
- 17
- 18
- 19
- 20
- 21
- 22
- 23
Json工具类实现
下面我们开始实现另外一个工具了,Json的,主要有两个功能
- 序列化
- 反序列
实现
class JsonUtil { public: /// @brief 序列化 /// @param val /// @param body /// @return static bool Serialize(const Json::Value &val, std::string *body) { Json::StreamWriterBuilder swb; std::unique_ptr<Json::StreamWriter> sw(swb.newStreamWriter()); std::stringstream ss; int ret = sw->write(val, &ss); if (ret != 0) { std::cerr << "序列化失败" << std::endl; return false; } *body = ss.str(); return true; } /// @brief 反序列化 /// @param val /// @param body /// @return static bool UnSerialize(const std::string &body, Json::Value *val) { Json::CharReaderBuilder crb; std::unique_ptr<Json::CharReader> cr(crb.newCharReader()); std::string err; bool ret = cr->parse(body.c_str(), body.c_str() + body.size(), val, &err); if (ret == false) { std::cerr << "反序列化失败" << std::endl; return false; } return true; } };- 1
- 2
- 3
- 4
- 5
- 6
- 7
- 8
- 9
- 10
- 11
- 12
- 13
- 14
- 15
- 16
- 17
- 18
- 19
- 20
- 21
- 22
- 23
- 24
- 25
- 26
- 27
- 28
- 29
- 30
- 31
- 32
- 33
- 34
- 35
- 36
- 37
- 38
- 39
- 40
- 41
测试
下面是测试
void JsonTset() { const char *name = "四小明"; int age = 18; float score[] = {77.5, 88, 99.5}; Json::Value val; val["姓名"] = name; val["年龄"] = 19; val["成绩"].append(score[0]); val["成绩"].append(score[1]); val["成绩"].append(score[2]); std::string body; aod::JsonUtil::Serialize(val, &body); std::cout << body << std::endl; std::cout << "=====================================" << std::endl; Json::Value stu; aod::JsonUtil::UnSerialize(body, &stu); std::cout << stu["姓名"].asString() << std::endl; std::cout << stu["年龄"].asString() << std::endl; // 换一种用法 for (auto &e : stu["成绩"]) { std::cout << e.asFloat() << std::endl; } }- 1
- 2
- 3
- 4
- 5
- 6
- 7
- 8
- 9
- 10
- 11
- 12
- 13
- 14
- 15
- 16
- 17
- 18
- 19
- 20
- 21
- 22
- 23
- 24
- 25
- 26
- 27
- 28
- 29
- 30
注意修改Makefile
[qkj@localhost source]$ make g++ -std=c++11 -o aod aod.cpp -ljsoncpp [qkj@localhost source]$ ./aod { "姓名" : "四小明", "年龄" : 19, "成绩" : [ 77.5, 88, 99.5 ] } ===================================== 四小明 19 77.5 88 99.5 [qkj@localhost source]$- 1
- 2
- 3
- 4
- 5
- 6
- 7
- 8
- 9
- 10
- 11
- 12
- 13
- 14
- 15
- 16
- 17
- 18
- 19
- 20
数据库的设计
下面我们就要设计我们的数据课了.
数据表设计
这里的的数据表是指我们存储文件的数据表.在视频共享点播系统中,视频数据和图片数据都存储在文件中,而我们需要在数据库中管理用户上传的每个视频信息。
- 视频ID
- 视频名称
- 视频描述信息
- 视频文件的url 路径(加上相对根目录实际上就是实际存储路径)
- 视频封面图片的URL 路径(只是链接,加上相对根目录才是实际的存储路径)
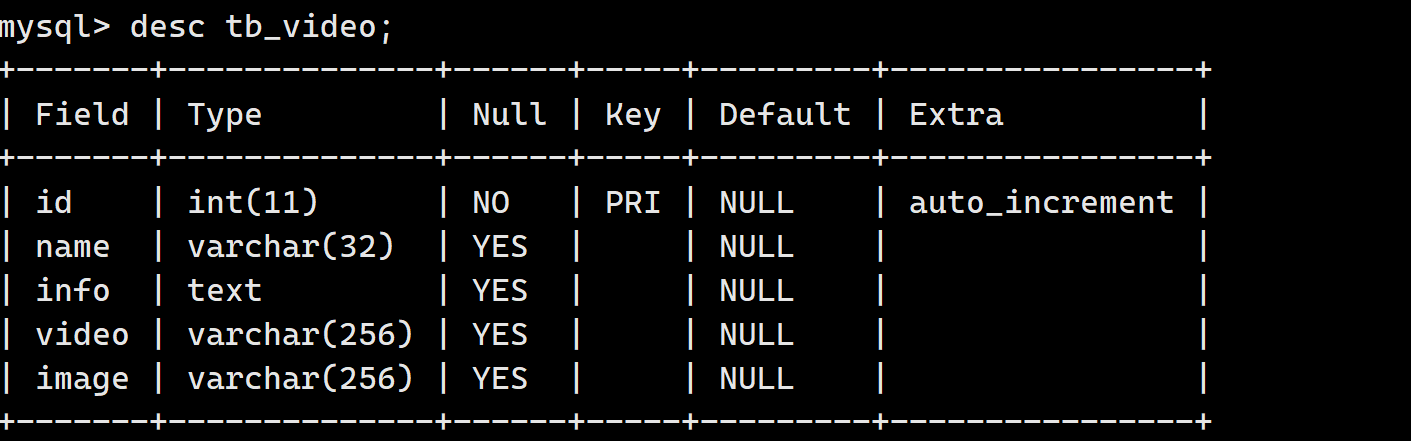
下面就是我们的数据表,注意,这里我们在aod_system数据库下设计.
drop database if exists aod_system; create database if not exists aod_system; use aod_system; create table if not exists tb_video( id int primary key auto_increment comment '视频ID', name varchar(32) comment '视频名称', info text comment '视频描述', video varchar(256) comment '视频文件url,加上静态资源根目录就是实际存储路径', image varchar(256) comment '封面图片文件url,加上静态资源根目录就是实际存储路径' );- 1
- 2
- 3
- 4
- 5
- 6
- 7
- 8
- 9
- 10
数据管理类设计
数据管理模块负责统一对于数据库中数据的增删改查管理,其他所有模块要进行数据的操作都通过数据管理模块完成。然而,数据库中有可能存在很多张表,每张表中数据又有不同,要进行的数据操也各不相同,因此咱们将数据的操作分摊到每一张表上,为每一张表中的数据操作都设计一个类,通过类实例化的对象来访问这张数据库表中的数据,这样的话当我们要访问哪张表的时候,使用哪个类实例化的对象即可。那么对于我们的数据,我们就要管理一下我们的数据表,也就是SQL语句,这里包含:
- 新增
- 修改
- 删除
- 查询所有
- 查询单个
- 模糊匹配
注意, 视频信息在接口之间的 传递因为字段数量可能很多,因此使用Json::Value 对象进行传递
[qkj@localhost source]$ touch data.hpp- 1
#include#include #include namespace aod { static MYSQL *MysqlInit(); static void MysqlDestroy(MYSQL *mysql); static bool MysqlQuery(MYSQL *mysql, const std::string &sql); } - 1
- 2
- 3
- 4
- 5
- 6
- 7
- 8
- 9
- 10
下面我们开始编写每一个功能编写.
数据库的初始化
static MYSQL *MysqlInit() { #define HOST "127.0.0.1" #define USER "root" #define PASSWARD "" #define DB "aod_system" #define PORT 3306 MYSQL *mysql = mysql_init(nullptr); if (nullptr == mysql) { std::cerr << "创建句柄失败" << std::endl; return nullptr; } // 1 . 登录认证 if (mysql_real_connect(mysql, HOST, USER, PASSWARD, DB, PORT, nullptr, 0) == nullptr) { std::cerr << "链接数据库失败" << std::endl; mysql_close(mysql); return nullptr; } std::cerr << "链接数据库成功" << std::endl; // 2. 设置字符集 mysql_set_character_set(mysql, "utf8"); return mysql; }- 1
- 2
- 3
- 4
- 5
- 6
- 7
- 8
- 9
- 10
- 11
- 12
- 13
- 14
- 15
- 16
- 17
- 18
- 19
- 20
- 21
- 22
- 23
- 24
- 25
- 26
- 27
销毁
static void MysqlDestroy(MYSQL *mysql) { if (nullptr == mysql) return; mysql_close(mysql); }- 1
- 2
- 3
- 4
- 5
- 6
语句执行
static bool MysqlQuery(MYSQL *mysql, const std::string &sql) { int ret = mysql_query(mysql, sql.c_str()); if (ret != 0) { std::cerr << "sql: " << sql << std::endl; std::cerr << mysql_errno(mysql) << std::endl; return false; } return true; }- 1
- 2
- 3
- 4
- 5
- 6
- 7
- 8
- 9
- 10
- 11
- 12
下面我们开始编写我们的操作SQL语句,这里我们是这样做了的.
class TableVideo { private: MYSQL *_mysql; // 一个对象就是一个客户端,管理一张表 std::mutex _mutex; // 防备操作对象在多线程中使用存在的线程安全 问题 public: TableVideo(); // 完成mysql句柄初始化 ~TableVideo(); // 释放msyql操作句柄 bool Insert(const Json::Value &video); // 新增-传入视频信息 bool Update(int video_id, const Json::Value &video); // 修改-传入视频id,和信息 bool Delete(const int video_id); // 删除-传入视频ID bool SelectAll(Json::Value *videos); // 查询所有--输出所有视频信息 bool SelectOne(int video_id, Json::Value *video); // 查询单个-输入视频id,输出信息 bool SelectLike(const std::string &key, Json::Value *videos); // 模糊匹配-输入名称关键字,输出视频信息 };- 1
- 2
- 3
- 4
- 5
- 6
- 7
- 8
- 9
- 10
- 11
- 12
- 13
- 14
- 15
这里先完成初始化.
TableVideo() // 完成mysql句柄初始化 { _mysql = MysqlInit(); if (_mysql == NULL) exit(-1); } ~TableVideo() { MysqlDestroy(_mysql); }- 1
- 2
- 3
- 4
- 5
- 6
- 7
- 8
- 9
- 10
新增、修改、删除
这里编写这三个功能的语句.
// 释放msyql操作句柄 bool Insert(const Json::Value &video) // 新增-传入视频信息 { std::string sql; sql.resize(4096 + video["info"].asString().size()); #define INSERT_VIDEO "insert tb_video values(null, '%s','%s','%s','%s');" sprintf(&sql[0], INSERT_VIDEO, video["name"].asCString(), video["info"].asCString(), video["video"].asCString(), video["image"].asCString()); return MysqlQuery(_mysql, sql); } bool Update(int video_id, const Json::Value &video) // 修改-传入视频id,和信息 { std::string sql; sql.resize(4096 + video["info"].asString().size()); #define UPDATE_VIDEO "update tb_video set name='%s',info='%s' where id=%d;" sprintf(&sql[0], UPDATE_VIDEO, video["name"].asCString(), video["info"].asCString(), video_id); return MysqlQuery(_mysql, sql); } bool Delete(const int video_id) // 删除-传入视频ID { #define DELETE_VIDEO "delete from tb_video where id=%d;" char sql[1024] = {0}; sprintf(sql, DELETE_VIDEO, video_id); return MysqlQuery(_mysql, sql); }- 1
- 2
- 3
- 4
- 5
- 6
- 7
- 8
- 9
- 10
- 11
- 12
- 13
- 14
- 15
- 16
- 17
- 18
- 19
- 20
- 21
- 22
- 23
- 24
- 25
- 26
全列查找、查找一个、模糊查找
这里我们需要说一下,我们的查找语句很好的执行,保存查找结果到本地也是可以的,但是这里存在一个线程不安全的问题,注意,我们的访问数据库可以理解是可以多个进程访问的,此时这里就是一个临界区,我们要加锁.
bool SelectAll(Json::Value *videos) // 查询所有--输出所有视频信息 { #define SELECTALL_VIDEO "select * from tb_video;" _mutex.lock(); bool ret = MysqlQuery(_mysql, SELECTALL_VIDEO); if (ret == false) { _mutex.unlock(); return false; } MYSQL_RES *res = mysql_store_result(_mysql); if (res == NULL) { std::cout << "mysql store结果失败" << std::endl; _mutex.unlock(); return false; } _mutex.unlock(); int num_rows = mysql_num_rows(res); for (int i = 0; i < num_rows; i++) { MYSQL_ROW row = mysql_fetch_row(res); Json::Value video; video["id"] = atoi(row[0]); video["name"] = row[1]; video["info"] = row[2]; video["video"] = row[3]; video["image"] = row[4]; videos->append(video); } mysql_free_result(res); return true; } bool SelectOne(int video_id, Json::Value *video) // 查询单个-输入视频id,输出信息 { #define SELECTONE_VIDEO "select * from tb_video where id=%d;" char sql[1024] = {0}; sprintf(sql, SELECTONE_VIDEO, video_id); _mutex.lock(); bool ret = MysqlQuery(_mysql, sql); if (ret == false) { _mutex.unlock(); return false; } MYSQL_RES *res = mysql_store_result(_mysql); if (res == NULL) { std::cout << "mysql store结果失败" << std::endl; _mutex.unlock(); return false; } _mutex.unlock(); int num_rows = mysql_num_rows(res); if (num_rows != 1) { std::cout << "没有找的数据" << std::endl; mysql_free_result(res); return false; } MYSQL_ROW row = mysql_fetch_row(res); (*video)["id"] = atoi(row[0]); (*video)["name"] = row[1]; (*video)["info"] = row[2]; (*video)["video"] = row[3]; (*video)["image"] = row[4]; mysql_free_result(res); return true; } bool SelectLike(const std::string &key, Json::Value *videos) // 模糊匹配-输入名称关键字,输出视频信息 { #define SELECTLIKE_VIDEO "select * from tb_video where name like '%%%s%%';" char sql[1024] = {0}; sprintf(sql, SELECTLIKE_VIDEO, key.c_str()); _mutex.lock(); bool ret = MysqlQuery(_mysql, sql); if (ret == false) { _mutex.unlock(); return false; } MYSQL_RES *res = mysql_store_result(_mysql); if (res == NULL) { std::cout << "mysql store结果失败" << std::endl; _mutex.unlock(); return false; } _mutex.unlock(); int num_rows=mysql_num_rows(res); for (int i = 0; i < num_rows; i++) { MYSQL_ROW row = mysql_fetch_row(res); Json::Value video; video["id"] = atoi(row[0]); video["name"] = row[1]; video["info"] = row[2]; video["video"] = row[3]; video["image"] = row[4]; videos->append(video); } mysql_free_result(res); return true; } };- 1
- 2
- 3
- 4
- 5
- 6
- 7
- 8
- 9
- 10
- 11
- 12
- 13
- 14
- 15
- 16
- 17
- 18
- 19
- 20
- 21
- 22
- 23
- 24
- 25
- 26
- 27
- 28
- 29
- 30
- 31
- 32
- 33
- 34
- 35
- 36
- 37
- 38
- 39
- 40
- 41
- 42
- 43
- 44
- 45
- 46
- 47
- 48
- 49
- 50
- 51
- 52
- 53
- 54
- 55
- 56
- 57
- 58
- 59
- 60
- 61
- 62
- 63
- 64
- 65
- 66
- 67
- 68
- 69
- 70
- 71
- 72
- 73
- 74
- 75
- 76
- 77
- 78
- 79
- 80
- 81
- 82
- 83
- 84
- 85
- 86
- 87
- 88
- 89
- 90
- 91
- 92
- 93
- 94
- 95
- 96
- 97
- 98
- 99
- 100
- 101
- 102
- 103
- 104
- 105
- 106
- 107
- 108
- 109
- 110
测试
这里来个测试,这里具体的情况大家自行测试,具体的我就不列举了.
void DataTset() { aod::TableVideo tb_video; Json::Value video; video["name"] = "白娘子传奇"; video["info"] = "这是一条白蛇和青蛇之间的故事,精彩"; video["video"] = "/video/snake.mp4"; video["image"] = "/img/sanke.jpg"; tb_video.Insert(video); video["name"] = "变形金刚"; video["info"] = "机器人大战,等你来战"; video["video"] = "/video/robot.mp4"; video["image"] = "/video/robot.jpg"; tb_video.Update(1, video); tb_video.SelectLike("金刚", &video); std::string body; aod::JsonUtil::Serialize(video, &body); std::cout << body << std::endl; // 如何产看结果 序列化 tb_video.Delete(1); }- 1
- 2
- 3
- 4
- 5
- 6
- 7
- 8
- 9
- 10
- 11
- 12
- 13
- 14
- 15
- 16
- 17
- 18
- 19
- 20
- 21
- 22
- 23
- 24
- 25
请求与响应
下面我们开始搭建网络通信模块,这里我们使用restful风格.
- REST 是 Representational State Transfer 的缩写,一个架构符合REST 原则,就称它为RESTful 架构
- RESTful 架构可以充分的利用 HTTP 协议的各种功能,是 HTTP 协议的最佳实践,正文通常采用JSON 格式
- RESTful API 是一种软件架构风格、设计风格,可以让软件更加清晰,更简洁,更有层次,可维护性更好.
restful 使用五种 HTTP 方法,对应 CRUD(增删改查) 操作
- GET 表示查询获取
- POST 对应新增
- PUT 对应修改
- DELETE 对应删除

下面我们开始构建我们每一个接口的具体的格式.
获取所有视频信息
请求: GET /video HTTP/1.1 xxxxxxxxxxx 这是一个空行 响应: HTTP/1.1 200 OK xxxxxxxxxxxxxxx 这是一个空行 [ { "info": "好电影", "id": 1, "image": "/img/thumbs/mysql.png", "name": "Mysql注意事项", "video": "/video/movie.mp4", }, { "info": "好电影", "id": 2, "image": "/img/thumbs/linux.png", "name": "Linux注意事项", "video": "/video/movie.mp4", } ]- 1
- 2
- 3
- 4
- 5
- 6
- 7
- 8
- 9
- 10
- 11
- 12
- 13
- 14
- 15
- 16
- 17
- 18
- 19
- 20
- 21
- 22
- 23
- 24
- 25
搜索指定关键字名称视频信息
请求: GET /video?search="Mysql" HTTP/1.1 响应: HTTP/1.1 200 OK [ { "info": "好电影", "id": 1, "image": "/img/thumbs/mysql.png", "name": "Mysql注意事项", "video": "/video/movie.mp4", } ]- 1
- 2
- 3
- 4
- 5
- 6
- 7
- 8
- 9
- 10
- 11
- 12
- 13
获取指定视频信息
请求: GET /video/1 HTTP/1.1 响应: HTTP/1.1 200 OK [ { "info": "好电影", "id": 1, "image": "/img/thumbs/mysql.png", "name": "Mysql注意事项", "video": "/video/movie.mp4", } ]- 1
- 2
- 3
- 4
- 5
- 6
- 7
- 8
- 9
- 10
- 11
- 12
- 13
删除指定视频信息
请求: DELETE /video/1 HTTP/1.1 响应: HTTP/1.1 200 OK- 1
- 2
- 3
- 4
修改指定视频信息
请求: PUT /video/1 HTTP/1.1 { "info": "这是一个非常好的教学视频,深入浅出,引人深思", "id": 1, "image": "/img/thumbs/mysql.png", "name": "Mysql注意事项", "video": "/video/movie.mp4", } 响应: HTTP/1.1 200 OK- 1
- 2
- 3
- 4
- 5
- 6
- 7
- 8
- 9
- 10
- 11
上传视频信息以及文件
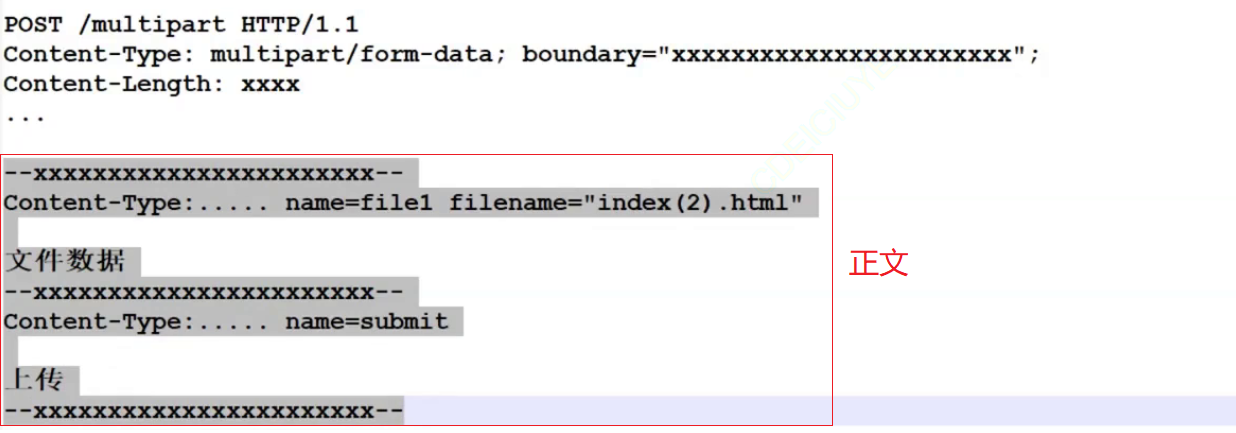
因为上传视频信息的时候,会携带有视频文件和封面图片的文件上传,而这些文件数据都是二进制的,用json 不好
传输,因此在这里使用传统的http 上传文件请求格式,而并没有使用restful 风格。请求: POST /video HTTP/1.1 Content-Type: multipart/form-data; boundary=----WebKitFormBoundarydsrFiETIzKETHWkn ------WebKitFormBoundarydsrFiETIzKETHWkn Content-Disposition: form-data; name="name" Xhsell连接事项,也就是视频名称 ------WebKitFormBoundarydsrFiETIzKETHWkn Content-Disposition: form-data; name="info" 一部非常好看的视频的描述信息 ------WebKitFormBoundarydsrFiETIzKETHWkn Content-Disposition: form-data; name="image"; filename="image.jpg" Content-Type: text/plain image封面图片数据 ------WebKitFormBoundarydsrFiETIzKETHWkn Content-Disposition: form-data; name="video"; filename="video.mp4" Content-Type: text/plain video视频数据 ------WebKitFormBoundarydsrFiETIzKETHWkn Content-Disposition: form-data; name="submit" ------WebKitFormBoundarydsrFiETIzKETHWkn-- 响应: HTTP/1.1 303 See Other Location: "/"- 1
- 2
- 3
- 4
- 5
- 6
- 7
- 8
- 9
- 10
- 11
- 12
- 13
- 14
- 15
- 16
- 17
- 18
- 19
- 20
- 21
- 22
- 23
业务处理
业务处理模块负责与客户端进行网络通信,接收客户端的请求,然后根据请求信息,明确客户端端用户的意图,进行业务处理,并进行对应的结果响应。在视频共享点播系统中,业务处理主要包含两大功能:1、网络通信功能的实现;2、业务功能处理的实现其中网络通信功能的实现咱们借助httplib 库即可方便的搭建http 服务器完成。这也是咱们将网络通信模块与业务处理模块合并在一起完成的原因。
而业务处理模块所要完成的业务功能主要有:
- 客户端的视频数据和信息上传
- 客户端的视频列表展示(视频信息查询)
- 客户端的视频观看请求(视频数据的获取)
- 客户端的视频其他管理(修改,删除)功能
[qkj@localhost source]$ touch server.hpp- 1
namespace aod { #define WWWROOT "../http/www" #define VIDEO_ROOT "/video/" #define IMAGE_ROOT "/image/" //因为httplib基于多线程,因此数据管理对象需要在多线程中访问,为了便于访问定义全局变量 TableVideo *tb_video = nullptr; //这里为了更加功能模块划分清晰一些,不使用lamda表达式完成,否则所有的功能实现集中到一个函数中太过庞大 class Server { private: int _port;//服务器的 监听端口 httplib::Server _srv;//用于搭建http服务器 private: //对应的业务处理接口 static void Insert(const httplib::Request &req, httplib::Response &rsp); static void Update(const httplib::Request &req, httplib::Response &rsp); static void Delete(const httplib::Request &req, httplib::Response &rsp); static void GetOne(const httplib::Request &req, httplib::Response &rsp); static void GetAll(const httplib::Request &req, httplib::Response &rsp); public: Server(int port):_port(port); bool RunModule();//建立请求与处理函数的映射关系,设置静态资源根目录,启动服务器, }; }- 1
- 2
- 3
- 4
- 5
- 6
- 7
- 8
- 9
- 10
- 11
- 12
- 13
- 14
- 15
- 16
- 17
- 18
- 19
- 20
- 21
- 22
- 23
- 24
初始化操作
这里我们分为两步
- 初始化数据库
- 搭建服务器
bool RunModule() { tb_video = new TableVideo(); // 1. 初始化操作 // 创建根目录 www FileUtil(WWWROOT).CreateDirectory(); std::string root = WWWROOT; std::string video_root_path = root + VIDEO_ROOT; std::string image_root_path = root + IMAGE_ROOT; // 这是文件存放的目录 FileUtil(video_root_path).CreateDirectory(); FileUtil(image_root_path).CreateDirectory(); // 2. 设置静态文件根目录 _svr.set_mount_point("/", WWWROOT); // 3. 添加请求 _svr.Post("/video", Insert); _svr.Delete("/video/(\\d+)", Delete); _svr.Put("/video/(\\d+)", Update); _svr.Get("/video/(\\d+)", SelectOne); _svr.Get("/video", SelectAll); // 启动服务器 _svr.listen("0.0.0.0", _port); return true; }- 1
- 2
- 3
- 4
- 5
- 6
- 7
- 8
- 9
- 10
- 11
- 12
- 13
- 14
- 15
- 16
- 17
- 18
- 19
- 20
- 21
- 22
- 23
- 24
- 25
- 26
- 27
新增视频
这里是新增一个视频.
void Server::Insert(const httplib::Request &req, httplib::Response &rsp) { if (req.has_file("name") == false || req.has_file("info") == false || req.has_file("video") == false || req.has_file("image") == false) { rsp.status = 400; rsp.body = R"({"result":false, "reason":"上传数据错误"})"; rsp.set_header("Content-Type", "application/json"); return; } httplib::MultipartFormData name = req.get_file_value("name"); // 视频名称 httplib::MultipartFormData info = req.get_file_value("info"); // 视频简介 httplib::MultipartFormData video = req.get_file_value("video"); // 视频文件 httplib::MultipartFormData image = req.get_file_value("image"); // 视频图片 std::string video_name = name.content; // 这里解释一下content为何是这个,不是文件名称--对于视频而言,这里确实是 std::string video_info = info.content; // ../http/www/video/变形金刚ss.mp4 std::string root = WWWROOT; std::string video_path = root + VIDEO_ROOT + video_name + video.filename; //../http/www/image/变形金刚1.jpg std::string image_path = root + IMAGE_ROOT + video_name + image.filename; if (false == FileUtil(video_path).SetContent(video.content)) { // std::cerr << "文件存储失败" << std::endl; rsp.status = 500; rsp.body = R"({"result":false, "reason":"视频存储失败"})"; rsp.set_header("Content-Type", "application/json"); return; } if (false == FileUtil(image_path).SetContent(image.content)) { // std::cerr << "文件存储失败" << std::endl; rsp.status = 500; rsp.body = R"({"result":false, "reason":"图片文件存储失败"})"; rsp.set_header("Content-Type", "application/json"); return; } Json::Value video_json; video_json["name"] = video_name; video_json["info"] = video_info; video_json["video"] = VIDEO_ROOT + video_name + video.filename; video_json["image"] = IMAGE_ROOT + video_name + image.filename; // 数据库插入 if (false == tb_video->Insert(video_json)) { // std::cerr << "文件存储失败" << std::endl; rsp.status = 500; rsp.body = R"({"result":false, "reason":"数据库存储失败"})"; rsp.set_header("Content-Type", "application/json"); return; } rsp.set_redirect("/index.html", 303); }- 1
- 2
- 3
- 4
- 5
- 6
- 7
- 8
- 9
- 10
- 11
- 12
- 13
- 14
- 15
- 16
- 17
- 18
- 19
- 20
- 21
- 22
- 23
- 24
- 25
- 26
- 27
- 28
- 29
- 30
- 31
- 32
- 33
- 34
- 35
- 36
- 37
- 38
- 39
- 40
- 41
- 42
- 43
- 44
- 45
- 46
- 47
- 48
- 49
- 50
- 51
- 52
- 53
- 54
- 55
- 56
- 57
- 58
- 59
- 60
- 61
- 62
- 63
- 64
- 65
- 66
- 67
修改视频
这是一个修改视频,注意,这里的修改我们注意一下,修改的是文件的名字和简绍,至于数据就不修改了.
static void Update(const httplib::Request &req, httplib::Response &rsp) { // 需要进行捕捉 // 这个是捕捉的数据 /numbers/123 // matches[0] = "/numbers/123" matches[1] = "123" std::string s = req.matches[1]; int video_id = atoi(s.c_str()); // 捕捉id // 去数据库里面查找是否存在 Json::Value v; if (false == tb_video->SelectOne(video_id, &v)) { rsp.status = 400; rsp.body = R"({"result":false, "reason":"视频不存在"})"; rsp.set_header("Content-Type", "application/json"); return; } // 开始修改 Json::Value video; if (false == JsonUtil::UnSerialize(req.body, &video)) { rsp.status = 400; rsp.body = R"({"result":false, "reason":"反序列化失败"})"; rsp.set_header("Content-Type", "application/json"); return; } if (false == tb_video->Update(video_id, video)) { rsp.status = 500; rsp.body = R"({"result":false, "reason":"修改数据库失败"})"; rsp.set_header("Content-Type", "application/json"); return; } }- 1
- 2
- 3
- 4
- 5
- 6
- 7
- 8
- 9
- 10
- 11
- 12
- 13
- 14
- 15
- 16
- 17
- 18
- 19
- 20
- 21
- 22
- 23
- 24
- 25
- 26
- 27
- 28
- 29
- 30
- 31
- 32
- 33
- 34
- 35
- 36
- 37
查找所有
我们的查询所有和模糊匹配都是一样的,在这里我们判断一下查询的时候是不是模糊匹配.
static void SelectAll(const httplib::Request &req, httplib::Response &rsp) { // 可能是 模糊匹配 bool select_flag = true; std::string search_key; if (true == req.has_param("search")) { // 表示是 模糊匹配 select_flag = false; search_key = req.get_param_value("search"); } Json::Value videos; if (select_flag == true) { // 这里是全部 if (false == tb_video->SelectAll(&videos)) { rsp.status = 500; rsp.body = R"({"result":false, "reason":"数据库信息不存在"})"; rsp.set_header("Content-Type", "application/json"); return; } } else { if (false == tb_video->SelectLike(search_key, &videos)) { rsp.status = 500; rsp.body = R"({"result":false, "reason":"数据库信息不存在"})"; rsp.set_header("Content-Type", "application/json"); return; } } rsp.status = 200; JsonUtil::Serialize(videos, &rsp.body); rsp.set_header("Content-Type", "application/json"); return; }- 1
- 2
- 3
- 4
- 5
- 6
- 7
- 8
- 9
- 10
- 11
- 12
- 13
- 14
- 15
- 16
- 17
- 18
- 19
- 20
- 21
- 22
- 23
- 24
- 25
- 26
- 27
- 28
- 29
- 30
- 31
- 32
- 33
- 34
- 35
- 36
- 37
- 38
- 39
- 40
- 41
- 42
查找一个
static void SelectOne(const httplib::Request &req, httplib::Response &rsp) { // 需要进行捕捉 // 这个是捕捉的数据 /numbers/123 // matches[0] = "/numbers/123" matches[1] = "123" std::string s = req.matches[1]; int video_id = atoi(s.c_str()); // 捕捉id Json::Value video; if (false == tb_video->SelectOne(video_id, &video)) { rsp.status = 500; rsp.body = R"({"result":false, "reason":"视频不存在"})"; rsp.set_header("Content-Type", "application/json"); return; } JsonUtil::Serialize(video, &rsp.body); rsp.set_header("Content-Type", "application/json"); }- 1
- 2
- 3
- 4
- 5
- 6
- 7
- 8
- 9
- 10
- 11
- 12
- 13
- 14
- 15
- 16
- 17
- 18
- 19
删除
static void Delete(const httplib::Request &req, httplib::Response &rsp) { // 需要进行捕捉 // 这个是捕捉的数据 /numbers/123 // matches[0] = "/numbers/123" matches[1] = "123" std::string s = req.matches[1]; int video_id = atoi(s.c_str()); // 捕捉id // 去数据库里面查找是否存在 Json::Value video; if (false == tb_video->SelectOne(video_id, &video)) { rsp.status = 500; rsp.body = R"({"result":false, "reason":"视频不存在"})"; rsp.set_header("Content-Type", "application/json"); return; } std::string root = WWWROOT; std::string video_path = root + video["video"].asString(); std::string image_path = root + video["image"].asString(); // 删除文件 remove(video_path.c_str()); remove(image_path.c_str()); // 删除数据库 if (false == tb_video->Delete(video_id)) { rsp.status = 500; rsp.body = R"({"result":false, "reason":"删除数据库信息失败"})"; rsp.set_header("Content-Type", "application/json"); return; } }- 1
- 2
- 3
- 4
- 5
- 6
- 7
- 8
- 9
- 10
- 11
- 12
- 13
- 14
- 15
- 16
- 17
- 18
- 19
- 20
- 21
- 22
- 23
- 24
- 25
- 26
- 27
- 28
- 29
- 30
- 31
- 32
- 33
测试
下面我们就有一个测试
void ServerTest() { aod::Server server(8081); server.RunModule(); }- 1
- 2
- 3
- 4
- 5

编译好之后,这里我们使用Postman软件尽心测试,注意,这里的视频我放在下方的链接.
https://github.com/qkja/Project/tree/master/video_on_demand/test
前端页面
这里我们不实现,直接给大家代码.这是我们的源码链接.
https://github.com/qkja/Project/tree/master/video_on_demand
-
相关阅读:
Chrome 浏览器经常卡死问题解决
C++入门
2019-04《信息资源管理 02378》真卷(独家文字版),圈定章节考点+统计真题分布
【安装笔记-20240616-Windows-Gpg4win 证书管理器】
【濡白的C语言】部分string.h库函数的实现
优秀的图文识别开源项目PandaOCR
Redis阅读——内存分配
源码阅读四步走,这才是阅读源码的正确姿势
ROS2 与 Gazebo 联合仿真项目模版
记一次 .NET 某餐饮小程序 内存暴涨分析
- 原文地址:https://blog.csdn.net/m0_61334618/article/details/132918308
