-
spring boot 整合多数据源
多数据源产生的场景
一般情况下,不会有多数据源这样的场景出现,但老项目或者特殊需求的项目,可能会有这样的场景
- 同一个应用需要访问两个数据库
- 不用数据库中间件的读写分离
注入数据源选择的时机
声明两个数据源实例,在getConnection的时候根据业务的不同,注入不同数据源的连接

环境准备
准备sql脚本,建立两个库,这里mysql为例
- create database stu;
- create database tech;
- use stu;
- create table student
- (
- id varchar(50) not null comment '主键',
- name varchar(50) null comment '姓名',
- stu_no varchar(50) null comment '学号',
- constraint student_pk primary key (id)
- );
- insert into student values ('1','张同学','111');
- insert into student values ('2','李同学','222');
- use tech;
- create table teacher
- (
- id varchar(50) not null comment '主键',
- name varchar(50) null comment '姓名',
- teach_no varchar(50) null comment '教师号',
- constraint teacher_pk primary key (id)
- );
- insert into teacher values ('1','王老师','111');
- insert into teacher values ('2','高老师','222');
实现DataSource方式实现多数据源
配置多数据源
- server:
- port: 9000
- spring:
- datasource:
- type: com.alibaba.druid.pool.DruidDataSource
- datasource1:
- url: jdbc:mysql://shilei.tech:3306/stu?useSSL=true&serverTimezone=Asia/Shanghai
- username: root
- password: root123456
- driver-class-name: com.mysql.cj.jdbc.Driver
- datasource2:
- url: jdbc:mysql://shilei.tech:3306/tech?useSSL=true&serverTimezone=Asia/Shanghai
- username: root
- password: root123456
- driver-class-name: com.mysql.cj.jdbc.Driver
- druid:
- initial-size: 5
- min-idle: 1
- max-active: 20
- mybatis-plus:
- mapper-locations: classpath:/mapper/*.xml
- type-aliases-package: com.datasource.dynamicdatasource.model
添加数据源配置
- package com.datasource.dynamicdatasource.config;
- import com.alibaba.druid.pool.DruidDataSource;
- import org.springframework.boot.context.properties.ConfigurationProperties;
- import org.springframework.context.annotation.Bean;
- import org.springframework.context.annotation.Configuration;
- import javax.sql.DataSource;
- /**
- * @author sl
- */
- @Configuration
- public class DataSourceConfig {
- @Bean("dataSource1")
- @ConfigurationProperties(prefix = "spring.datasource.datasource1")
- public DataSource dataSource1(){
- DruidDataSource druidDataSource = new DruidDataSource();
- return druidDataSource;
- }
- @Bean("dataSource2")
- @ConfigurationProperties(prefix = "spring.datasource.datasource2")
- public DataSource dataSource2(){
- DruidDataSource druidDataSource = new DruidDataSource();
- return druidDataSource;
- }
- }
实现DataSource多数据源
- package com.datasource.dynamicdatasource.config;
- import org.springframework.beans.factory.InitializingBean;
- import org.springframework.context.annotation.Configuration;
- import org.springframework.context.annotation.Primary;
- import javax.annotation.Resource;
- import javax.sql.DataSource;
- import java.io.PrintWriter;
- import java.sql.Connection;
- import java.sql.SQLException;
- import java.sql.SQLFeatureNotSupportedException;
- import java.util.logging.Logger;
- /**
- * @author sl
- * @Primary主要注入的bean
- */
- @Configuration
- @Primary
- public class DynamicDataSource implements DataSource {
- public static ThreadLocal
nameFlag = new ThreadLocal<>(); - @Resource
- private DataSource dataSource1;
- @Resource
- private DataSource dataSource2;
- @Override
- public Connection getConnection() throws SQLException {
- if("student".equals(nameFlag.get())){
- return dataSource1.getConnection();
- }
- return dataSource2.getConnection();
- }
- @Override
- public Connection getConnection(String username, String password) throws SQLException {
- return null;
- }
- @Override
- public
T unwrap(Class iface) throws SQLException { - return null;
- }
- @Override
- public boolean isWrapperFor(Class iface) throws SQLException {
- return false;
- }
- @Override
- public PrintWriter getLogWriter() throws SQLException {
- return null;
- }
- @Override
- public void setLogWriter(PrintWriter out) throws SQLException {
- }
- @Override
- public void setLoginTimeout(int seconds) throws SQLException {
- }
- @Override
- public int getLoginTimeout() throws SQLException {
- return 0;
- }
- @Override
- public Logger getParentLogger() throws SQLFeatureNotSupportedException {
- return null;
- }
- }
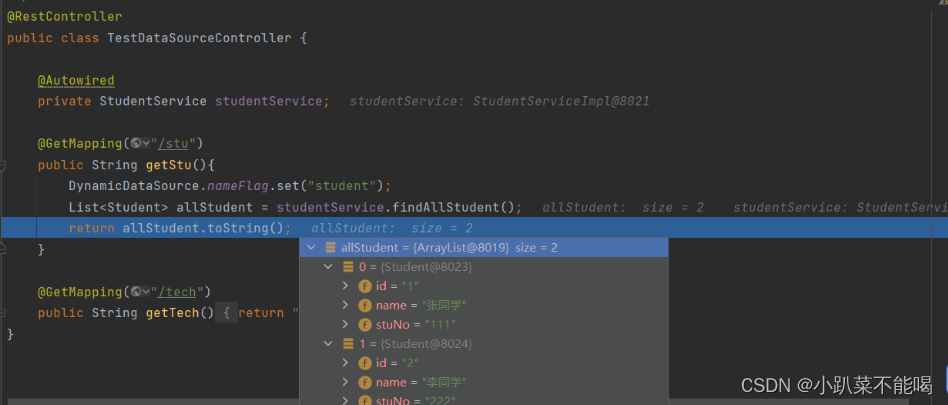
测试多数据源
- package com.datasource.dynamicdatasource.controller;
- import com.datasource.dynamicdatasource.config.DynamicDataSource;
- import com.datasource.dynamicdatasource.model.Student;
- import com.datasource.dynamicdatasource.model.Teacher;
- import com.datasource.dynamicdatasource.service.StudentService;
- import com.datasource.dynamicdatasource.service.TeacherService;
- import org.springframework.beans.factory.annotation.Autowired;
- import org.springframework.web.bind.annotation.GetMapping;
- import org.springframework.web.bind.annotation.RestController;
- import java.util.List;
- /**
- * @author sl
- */
- @RestController
- public class TestDataSourceController {
- @Autowired
- private StudentService studentService;
- @Autowired
- private TeacherService teacherService;
- @GetMapping("/stu")
- public String getStu(){
- DynamicDataSource.nameFlag.set("student");
- List
allStudent = studentService.findAllStudent(); - return allStudent.toString();
- }
- @GetMapping("/tech")
- public String getTech(){
- DynamicDataSource.nameFlag.set("teacher");
- List
allTeacher = teacherService.findAllTeacher(); - return allTeacher.toString();
- }
- }
效果如下所示
此实现方式的弊端
实现DataSource接口我们本质上只使用了一个方法,就是getConnection()这个无参的方法,其他方法,当内部调用时可能会导致错误,我们不可能实现所有的方法,所以我们继承AbstractRoutingDataSource抽象类
继承AbstractRoutingDataSource实现多数据源
AbstractRoutingDataSource的结构

可以看到AbstractRoutingDataSource继承自DataSource,提供了一些实现方法
AbstractRoutingDataSource的重要属性
targetDataSources 所有数据源 (需指定)
defaultTargetDataSource 默认数据源(需指定)
resolvedDataSources= targetDataSources 负责最终切换的数据源map 等于 tagetDataSources
继承AbstractRoutingDataSource实现多数据源
- package com.datasource.dynamicdatasource.config;
- import org.springframework.context.annotation.Configuration;
- import org.springframework.context.annotation.Primary;
- import org.springframework.jdbc.datasource.lookup.AbstractRoutingDataSource;
- import javax.annotation.Resource;
- import javax.sql.DataSource;
- import java.util.HashMap;
- import java.util.Map;
- /**
- * @author sl
- * @Primary主要注入的bean
- */
- @Configuration
- @Primary
- public class DynamicDataSource extends AbstractRoutingDataSource {
- public static ThreadLocal
nameFlag = new ThreadLocal<>(); - @Resource
- private DataSource dataSource1;
- @Resource
- private DataSource dataSource2;
- @Override
- protected Object determineCurrentLookupKey() {
- // 返回当前数据源的标识
- return nameFlag.get();
- }
- @Override
- public void afterPropertiesSet() {
- // 为targetDataSources 初始化所有数据源
- Map
- targetDataSources.put("student",dataSource1);
- targetDataSources.put("teacher",dataSource2);
- super.setTargetDataSources(targetDataSources);
- // 设置默认数据源
- super.setDefaultTargetDataSource(dataSource1);
- // 循环给resolvedDataSources,也就是最终数据源map
- super.afterPropertiesSet();
- }
- }
determineCurrentLookupKey的作用
看一段源码,就是通过determineCurrentLookupKey获取数据源的key,然后去resolvedDataSources中取数据源,resolvedDataSources数据源其实就是targetDataSources
- protected DataSource determineTargetDataSource() {
- Assert.notNull(this.resolvedDataSources, "DataSource router not initialized");
- Object lookupKey = determineCurrentLookupKey();
- DataSource dataSource = this.resolvedDataSources.get(lookupKey);
- if (dataSource == null && (this.lenientFallback || lookupKey == null)) {
- dataSource = this.resolvedDefaultDataSource;
- }
- if (dataSource == null) {
- throw new IllegalStateException("Cannot determine target DataSource for lookup key [" + lookupKey + "]");
- }
- return dataSource;
- }
测试多数据源
- package com.datasource.dynamicdatasource.controller;
- import com.datasource.dynamicdatasource.config.DynamicDataSource;
- import com.datasource.dynamicdatasource.model.Student;
- import com.datasource.dynamicdatasource.model.Teacher;
- import com.datasource.dynamicdatasource.service.StudentService;
- import com.datasource.dynamicdatasource.service.TeacherService;
- import org.springframework.beans.factory.annotation.Autowired;
- import org.springframework.web.bind.annotation.GetMapping;
- import org.springframework.web.bind.annotation.RestController;
- import java.util.List;
- /**
- * @author sl
- */
- @RestController
- public class TestDataSourceController {
- @Autowired
- private StudentService studentService;
- @Autowired
- private TeacherService teacherService;
- @GetMapping("/stu")
- public String getStu(){
- // 默认数据源就是student
- List
allStudent = studentService.findAllStudent(); - return allStudent.toString();
- }
- @GetMapping("/tech")
- public String getTech(){
- DynamicDataSource.nameFlag.set("teacher");
- List
allTeacher = teacherService.findAllTeacher(); - return allTeacher.toString();
- }
- }
AOP自定义注解方式+AbstractRoutingDataSource实现多数据源
数据源的切换还是使用AbstractRoutingDataSource,只不过切换方式采用aop拦截自定义注解切换数据源,这种方式也是mybatis-plus多数据源插件所采用的方式
自定义注解
- package com.datasource.dynamicdatasource.annotation;
- import java.lang.annotation.ElementType;
- import java.lang.annotation.Retention;
- import java.lang.annotation.RetentionPolicy;
- import java.lang.annotation.Target;
- /**
- * @author sl
- */
- @Target({ElementType.TYPE, ElementType.METHOD})
- @Retention(RetentionPolicy.RUNTIME)
- public @interface MyDataSource {
- String value() default "student";
- }
配置切面
- <dependency>
- <groupId>org.springframework.bootgroupId>
- <artifactId>spring-boot-starter-aopartifactId>
- dependency>
- package com.datasource.dynamicdatasource.aspect;
- import com.datasource.dynamicdatasource.annotation.MyDataSource;
- import com.datasource.dynamicdatasource.config.DynamicDataSource;
- import org.aspectj.lang.JoinPoint;
- import org.aspectj.lang.annotation.Aspect;
- import org.aspectj.lang.annotation.Before;
- import org.aspectj.lang.annotation.Pointcut;
- import org.aspectj.lang.reflect.MethodSignature;
- import org.springframework.stereotype.Component;
- import java.lang.reflect.Method;
- /**
- * @author sl
- *@Aspect 标识是一个切面
- */
- @Aspect
- @Component
- public class DatasourceAspect {
- /**
- * 切点规则
- */
- @Pointcut("@annotation(com.datasource.dynamicdatasource.annotation.MyDataSource)")
- public void pointcut() {
- }
- @Before("pointcut()")
- public void dataSourceAspect(JoinPoint joinPoint){
- // 获取方法
- Method method = ((MethodSignature) joinPoint.getSignature()).getMethod();
- // 判断方法中是否添加了注解
- if(method.isAnnotationPresent(MyDataSource.class)){
- // 获取方法上的注解
- MyDataSource annotation = method.getAnnotation(MyDataSource.class);
- String value = annotation.value();
- // 设置数据源
- DynamicDataSource.nameFlag.set(value);
- }
- }
- }
测试自定义注解切换数据源
- @GetMapping("/tech")
- @MyDataSource("teacher")
- public String getTech(){
- List
allTeacher = teacherService.findAllTeacher(); - return allTeacher.toString();
- }
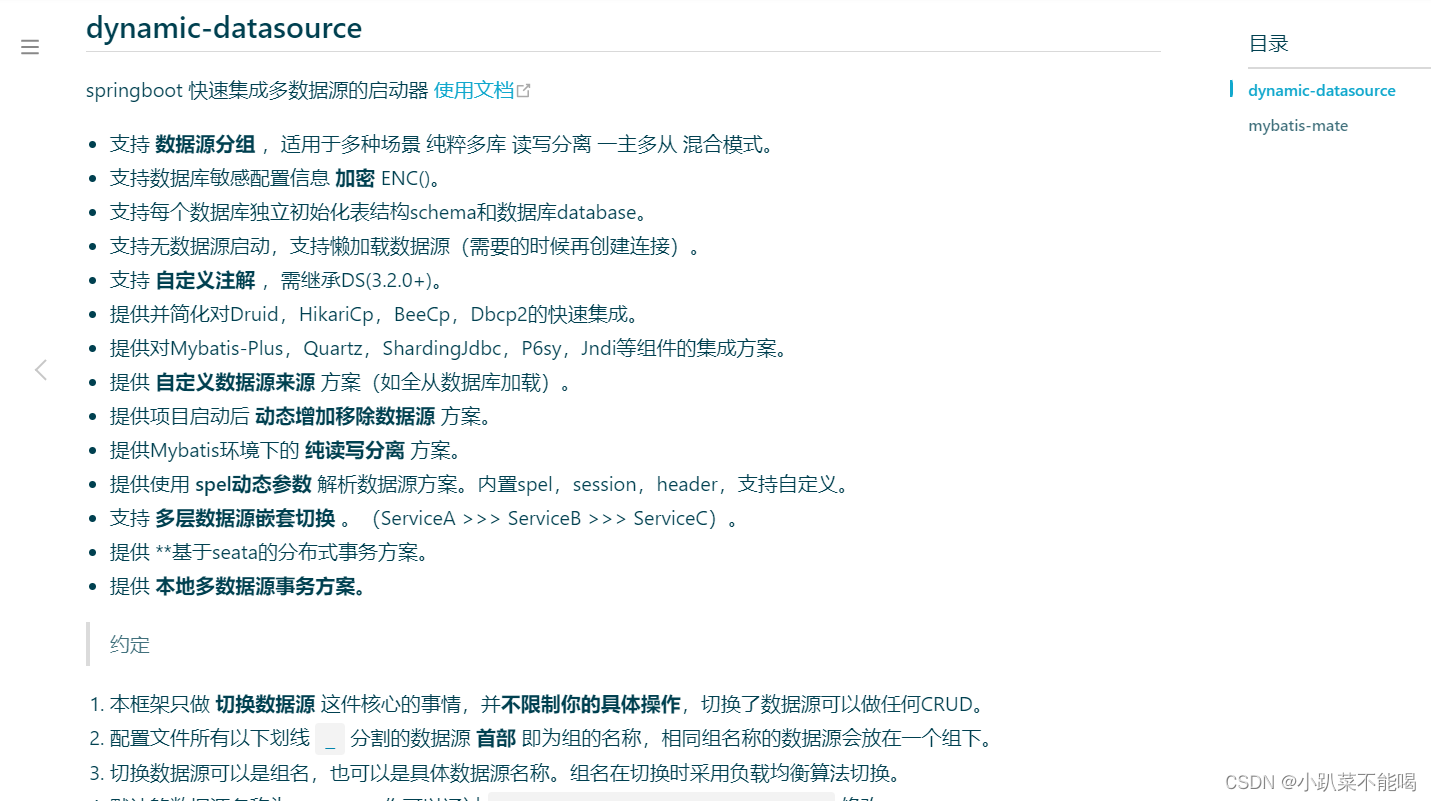
dynamic-datasource多数据源组件实现多数据源
官方文档及搭建指南地址:多数据源 | MyBatis-Plus
引入依赖
- <dependency>
- <groupId>com.baomidougroupId>
- <artifactId>dynamic-datasource-spring-boot-starterartifactId>
- <version>3.6.1version>
- dependency>
配置数据源
- server:
- port: 9000
- spring:
- datasource:
- type: com.alibaba.druid.pool.DruidDataSource
- dynamic:
- #设置默认的数据源或者数据源组,默认值即为master
- primary: master
- #严格匹配数据源,默认false. true未匹配到指定数据源时抛异常,false使用默认数据源
- strict: false
- datasource:
- master:
- url: jdbc:mysql://shilei.tech:3306/stu?useSSL=true&serverTimezone=Asia/Shanghai
- username: root
- password: root123456
- driver-class-name: com.mysql.cj.jdbc.Driver
- teacher:
- url: jdbc:mysql://shilei.tech:3306/tech?useSSL=true&serverTimezone=Asia/Shanghai
- username: root
- password: root123456
- driver-class-name: com.mysql.cj.jdbc.Driver
- druid:
- initial-size: 5
- min-idle: 1
- max-active: 20
- mybatis-plus:
- mapper-locations: classpath:/mapper/*.xml
- type-aliases-package: com.datasource.dynamicdatasource.model
测试数据源切换
数据源切换使用@DS注解,不使用此注解,使用默认数据源,方法上使用>类上使用
- package com.datasource.dynamicdatasource.controller;
- import com.baomidou.dynamic.datasource.annotation.DS;
- import com.datasource.dynamicdatasource.model.Student;
- import com.datasource.dynamicdatasource.model.Teacher;
- import com.datasource.dynamicdatasource.service.StudentService;
- import com.datasource.dynamicdatasource.service.TeacherService;
- import org.springframework.beans.factory.annotation.Autowired;
- import org.springframework.web.bind.annotation.GetMapping;
- import org.springframework.web.bind.annotation.RestController;
- import java.util.List;
- /**
- * @author sl
- */
- @RestController
- public class TestDataSourceController {
- @Autowired
- private StudentService studentService;
- @Autowired
- private TeacherService teacherService;
- @GetMapping("/stu")
- public String getStu(){
- List
allStudent = studentService.findAllStudent(); - return allStudent.toString();
- }
- @GetMapping("/tech")
- @DS("teacher")
- public String getTech(){
- List
allTeacher = teacherService.findAllTeacher(); - return allTeacher.toString();
- }
- }
项目启动日志中可以看到两个数据源的加载信息

访问tech以及stu都能正常访问,代表动态数据源添加成功

需要注意的问题
使用多数据源要注意事务的控制,提交和回滚策略,可以观看spring多数据源事务解决方案
-
相关阅读:
“磐云杯”中职网络安全技能大赛A模块新题
ls命令-使用频率最高的命令
微信公众号h5写一个全局调用微信分享功能
JSP SSH车间生产管理系统myeclipse开发mysql数据库MVC模式java编程网页设计
【php快速上手(十一)】
23届前端面试选择题(长期更新)
MybatisPlus简单使用与自定义sql以及通过自定义sql实现多表联查的分页查询
基于文本信息抽取的列控车载设备故障发现
ViT:Vision transformer的cls token如何实现分类?
2D物理引擎 Box2D for javascript Games 第六章 关节和马达
- 原文地址:https://blog.csdn.net/m0_65775063/article/details/132873594
