-
OpenMMLab MMYOLO目标检测环境搭建(一)
基准和模型动物园概述
支持YOLOv5实例分割
支持基于mmposex的YOLOv5 - pose
添加15分钟实例分割教程
YOLOv5支持使用掩码注释来优化bbox
Add多尺度训练和测试文档。
有关发布历史和更新细节,请参阅changelog。


所有模型均在 COCO train2017 数据集上进行训练,并在 val2017 数据集上进行评估。
TRT-FP16-GPU-Latency(ms) 是使用 TensorRT 8.4、批量大小为 1、测试形状为 640x640 且仅进行模型前向的 NVIDIA Tesla T4 设备上的 GPU 计算时间(YOLOX-tiny 的测试形状为 416x416)
模型参数和 FLOP 的数量是使用get_flops脚本获取的。不同的计算方法可能略有不同
RTMDet 性能是使用MMRazor 知识蒸馏进行训练的结果
MMYOLO中目前仅实现了YOLOv6 2.0版本,L和M是未经知识蒸馏的结果
YOLOv8结果使用mask实例注释进行优化,但YOLOv5、YOLOv6和YOLOv7不使用
PYOLOE+使用Obj365作为预训练权重,因此COCO训练的epoch数只需要80
YOLOX-tiny、YOLOX-s 和 YOLOX-m 使用 RTMDet 中提出的优化器参数进行训练,与原始实现相比具有不同程度的性能改进。支持的任务
物体检测
旋转物体检测支持的算法
YOLOv5
YOLOv5u (Inference only)
YOLOX
RTMDet
RTMDet-Rotated
YOLOv6
YOLOv7
PPYOLOE
YOLOv8支持的数据集
COCO数据集
VOC数据集

Crowd人类数据集

DOTA 1.0 数据集
1、环境搭建
conda create -n mmyolo python=3.7 -y #创建环境 conda activate mmyolo #激活环境 conda install pytorch torchvision torchaudio cudatoolkit=10.2 -c pytorch #安装 PyTorch and torchvision (官方) #如果网不好,可以这样安装 pip3 install torch==1.8.2+cu102 torchvision==0.9.2+cu102 torchaudio===0.8.2 -f https://download.pytorch.org/whl/lts/1.8/torch_lts.html -i http://mirrors.aliyun.com/pypi/simple/ --trusted-host mirrors.aliyun.com pip install torch==1.11.0+cu115 torchvision==0.12.0+cu115 torchaudio==0.11.0 -f https://download.pytorch.org/whl/torch_stable.html -i http://mirrors.aliyun.com/pypi/simple/ --trusted-host mirrors.aliyun.com #验证是否安装成功 >>> import torchvision >>> import torch >>> import.__version__ File "" , line 1 import.__version__ ^ SyntaxError: invalid syntax >>> torch.__version__ '1.8.2+cu102'- 1
- 2
- 3
- 4
- 5
- 6
- 7
- 8
- 9
- 10
- 11
- 12
- 13
- 14
- 15
- 16
- 17
- 18
- 19
- 20
conda create -n mmyolo python=3.8 pytorch==1.10.1 torchvision==0.11.2 cudatoolkit=11.3 -c pytorch -y conda activate mmyolo pip install openmim -i http://mirrors.aliyun.com/pypi/simple/ --trusted-host mirrors.aliyun.com mim install "mmengine>=0.6.0" -i http://mirrors.aliyun.com/pypi/simple/ --trusted-host mirrors.aliyun.com mim install "mmcv>=2.0.0rc4,<2.1.0" -i http://mirrors.aliyun.com/pypi/simple/ --trusted-host mirrors.aliyun.com mim install "mmdet>=3.0.0,<4.0.0" -i http://mirrors.aliyun.com/pypi/simple/ --trusted-host mirrors.aliyun.com git clone https://github.com/open-mmlab/mmyolo.git cd mmyolo # Install albumentations pip install -r requirements/albu.txt -i http://mirrors.aliyun.com/pypi/simple/ --trusted-host mirrors.aliyun.com # Install MMYOLO mim install -v -e .- 1
- 2
- 3
- 4
- 5
- 6
- 7
- 8
- 9
- 10
- 11
- 12
2、环境测试
To verify whether MMYOLO is installed correctly, we provide an inference demo.
Step 1. We need to download config and checkpoint files.
mim download mmyolo --config yolov5_s-v61_syncbn_fast_8xb16-300e_coco --dest .- 1
下载将需要几秒钟或更长时间,具体取决于您的网络环境。完成后,您将在当前文件夹中找到两个文件yolov5_s-v61_syncbn_fast_8xb16-300e_coco.py和。yolov5_s-v61_syncbn_fast_8xb16-300e_coco_20220918_084700-86e02187.pth
Step 2. Verify the inference demo.
选项(a)。如果您从源安装 MMYOLO,只需运行以下命令。
支持的输入类型:
单幅图像,包括jpg、jpeg、png、ppm、bmp、pgm、tif、tiff、webp。
文件夹,会遍历该文件夹下的所有图像文件并输出相应的结果。
URL,会自动从该URL下载并输出相应的结果。python demo/image_demo.py demo/demo.jpg \ yolov5_s-v61_syncbn_fast_8xb16-300e_coco.py \ yolov5_s-v61_syncbn_fast_8xb16-300e_coco_20220918_084700-86e02187.pth # Optional parameters # --out-dir ./output *The detection results are output to the specified directory. When args have action --show, the script do not save results. Default: ./output # --device cuda:0 *The computing resources used, including cuda and cpu. Default: cuda:0 # --show *Display the results on the screen. Default: False # --score-thr 0.3 *Confidence threshold. Default: 0.3- 1
- 2
- 3
- 4
- 5
- 6
- 7
- 8
- 9
您将在文件夹中看到一个新图像output,其中绘制了边界框。

3、 15 分钟开始 MMYOLO 物体检测
1、数据

python tools/misc/download_dataset.py --dataset-name cat --save-dir ./data/cat --unzip --delete- 1

2、配置
以YOLOv5算法为例,考虑到用户的GPU内存有限,我们需要修改一些默认的训练参数以使其顺利运行。需要修改的关键参数如下:
YOLOv5是Anchor-Based算法,不同的数据集需要自适应计算合适的anchor
默认配置使用 8 个 GPU,每个 GPU 的批量大小为 16 个。现在将其更改为单 GPU,批量大小为 12。默认训练 epoch 为 300。将其更改为 40 epoch
考虑到数据集较小,我们选择使用固定主干权重
原则上,当batch size改变时,学习率应该相应地线性缩放,但实际测量发现这是没有必要的。在该文件夹中创建一个yolov5_s-v61_fast_1xb12-40e_cat.py配置文件configs/yolov5(我们已提供此配置供您直接使用)并将以下内容复制到配置文件中。
# Inherit and overwrite part of the config based on this config _base_ = 'yolov5_s-v61_syncbn_fast_8xb16-300e_coco.py' data_root = './data/cat/' # dataset root class_name = ('cat', ) # dataset category name num_classes = len(class_name) # dataset category number # metainfo is a configuration that must be passed to the dataloader, otherwise it is invalid # palette is a display color for category at visualization # The palette length must be greater than or equal to the length of the classes metainfo = dict(classes=class_name, palette=[(20, 220, 60)]) # Adaptive anchor based on tools/analysis_tools/optimize_anchors.py anchors = [ [(68, 69), (154, 91), (143, 162)], # P3/8 [(242, 160), (189, 287), (391, 207)], # P4/16 [(353, 337), (539, 341), (443, 432)] # P5/32 ] # Max training 40 epoch max_epochs = 40 # Set batch size to 12 train_batch_size_per_gpu = 12 # dataloader num workers train_num_workers = 4 # load COCO pre-trained weight load_from = 'https://download.openmmlab.com/mmyolo/v0/yolov5/yolov5_s-v61_syncbn_fast_8xb16-300e_coco/yolov5_s-v61_syncbn_fast_8xb16-300e_coco_20220918_084700-86e02187.pth' # noqa model = dict( # Fixed the weight of the entire backbone without training backbone=dict(frozen_stages=4), bbox_head=dict( head_module=dict(num_classes=num_classes), prior_generator=dict(base_sizes=anchors) )) train_dataloader = dict( batch_size=train_batch_size_per_gpu, num_workers=train_num_workers, dataset=dict( data_root=data_root, metainfo=metainfo, # Dataset annotation file of json path ann_file='annotations/trainval.json', # Dataset prefix data_prefix=dict(img='images/'))) val_dataloader = dict( dataset=dict( metainfo=metainfo, data_root=data_root, ann_file='annotations/test.json', data_prefix=dict(img='images/'))) test_dataloader = val_dataloader _base_.optim_wrapper.optimizer.batch_size_per_gpu = train_batch_size_per_gpu val_evaluator = dict(ann_file=data_root + 'annotations/test.json') test_evaluator = val_evaluator default_hooks = dict( # Save weights every 10 epochs and a maximum of two weights can be saved. # The best model is saved automatically during model evaluation checkpoint=dict(interval=10, max_keep_ckpts=2, save_best='auto'), # The warmup_mim_iter parameter is critical. # The default value is 1000 which is not suitable for cat datasets. param_scheduler=dict(max_epochs=max_epochs, warmup_mim_iter=10), # The log printing interval is 5 logger=dict(type='LoggerHook', interval=5)) # The evaluation interval is 10 train_cfg = dict(max_epochs=max_epochs, val_interval=10)- 1
- 2
- 3
- 4
- 5
- 6
- 7
- 8
- 9
- 10
- 11
- 12
- 13
- 14
- 15
- 16
- 17
- 18
- 19
- 20
- 21
- 22
- 23
- 24
- 25
- 26
- 27
- 28
- 29
- 30
- 31
- 32
- 33
- 34
- 35
- 36
- 37
- 38
- 39
- 40
- 41
- 42
- 43
- 44
- 45
- 46
- 47
- 48
- 49
- 50
- 51
- 52
- 53
- 54
- 55
- 56
- 57
- 58
- 59
- 60
- 61
- 62
- 63
- 64
- 65
- 66
- 67
- 68
- 69
- 70
- 71
上面的配置继承自yolov5_s-v61_syncbn_fast_8xb16-300e_coco.py. 根据cat数据集的特点更新了、、、、、data_root等配置。metainfotrain_dataloaderval_dataloadernum_classes
3、训练
python tools/train.py configs/yolov5/yolov5_s-v61_fast_1xb12-40e_cat.py- 1
运行上述训练命令,work_dirs/yolov5_s-v61_fast_1xb12-40e_cat会自动生成文件夹,检查点文件和训练配置文件将保存在该文件夹中。在低端 1660 GPU 上,整个训练过程大约需要八分钟。

上述属性是通过 COCO API 打印的,其中 -1 表示该比例不存在对象。根据COCO定义的规则,Cat数据集包含所有大型物体,不存在小型或中型物体。训练中断后恢复
如果您停止训练,您可以添加–resume到训练命令的末尾,程序将自动使用来自 的最新权重文件恢复训练work_dirs。
python tools/train.py configs/yolov5/yolov5_s-v61_fast_1xb12-40e_cat.py --resume- 1
保存GPU内存策略
上述配置需要大约 3G RAM,所以如果你没有足够的内存,请考虑开启混合精度训练
python tools/train.py configs/yolov5/yolov5_s-v61_fast_1xb12-40e_cat.py --amp- 1
培训可视化
MMYOLO目前支持本地、TensorBoard、WandB等后端可视化。默认使用本地可视化,训练过程中可以切换到WandB等各种指标实时可视化。
Tensorboard
pip install tensorboard- 1
Add the tensorboard config at the end of config file we just created: configs/yolov5/yolov5_s-v61_fast_1xb12-40e_cat.py.
visualizer = dict(vis_backends=[dict(type='LocalVisBackend'),dict(type='TensorboardVisBackend')])- 1
重新运行训练命令后,将在可视化文件夹中生成Tensorboard文件work_dirs/yolov5_s-v61_fast_1xb12-40e_cat/{timestamp}/vis_data。我们可以通过运行以下命令,使用 Tensorboard 从 Web 链接查看损失、学习率和 coco/bbox_mAP 可视化:
tensorboard --logdir=work_dirs/yolov5_s-v61_fast_1xb12-40e_cat- 1
4、训练特征图可视化
MMYOLO 提供了特征图的可视化脚本来分析当前的模型训练。请参考特征图可视化
由于直接可视化的偏差test_pipeline,我们需要test_pipeline修改configs/yolov5/yolov5_s-v61_syncbn_8xb16-300e_coco.py
test_pipeline = [ dict( type='LoadImageFromFile', backend_args=_base_.backend_args), dict(type='YOLOv5KeepRatioResize', scale=img_scale), dict( type='LetterResize', scale=img_scale, allow_scale_up=False, pad_val=dict(img=114)), dict(type='LoadAnnotations', with_bbox=True, _scope_='mmdet'), dict( type='mmdet.PackDetInputs', meta_keys=('img_id', 'img_path', 'ori_shape', 'img_shape', 'scale_factor', 'pad_param')) ]- 1
- 2
- 3
- 4
- 5
- 6
- 7
- 8
- 9
- 10
- 11
- 12
- 13
- 14
- 15
- 16
到以下配置:
test_pipeline = [ dict( type='LoadImageFromFile', backend_args=_base_.backend_args), dict(type='mmdet.Resize', scale=img_scale, keep_ratio=False), # modify the LetterResize to mmdet.Resize dict(type='LoadAnnotations', with_bbox=True, _scope_='mmdet'), dict( type='mmdet.PackDetInputs', meta_keys=('img_id', 'img_path', 'ori_shape', 'img_shape', 'scale_factor')) ]- 1
- 2
- 3
- 4
- 5
- 6
- 7
- 8
- 9
- 10
- 11
我们选择该data/cat/images/IMG_20221020_112705.jpg图像作为示例来可视化 YOLOv5 主干层和颈部层的输出特征图
1.可视化YOLOv5主干的三个通道
python demo/featmap_vis_demo.py data/cat/images/IMG_20221020_112705.jpg \ configs/yolov5/yolov5_s-v61_fast_1xb12-40e_cat.py \ work_dirs/yolov5_s-v61_fast_1xb12-40e_cat/epoch_40.pth \ --target-layers backbone \ --channel-reduction squeeze_mean- 1
- 2
- 3
- 4
- 5

结果将保存到当前路径的输出文件夹中。上图中绘制的三个输出特征图分别对应小、中、大输出特征图。由于本次训练的backbone实际上并没有参与训练,所以从上图可以看出,大物体猫是在小特征图上进行预测的,这符合物体检测的分层检测的思想。2.可视化YOLOv5颈部的三个通道
python demo/featmap_vis_demo.py data/cat/images/IMG_20221020_112705.jpg \ configs/yolov5/yolov5_s-v61_fast_1xb12-40e_cat.py \ work_dirs/yolov5_s-v61_fast_1xb12-40e_cat/epoch_40.pth \ --target-layers neck \ --channel-reduction squeeze_mean- 1
- 2
- 3
- 4
- 5

从上图可以看出,由于neck参与训练,而且我们也重置了anchor,导致三个输出特征图被迫模拟相同尺度的物体,导致neck的三个输出特征图相似,这就破坏了neck的三个输出特征图。原始骨干预训练分布。同时也可以看出,40个epoch不足以训练上述数据集,并且特征图表现不佳。3. 基于梯度的 CAM 可视化
基于上述特征图可视化,我们可以在bbox级别的特征层分析Grad CAM
安装grad-cam包:pip install "grad-cam"- 1
(a) 查看颈部最小输出特征图的Grad CAM
python demo/boxam_vis_demo.py data/cat/images/IMG_20221020_112705.jpg \ configs/yolov5/yolov5_s-v61_fast_1xb12-40e_cat.py \ work_dirs/yolov5_s-v61_fast_1xb12-40e_cat/epoch_40.pth \ --target-layer neck.out_layers[2]- 1
- 2
- 3
- 4

(b) 查看颈部中等输出特征图的Grad CAMpython demo/boxam_vis_demo.py data/cat/images/IMG_20221020_112705.jpg \ configs/yolov5/yolov5_s-v61_fast_1xb12-40e_cat.py \ work_dirs/yolov5_s-v61_fast_1xb12-40e_cat/epoch_40.pth \ --target-layer neck.out_layers[1]- 1
- 2
- 3
- 4

© 查看颈部最大输出特征图的Grad CAMpython demo/boxam_vis_demo.py data/cat/images/IMG_20221020_112705.jpg \ configs/yolov5/yolov5_s-v61_fast_1xb12-40e_cat.py \ work_dirs/yolov5_s-v61_fast_1xb12-40e_cat/epoch_40.pth \ --target-layer neck.out_layers[0]- 1
- 2
- 3
- 4

5、EasyDeploy部署
这里我们将使用MMYOLO的EasyDeploy来演示模型的转换部署和基本推理。
首先你需要按照EasyDeploy的基本文档控制每个库自己安装的设备。pip install onnx pip install onnx-simplifier # Install if you want to use simplify pip install tensorrt # If you have GPU environment and need to output TensorRT model you need to continue execution- 1
- 2
- 3
安装完成后,您可以使用以下命令将训练好的模型一键转换并部署到cat数据集上。当前ONNX版本为1.13.0,TensorRT版本为8.5.3.1,因此保留值–opset11。其余参数需要根据使用的配置进行调整。这里我们导出 ONNX 的 CPU 版本,设置–backend为 1。
python projects/easydeploy/tools/export.py \ configs/yolov5/yolov5_s-v61_fast_1xb12-40e_cat.py \ work_dirs/yolov5_s-v61_fast_1xb12-40e_cat/epoch_40.pth \ --work-dir work_dirs/yolov5_s-v61_fast_1xb12-40e_cat \ --img-size 640 640 \ --batch 1 \ --device cpu \ --simplify \ --opset 11 \ --backend 1 \ --pre-topk 1000 \ --keep-topk 100 \ --iou-threshold 0.65 \ --score-threshold 0.25- 1
- 2
- 3
- 4
- 5
- 6
- 7
- 8
- 9
- 10
- 11
- 12
- 13
- 14
成功后,您将在 下获得转换后的 ONNX 模型work-dir,该模型end2end.onnx默认命名。
让我们使用end2end.onnxmodel 来执行基本的图像推理:python projects/easydeploy/tools/image-demo.py \ data/cat/images/IMG_20210728_205312.jpg \ configs/yolov5/yolov5_s-v61_fast_1xb12-40e_cat.py \ work_dirs/yolov5_s-v61_fast_1xb12-40e_cat/end2end.onnx \ --device cpu- 1
- 2
- 3
- 4
- 5
output推理成功后,会在默认MMYOLO根目录的文件夹中生成结果图像。如果想查看结果而不保存,可以–show在上述命令末尾添加。为了方便起见,以下是生成的结果。
我们继续转换TensorRT的引擎文件,因为TensorRT需要针对当前环境和部署版本,所以一定要导出参数,这里我们导出TensorRT8文件,为2 --backend。python projects/easydeploy/tools/export.py \ configs/yolov5/yolov5_s-v61_fast_1xb12-40e_cat.py \ work_dirs/yolov5_s-v61_fast_1xb12-40e_cat/epoch_40.pth \ --work-dir work_dirs/yolov5_s-v61_fast_1xb12-40e_cat \ --img-size 640 640 \ --batch 1 \ --device cuda:0 \ --simplify \ --opset 11 \ --backend 2 \ --pre-topk 1000 \ --keep-topk 100 \ --iou-threshold 0.65 \ --score-threshold 0.25- 1
- 2
- 3
- 4
- 5
- 6
- 7
- 8
- 9
- 10
- 11
- 12
- 13
- 14
生成的结果end2end.onnx是 TensorRT8 部署的 ONNX 文件,我们将使用它来完成 TensorRT 引擎转换。
python projects/easydeploy/tools/build_engine.py \ work_dirs/yolov5_s-v61_fast_1xb12-40e_cat/end2end.onnx \ --img-size 640 640 \ --device cuda:0- 1
- 2
- 3
- 4
执行成功会生成end2end.engine以下文件work-dir:
work_dirs/yolov5_s-v61_fast_1xb12-40e_cat ├── 202302XX_XXXXXX │ ├── 202302XX_XXXXXX.log │ └── vis_data │ ├── 202302XX_XXXXXX.json │ ├── config.py │ └── scalars.json ├── best_coco │ └── bbox_mAP_epoch_40.pth ├── end2end.engine ├── end2end.onnx ├── epoch_30.pth ├── epoch_40.pth ├── last_checkpoint └── yolov5_s-v61_fast_1xb12-40e_cat.py- 1
- 2
- 3
- 4
- 5
- 6
- 7
- 8
- 9
- 10
- 11
- 12
- 13
- 14
- 15
让我们继续用于image-demo.py图像推理:
python projects/easydeploy/tools/image-demo.py \ data/cat/images/IMG_20210728_205312.jpg \ configs/yolov5/yolov5_s-v61_fast_1xb12-40e_cat.py \ work_dirs/yolov5_s-v61_fast_1xb12-40e_cat/end2end.engine \ --device cuda:0- 1
- 2
- 3
- 4
- 5
这里我们选择将推理结果保存在下面,output而不是直接显示它们。推理结果如下所示。

3、 15 分钟开始使用 MMYOLO 实例分割
实例分割是计算机视觉中的一项任务,旨在分割图像中的每个对象并为每个对象分配唯一的标识符。
与语义分割不同,实例分割不仅分割出图像中的不同类别,而且还分离出同一类别的不同实例。

1、数据集

您可以通过以下命令直接下载并使用:python tools/misc/download_dataset.py --dataset-name balloon --save-dir ./data/balloon --unzip --delete python ./tools/dataset_converters/balloon2coco.py- 1
- 2
MMYOLO 项目的数据位于 MMYOLO 项目目录中。和文件以 COCO 格式存储注释,而和目录train.json包含数据集的所有图像。val.jsondata/balloon/traindata/balloon/val
2、配置
以YOLOv5算法为例,考虑到用户的GPU内存有限,我们需要修改一些默认的训练参数以使其顺利运行。需要修改的关键参数如下:
YOLOv5是一种Anchor-Based算法,不同的数据集需要自适应计算合适的anchor。默认配置使用 8 个 GPU,每个 GPU 的批量大小为 16 个。现在将其更改为单 GPU,批量大小为 12。 原则上,当批量大小改变时,学习率应该相应地线性缩放,但实际测量发现这是没有必要的。- 1
- 2
- 3
要执行特定操作,请yolov5_ins_s-v61_syncbn_fast_8xb16-300e_balloon_instance.py在该configs/yolov5/ins_seg文件夹中创建一个名为的新配置文件。为了方便起见,我们已经提供了这个配置文件。将以下内容复制到配置文件中。
_base_ = './yolov5_ins_s-v61_syncbn_fast_8xb16-300e_coco_instance.py' # noqa data_root = 'data/balloon/' # dataset root # Training set annotation file of json path train_ann_file = 'train.json' train_data_prefix = 'train/' # Dataset prefix # Validation set annotation file of json path val_ann_file = 'val.json' val_data_prefix = 'val/' metainfo = { 'classes': ('balloon', ), # dataset category name 'palette': [ (220, 20, 60), ] } num_classes = 1 # Set batch size to 4 train_batch_size_per_gpu = 4 # dataloader num workers train_num_workers = 2 log_interval = 1 ##################### train_dataloader = dict( batch_size=train_batch_size_per_gpu, num_workers=train_num_workers, dataset=dict( data_root=data_root, metainfo=metainfo, data_prefix=dict(img=train_data_prefix), ann_file=train_ann_file)) val_dataloader = dict( dataset=dict( data_root=data_root, metainfo=metainfo, data_prefix=dict(img=val_data_prefix), ann_file=val_ann_file)) test_dataloader = val_dataloader val_evaluator = dict(ann_file=data_root + val_ann_file) test_evaluator = val_evaluator default_hooks = dict(logger=dict(interval=log_interval)) ##################### model = dict(bbox_head=dict(head_module=dict(num_classes=num_classes)))- 1
- 2
- 3
- 4
- 5
- 6
- 7
- 8
- 9
- 10
- 11
- 12
- 13
- 14
- 15
- 16
- 17
- 18
- 19
- 20
- 21
- 22
- 23
- 24
- 25
- 26
- 27
- 28
- 29
- 30
- 31
- 32
- 33
- 34
- 35
- 36
- 37
- 38
- 39
- 40
- 41
- 42
- 43
上述配置根据气球数据集的特点,继承yolov5_ins_s-v61_syncbn_fast_8xb16-300e_coco_instance.py并更新了data_root、metainfo、train_dataloader、val_dataloader、num_classes等配置。
3、Training
python tools/train.py configs/yolov5/ins_seg/yolov5_ins_s-v61_syncbn_fast_8xb16-300e_balloon_instance.py- 1
运行上述训练命令后,work_dirs/yolov5_ins_s-v61_syncbn_fast_8xb16-300e_balloon_instance会自动生成该文件夹。本次训练的权重文件和训练配置文件将保存在该文件夹中。在 GTX 1660 这样的低端 GPU 上,整个训练过程大约需要 30 分钟。
4、测试
python tools/test.py configs/yolov5/ins_seg/yolov5_ins_s-v61_syncbn_fast_8xb16-300e_balloon_instance.py \ work_dirs/yolov5_ins_s-v61_syncbn_fast_8xb16-300e_balloon_instance/best_coco_bbox_mAP_epoch_300.pth \ --show-dir show_results- 1
- 2
- 3
4、训练技巧
训练技巧
###1 提高检测性能
1. 多尺度训练
在目标检测领域,多尺度训练是一个非常常见的技巧。然而,在YOLO中,大多数模型都是使用640x640的单尺度输入进行训练的。有两个原因:
单尺度训练比多尺度训练更快。当训练epoch为300或500时,训练效率是用户主要关心的问题。多尺度训练会更慢。 训练管道中隐含了多尺度增强,相当于多尺度训练的应用,如‘Mosaic’、‘RandomAffine’和‘Resize’,因此不需要引入多尺度训练再次输入模型。- 1
- 2
- 3
通过在COCO数据集上的实验发现,YOLOv5的DataLoader输出后直接引入多尺度训练,实际性能提升很小。如果你想在 MMYOLO 中开始对 YOLO 系列算法进行多尺度训练,可以参考ms_training_testing,不过,这并不意味着用户自定义数据集微调模式没有明显的收益。
MMYOLO 目前支持流行的 YOLOv5、YOLOv6、YOLOv7、YOLOv8 和 RTMDet 算法,默认配置为单尺度 640x640 训练。MM系列开源库中常用的多尺度训练的实现有两种
中的每个图像输出train_pipeline都是可变比例的,并通过DataPreprocessor中的stack_batch函数将不同比例的输入图像填充到相同的比例。MMDet 中的大多数算法都是使用这种方法实现的。
中的每个图像输出train_pipeline都是固定尺度的,并且DataPreprocessor对图像批次进行上采样和下采样,直接进行多尺度训练。
MMYOLO 支持两种多尺度训练方法。理论上,第一种实现可以生成更丰富的尺度,但由于其对单个图像的独立增强,其训练效率不如第二种。因此,我们建议使用第二种方法。
以configs/yolov5/yolov5_s-v61_fast_1xb12-40e_cat.py配置为例,其默认配置是640x640固定尺度训练,假设你想实现32的倍数、多尺度范围(480、800)的训练,可以参考YOLOX的实践,通过DataPreprocessor中的YOLOXBatchSyncRandomResize实现。
在使用以下内容configs/yolov5命名的路径下创建新配置。configs/yolov5/yolov5_s-v61_fast_1xb12-ms-40e_cat.py
_base_ = 'yolov5_s-v61_fast_1xb12-40e_cat.py' model = dict( data_preprocessor=dict( type='YOLOv5DetDataPreprocessor', pad_size_divisor=32, batch_augments=[ dict( type='YOLOXBatchSyncRandomResize', # multi-scale range (480, 800) random_size_range=(480, 800), # The output scale needs to be divisible by 32 size_divisor=32, interval=1) ]) )- 1
- 2
- 3
- 4
- 5
- 6
- 7
- 8
- 9
- 10
- 11
- 12
- 13
- 14
- 15
- 16
上述配置将实现多尺度训练。为了方便起见,我们已经在下面提供了此配置configs/yolov5/。YOLO 系列算法的其余部分类似。
2 使用Mask标注优化物体检测性能
当数据集标注完整时,例如边界框标注和实例分割标注同时存在,但任务只需要部分标注,则可以使用完整的数据标注来训练任务,以提高性能。在对象检测中,我们还可以从实例分割注释中学习来提高对象检测的性能。以下是YOLOv8引入的附加实例分割标注优化的检测结果。性能提升如下所示:

如图所示,不同尺度的模型有不同程度的性能提升。需要注意的是,“Mask Refine”仅在数据增强阶段起作用,不需要对模型的其他训练部分进行任何更改,也不会影响训练速度。详情如下所示:

上述Mask代表了一种数据增强转换,其中实例分割注释起着关键作用。该技术在其他YOLO系列中的应用都有不同程度的增加。3 训练后期关闭强增强以提高检测性能
该策略在YOLOX算法中首次提出,可以极大地提高检测性能。论文指出,Mosaic+MixUp 可以大幅提升目标检测性能,但训练图片与自然图片的真实分布相去甚远,而且 Mosaic 大量的裁剪操作会带来很多不准确的标签框,因此,YOLOX 提出将去掉最后15个epoch的强增强,改用较弱的增强,这样检测器就可以避免不准确标记框的影响,在自然图片的数据分布下完成最终的收敛。
该策略已应用于大多数YOLO算法。以YOLOv8为例,其数据增强管道如下所示:

然而,何时关闭强增强是一个超参数。如果过早关闭强增强,可能无法充分发挥马赛克等强增强效果。如果太晚关闭强增强,它就没有增益,因为之前已经过拟合了。在YOLOv8实验中可以观察到这种现象

从上表可以看出:在 COCO 数据集上训练 500 个 epoch 的大型模型很容易出现过度拟合,在这种情况下,禁用 Mosaic 等强增强功能可能无法有效减少过度拟合。
使用Mask注释可以缓解过度拟合并提高性能4 添加纯背景图片抑制FP
对于目标检测中的非开放世界数据集,训练和测试都是在一组固定的类上进行的,当应用于未经训练的类的图像时,有可能产生误报。常见的缓解策略是添加一定比例的纯背景图片。在大多数YOLO系列中,默认启用通过添加纯背景图像来抑制误报的功能。用户只需将train_dataloader.dataset.filter_cfg.filter_empty_gt设置为False,表示训练时不应该过滤掉纯背景图像。
5 也许 AdamW 能创造奇迹
YOLOv5、YOLOv6、YOLOv7、YOLOv8均采用SGD优化器,对参数设置比较严格,而AdamW则相反,对学习率不太敏感。如果用户微调自定义数据集可以尝试选择 AdamW 优化器。我们在YOLOX中做了简单的试验,发现在tiny、s、m尺度模型上用AdamW替换优化器都有一定的改进。

6 考虑忽略场景以避免不确定的注释
以 CrowdHuman 为例,这是一个拥挤的行人检测数据集。这是一个典型的图像:

该区域不是真人,例如海报上的人
该区域太拥挤,无法标记
在这种情况下,您不能简单地删除此类注释,因为一旦删除它们,就意味着在训练期间将它们视为背景区域。然而,它们与背景不同。首先,海报上的人与真人非常相似,而且人群密集的地方确实存在难以标注的人。如果只是将它们作为背景进行训练,会导致漏报。最好的方法是将拥挤区域视为忽略区域,该区域中的任何输出都被直接忽略,不计算损失,也不强制执行模型拟合。


7 使用知识蒸馏
知识蒸馏是一种广泛使用的技术,可以将大模型的性能转移到较小的模型上,从而提高较小模型的检测性能。目前MMYOLO和MMRazor已经支持该功能,并在RTMDet上进行了初步验证。

8 更强的增强参数用于更大的模型
如果您在默认配置的基础上修改了模型或更换了主干网络,建议根据当前模型大小缩放数据增强参数。一般来说,较大的模型需要更强的增强参数,否则它们可能无法充分利用大型模型的优势。相反,如果对小模型应用强增强,则可能会导致欠拟合。以 RTMDet 为例,我们可以观察不同模型大小的数据增强参数。

random_resize_ratio_range表示 的随机缩放范围RandomResize,mosaic_max_cached_images/mixup_max_cached_images表示增强时缓存的图像数量Mosaic/MixUp,可用于调整增强的强度。YOLO系列模型都遵循同一套参数设置原则。加快训练速度
1 启用 cudnn_benchmark 进行单尺度训练
YOLO系列算法中大部分输入图像尺寸都是固定的,属于单尺度训练。这种情况下,可以开启cudnn_benchmark来加快训练速度。该参数主要是为PyTorch的cuDNN底层库设置的,设置该标志可以让内置的cuDNN自动寻找最适合当前配置的最高效的算法,以优化运行效率。如果在多尺度模式下打开该标志,它将不断搜索最优算法,这可能反而会减慢训练速度。
要在 MMYOLO 中启用cudnn_benchmark,您可以在配置中进行设置。env_cfg = dict(cudnn_benchmark=True)
2 使用 Mosaic 和 MixUp 进行缓存
如果您在数据增强中应用了 Mosaic 和 MixUp,并且在调查训练瓶颈后发现随机图像读取导致了问题,那么建议将常规 Mosaic 和 MixUp 替换为建议的启用缓存的版本在 RTMDet 中。

Mosaic和MixUp涉及混合多张图像,其耗时是普通数据增强的K倍(K是混合图像的数量)。例如YOLOv5中,每次做Mosaic时,都需要从硬盘重新加载4张图像的信息。而Mosaic和MixUp的缓存版本只需要重新加载当前图像,而混合增强涉及的剩余图像则从缓存队列中获取,通过牺牲一定的内存空间大大提高了效率。

如图所示,缓存队列中存储了N张预加载的图像和标签数据。在每个训练步骤中,只需要在缓存队列中加载和更新一张新图像及其标签数据。(缓存队列中的图片可以重复,如图img3出现两次。)如果缓存队列的长度超过预设长度,则会随机弹出一张图片。当需要进行混合数据增强时,只需从缓存中随机选择所需的图像进行串联或其他处理,而不需要从硬盘加载所有图像,从而节省图像加载时间。减少超参数的数量
YOLOv5提供了一些减少超参数数量的实用方法,如下所述。
5、测试技巧
1、TTA 提高测试准确性
使用 TTA(测试时间增强)进行数据增强是一种多功能技巧,可以提高目标检测模型的性能,在竞赛场景中特别有用。–ttaMMYOLO已经支持TTA,测试时只需添加即可启用。欲了解更多详情,请参阅TTA
2、推理速度和测试精度之间的平衡
在模型性能测试时,我们一般要求较高的mAP,但在实际应用或推理中,我们希望模型执行得更快,同时保持较低的误报率和漏报率。也就是说,测试时只关注mAP,而忽略后处理和评估速度,而在实际应用中,追求速度和精度之间的平衡。在YOLO系列中,可以通过控制某些参数来实现速度和精度之间的平衡。在此示例中,我们将使用 YOLOv5 详细描述这一点。
1 在推理过程中避免单个检测框的多个类输出
YOLOv5在分类分支的训练过程中使用BCE Loss(use_sigmoid=True)。假设有4个对象类别,则分类分支输出的类别数为4而不是5。而且,由于使用了sigmoid而不是softmax预测,因此可以在a上预测多个满足过滤阈值的检测框。某个位置,这意味着可能存在一个预测bbox对应多个预测标签的情况。如下图所示:

一般计算mAP时,过滤阈值设置为0.001。由于sigmoid的非竞争性预测模式,一个box可能对应多个标签。这种计算方法在计算mAP时可以提高召回率,但实际应用中可能不太方便。一种常见的方法是提高过滤阈值。不过,如果不想出现很多漏报,建议将该multi_label参数设置为False。它位于配置文件中mode.test_cfg.multi_label,默认值为True,允许一个检测框对应多个标签。
2 简化测试流程
test_pipeline = [ dict(type='LoadImageFromFile'), dict(type='YOLOv5KeepRatioResize', scale=img_scale), dict( type='LetterResize', scale=img_scale, allow_scale_up=False, pad_val=dict(img=114)), dict(type='LoadAnnotations', with_bbox=True, _scope_='mmdet'), dict( type='mmdet.PackDetInputs', meta_keys=('img_id', 'img_path', 'ori_shape', 'img_shape', 'scale_factor', 'pad_param')) ]- 1
- 2
- 3
- 4
- 5
- 6
- 7
- 8
- 9
- 10
- 11
- 12
- 13
- 14
它使用两种不同功能的Resize,目的是提高评估时的mAP值。在实际部署中,你可以简化这个管道,如下所示:
test_pipeline = [ dict(type='LoadImageFromFile'), dict( type='LetterResize', scale=_base_.img_scale, allow_scale_up=True, use_mini_pad=True), dict(type='LoadAnnotations', with_bbox=True), dict( type='mmdet.PackDetInputs', meta_keys=('img_id', 'img_path', 'ori_shape', 'img_shape', 'scale_factor', 'pad_param')) ]- 1
- 2
- 3
- 4
- 5
- 6
- 7
- 8
- 9
- 10
- 11
- 12
- 13
在实际应用中,YOLOv5算法使用简化的管道,multi_label设置为False,score_thr增加到0.25,iou_threshold减小到0.45。在YOLOv5配置中,我们提供了一组用于地面检测的配置参数,详细信息请参见yolov5_s-v61_syncbn-detect_8xb16-300e_coco.py。
3 Batch Shape加快测试速度
Batch Shape 是 YOLOv5 中提出的一种测试技术,可以加快推理速度。这个想法是不再要求测试过程中的所有图像都是 640x640,而是以可变比例进行测试,只要当前批次中的形状相同即可。这种方法可以减少额外的图像像素填充并加快推理过程。Batch Shape的具体实现可以参见链接。MMYOLO 中的几乎所有算法在测试期间都默认启用 Batch Shape 策略。如果用户想禁用该功能,可以设置val_dataloader.dataset.batch_shapes_cfg=None。
在实际应用中,由于动态形状不如固定形状快速高效。因此,该策略一般不会在现实场景中使用。
6、模型设计说明
1、YOLO系列模型基础类

图1:P5模型结构- 1

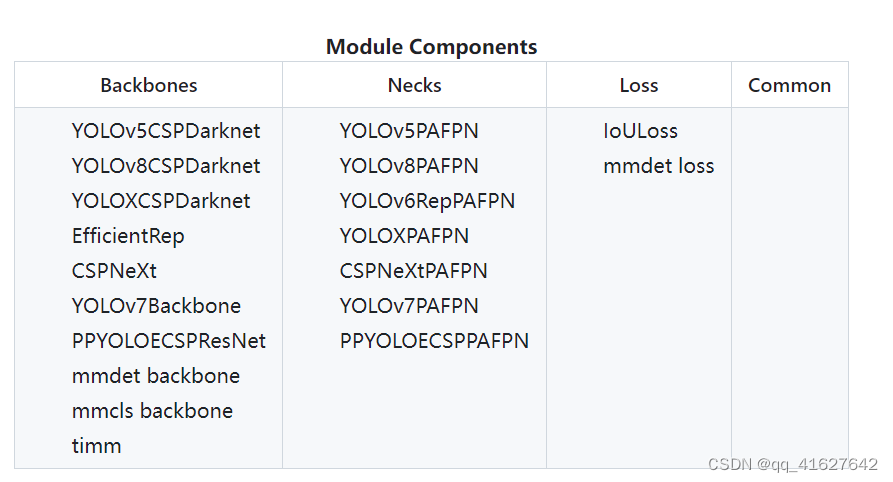
图2:P6模型结构YOLO系列算法大多采用统一的算法构建结构,典型为Darknet + PAFPN。为了让用户快速了解YOLO系列算法架构,我们特意设计了BaseBackbone+BaseYOLONeck结构,如上图所示。
he benefits of the abstract BaseBackbone include:
子类不需要关心前向过程。只需将模型构建为构建器模式即可。 可以配置实现自定义插件功能。用户可以轻松插入一些类似的注意力模块。 所有子类自动支持冻结某些阶段和 bn 函数。- 1
- 2
- 3
- 4
- 5
- 6
BaseYOLONeck具有与 相同的优点BaseBackbone。
1、基础骨干网
如图1所示,对于P5,BaseBackbone包括1个stem层和4个stage层,与ResNet的基本结构类似。
如图2所示,对于P6,BaseBackbone包括1个干层和5个阶段层。不同的骨干网络算法继承BaseBackbone. 用户可以通过内部方法实现定制的基础模块来构建整个网络的每一层build_xx。2、BaseYOLONeck
我们以类似的方式重现YOLO系列Neck组件BaseBackbone,我们主要可以将它们分为Reduce layer, UpSample layer, TopDown layer, DownSample layer, BottomUP layer和output convolution layer。
每一层都可以通过方法的继承和重写来定制其内部构造。3、BaseDenseHead
MMYOLO使用MMDetection中设计的BaseDenseHead作为Head结构的基类。以YOLOv5为例,其HeadModule的forward函数替代了原来的forward方法。

如上图所示,实线是MMYOLO中的实现,而MMDetection中的原始实现如虚线所示。MMYOLO 相对于原来的实现有以下优点:
在 MMDetection 中,bbox_head分为三个大组件:assigner + box coder + sampler 。但由于这三个组件之间的传递是通用的,所以需要封装额外的对象。通过 MMYOLO 的统一,用户无需将它们分开。不刻意强行划分三个组件的好处是:不再需要内部数据的数据封装,简化代码逻辑,降低社区使用和算法复现的难度MMYOLO 更快。用户在定制实现算法时,可以不依赖原有框架,对部分代码进行深度优化。
In general, with the partly decoupled model + loss_by_feat part in MMYOLO, users can construct any model with any loss_by_feat by modifying the configuration. For example, applying the loss_by_feat of YOLOX to the YOLOv5 model, etc.
总的来说,MMYOLO中采用部分解耦的模型+部分的方式,用户可以通过修改配置来loss_by_feat构建任意模型。loss_by_feat例如将loss_by_featYOLOX的应用到YOLOv5模型等。
以MMDetection中YOLOX配置为例,Head模块配置写法如下:
bbox_head=dict( type='YOLOXHead', num_classes=80, in_channels=128, feat_channels=128, stacked_convs=2, strides=(8, 16, 32), use_depthwise=False, norm_cfg=dict(type='BN', momentum=0.03, eps=0.001), act_cfg=dict(type='Swish'), ... loss_obj=dict( type='CrossEntropyLoss', use_sigmoid=True, reduction='sum', loss_weight=1.0), loss_l1=dict(type='L1Loss', reduction='sum', loss_weight=1.0)), train_cfg=dict(assigner=dict(type='SimOTAAssigner', center_radius=2.5)),- 1
- 2
- 3
- 4
- 5
- 6
- 7
- 8
- 9
- 10
- 11
- 12
- 13
- 14
- 15
- 16
- 17
- 18
对于MMYOLO中的head_module,新的配置写法如下:
bbox_head=dict( type='YOLOXHead', head_module=dict( type='YOLOXHeadModule', num_classes=80, in_channels=256, feat_channels=256, widen_factor=widen_factor, stacked_convs=2, featmap_strides=(8, 16, 32), use_depthwise=False, norm_cfg=dict(type='BN', momentum=0.03, eps=0.001), act_cfg=dict(type='SiLU', inplace=True), ), ... loss_obj=dict( type='mmdet.CrossEntropyLoss', use_sigmoid=True, reduction='sum', loss_weight=1.0), loss_bbox_aux=dict(type='mmdet.L1Loss', reduction='sum', loss_weight=1.0)), train_cfg=dict( assigner=dict( type='mmdet.SimOTAAssigner', center_radius=2.5, iou_calculator=dict(type='mmdet.BboxOverlaps2D'))),- 1
- 2
- 3
- 4
- 5
- 6
- 7
- 8
- 9
- 10
- 11
- 12
- 13
- 14
- 15
- 16
- 17
- 18
- 19
- 20
- 21
- 22
- 23
- 24
- 25
- 26
7、更换骨干网
当使用其他骨干网络时,需要保证骨干网络的输出通道与颈网络的输入通道匹配。
下面给出的配置文件仅确保训练正常进行,其训练性能可能不是最佳的。因为某些主干网络需要特定的学习率、优化器和其他超参数。相关内容稍后会在“训练技巧”部分补充。
使用MMYOLO中实现的骨干网络
假设要作为YOLOv6EfficientRep的骨干网络YOLOv5,示例配置如下
_base_ = './yolov5_s-v61_syncbn_8xb16-300e_coco.py' model = dict( backbone=dict( type='YOLOv6EfficientRep', norm_cfg=dict(type='BN', momentum=0.03, eps=0.001), act_cfg=dict(type='ReLU', inplace=True)) )- 1
- 2
- 3
- 4
- 5
- 6
- 7
- 8
使用在其他 OpenMMLab 存储库中实现的骨干网络
MMYOLO、MMDetection、MMClassification 和 MMSegmentation 中的模型注册表均继承自 OpenMMLab 2.0 系统中 MMEngine 中的根注册表,允许这些存储库直接使用彼此已实现的模块。因此,在MMYOLO中,用户可以使用MMDetection和MMClassification的骨干网络,而无需重新实现。
假设要作为ResNet-50的骨干网络YOLOv5,示例配置如下:
_base_ = './yolov5_s-v61_syncbn_8xb16-300e_coco.py' deepen_factor = _base_.deepen_factor widen_factor = 1.0 channels = [512, 1024, 2048] model = dict( backbone=dict( _delete_=True, # Delete the backbone field in _base_ type='mmdet.ResNet', # Using ResNet from mmdet depth=50, num_stages=4, out_indices=(1, 2, 3), frozen_stages=1, norm_cfg=dict(type='BN', requires_grad=True), norm_eval=True, style='pytorch', init_cfg=dict(type='Pretrained', checkpoint='torchvision://resnet50')), neck=dict( type='YOLOv5PAFPN', widen_factor=widen_factor, in_channels=channels, # Note: The 3 channels of ResNet-50 output are [512, 1024, 2048], which do not match the original yolov5-s neck and need to be changed. out_channels=channels), bbox_head=dict( type='YOLOv5Head', head_module=dict( type='YOLOv5HeadModule', in_channels=channels, # input channels of head need to be changed accordingly widen_factor=widen_factor)) )- 1
- 2
- 3
- 4
- 5
- 6
- 7
- 8
- 9
- 10
- 11
- 12
- 13
- 14
- 15
- 16
- 17
- 18
- 19
- 20
- 21
- 22
- 23
- 24
- 25
- 26
- 27
- 28
- 29
- 30
假设要作为SwinTransformer-Tiny的骨干网络YOLOv5,示例配置如下:
_base_ = './yolov5_s-v61_syncbn_8xb16-300e_coco.py' deepen_factor = _base_.deepen_factor widen_factor = 1.0 channels = [192, 384, 768] checkpoint_file = 'https://github.com/SwinTransformer/storage/releases/download/v1.0.0/swin_tiny_patch4_window7_224.pth' # noqa model = dict( backbone=dict( _delete_=True, # Delete the backbone field in _base_ type='mmdet.SwinTransformer', # Using SwinTransformer from mmdet embed_dims=96, depths=[2, 2, 6, 2], num_heads=[3, 6, 12, 24], window_size=7, mlp_ratio=4, qkv_bias=True, qk_scale=None, drop_rate=0., attn_drop_rate=0., drop_path_rate=0.2, patch_norm=True, out_indices=(1, 2, 3), with_cp=False, convert_weights=True, init_cfg=dict(type='Pretrained', checkpoint=checkpoint_file)), neck=dict( type='YOLOv5PAFPN', deepen_factor=deepen_factor, widen_factor=widen_factor, in_channels=channels, # Note: The 3 channels of SwinTransformer-Tiny output are [192, 384, 768], which do not match the original yolov5-s neck and need to be changed. out_channels=channels), bbox_head=dict( type='YOLOv5Head', head_module=dict( type='YOLOv5HeadModule', in_channels=channels, # input channels of head need to be changed accordingly widen_factor=widen_factor)) )- 1
- 2
- 3
- 4
- 5
- 6
- 7
- 8
- 9
- 10
- 11
- 12
- 13
- 14
- 15
- 16
- 17
- 18
- 19
- 20
- 21
- 22
- 23
- 24
- 25
- 26
- 27
- 28
- 29
- 30
- 31
- 32
- 33
- 34
- 35
- 36
- 37
- 38
- 39
使用 MMClassification 中实现的骨干网络
假设要作为ConvNeXt-Tiny的骨干网络YOLOv5,示例配置如下
_base_ = './yolov5_s-v61_syncbn_8xb16-300e_coco.py' # please run the command, mim install "mmcls>=1.0.0rc2", to install mmcls # import mmcls.models to trigger register_module in mmcls custom_imports = dict(imports=['mmcls.models'], allow_failed_imports=False) checkpoint_file = 'https://download.openmmlab.com/mmclassification/v0/convnext/downstream/convnext-tiny_3rdparty_32xb128-noema_in1k_20220301-795e9634.pth' # noqa deepen_factor = _base_.deepen_factor widen_factor = 1.0 channels = [192, 384, 768] model = dict( backbone=dict( _delete_=True, # Delete the backbone field in _base_ type='mmcls.ConvNeXt', # Using ConvNeXt from mmcls arch='tiny', out_indices=(1, 2, 3), drop_path_rate=0.4, layer_scale_init_value=1.0, gap_before_final_norm=False, init_cfg=dict( type='Pretrained', checkpoint=checkpoint_file, prefix='backbone.')), # The pre-trained weights of backbone network in MMCls have prefix='backbone.'. The prefix in the keys will be removed so that these weights can be normally loaded. neck=dict( type='YOLOv5PAFPN', deepen_factor=deepen_factor, widen_factor=widen_factor, in_channels=channels, # Note: The 3 channels of ConvNeXt-Tiny output are [192, 384, 768], which do not match the original yolov5-s neck and need to be changed. out_channels=channels), bbox_head=dict( type='YOLOv5Head', head_module=dict( type='YOLOv5HeadModule', in_channels=channels, # input channels of head need to be changed accordingly widen_factor=widen_factor)) )- 1
- 2
- 3
- 4
- 5
- 6
- 7
- 8
- 9
- 10
- 11
- 12
- 13
- 14
- 15
- 16
- 17
- 18
- 19
- 20
- 21
- 22
- 23
- 24
- 25
- 26
- 27
- 28
- 29
- 30
- 31
- 32
- 33
- 34
- 35
假设要作为MobileNetV3-small的骨干网络YOLOv5,示例配置如下:
_base_ = './yolov5_s-v61_syncbn_8xb16-300e_coco.py' # please run the command, mim install "mmcls>=1.0.0rc2", to install mmcls # import mmcls.models to trigger register_module in mmcls custom_imports = dict(imports=['mmcls.models'], allow_failed_imports=False) checkpoint_file = 'https://download.openmmlab.com/mmclassification/v0/mobilenet_v3/convert/mobilenet_v3_small-8427ecf0.pth' # noqa deepen_factor = _base_.deepen_factor widen_factor = 1.0 channels = [24, 48, 96] model = dict( backbone=dict( _delete_=True, # Delete the backbone field in _base_ type='mmcls.MobileNetV3', # Using MobileNetV3 from mmcls arch='small', out_indices=(3, 8, 11), # Modify out_indices init_cfg=dict( type='Pretrained', checkpoint=checkpoint_file, prefix='backbone.')), # The pre-trained weights of backbone network in MMCls have prefix='backbone.'. The prefix in the keys will be removed so that these weights can be normally loaded. neck=dict( type='YOLOv5PAFPN', deepen_factor=deepen_factor, widen_factor=widen_factor, in_channels=channels, # Note: The 3 channels of MobileNetV3 output are [24, 48, 96], which do not match the original yolov5-s neck and need to be changed. out_channels=channels), bbox_head=dict( type='YOLOv5Head', head_module=dict( type='YOLOv5HeadModule', in_channels=channels, # input channels of head need to be changed accordingly widen_factor=widen_factor)) )- 1
- 2
- 3
- 4
- 5
- 6
- 7
- 8
- 9
- 10
- 11
- 12
- 13
- 14
- 15
- 16
- 17
- 18
- 19
- 20
- 21
- 22
- 23
- 24
- 25
- 26
- 27
- 28
- 29
- 30
- 31
- 32
- 33
timm通过 MMClassification使用骨干网络
MMClassification还为Py Torch Image Models ( )骨干网络提供了包装器,用户可以通过MMClassificationtimm直接使用骨干网络timm。假设要作为EfficientNet-B1的骨干网络YOLOv5,示例配置如下:
_base_ = './yolov5_s-v61_syncbn_8xb16-300e_coco.py' # please run the command, mim install "mmcls>=1.0.0rc2", to install mmcls # and the command, pip install timm, to install timm # import mmcls.models to trigger register_module in mmcls custom_imports = dict(imports=['mmcls.models'], allow_failed_imports=False) deepen_factor = _base_.deepen_factor widen_factor = 1.0 channels = [40, 112, 320] model = dict( backbone=dict( _delete_=True, # Delete the backbone field in _base_ type='mmcls.TIMMBackbone', # Using timm from mmcls model_name='efficientnet_b1', # Using efficientnet_b1 in timm features_only=True, pretrained=True, out_indices=(2, 3, 4)), neck=dict( type='YOLOv5PAFPN', deepen_factor=deepen_factor, widen_factor=widen_factor, in_channels=channels, # Note: The 3 channels of EfficientNet-B1 output are [40, 112, 320], which do not match the original yolov5-s neck and need to be changed. out_channels=channels), bbox_head=dict( type='YOLOv5Head', head_module=dict( type='YOLOv5HeadModule', in_channels=channels, # input channels of head need to be changed accordingly widen_factor=widen_factor)) )- 1
- 2
- 3
- 4
- 5
- 6
- 7
- 8
- 9
- 10
- 11
- 12
- 13
- 14
- 15
- 16
- 17
- 18
- 19
- 20
- 21
- 22
- 23
- 24
- 25
- 26
- 27
- 28
- 29
- 30
- 31
- 32
使用MMSelfSup中实现的骨干网络
假设你想使用MMSelfSup中ResNet-50自监督训练的网络作为 的骨干网络,示例配置如下:MoCo v3YOLOv5
_base_ = './yolov5_s-v61_syncbn_8xb16-300e_coco.py' # please run the command, mim install "mmselfsup>=1.0.0rc3", to install mmselfsup # import mmselfsup.models to trigger register_module in mmselfsup custom_imports = dict(imports=['mmselfsup.models'], allow_failed_imports=False) checkpoint_file = 'https://download.openmmlab.com/mmselfsup/1.x/mocov3/mocov3_resnet50_8xb512-amp-coslr-800e_in1k/mocov3_resnet50_8xb512-amp-coslr-800e_in1k_20220927-e043f51a.pth' # noqa deepen_factor = _base_.deepen_factor widen_factor = 1.0 channels = [512, 1024, 2048] model = dict( backbone=dict( _delete_=True, # Delete the backbone field in _base_ type='mmselfsup.ResNet', depth=50, num_stages=4, out_indices=(2, 3, 4), # Note: out_indices of ResNet in MMSelfSup are 1 larger than those in MMdet and MMCls frozen_stages=1, norm_cfg=dict(type='BN', requires_grad=True), norm_eval=True, style='pytorch', init_cfg=dict(type='Pretrained', checkpoint=checkpoint_file)), neck=dict( type='YOLOv5PAFPN', deepen_factor=deepen_factor, widen_factor=widen_factor, in_channels=channels, # Note: The 3 channels of ResNet-50 output are [512, 1024, 2048], which do not match the original yolov5-s neck and need to be changed. out_channels=channels), bbox_head=dict( type='YOLOv5Head', head_module=dict( type='YOLOv5HeadModule', in_channels=channels, # input channels of head need to be changed accordingly widen_factor=widen_factor)) )- 1
- 2
- 3
- 4
- 5
- 6
- 7
- 8
- 9
- 10
- 11
- 12
- 13
- 14
- 15
- 16
- 17
- 18
- 19
- 20
- 21
- 22
- 23
- 24
- 25
- 26
- 27
- 28
- 29
- 30
- 31
- 32
- 33
- 34
- 35
不要使用预训练权重
当我们更换主干网络时,默认加载主干网络的预训练权重来训练模型初始化。如果您想从头开始训练时间模型,而不是使用主干网络的预训练权重,您可以将init_cfg“backbone”设置为“None”。在这种情况下,主干网络将使用默认的初始化方法进行初始化,而不是使用训练好的预训练权重。
_base_ = './yolov5_s-v61_syncbn_8xb16-300e_coco.py' deepen_factor = _base_.deepen_factor widen_factor = 1.0 channels = [512, 1024, 2048] model = dict( backbone=dict( _delete_=True, # Delete the backbone field in _base_ type='mmdet.ResNet', # Using ResNet from mmdet depth=50, num_stages=4, out_indices=(1, 2, 3), frozen_stages=1, norm_cfg=dict(type='BN', requires_grad=True), norm_eval=True, style='pytorch', init_cfg=None # If init_cfg is set to None, backbone will not be initialized with pre-trained weights ), neck=dict( type='YOLOv5PAFPN', widen_factor=widen_factor, in_channels=channels, # Note: The 3 channels of ResNet-50 output are [512, 1024, 2048], which do not match the original yolov5-s neck and need to be changed. out_channels=channels), bbox_head=dict( type='YOLOv5Head', head_module=dict( type='YOLOv5HeadModule', in_channels=channels, # input channels of head need to be changed accordingly widen_factor=widen_factor)) )- 1
- 2
- 3
- 4
- 5
- 6
- 7
- 8
- 9
- 10
- 11
- 12
- 13
- 14
- 15
- 16
- 17
- 18
- 19
- 20
- 21
- 22
- 23
- 24
- 25
- 26
- 27
- 28
- 29
- 30
- 31
8、插件
MMYOLO 支持在 Backbone 的不同阶段添加 none_local and dropblock等插件。用户可以通过修改config中backbone的plugins参数来直接管理插件。例如,GeneralizedAttention为YOLOv5. 配置文件如下:
_base_ = './yolov5_s-v61_syncbn_8xb16-300e_coco.py' model = dict( backbone=dict( plugins=[ dict( cfg=dict( type='GeneralizedAttention', spatial_range=-1, num_heads=8, attention_type='0011', kv_stride=2), stages=(False, False, True, True)) ]))- 1
- 2
- 3
- 4
- 5
- 6
- 7
- 8
- 9
- 10
- 11
- 12
- 13
- 14
cfg参数表示插件的具体配置。该stages参数表示是否在主干相应阶段之后添加插件。列表的长度stages必须与主干阶段的数量相同。
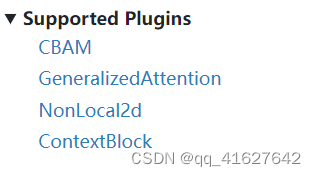
CBAM
GeneralizedAttention
NonLocal2d
ContextBlock9、冻结图层
1、Freeze the weight of backbone
在MMYOLO中,我们可以通过设置frozen_stages参数来冻结一些主干网络stages,使这些stage参数不参与模型更新。需要注意的是,frozen_stages = i,这意味着从initial到thi的所有参数都将被冻结。下面是一个例子。其他算法也是同样的逻辑。
_base_ = './yolov5_s-v61_syncbn_8xb16-300e_coco.py' model = dict( backbone=dict( frozen_stages=1 # Indicates that the parameters in the first stage and all stages before it are frozen ))- 1
- 2
- 3
- 4
- 5
- 6
2、Freeze the weight of neck
另外,还可以通过freeze_all参数来冻结在MMYOLO的整体neck。下面是一个例子YOLOv5。其他算法也是同样的逻辑。
_base_ = './yolov5_s-v61_syncbn_8xb16-300e_coco.py' model = dict( neck=dict( freeze_all=True # If freeze_all=True, all parameters of the neck will be frozen ))- 1
- 2
- 3
- 4
- 5
- 6
10、设置随机种子
如果你想在训练过程中设置随机种子,可以使用以下命令
python ./tools/train.py \ ${CONFIG} \ # path of the config file --cfg-options randomness.seed=2023 \ # set seed to 2023 [randomness.diff_rank_seed=True] \ # set different seeds according to global rank [randomness.deterministic=True] # set the deterministic option for CUDNN backend # [] stands for optional parameters, when actually entering the command line, you do not need to enter []- 1
- 2
- 3
- 4
- 5
- 6
randomness可设置三个参数,含义如下。
randomness.seed=2023,将随机种子设置为 2023。 randomness.diff_rank_seed=True,根据global rank设置不同的种子。默认为 False。 randomness.deterministic=True,set the deterministic option for cuDNN backend,即设置torch.backends.cudnn.deterministic为 True 和torch.backends.cudnn.benchmarkFalse。默认为 False。有关更多详细信息,请参阅 https://pytorch.org/docs/stable/notes/randomness.html。- 1
- 2
- 3
- 4
- 5
11、应用multiple necks
如果要堆叠multiple Necks,可以直接在config中设置Neck参数。MMYOLO 支持以List形式组合multiple Necks。您需要确保前一个 Neck 的输出通道与下一个 Neck 的输入通道匹配。如果需要调整通道数,可以插入模块mmdet.ChannelMapper来对齐多个Neck之间的通道数。具体配置如下:
_base_ = './yolov5_s-v61_syncbn_8xb16-300e_coco.py' deepen_factor = _base_.deepen_factor widen_factor = _base_.widen_factor model = dict( type='YOLODetector', neck=[ dict( type='YOLOv5PAFPN', deepen_factor=deepen_factor, widen_factor=widen_factor, in_channels=[256, 512, 1024], out_channels=[256, 512, 1024], # The out_channels is controlled by widen_factor,so the YOLOv5PAFPN's out_channels equls to out_channels * widen_factor num_csp_blocks=3, norm_cfg=dict(type='BN', momentum=0.03, eps=0.001), act_cfg=dict(type='SiLU', inplace=True)), dict( type='mmdet.ChannelMapper', in_channels=[128, 256, 512], out_channels=128, ), dict( type='mmdet.DyHead', in_channels=128, out_channels=256, num_blocks=2, # disable zero_init_offset to follow official implementation zero_init_offset=False) ] bbox_head=dict(head_module=dict(in_channels=[512,512,512])) # The out_channels is controlled by widen_factor,so the YOLOv5HeadModuled in_channels * widen_factor equals to the last neck's out_channels )- 1
- 2
- 3
- 4
- 5
- 6
- 7
- 8
- 9
- 10
- 11
- 12
- 13
- 14
- 15
- 16
- 17
- 18
- 19
- 20
- 21
- 22
- 23
- 24
- 25
- 26
- 27
- 28
- 29
- 30
- 31
12、在训练或推理期间指定特定的 GPU
如果您有多个 GPU,例如 8 个 GPU,编号为,则默认使用 GPU 0 进行训练或推理。如果您想指定其他GPU进行训练或推理,可以使用以下命令:0, 1, 2, 3, 4, 5, 6, 7
CUDA_VISIBLE_DEVICES=5 python ./tools/train.py ${CONFIG} #train CUDA_VISIBLE_DEVICES=5 python ./tools/test.py ${CONFIG} ${CHECKPOINT_FILE} #test- 1
- 2
如果设置CUDA_VISIBLE_DEVICES为-1或大于最大GPU数量的数字,例如8,则CPU将用于训练或推理。
如果您想使用其中几个 GPU 并行训练,可以使用以下命令:CUDA_VISIBLE_DEVICES=0,1,2,3 ./tools/dist_train.sh ${CONFIG} ${GPU_NUM}- 1
这里GPU_NUM是4。另外,如果在一台机器上并行训练多个任务,并且每个任务需要多个GPU,则每个任务的PORT需要设置不同,以避免通信冲突,例如以下命令:
CUDA_VISIBLE_DEVICES=0,1,2,3 PORT=29500 ./tools/dist_train.sh ${CONFIG} 4 CUDA_VISIBLE_DEVICES=4,5,6,7 PORT=29501 ./tools/dist_train.sh ${CONFIG} 4- 1
- 2
13、有用的工具
可视化数据集分析
tools/analysis_tools/dataset_analysis.py帮助用户获取四个功能的效果图,并将图片保存到dataset_analysis当前运行目录下的文件夹中。
脚本功能说明:
各子功能所需的数据是通过main() 的数据准备得到的。- 1
函数1:由show_bbox_num子函数生成,显示类别和bbox实例的分布。

函数2:由show_bbox_wh子函数生成,用于显示类别和bbox实例的宽度和高度分布

函数3:由show_bbox_wh_ratio函数生成,显示类别和bbox实例的宽高比分布。

函数4:由show_bbox_area子函数生成,根据区域规则显示类别和bbox实例区域的分布图。

打印列表:由 sub 函数show_class_list和生成show_data_list。

python tools/analysis_tools/dataset_analysis.py ${CONFIG} \ [--type ${TYPE}] \ [--class-name ${CLASS_NAME}] \ [--area-rule ${AREA_RULE}] \ [--func ${FUNC}] \ [--out-dir ${OUT_DIR}]- 1
- 2
- 3
- 4
- 5
- 6
例如:
1.使用config文件configs/yolov5/voc/yolov5_s-v61_fast_1xb64-50e_voc.py分析数据集,默认数据加载类型为train_dataset,面积规则为[0,32,96,1e5],生成包含所有函数的结果图并将图保存到当前运行目录文件./dataset_analysis夹中:python tools/analysis_tools/dataset_analysis.py configs/yolov5/voc/yolov5_s-v61_fast_1xb64-50e_voc.py- 1
2.使用config文件configs/yolov5/voc/yolov5_s-v61_fast_1xb64-50e_voc.py分析数据集,将数据加载类型从默认改为train_dataset通过val_dataset设置–val-dataset:
python tools/analysis_tools/dataset_analysis.py configs/yolov5/voc/yolov5_s-v61_fast_1xb64-50e_voc.py --val-dataset- 1
3.使用config文件configs/yolov5/voc/yolov5_s-v61_fast_1xb64-50e_voc.py分析数据集,将所有生成的类的显示更改为特定类。以类的显示person为例:
python tools/analysis_tools/dataset_analysis.py configs/yolov5/voc/yolov5_s-v61_fast_1xb64-50e_voc.py --class-name person- 1
4.使用config文件configs/yolov5/voc/yolov5_s-v61_fast_1xb64-50e_voc.py分析数据集,通过重新定义区域规则–area-rule。以区域规则为例,则变为:30 70 125[0,30,70,125,1e5]
python tools/analysis_tools/dataset_analysis.py configs/yolov5/voc/yolov5_s-v61_fast_1xb64-50e_voc.py \ --area-rule 30 70 125- 1
- 2
5.使用config文件configs/yolov5/voc/yolov5_s-v61_fast_1xb64-50e_voc.py分析数据集,将四个函数效果图的显示改为仅显示示例:Function 1
python tools/analysis_tools/dataset_analysis.py configs/yolov5/voc/yolov5_s-v61_fast_1xb64-50e_voc.py \ --func show_bbox_num- 1
- 2
6.使用config文件configs/yolov5/voc/yolov5_s-v61_fast_1xb64-50e_voc.py分析数据集,修改图片保存地址为work_dirs/dataset_analysis:
python tools/analysis_tools/dataset_analysis.py configs/yolov5/voc/yolov5_s-v61_fast_1xb64-50e_voc.py \ --out-dir work_dirs/dataset_analysis- 1
- 2
- 3
OPTIMIZE ANCHORS SIZE
脚本tools/analysis_tools/optimize_anchors.py支持三种方法来优化 YOLO 锚点,包括k-means 锚点集群和.Differential Evolutionv5-k-means
k-均值
在k-means方法中,距离标准是基于IoU,python shell如下:python tools/analysis_tools/optimize_anchors.py ${CONFIG} \ --algorithm k-means \ --input-shape ${INPUT_SHAPE [WIDTH HEIGHT]} \ --out-dir ${OUT_DIR}- 1
- 2
- 3
- 4
difference_evolution
在difference_evolution方法中,基于差分进化算法,使用avg_iou_cost作为最小目标函数,python shell如下:python tools/analysis_tools/optimize_anchors.py ${CONFIG} \ --algorithm DE \ --input-shape ${INPUT_SHAPE [WIDTH HEIGHT]} \ --out-dir ${OUT_DIR}- 1
- 2
- 3
- 4
v5-k-means
在v5-k-means方法中,聚类标准与YOLOv5相同,使用shape-match,python shell如下
python tools/analysis_tools/optimize_anchors.py ${CONFIG} \ --algorithm v5-k-means \ --input-shape ${INPUT_SHAPE [WIDTH HEIGHT]} \ --prior_match_thr ${PRIOR_MATCH_THR} \ --out-dir ${OUT_DIR}- 1
- 2
- 3
- 4
- 5
超参数调度程序可视化
tools/analysis_tools/vis_scheduler旨在帮助用户检查优化器的超参数调度器(无需训练),支持“学习率learning rate”、“动量momentum”和“权重衰减“weight_decay”。
python tools/analysis_tools/vis_scheduler.py \ ${CONFIG_FILE} \ [-p, --parameter ${PARAMETER_NAME}] \ [-d, --dataset-size ${DATASET_SIZE}] \ [-n, --ngpus ${NUM_GPUs}] \ [-o, --out-dir ${OUT_DIR}] \ [--title ${TITLE}] \ [--style ${STYLE}] \ [--window-size ${WINDOW_SIZE}] \ [--cfg-options]- 1
- 2
- 3
- 4
- 5
- 6
- 7
- 8
- 9
- 10
所有参数说明:
config:模型配置文件的路径。 -p, --parameter:可视化其变化曲线的参数,可选择“lr”、“momentum”或“wd”。默认使用“lr”。 -d, --dataset-size:数据集的大小。如果设置,DATASETS.build将被跳过并${DATASET_SIZE}用作尺寸。默认使用该功能DATASETS.build。 -n, --ngpus:训练时使用的GPU数量,默认为1。 -o, --out-dir:曲线图的输出路径,默认不输出。 --title:图的标题。如果不设置,默认为配置文件名。 --style: plt 的风格。如果不设置,则默认为whitegrid。 --window-size:显示窗口的形状。如果没有指定,它将被设置为12*7。如果使用,其格式必须为'W*H'. --cfg-options:配置文件的修改,请参考了解Configs。 加载注释可能会花费很多时间,您可以直接指定数据集的大小以节省时间。-d, dataset-size- 1
- 2
- 3
- 4
- 5
- 6
- 7
- 8
- 9
- 10
您可以使用以下命令来绘制配置中使用的步进学习率计划configs/rtmdet/rtmdet_s_syncbn_fast_8xb32-300e_coco.py
python tools/analysis_tools/vis_scheduler.py \ configs/rtmdet/rtmdet_s_syncbn_fast_8xb32-300e_coco.py \ --dataset-size 118287 \ --ngpus 8 \ --out-dir ./output- 1
- 2
- 3
- 4
- 5

14、了解 YOLOV5 的配置
MMYOLO 和其他 OpenMMLab 存储库使用MMEngine 的配置系统。具有模块化、继承性设计,方便进行各种实验。
1、配置文件内容
MMYOLO采用模块化设计,所有不同功能的模块都可以通过config进行配置。以yolov5_s-v61_syncbn_8xb16-300e_coco.py为例,我们根据不同的功能模块介绍config中的各个字段:
重要参数
当改变训练配置时,通常需要修改以下参数。例如,网络使用缩放因子deepen_factor和widen_factor来控制 MMYOLO 中模型的大小。所以我们建议在配置文件中单独定义这些参数
img_scale = (640, 640) # height of image, width of image deepen_factor = 0.33 # The scaling factor that controls the depth of the network structure, 0.33 for YOLOv5-s widen_factor = 0.5 # The scaling factor that controls the width of the network structure, 0.5 for YOLOv5-s max_epochs = 300 # Maximum training epochs: 300 epochs save_epoch_intervals = 10 # Validation intervals. Run validation every 10 epochs. train_batch_size_pre_gpu = 16 # Batch size of a single GPU during training train_num_workers = 8 # Worker to pre-fetch data for each single GPU val_batch_size_pre_gpu = 1 # Batch size of a single GPU during validation. val_num_workers = 2 # Worker to pre-fetch data for each single GPU during validation- 1
- 2
- 3
- 4
- 5
- 6
- 7
- 8
- 9
型号配置
在MMYOLO的配置中,我们用来model设置检测算法组件。除了backbone、neck等神经网络组件外,还需要data_preprocessor、train_cfg、 和test_cfg。data_preprocessor负责处理dataloader输出的一批数据。train_cfg、test_cfg模型配置中用于训练和测试组件的超参数。
anchors = [[(10, 13), (16, 30), (33, 23)], # Basic size of multi-scale prior box [(30, 61), (62, 45), (59, 119)], [(116, 90), (156, 198), (373, 326)]] strides = [8, 16, 32] # Strides of multi-scale prior box model = dict( type='YOLODetector', # The name of detector data_preprocessor=dict( # The config of data preprocessor, usually includes image normalization and padding type='mmdet.DetDataPreprocessor', # The type of the data preprocessor, refer to https://mmdetection.readthedocs.io/en/dev-3.x/api.html#module-mmdet.models.data_preprocessors. It is worth noticing that using `YOLOv5DetDataPreprocessor` achieves faster training speed. mean=[0., 0., 0.], # Mean values used to pre-training the pre-trained backbone models, ordered in R, G, B std=[255., 255., 255.], # Standard variance used to pre-training the pre-trained backbone models, ordered in R, G, B bgr_to_rgb=True), # whether to convert image from BGR to RGB backbone=dict( # The config of backbone type='YOLOv5CSPDarknet', # The type of backbone, currently it is available candidates are 'YOLOv5CSPDarknet', 'YOLOv6EfficientRep', 'YOLOXCSPDarknet' deepen_factor=deepen_factor, # The scaling factor that controls the depth of the network structure widen_factor=widen_factor, # The scaling factor that controls the width of the network structure norm_cfg=dict(type='BN', momentum=0.03, eps=0.001), # The config of normalization layers. act_cfg=dict(type='SiLU', inplace=True)), # The config of activation function neck=dict( type='YOLOv5PAFPN', # The neck of detector is YOLOv5FPN, We also support 'YOLOv6RepPAFPN', 'YOLOXPAFPN'. deepen_factor=deepen_factor, # The scaling factor that controls the depth of the network structure widen_factor=widen_factor, # The scaling factor that controls the width of the network structure in_channels=[256, 512, 1024], # The input channels, this is consistent with the output channels of backbone out_channels=[256, 512, 1024], # The output channels of each level of the pyramid feature map, this is consistent with the input channels of head num_csp_blocks=3, # The number of bottlenecks of CSPLayer norm_cfg=dict(type='BN', momentum=0.03, eps=0.001), # The config of normalization layers. act_cfg=dict(type='SiLU', inplace=True)), # The config of activation function bbox_head=dict( type='YOLOv5Head', # The type of BBox head is 'YOLOv5Head', we also support 'YOLOv6Head', 'YOLOXHead' head_module=dict( type='YOLOv5HeadModule', # The type of Head module is 'YOLOv5HeadModule', we also support 'YOLOv6HeadModule', 'YOLOXHeadModule' num_classes=80, # Number of classes for classification in_channels=[256, 512, 1024], # The input channels, this is consistent with the input channels of neck widen_factor=widen_factor, # The scaling factor that controls the width of the network structure featmap_strides=[8, 16, 32], # The strides of the multi-scale feature maps num_base_priors=3), # The number of prior boxes on a certain point prior_generator=dict( # The config of prior generator type='mmdet.YOLOAnchorGenerator', # The prior generator uses 'YOLOAnchorGenerator. Refer to https://github.com/open-mmlab/mmdetection/blob/dev-3.x/mmdet/models/task_modules/prior_generators/anchor_generator.py for more details base_sizes=anchors, # Basic scale of the anchor strides=strides), # The strides of the anchor generator. This is consistent with the FPN feature strides. The strides will be taken as base_sizes if base_sizes is not set. ), test_cfg=dict( multi_label=True, # The config of multi-label for multi-clas prediction. The default setting is True. nms_pre=30000, # The number of boxes before NMS score_thr=0.001, # Threshold to filter out boxes. nms=dict(type='nms', # Type of NMS iou_threshold=0.65), # NMS threshold max_per_img=300)) # Max number of detections of each image- 1
- 2
- 3
- 4
- 5
- 6
- 7
- 8
- 9
- 10
- 11
- 12
- 13
- 14
- 15
- 16
- 17
- 18
- 19
- 20
- 21
- 22
- 23
- 24
- 25
- 26
- 27
- 28
- 29
- 30
- 31
- 32
- 33
- 34
- 35
- 36
- 37
- 38
- 39
- 40
- 41
- 42
- 43
- 44
- 45
- 46
- 47
- 48
数据集和评估器配置
运行器的训练、验证和测试需要数据加载器。需要设置数据集和数据管道来构建数据加载器。由于这部分的复杂性,我们使用中间变量来简化数据加载器配置的编写。MMYOLO 中的轻量级目标检测算法采用了更复杂的数据增强方法。因此,MMYOLO 比 MMDetection 中的其他模型具有更广泛的数据集配置。
dataset_type = 'CocoDataset' # Dataset type, this will be used to define the dataset data_root = 'data/coco/' # Root path of data pre_transform = [ # Training data loading pipeline dict( type='LoadImageFromFile'), # First pipeline to load images from file path dict(type='LoadAnnotations', # Second pipeline to load annotations for current image with_bbox=True) # Whether to use bounding box, True for detection ] albu_train_transforms = [ # Albumentation is introduced for image data augmentation. We follow the code of YOLOv5-v6.1, please make sure its version is 1.0.+ dict(type='Blur', p=0.01), # Blur augmentation, the probability is 0.01 dict(type='MedianBlur', p=0.01), # Median blue augmentation, the probability is 0.01 dict(type='ToGray', p=0.01), # Randomly convert RGB to gray-scale image, the probability is 0.01 dict(type='CLAHE', p=0.01) # CLAHE(Limited Contrast Adaptive Histogram Equalization) augmentation, the probability is 0.01 ] train_pipeline = [ # Training data processing pipeline *pre_transform, # Introduce the pre-defined training data loading processing dict( type='Mosaic', # Mosaic augmentation img_scale=img_scale, # The image scale after Mosaic augmentation pad_val=114.0, # Pixel values filled with empty areas pre_transform=pre_transform), # Pre-defined training data loading pipeline dict( type='YOLOv5RandomAffine', # Random Affine augmentation for YOLOv5 max_rotate_degree=0.0, # Maximum degrees of rotation transform max_shear_degree=0.0, # Maximum degrees of shear transform scaling_ratio_range=(0.5, 1.5), # Minimum and maximum ratio of scaling transform border=(-img_scale[0] // 2, -img_scale[1] // 2), # Distance from height and width sides of input image to adjust output shape. Only used in mosaic dataset. border_val=(114, 114, 114)), # Border padding values of 3 channels. dict( type='mmdet.Albu', # Albumentation of MMDetection transforms=albu_train_transforms, # Pre-defined albu_train_transforms bbox_params=dict( type='BboxParams', format='pascal_voc', label_fields=['gt_bboxes_labels', 'gt_ignore_flags']), keymap={ 'img': 'image', 'gt_bboxes': 'bboxes' }), dict(type='YOLOv5HSVRandomAug'), # Random augmentation on HSV channel dict(type='mmdet.RandomFlip', prob=0.5), # Random flip, the probability is 0.5 dict( type='mmdet.PackDetInputs', # Pipeline that formats the annotation data and decides which keys in the data should be packed into data_samples meta_keys=('img_id', 'img_path', 'ori_shape', 'img_shape', 'flip', 'flip_direction')) ] train_dataloader = dict( # Train dataloader config batch_size=train_batch_size_pre_gpu, # Batch size of a single GPU during training num_workers=train_num_workers, # Worker to pre-fetch data for each single GPU during training persistent_workers=True, # If ``True``, the dataloader will not shut down the worker processes after an epoch end, which can accelerate training speed. pin_memory=True, # If ``True``, the dataloader will allow pinned memory, which can reduce copy time between CPU and memory sampler=dict( # training data sampler type='DefaultSampler', # DefaultSampler which supports both distributed and non-distributed training. Refer to https://github.com/open-mmlab/mmengine/blob/main/mmengine/dataset/sampler.py shuffle=True), # randomly shuffle the training data in each epoch dataset=dict( # Train dataset config type=dataset_type, data_root=data_root, ann_file='annotations/instances_train2017.json', # Path of annotation file data_prefix=dict(img='train2017/'), # Prefix of image path filter_cfg=dict(filter_empty_gt=False, min_size=32), # Config of filtering images and annotations pipeline=train_pipeline))- 1
- 2
- 3
- 4
- 5
- 6
- 7
- 8
- 9
- 10
- 11
- 12
- 13
- 14
- 15
- 16
- 17
- 18
- 19
- 20
- 21
- 22
- 23
- 24
- 25
- 26
- 27
- 28
- 29
- 30
- 31
- 32
- 33
- 34
- 35
- 36
- 37
- 38
- 39
- 40
- 41
- 42
- 43
- 44
- 45
- 46
- 47
- 48
- 49
- 50
- 51
- 52
- 53
- 54
- 55
- 56
- 57
- 58
- 59
- 60
- 61
- 62
- 63
在YOLOv5的测试阶段,Letter Resize方法将所有测试图像的大小调整为相同的比例,从而保留了所有测试图像的长宽比。因此,验证和测试阶段共享相同的数据管道
test_pipeline = [ # Validation/ Testing dataloader config dict( type='LoadImageFromFile'), # First pipeline to load images from file path dict(type='YOLOv5KeepRatioResize', # Second pipeline to resize images with the same aspect ratio scale=img_scale), # Pipeline that resizes the images dict( type='LetterResize', # Third pipeline to rescale images to meet the requirements of different strides scale=img_scale, # Target scale of image allow_scale_up=False, # Allow scale up when radio > 1 pad_val=dict(img=114)), # Padding value dict(type='LoadAnnotations', with_bbox=True), # Forth pipeline to load annotations for current image dict( type='mmdet.PackDetInputs', # Pipeline that formats the annotation data and decides which keys in the data should be packed into data_samples meta_keys=('img_id', 'img_path', 'ori_shape', 'img_shape', 'scale_factor', 'pad_param')) ] val_dataloader = dict( batch_size=val_batch_size_pre_gpu, # Batch size of a single GPU num_workers=val_num_workers, # Worker to pre-fetch data for each single GPU persistent_workers=True, # If ``True``, the dataloader will not shut down the worker processes after an epoch end, which can accelerate training speed. pin_memory=True, # If ``True``, the dataloader will allow pinned memory, which can reduce copy time between CPU and memory drop_last=False, # IF ``True``, the dataloader will drop data, which fails to make a batch sampler=dict( type='DefaultSampler', # Default sampler for both distributed and normal training shuffle=False), # not shuffle during validation and testing dataset=dict( type=dataset_type, data_root=data_root, test_mode=True, # # Turn on test mode of the dataset to avoid filtering annotations or images data_prefix=dict(img='val2017/'), # Prefix of image path ann_file='annotations/instances_val2017.json', # Path of annotation file pipeline=test_pipeline, batch_shapes_cfg=dict( # Config of batch shapes type='BatchShapePolicy', # Policy that makes paddings with least pixels during batch inference process, which does not require the image scales of all batches to be the same throughout validation. batch_size=val_batch_size_pre_gpu, # Batch size for batch shapes strategy, equals to validation batch size on single GPU img_size=img_scale[0], # Image scale size_divisor=32, # The image scale of padding should be divided by pad_size_divisor extra_pad_ratio=0.5))) # additional paddings for pixel scale test_dataloader = val_dataloader- 1
- 2
- 3
- 4
- 5
- 6
- 7
- 8
- 9
- 10
- 11
- 12
- 13
- 14
- 15
- 16
- 17
- 18
- 19
- 20
- 21
- 22
- 23
- 24
- 25
- 26
- 27
- 28
- 29
- 30
- 31
- 32
- 33
- 34
- 35
- 36
- 37
- 38
- 39
- 40
- 41
评估器用于计算验证和测试数据集上训练模型的指标。评估器的配置由一个或一系列指标配置组成:
val_evaluator = dict( # Validation evaluator config type='mmdet.CocoMetric', # The coco metric used to evaluate AR, AP, and mAP for detection proposal_nums=(100, 1, 10), # The number of proposal used to evaluate for detection ann_file=data_root + 'annotations/instances_val2017.json', # Annotation file path metric='bbox', # Metrics to be evaluated, `bbox` for detection ) test_evaluator = val_evaluator # Testing evaluator config- 1
- 2
- 3
- 4
- 5
- 6
- 7
由于测试数据集没有注释文件,MMYOLO 中的 test_dataloader 和 test_evaluator 配置通常与 val 的配置相同。如果你想将检测结果保存在测试数据集上,可以这样编写配置:
# inference on test dataset and # format the output results for submission. test_dataloader = dict( batch_size=1, num_workers=2, persistent_workers=True, drop_last=False, sampler=dict(type='DefaultSampler', shuffle=False), dataset=dict( type=dataset_type, data_root=data_root, ann_file=data_root + 'annotations/image_info_test-dev2017.json', data_prefix=dict(img='test2017/'), test_mode=True, pipeline=test_pipeline)) test_evaluator = dict( type='mmdet.CocoMetric', ann_file=data_root + 'annotations/image_info_test-dev2017.json', metric='bbox', format_only=True, # Only format and save the results to coco json file outfile_prefix='./work_dirs/coco_detection/test') # The prefix of output json files- 1
- 2
- 3
- 4
- 5
- 6
- 7
- 8
- 9
- 10
- 11
- 12
- 13
- 14
- 15
- 16
- 17
- 18
- 19
- 20
- 21
训练和测试配置
MMEngine 的运行程序使用 Loop 来控制训练、验证和测试过程。用户可以使用这些字段设置最大训练周期和验证间隔。
max_epochs = 300 # Maximum training epochs: 300 epochs save_epoch_intervals = 10 # Validation intervals. Run validation every 10 epochs. train_cfg = dict( type='EpochBasedTrainLoop', # The training loop type. Refer to https://github.com/open-mmlab/mmengine/blob/main/mmengine/runner/loops.py max_epochs=max_epochs, # Maximum training epochs: 300 epochs val_interval=save_epoch_intervals) # Validation intervals. Run validation every 10 epochs. val_cfg = dict(type='ValLoop') # The validation loop type test_cfg = dict(type='TestLoop') # The testing loop type- 1
- 2
- 3
- 4
- 5
- 6
- 7
- 8
- 9
MMEngine还支持动态评估间隔。例如,您可以在前 280 个 epoch 上每 10 个 epoch 运行一次验证,并在最后 20 个 epoch 上每个 epoch 运行一次验证。配置如下。
max_epochs = 300 # Maximum training epochs: 300 epochs save_epoch_intervals = 10 # Validation intervals. Run validation every 10 epochs. train_cfg = dict( type='EpochBasedTrainLoop', # The training loop type. Refer to https://github.com/open-mmlab/mmengine/blob/main/mmengine/runner/loops.py max_epochs=max_epochs, # Maximum training epochs: 300 epochs val_interval=save_epoch_intervals, # Validation intervals. Run validation every 10 epochs. dynamic_intervals=[(280, 1)]) # Switch evaluation on 280 epoch and switch the interval to 1. val_cfg = dict(type='ValLoop') # The validation loop type test_cfg = dict(type='TestLoop') # The testing loop type- 1
- 2
- 3
- 4
- 5
- 6
- 7
- 8
- 9
- 10
优化配置
optim_wrapper是配置优化相关设置的字段。优化器包装器不仅提供优化器的功能,还支持梯度裁剪、混合精度训练等功能。在优化器包装器教程中了解更多信息。
optim_wrapper = dict( # Optimizer wrapper config type='OptimWrapper', # Optimizer wrapper type, switch to AmpOptimWrapper to enable mixed precision training. optimizer=dict( # Optimizer config. Support all kinds of optimizers in PyTorch. Refer to https://pytorch.org/docs/stable/optim.html#algorithms type='SGD', # Stochastic gradient descent optimizer lr=0.01, # The base learning rate momentum=0.937, # Stochastic gradient descent with momentum weight_decay=0.0005, # Weight decay of SGD nesterov=True, # Enable Nesterov momentum, Refer to http://www.cs.toronto.edu/~hinton/absps/momentum.pdf batch_size_pre_gpu=train_batch_size_pre_gpu), # Enable automatic learning rate scaling clip_grad=None, # Gradient clip option. Set None to disable gradient clip. Find usage in https://mmengine.readthedocs.io/en/latest/tutorials/optim_wrapper.html constructor='YOLOv5OptimizerConstructor') # The constructor for YOLOv5 optimizer- 1
- 2
- 3
- 4
- 5
- 6
- 7
- 8
- 9
- 10
- 11
param_scheduler是配置调整优化超参数(例如学习率和动量)的方法的字段。用户可以组合多个调度器来创建所需的参数调整策略。在参数调度程序教程中查找更多信息。在YOLOv5中,参数调度实现起来比较复杂,很难用param_scheduler. 所以我们用YOLOv5ParamSchedulerHook它来实现(见下一节),它更简单但通用性较差。
param_scheduler = None- 1
Hook config
用户可以将钩子附加到训练、验证和测试循环中,以在运行期间插入一些操作。有两个不同的钩子字段,一个是default_hooks,另一个是custom_hooks。
default_hooks是运行时必须需要的挂钩的挂钩配置的字典。它们具有不应修改的默认优先级。如果未设置,运行程序将使用默认值。要禁用默认挂钩,用户可以将其配置设置为None.default_hooks = dict( param_scheduler=dict( type='YOLOv5ParamSchedulerHook', # MMYOLO uses `YOLOv5ParamSchedulerHook` to adjust hyper-parameters in optimizers scheduler_type='linear', lr_factor=0.01, max_epochs=max_epochs), checkpoint=dict( type='CheckpointHook', # Hook to save model checkpoint on specific intervals interval=save_epoch_intervals, # Save model checkpoint every 10 epochs. max_keep_ckpts=3)) # The maximum checkpoints to keep.- 1
- 2
- 3
- 4
- 5
- 6
- 7
- 8
- 9
- 10
custom_hooks是钩子配置列表。用户可以开发自己的钩子并将其插入到该字段中。
custom_hooks = [ dict( type='EMAHook', # A Hook to apply Exponential Moving Average (EMA) on the model during training. ema_type='ExpMomentumEMA', # The type of EMA strategy to use. momentum=0.0001, # The momentum of EMA update_buffers=True, # # If ``True``, calculate the running averages of model parameters priority=49) # Priority higher than NORMAL(50) ]- 1
- 2
- 3
- 4
- 5
- 6
- 7
- 8
运行时配置
default_scope = 'mmyolo' # The default registry scope to find modules. Refer to https://mmengine.readthedocs.io/en/latest/tutorials/registry.html env_cfg = dict( cudnn_benchmark=True, # Whether to enable cudnn benchmark mp_cfg=dict( # Multi-processing config mp_start_method='fork', # Use fork to start multi-processing threads. 'fork' is usually faster than 'spawn' but may be unsafe. See discussion in https://github.com/pytorch/pytorch/issues/1355 opencv_num_threads=0), # Disable opencv multi-threads to avoid system being overloaded dist_cfg=dict(backend='nccl'), # Distribution configs ) vis_backends = [dict(type='LocalVisBackend')] # Visualization backends. Refer to: https://mmengine.readthedocs.io/zh_CN/latest/advanced_tutorials/visualization.html visualizer = dict( type='mmdet.DetLocalVisualizer', vis_backends=vis_backends, name='visualizer') log_processor = dict( type='LogProcessor', # Log processor to process runtime logs window_size=50, # Smooth interval of log values by_epoch=True) # Whether to format logs with epoch style. Should be consistent with the train loop's type. log_level = 'INFO' # The level of logging. load_from = None # Load model checkpoint as a pre-trained model from a given path. This will not resume training. resume = False # Whether to resume from the checkpoint defined in `load_from`. If `load_from` is None, it will resume the latest checkpoint in the `work_dir`.- 1
- 2
- 3
- 4
- 5
- 6
- 7
- 8
- 9
- 10
- 11
- 12
- 13
- 14
- 15
- 16
- 17
- 18
- 19
- 20
- 21
2、配置文件继承
config/_base_包含默认运行时。由组件组成的配置_base_称为原始配置。
对于同一文件夹下的所有配置,建议只有一个 原始配置。所有其他配置都应该从原始配置继承。这样,最大继承级别为3。
为了便于理解,我们建议贡献者继承现有的方法。例如,如果基于YOLOv5-s进行一些修改,例如修改网络深度,用户可以先继承 ,然后修改配置文件中的必要字段。base = ./yolov5_s-v61_syncbn_8xb16-300e_coco.py
如果您正在构建一个不与任何现有方法共享结构的全新方法,您可以yolov100在 下创建一个文件夹configs,
更多详细信息请参考mmengine 配置教程。
通过设置该_base_字段,我们可以设置当前配置文件继承自哪些文件。
当_base_是一串文件路径时,表示继承一个配置文件的内容。
_base_ = '../_base_/default_runtime.py'- 1
当_base_是多个文件路径的列表时,表示继承多个文件。
_base_ = [ './yolov5_s-v61_syncbn_8xb16-300e_coco.py', '../_base_/default_runtime.py' ]- 1
- 2
- 3
- 4
如果您想检查配置文件,可以运行以查看完整的配置。mim run mmdet print_config /PATH/TO/CONFIG
忽略基本配置中的某些字段
有时,您可能会设置_delete_=True忽略基本配置中的某些字段。简单的说明可以参考mmengine配置教程。
例如,在 MMYOLO 中,使用以下配置更改 RTMDet 的主干。
model = dict( type='YOLODetector', data_preprocessor=dict(...), backbone=dict( type='CSPNeXt', arch='P5', expand_ratio=0.5, deepen_factor=deepen_factor, widen_factor=widen_factor, channel_attention=True, norm_cfg=dict(type='BN'), act_cfg=dict(type='SiLU', inplace=True)), neck=dict(...), bbox_head=dict(...))- 1
- 2
- 3
- 4
- 5
- 6
- 7
- 8
- 9
- 10
- 11
- 12
- 13
- 14
如果您想更改CSPNeXt为RTMDet 主干,因为和中YOLOv6EfficientRep有不同的字段 (channel_attention和expand_ratio) ,您需要使用 将字段中的所有旧密钥替换为新密钥。CSPNeXtYOLOv6EfficientRep_delete_=Truebackbone
_base_ = '../rtmdet/rtmdet_l_syncbn_8xb32-300e_coco.py' model = dict( backbone=dict( _delete_=True, type='YOLOv6EfficientRep', deepen_factor=deepen_factor, widen_factor=widen_factor, norm_cfg=dict(type='BN', momentum=0.03, eps=0.001), act_cfg=dict(type='ReLU', inplace=True)), neck=dict(...), bbox_head=dict(...))- 1
- 2
- 3
- 4
- 5
- 6
- 7
- 8
- 9
- 10
- 11
在配置中使用中间变量
一些中间变量在配置文件中使用,例如train_pipeline和test_pipeline在数据集中。值得注意的是,当修改子配置中的中间变量时,用户需要再次将中间变量传递到相应的字段中。image_scale例如,我们想在训练期间更改并添加YOLOv5MixUp数据增强,img_scale/train_pipeline/test_pipeline这些都是我们想要修改的中间变量。
_base_ = './yolov5_s-v61_syncbn_8xb16-300e_coco.py' img_scale = (1280, 1280) # image height, image width affine_scale = 0.9 mosaic_affine_pipeline = [ dict( type='Mosaic', img_scale=img_scale, pad_val=114.0, pre_transform=pre_transform), dict( type='YOLOv5RandomAffine', max_rotate_degree=0.0, max_shear_degree=0.0, scaling_ratio_range=(1 - affine_scale, 1 + affine_scale), border=(-img_scale[0] // 2, -img_scale[1] // 2), border_val=(114, 114, 114)) ] train_pipeline = [ *pre_transform, *mosaic_affine_pipeline, dict( type='YOLOv5MixUp', # MixUp augmentation of YOLOv5 prob=0.1, # the probability of YOLOv5MixUp pre_transform=[*pre_transform,*mosaic_affine_pipeline]), # Pre-defined Training data pipeline and MixUp augmentation. dict( type='mmdet.Albu', transforms=albu_train_transforms, bbox_params=dict( type='BboxParams', format='pascal_voc', label_fields=['gt_bboxes_labels', 'gt_ignore_flags']), keymap={ 'img': 'image', 'gt_bboxes': 'bboxes' }), dict(type='YOLOv5HSVRandomAug'), dict(type='mmdet.RandomFlip', prob=0.5), dict( type='mmdet.PackDetInputs', meta_keys=('img_id', 'img_path', 'ori_shape', 'img_shape', 'flip', 'flip_direction')) ] test_pipeline = [ dict( type='LoadImageFromFile'), dict(type='YOLOv5KeepRatioResize', scale=img_scale), dict( type='LetterResize', scale=img_scale, allow_scale_up=False, pad_val=dict(img=114)), dict(type='LoadAnnotations', with_bbox=True), dict( type='mmdet.PackDetInputs', meta_keys=('img_id', 'img_path', 'ori_shape', 'img_shape', 'scale_factor', 'pad_param')) ] train_dataloader = dict(dataset=dict(pipeline=train_pipeline)) val_dataloader = dict(dataset=dict(pipeline=test_pipeline)) test_dataloader = dict(dataset=dict(pipeline=test_pipeline))- 1
- 2
- 3
- 4
- 5
- 6
- 7
- 8
- 9
- 10
- 11
- 12
- 13
- 14
- 15
- 16
- 17
- 18
- 19
- 20
- 21
- 22
- 23
- 24
- 25
- 26
- 27
- 28
- 29
- 30
- 31
- 32
- 33
- 34
- 35
- 36
- 37
- 38
- 39
- 40
- 41
- 42
- 43
- 44
- 45
- 46
- 47
- 48
- 49
- 50
- 51
- 52
- 53
- 54
- 55
- 56
- 57
- 58
- 59
- 60
- 61
- 62
- 63
- 64
我们首先定义一个新的train_pipeline/test_pipeline并将其传递给data。
同样,如果我们想从SyncBN到BN或切换MMSyncBN,我们需要修改norm_cfg配置文件中的每一个。
_base_ = './yolov5_s-v61_syncbn_8xb16-300e_coco.py' norm_cfg = dict(type='BN', requires_grad=True) model = dict( backbone=dict(norm_cfg=norm_cfg), neck=dict(norm_cfg=norm_cfg), ...)- 1
- 2
- 3
- 4
- 5
- 6
重用 base 文件中的变量
如果用户想要重用基础文件中的变量,可以使用{{base.xxx}}. 最新版本的MMEngine还支持重用变量而无需{{}}使用。
例如:
_base_ = '../_base_/default_runtime.py' pre_transform = _base_.pre_transform # `pre_transform` equals to `pre_transform` in the _base_ config- 1
- 2
- 3
通过脚本参数修改配置
使用tools/train.py或提交作业时tools/test.py,您可以指定–cfg-options就地修改配置。
更新字典链的配置键。
可以按照原始配置中字典键的顺序指定配置选项。例如,将模型主干中的所有 BN 模块更改为模式。–cfg-options model.backbone.norm_eval=Falsetrain
更新配置列表中的密钥。
一些配置字典在您的配置中组成一个列表。例如,训练管道train_dataloader.dataset.pipeline通常是一个列表,例如。如果您想在管道中更改为,您可以指定。[dict(type=‘LoadImageFromFile’), …]‘LoadImageFromFile’‘LoadImageFromNDArray’–cfg-options data.train.pipeline.0.type=LoadImageFromNDArray
更新列表/元组的值。
有时要更新的值是列表或元组,例如,配置文件通常设置. 如果要更改平均值,可以指定。请注意,引号对于支持列表/元组数据类型是必需的,并且指定值的引号内不允许有空格。model.data_preprocessor.mean=[123.675, 116.28, 103.53]–cfg-options model.data_preprocessor.mean=“[127,127,127]”"
配置名称样式{algorithm name}_{model component names [component1]_[component2]_[...]}-[version id]_[norm setting]_[data preprocessor type]_{training settings}_{training dataset information}_[testing dataset information].py- 1
文件名分为 8 个名称字段,其中有 4 个必填部分和 4 个可选部分。所有零件和组件均用 连接_,每个零件或组件的单词应用 连接-。{}表示必填名称字段,[]表示可选名称字段。
{algorithm name}:算法的名称。它可以是检测器名称,例如yolov5、yolov6、yolox等。
{component names}:算法中使用的组件的名称,例如backbone、neck等。例如,yolov5_s表示its deepen_factoris0.33和its widen_factoris 0.5。
[version_id](可选):由于YOLO系列的演进速度比传统的物体检测算法快很多,用于区分不同子版本之间的差异。例如,YOLOv5-3.0使用该层作为主干层,YOLOv5-6.0使用该层作为主干层。version idFocusConv
norm_setting:bn表示,表示。Batch NormalizationsyncbnSynchronized Batch Normalization
[data preprocessor type](可选):fast结合 YOLOv5DetDataPreprocessor 和yolov5_collate来预处理数据。训练速度比默认速度更快mmdet.DetDataPreprocessor,同时将整个管道扩展到多任务学习。
{training settings}:训练设置的信息,例如批量大小、增强、损失技巧、调度程序和时期/迭代。例如:8xb16-300e_coco表示使用 8-GPU x 16-images-per-GPU,并训练 300 个 epoch。一些缩写:
{gpu x batch_per_gpu}:GPU 和每个 GPU 的样本。例如,4xb4是 4-GPU x 4-images-per-GPU 的短期术语。
{schedule}:训练计划,MMYOLO 中的默认选项是 300 epoch。
{training dataset information}:训练数据集名称,例如coco、cityscapes、voc-0712、wider-face和balloon。
[testing dataset information](可选):测试在一个数据集上训练但在另一个数据集上测试的模型的数据集名称。如果没有提及,则意味着模型是在相同的数据集类型上进行训练和测试的。
15、混合图像数据增强更新
在运行过程中需要获取多张图像的标注信息进行融合。在OpenMMLab数据增强管道中,数据集的其他索引通常不可用。为了实现上述功能,在MMDetection中复现的YOLOX中,提出了MultiImageMixDataset数据集包装器的概念。MultiImageMixDataset数据集包装器将包括一些数据增强方法,例如Mosaic和RandAffine,同时CocoDataset还需要包括一个pipeline来实现图像和注释加载功能。通过这种方式,我们可以快速实现混合数据增强。配置方法如下
train_pipeline = [ dict(type='Mosaic', img_scale=img_scale, pad_val=114.0), dict( type='RandomAffine', scaling_ratio_range=(0.1, 2), border=(-img_scale[0] // 2, -img_scale[1] // 2)), dict( type='MixUp', img_scale=img_scale, ratio_range=(0.8, 1.6), pad_val=114.0), ... ] train_dataset = dict( # use MultiImageMixDataset wrapper to support mosaic and mixup type='MultiImageMixDataset', dataset=dict( type='CocoDataset', pipeline=[ dict(type='LoadImageFromFile'), dict(type='LoadAnnotations', with_bbox=True) ]), pipeline=train_pipeline)- 1
- 2
- 3
- 4
- 5
- 6
- 7
- 8
- 9
- 10
- 11
- 12
- 13
- 14
- 15
- 16
- 17
- 18
- 19
- 20
- 21
- 22
- 23
- 24
然而,这种实现有一个缺点:不熟悉 MMDetection 的用户会忘记像 Mosaic 这样的数据增强方法必须与 一起使用MultiImageMixDataset,增加了使用复杂度。而且,这也很难理解。
为了解决这个问题,MMYOLO 中做了进一步的简化,直接让pipelineget dataset。通过这种方式,Mosaic可以像随机翻转一样实现和使用其他数据增强方法,而不再需要数据包装器。新的配置方法如下:
pre_transform = [ dict(type='LoadImageFromFile'), dict(type='LoadAnnotations', with_bbox=True) ] train_pipeline = [ *pre_transform, dict( type='Mosaic', img_scale=img_scale, pad_val=114.0, pre_transform=pre_transform), dict( type='mmdet.RandomAffine', scaling_ratio_range=(0.1, 2), border=(-img_scale[0] // 2, -img_scale[1] // 2)), dict( type='YOLOXMixUp', img_scale=img_scale, ratio_range=(0.8, 1.6), pad_val=114.0, pre_transform=pre_transform), ... ]- 1
- 2
- 3
- 4
- 5
- 6
- 7
- 8
- 9
- 10
- 11
- 12
- 13
- 14
- 15
- 16
- 17
- 18
- 19
- 20
- 21
- 22
- 23
包括MixUp在内的更复杂的YOLOv5-m配置如下所示
mosaic_affine_pipeline = [ dict( type='Mosaic', img_scale=img_scale, pad_val=114.0, pre_transform=pre_transform), dict( type='YOLOv5RandomAffine', max_rotate_degree=0.0, max_shear_degree=0.0, scaling_ratio_range=(1 - affine_scale, 1 + affine_scale), border=(-img_scale[0] // 2, -img_scale[1] // 2), border_val=(114, 114, 114)) ] # enable mixup train_pipeline = [ *pre_transform, *mosaic_affine_pipeline, dict( type='YOLOv5MixUp', prob=0.1, pre_transform=[*pre_transform, *mosaic_affine_pipeline]), dict( type='mmdet.Albu', transforms=albu_train_transforms, bbox_params=dict( type='BboxParams', format='pascal_voc', label_fields=['gt_bboxes_labels', 'gt_ignore_flags']), keymap={ 'img': 'image', 'gt_bboxes': 'bboxes' }), dict(type='YOLOv5HSVRandomAug'), dict(type='mmdet.RandomFlip', prob=0.5), dict( type='mmdet.PackDetInputs', meta_keys=('img_id', 'img_path', 'ori_shape', 'img_shape', 'flip', 'flip_direction')) ]- 1
- 2
- 3
- 4
- 5
- 6
- 7
- 8
- 9
- 10
- 11
- 12
- 13
- 14
- 15
- 16
- 17
- 18
- 19
- 20
- 21
- 22
- 23
- 24
- 25
- 26
- 27
- 28
- 29
- 30
- 31
- 32
- 33
- 34
- 35
- 36
- 37
- 38
- 39
- 40
使用非常简单,只需将Dataset对象传递给管道即可。
def prepare_data(self, idx) -> Any: """Pass the dataset to the pipeline during training to support mixed data augmentation, such as Mosaic and MixUp.""" if self.test_mode is False: data_info = self.get_data_info(idx) data_info['dataset'] = self return self.pipeline(data_info) else: return super().prepare_data(idx)- 1
- 2
- 3
- 4
- 5
- 6
- 7
- 8
- 9
16、自定义数据集的注释到部署工作流程
https://mmyolo.readthedocs.io/en/latest/recommended_topics/labeling_to_deployment_tutorials.html#use-the-software-of-labelme-to-annotate
17、 可视化
本文包括特征图可视化以及基于梯度和无梯度的 CAM 可视化
特征图可视化

可视化为深度学习模型的训练和测试过程提供了直观的解释。
在MMYOLO中,可以使用MMEngine中Visualizer提供的进行特征图可视化,其具有以下特点:支持基本绘图界面和特征图可视化。 支持选择模型中的不同层来获取特征图。显示方式有squeeze_mean、select_max、topk。用户还可以使用arrangement 自定义特征图显示的布局。- 1
- 2
特征图生成
您可以使用它demo/featmap_vis_demo.py来快速查看可视化结果。为了更好地理解所有功能,我们在这里列出了所有主要参数及其特征,如下所示:
img:要可视化的图像。可以是单个图像文件或图像文件路径列表。 config:算法的配置文件。 checkpoint:对应算法的权重文件。 --out-file:获取的特征图在您设备上保存的文件路径。 --device:用于图像推理的硬件。例如,--device cuda:0意味着使用第一个 GPU,--device cpu意味着使用 CPU。 --score-thr:置信度分数阈值。仅显示置信度分数高于此阈值的 bbox。 --preview-model:是否需要预览模型。这可以让用户更直观地理解特征层的结构。 --target-layers:获取可视化特征图结果的特定层。 如果只有一个参数,则该特定层的特征图将被可视化。例如--target-layers backbone , --target-layers neck , --target-layers backbone.stage4 等。 如果参数是一个列表,则相应层的所有特征图将被可视化。例如,--target-layers backbone.stage4 neck表示backbone的stage4层和neck的三层同时输出,总共四层特征图。 --channel-reduction:如果需要将多个通道压缩为单个通道,然后与图片叠加显示,因为输入张量通常有多个通道。这里可以使用三个参数: squeeze_mean:输入通道C将使用均值函数压缩为一个通道,输出维度变为(1, H, W) select_max:Sum the input channel C in the spatial space,维度变为(C, )。然后选择值最大的通道。 None:表示不需要压缩。此时,可以通过topk参数选择激活度最高的topk特征图进行显示。 --topk:仅当channel_reduction参数为None时有效。它根据激活程度选择topk通道,然后将其与图像叠加显示。可以使用--arrangement参数指定显示布局,该参数是由空格分隔的两个数字组成的数组。例如,--topk 5 --arrangement 2 3 表示 in 2 rows and 3 columns中显示了激活度最高的 5 个特征图。类似地, --topk 7 --arrangement 3 3表示in 3 rows and 3 columns 中显示了激活度最高的 7 个特征图。 如果topk不为-1,则选择topk通道按照激活程度顺序显示。 如果topk为-1,则通道号C必须为1或3以指示输入数据是图片。否则会出错提示用户用 channel_reduction压缩通道。- 1
- 2
- 3
- 4
- 5
- 6
- 7
- 8
- 9
- 10
- 11
- 12
- 13
- 14
- 15
- 16
- 17
- 18
考虑到输入的特征图通常非常小,该函数默认会对特征图进行上采样,以便于可视化。
注意:当图像和特征图比例不同时,该draw_featmap函数会自动执行上采样对齐。如果你的图像在推理时有Pad预处理等操作,得到的特征图是经过Pad 处理的,如果直接对图像进行上采样,可能会出现错位的问题。
使用示例
以预训练的YOLOv5-s模型为例。请将模型权重文件下载到根目录。
cd mmyolo wget https://download.openmmlab.com/mmyolo/v0/yolov5/yolov5_s-v61_syncbn_fast_8xb16-300e_coco/yolov5_s-v61_syncbn_fast_8xb16-300e_coco_20220918_084700-86e02187.pth- 1
- 2
(1) 将多通道特征图压缩为单通道并select_max显示。通过提取该层的输出进行可视化,将生成backbone中三个输出层的特征图:
python demo/featmap_vis_demo.py demo/dog.jpg \ configs/yolov5/yolov5_s-v61_syncbn_fast_8xb16-300e_coco.py \ yolov5_s-v61_syncbn_fast_8xb16-300e_coco_20220918_084700-86e02187.pth \ --target-layers backbone \ --channel-reduction select_max- 1
- 2
- 3
- 4
- 5

上面的代码存在图像和特征图需要对齐的问题。对此有两种解决方案:在YOLOv5配置中将post-process改为simple Resize,不影响可视化。 可视化时使用预处理阶段之后的图像,而不是预处理阶段之前的图像。- 1
- 2
为简单起见,我们采用本演示中的第一个解决方案。不过以后会做出第二种方案,让大家不用额外修改配置文件就可以使用。更具体地说,将原始版本test_pipeline更改为仅进行调整大小处理的版本。
原文test_pipeline是:
test_pipeline = [ dict( type='LoadImageFromFile', backend_args=_base_.backend_args), dict(type='YOLOv5KeepRatioResize', scale=img_scale), dict( type='LetterResize', scale=img_scale, allow_scale_up=False, pad_val=dict(img=114)), dict(type='LoadAnnotations', with_bbox=True, _scope_='mmdet'), dict( type='mmdet.PackDetInputs', meta_keys=('img_id', 'img_path', 'ori_shape', 'img_shape', 'scale_factor', 'pad_param')) ]- 1
- 2
- 3
- 4
- 5
- 6
- 7
- 8
- 9
- 10
- 11
- 12
- 13
- 14
- 15
- 16
更改为以下版本:
test_pipeline = [ dict( type='LoadImageFromFile', backend_args=_base_.backend_args), dict(type='mmdet.Resize', scale=img_scale, keep_ratio=False), # change the LetterResize to mmdet.Resize dict(type='LoadAnnotations', with_bbox=True, _scope_='mmdet'), dict( type='mmdet.PackDetInputs', meta_keys=('img_id', 'img_path', 'ori_shape', 'img_shape', 'scale_factor')) ]- 1
- 2
- 3
- 4
- 5
- 6
- 7
- 8
- 9
- 10
- 11
正确结果如下:

(2)利用squeeze_mean参数将多通道特征图压缩为单通道并显示。通过提取neck该层的输出进行可视化,将生成三个neck输出层的特征图:python demo/featmap_vis_demo.py demo/dog.jpg \ configs/yolov5/yolov5_s-v61_syncbn_fast_8xb16-300e_coco.py \ yolov5_s-v61_syncbn_fast_8xb16-300e_coco_20220918_084700-86e02187.pth \ --target-layers neck \ --channel-reduction squeeze_mean- 1
- 2
- 3
- 4
- 5

(3)利用squeeze_mean参数将多通道特征图压缩为单通道并显示。然后,通过提取backbone.stage4和backbone.stage3层的输出来可视化特征图,将生成两个输出层的特征图:python demo/featmap_vis_demo.py demo/dog.jpg \ configs/yolov5/yolov5_s-v61_syncbn_fast_8xb16-300e_coco.py \ yolov5_s-v61_syncbn_fast_8xb16-300e_coco_20220918_084700-86e02187.pth \ --target-layers backbone.stage4 backbone.stage3 \ --channel-reduction squeeze_mean- 1
- 2
- 3
- 4
- 5

(4) 使用–topk 3 --arrangement 2 2 该参数选择多通道特征图中激活度最高的前3个通道并以2x2布局方式显示。用户可以通过参数将布局更改为自己想要的,特征图将自动格式化。首先,每层中的top3 特征图被格式化为一个 2x2形状,然后每层也被格式化为2x2:python demo/featmap_vis_demo.py demo/dog.jpg \ configs/yolov5/yolov5_s-v61_syncbn_fast_8xb16-300e_coco.py \ yolov5_s-v61_syncbn_fast_8xb16-300e_coco_20220918_084700-86e02187.pth \ --target-layers backbone.stage3 backbone.stage4 \ --channel-reduction None \ --topk 3 \ --arrangement 2 2- 1
- 2
- 3
- 4
- 5
- 6
- 7
- 8

(5) 可视化过程完成后,您可以选择显示结果或将结果存储在本地。您只需要添加参数:–out-file xxx.jpgpython demo/featmap_vis_demo.py demo/dog.jpg \ configs/yolov5/yolov5_s-v61_syncbn_fast_8xb16-300e_coco.py \ yolov5_s-v61_syncbn_fast_8xb16-300e_coco_20220918_084700-86e02187.pth \ --target-layers backbone \ --channel-reduction select_max \ --out-file featmap_backbone.jpg- 1
- 2
- 3
- 4
- 5
- 6
基于梯度和无梯度的 CAM 可视化
对象检测 CAM 可视化比分类 CAM 更加复杂且不同。本文仅简单说明使用方法,后面会单独开文档详细介绍实现原理和注意事项。
您可以call demo/boxmap_vis_demo.py轻松快速地获取Box级别的AM可视化结果。目前,YOLOv5/YOLOv6/YOLOX/RTMDet是支持的。
以YOLOv5为例,与特征图可视化一样,需要test_pipeline先修改一下,否则会出现特征图与原图错位的问题。
原文test_pipeline是:
test_pipeline = [ dict( type='LoadImageFromFile', backend_args=_base_.backend_args), dict(type='YOLOv5KeepRatioResize', scale=img_scale), dict( type='LetterResize', scale=img_scale, allow_scale_up=False, pad_val=dict(img=114)), dict(type='LoadAnnotations', with_bbox=True, _scope_='mmdet'), dict( type='mmdet.PackDetInputs', meta_keys=('img_id', 'img_path', 'ori_shape', 'img_shape', 'scale_factor', 'pad_param')) ]- 1
- 2
- 3
- 4
- 5
- 6
- 7
- 8
- 9
- 10
- 11
- 12
- 13
- 14
- 15
- 16
更改为以下版本:
test_pipeline = [ dict( type='LoadImageFromFile', backend_args=_base_.backend_args), dict(type='mmdet.Resize', scale=img_scale, keep_ratio=False), # change the LetterResize to mmdet.Resize dict(type='LoadAnnotations', with_bbox=True, _scope_='mmdet'), dict( type='mmdet.PackDetInputs', meta_keys=('img_id', 'img_path', 'ori_shape', 'img_shape', 'scale_factor')) ]- 1
- 2
- 3
- 4
- 5
- 6
- 7
- 8
- 9
- 10
- 11
(1) 使用GradCAM方法可视化neck模块最后一个输出层的AM
python demo/boxam_vis_demo.py \ demo/dog.jpg \ configs/yolov5/yolov5_s-v61_syncbn_fast_8xb16-300e_coco.py \ yolov5_s-v61_syncbn_fast_8xb16-300e_coco_20220918_084700-86e02187.pth- 1
- 2
- 3
- 4

对应的特征AM如下:

可以看到该GradCAM效果可以突出box级别的AM信息
您可以选择通过–topk参数仅可视化具有最高预测分数的 top预测框python demo/boxam_vis_demo.py \ demo/dog.jpg \ configs/yolov5/yolov5_s-v61_syncbn_fast_8xb16-300e_coco.py \ yolov5_s-v61_syncbn_fast_8xb16-300e_coco_20220918_084700-86e02187.pth \ --topk 2- 1
- 2
- 3
- 4
- 5

(2)使用AblationCAM方法可视化neck模块最后一个输出层的AM
python demo/boxam_vis_demo.py \ demo/dog.jpg \ configs/yolov5/yolov5_s-v61_syncbn_fast_8xb16-300e_coco.py \ yolov5_s-v61_syncbn_fast_8xb16-300e_coco_20220918_084700-86e02187.pth \ --method ablationcam- 1
- 2
- 3
- 4
- 5

由于AblationCAM是按每个通道对分数的贡献进行加权的,因此不可能像GradCAN 那样仅可视化框级别的 AM 信息。但你可以用来–norm-in-bbox只在 AM 中显示 bboxpython demo/boxam_vis_demo.py \ demo/dog.jpg \ configs/yolov5/yolov5_s-v61_syncbn_fast_8xb16-300e_coco.py \ yolov5_s-v61_syncbn_fast_8xb16-300e_coco_20220918_084700-86e02187.pth \ --method ablationcam \ --norm-in-bbox- 1
- 2
- 3
- 4
- 5
- 6

对大图像进行推理
首先安装sahi:
pip install -U sahi>=0.11.4- 1
对大图像(如卫星图像)执行 MMYOLO 推理:
wget -P checkpoint https://download.openmmlab.com/mmyolo/v0/yolov5/yolov5_m-v61_syncbn_fast_8xb16-300e_coco/yolov5_m-v61_syncbn_fast_8xb16-300e_coco_20220917_204944-516a710f.pth python demo/large_image_demo.py \ demo/large_image.jpg \ configs/yolov5/yolov5_m-v61_syncbn_fast_8xb16-300e_coco.py \ checkpoint/yolov5_m-v61_syncbn_fast_8xb16-300e_coco_20220917_204944-516a710f.pth \- 1
- 2
- 3
- 4
- 5
- 6
将切片参数设置为:
python demo/large_image_demo.py \ demo/large_image.jpg \ configs/yolov5/yolov5_m-v61_syncbn_fast_8xb16-300e_coco.py \ checkpoint/yolov5_m-v61_syncbn_fast_8xb16-300e_coco_20220917_204944-516a710f.pth \ --patch-size 512 --patch-overlap-ratio 0.25- 1
- 2
- 3
- 4
- 5
- 6
在对大图像执行推理时导出调试视觉效果:
python demo/large_image_demo.py \ demo/large_image.jpg \ configs/yolov5/yolov5_m-v61_syncbn_fast_8xb16-300e_coco.py \ checkpoint/yolov5_m-v61_syncbn_fast_8xb16-300e_coco_20220917_204944-516a710f.pth \ --debug- 1
- 2
- 3
- 4
- 5
-
相关阅读:
喜提JDK的BUG一枚!多线程的情况下请谨慎使用这个类的stream遍历。
pytorch单机多卡及常见问题
携职教育:【建议收藏】14个热门证书,最全考证时间表
六级高频词汇
java-php-python-ssm-民航售票管理系统-计算机毕业设计
快速上手Docker
【云计算赛项】职业技能竞赛--容器开发部分例题K8s编排部署WebMall
面试打底稿⑥ 项目一的第二部分
微信小程序实现一些优惠券/卡券
Redisson源码解读-公平锁
- 原文地址:https://blog.csdn.net/qq_41627642/article/details/132720919
