-
嵌入式Linux驱动开发(I2C专题)(五)
I2C系统驱动程序模型
参考资料:
- Linux内核文档:
Documentation\i2c\instantiating-devices.rstDocumentation\i2c\writing-clients.rst
- Linux内核驱动程序示例:
drivers/eeprom/at24.c
1. I2C驱动程序的层次

I2C Core就是I2C核心层,它的作用:- 提供统一的访问函数,比如i2c_transfer、i2c_smbus_xfer等
- 实现
I2C总线-设备-驱动模型,管理:I2C设备(i2c_client)、I2C设备驱动(i2c_driver)、I2C控制器(i2c_adapter)
2. I2C总线-设备-驱动模型

2.1 i2c_driver
i2c_driver表明能支持哪些设备:
- 使用of_match_table来判断
- 设备树中,某个I2C控制器节点下可以创建I2C设备的节点
- 如果I2C设备节点的compatible属性跟of_match_table的某项兼容,则匹配成功
- i2c_client.name跟某个of_match_table[i].compatible值相同,则匹配成功
- 设备树中,某个I2C控制器节点下可以创建I2C设备的节点
- 使用id_table来判断
- i2c_client.name跟某个id_table[i].name值相同,则匹配成功
i2c_driver跟i2c_client匹配成功后,就调用i2c_driver.probe函数。
2.2 i2c_client
i2c_client表示一个I2C设备,创建i2c_client的方法有4种:
-
方法1
-
通过I2C bus number来创建
int i2c_register_board_info(int busnum, struct i2c_board_info const *info, unsigned len);- 1
-
通过设备树来创建
i2c1: i2c@400a0000 { /* ... master properties skipped ... */ clock-frequency = <100000>; flash@50 { compatible = "atmel,24c256"; reg = <0x50>; }; pca9532: gpio@60 { compatible = "nxp,pca9532"; gpio-controller; #gpio-cells = <2>; reg = <0x60>; }; };- 1
- 2
- 3
- 4
- 5
- 6
- 7
- 8
- 9
- 10
- 11
- 12
- 13
- 14
- 15
- 16
-
-
方法2
有时候无法知道该设备挂载哪个I2C bus下,无法知道它对应的I2C bus number。
但是可以通过其他方法知道对应的i2c_adapter结构体。
可以使用下面两个函数来创建i2c_client:-
i2c_new_device
static struct i2c_board_info sfe4001_hwmon_info = { I2C_BOARD_INFO("max6647", 0x4e), }; int sfe4001_init(struct efx_nic *efx) { (...) efx->board_info.hwmon_client = i2c_new_device(&efx->i2c_adap, &sfe4001_hwmon_info); (...) }- 1
- 2
- 3
- 4
- 5
- 6
- 7
- 8
- 9
- 10
- 11
- 12
-
i2c_new_probed_device
static const unsigned short normal_i2c[] = { 0x2c, 0x2d, I2C_CLIENT_END }; static int usb_hcd_nxp_probe(struct platform_device *pdev) { (...) struct i2c_adapter *i2c_adap; struct i2c_board_info i2c_info; (...) i2c_adap = i2c_get_adapter(2); memset(&i2c_info, 0, sizeof(struct i2c_board_info)); strscpy(i2c_info.type, "isp1301_nxp", sizeof(i2c_info.type)); isp1301_i2c_client = i2c_new_probed_device(i2c_adap, &i2c_info, normal_i2c, NULL); i2c_put_adapter(i2c_adap); (...) }- 1
- 2
- 3
- 4
- 5
- 6
- 7
- 8
- 9
- 10
- 11
- 12
- 13
- 14
- 15
- 16
- 17
-
差别:
- i2c_new_device:会创建i2c_client,即使该设备并不存在
- i2c_new_probed_device:
- 它成功的话,会创建i2c_client,并且表示这个设备肯定存在
- I2C设备的地址可能发生变化,比如AT24C02的引脚A2A1A0电平不一样时,设备地址就不一样
- 可以罗列出可能的地址
- i2c_new_probed_device使用这些地址判断设备是否存在
-
-
方法3(不推荐):由i2c_driver.detect函数来判断是否有对应的I2C设备并生成i2c_client
-
方法4:通过用户空间(user-space)生成
调试时、或者不方便通过代码明确地生成i2c_client时,可以通过用户空间来生成。
// 创建一个i2c_client, .name = "eeprom", .addr=0x50, .adapter是i2c-3 # echo eeprom 0x50 > /sys/bus/i2c/devices/i2c-3/new_device // 删除一个i2c_client # echo 0x50 > /sys/bus/i2c/devices/i2c-3/delete_device- 1
- 2
- 3
- 4
编写设备驱动之i2c_driver
参考资料:
Linux内核文档:
Documentation\i2c\instantiating-devices.rst
Documentation\i2c\writing-clients.rst
Linux内核驱动程序示例:
drivers/eeprom/at24.c1. 套路
1.1 I2C总线-设备-驱动模型

1.2 示例
分配、设置、注册一个i2c_driver结构体,类似drivers/eeprom/at24.c:

2. 编写i2c_driver
2.1 先写一个框架
#include#include #include #include #include #include #include #include #include #include #include #include #include #include #include #include #include static const struct of_device_id of_match_ids_example[] = { { .compatible = "com_name,chip_name", .data = NULL }, { /* END OF LIST */ }, }; static const struct i2c_device_id example_ids[] = { { "chip_name", (kernel_ulong_t)NULL }, { /* END OF LIST */ } }; static int i2c_driver_example_probe(struct i2c_client *client) { return 0; } static int i2c_driver_example_remove(struct i2c_client *client) { return 0; } static struct i2c_driver i2c_example_driver = { .driver = { .name = "example", .of_match_table = of_match_ids_example, }, .probe_new = i2c_driver_example_probe, .remove = i2c_driver_example_remove, .id_table = example_ids, }; static int __init i2c_driver_example_init(void) { return i2c_add_driver(&i2c_example_driver); } module_init(i2c_driver_example_init); static void __exit i2c_driver_example_exit(void) { i2c_del_driver(&i2c_example_driver); } module_exit(i2c_driver_example_exit); MODULE_LICENSE("GPL"); - 1
- 2
- 3
- 4
- 5
- 6
- 7
- 8
- 9
- 10
- 11
- 12
- 13
- 14
- 15
- 16
- 17
- 18
- 19
- 20
- 21
- 22
- 23
- 24
- 25
- 26
- 27
- 28
- 29
- 30
- 31
- 32
- 33
- 34
- 35
- 36
- 37
- 38
- 39
- 40
- 41
- 42
- 43
- 44
- 45
- 46
- 47
- 48
- 49
- 50
- 51
- 52
- 53
- 54
- 55
- 56
- 57
- 58
- 59
- 60
- 61
- 62
2.2 在为AP3216C编写代码
百问网的开发板上有光感芯片AP3216C:

AP3216C是红外、光强、距离三合一的传感器,以读出光强、距离值为例,步骤如下:复位:往寄存器0写入0x4
使能:往寄存器0写入0x3
读红外:读寄存器0xA、0xB得到2字节的红外数据
读光强:读寄存器0xC、0xD得到2字节的光强
读距离:读寄存器0xE、0xF得到2字节的距离值
AP3216C的设备地址是0x1E。ap3216c_drv.c
#include#include #include #include #include #include #include #include #include #include #include #include #include #include #include #include #include #include #include static int major = 0; static struct class *ap3216c_class; static struct i2c_client *ap3216c_client; static ssize_t ap3216c_read (struct file *file, char __user *buf, size_t size, loff_t *offset) { int err; char kernel_buf[6]; int val; if (size != 6) return -EINVAL; val = i2c_smbus_read_word_data(ap3216c_client, 0xA); /* read IR */ kernel_buf[0] = val & 0xff; kernel_buf[1] = (val>>8) & 0xff; val = i2c_smbus_read_word_data(ap3216c_client, 0xC); /* read 光强 */ kernel_buf[2] = val & 0xff; kernel_buf[3] = (val>>8) & 0xff; val = i2c_smbus_read_word_data(ap3216c_client, 0xE); /* read 距离 */ kernel_buf[4] = val & 0xff; kernel_buf[5] = (val>>8) & 0xff; err = copy_to_user(buf, kernel_buf, size); return size; } static int ap3216c_open (struct inode *node, struct file *file) { i2c_smbus_write_byte_data(ap3216c_client, 0, 0x4); /* delay for reset */ mdelay(20); i2c_smbus_write_byte_data(ap3216c_client, 0, 0x3); mdelay(250); return 0; } static struct file_operations ap3216c_ops = { .owner = THIS_MODULE, .open = ap3216c_open, .read = ap3216c_read, }; static const struct of_device_id of_match_ids_ap3216c[] = { { .compatible = "lite-on,ap3216c", .data = NULL }, { /* END OF LIST */ }, }; static const struct i2c_device_id ap3216c_ids[] = { { "ap3216c", (kernel_ulong_t)NULL }, { /* END OF LIST */ } }; static int ap3216c_probe(struct i2c_client *client, const struct i2c_device_id *id) { printk("%s %s %d\n", __FILE__, __FUNCTION__, __LINE__); ap3216c_client = client; /* register_chrdev */ major = register_chrdev(0, "ap3216c", &ap3216c_ops); ap3216c_class = class_create(THIS_MODULE, "ap3216c_class"); device_create(ap3216c_class, NULL, MKDEV(major, 0), NULL, "ap3216c"); /* /dev/ap3216c */ return 0; } static int ap3216c_remove(struct i2c_client *client) { printk("%s %s %d\n", __FILE__, __FUNCTION__, __LINE__); device_destroy(ap3216c_class, MKDEV(major, 0)); class_destroy(ap3216c_class); /* unregister_chrdev */ unregister_chrdev(major, "ap3216c"); return 0; } static struct i2c_driver i2c_ap3216c_driver = { .driver = { .name = "ap3216c", .of_match_table = of_match_ids_ap3216c, }, .probe = ap3216c_probe, .remove = ap3216c_remove, .id_table = ap3216c_ids, }; static int __init i2c_driver_ap3216c_init(void) { printk("%s %s %d\n", __FILE__, __FUNCTION__, __LINE__); return i2c_add_driver(&i2c_ap3216c_driver); } module_init(i2c_driver_ap3216c_init); static void __exit i2c_driver_ap3216c_exit(void) { i2c_del_driver(&i2c_ap3216c_driver); } module_exit(i2c_driver_ap3216c_exit); MODULE_LICENSE("GPL"); - 1
- 2
- 3
- 4
- 5
- 6
- 7
- 8
- 9
- 10
- 11
- 12
- 13
- 14
- 15
- 16
- 17
- 18
- 19
- 20
- 21
- 22
- 23
- 24
- 25
- 26
- 27
- 28
- 29
- 30
- 31
- 32
- 33
- 34
- 35
- 36
- 37
- 38
- 39
- 40
- 41
- 42
- 43
- 44
- 45
- 46
- 47
- 48
- 49
- 50
- 51
- 52
- 53
- 54
- 55
- 56
- 57
- 58
- 59
- 60
- 61
- 62
- 63
- 64
- 65
- 66
- 67
- 68
- 69
- 70
- 71
- 72
- 73
- 74
- 75
- 76
- 77
- 78
- 79
- 80
- 81
- 82
- 83
- 84
- 85
- 86
- 87
- 88
- 89
- 90
- 91
- 92
- 93
- 94
- 95
- 96
- 97
- 98
- 99
- 100
- 101
- 102
- 103
- 104
- 105
- 106
- 107
- 108
- 109
- 110
- 111
- 112
- 113
- 114
- 115
- 116
- 117
- 118
- 119
- 120
- 121
- 122
- 123
- 124
- 125
- 126
- 127
ap3216c_client.c
#include#include #include #include #include #include #include #include #include #include #include #include #include #include #include #include #include #include #include #if 1 static struct i2c_client *ap3216c_client; static int __init i2c_client_ap3216c_init(void) { struct i2c_adapter *adapter; static struct i2c_board_info board_info = { I2C_BOARD_INFO("ap3216c", 0x1e), }; printk("%s %s %d\n", __FILE__, __FUNCTION__, __LINE__); /* register I2C device */ adapter = i2c_get_adapter(0); ap3216c_client = i2c_new_device(adapter, &board_info); i2c_put_adapter(adapter); return 0; } #else static struct i2c_client *ap3216c_client; /* Addresses to scan */ static const unsigned short normal_i2c[] = { 0x1e, I2C_CLIENT_END }; static int __init i2c_client_ap3216c_init(void) { struct i2c_adapter *adapter; struct i2c_board_info board_info; memset(&board_info, 0, sizeof(struct i2c_board_info)); strscpy(board_info.type, "ap3216c", sizeof(board_info.type)); printk("%s %s %d\n", __FILE__, __FUNCTION__, __LINE__); /* register I2C device */ adapter = i2c_get_adapter(0); ap3216c_client = i2c_new_probed_device(adapter, &board_info,normal_i2c, NULL); i2c_put_adapter(adapter); return 0; } #endif module_init(i2c_client_ap3216c_init); static void __exit i2c_client_ap3216c_exit(void) { i2c_unregister_device(ap3216c_client); } module_exit(i2c_client_ap3216c_exit); MODULE_LICENSE("GPL"); - 1
- 2
- 3
- 4
- 5
- 6
- 7
- 8
- 9
- 10
- 11
- 12
- 13
- 14
- 15
- 16
- 17
- 18
- 19
- 20
- 21
- 22
- 23
- 24
- 25
- 26
- 27
- 28
- 29
- 30
- 31
- 32
- 33
- 34
- 35
- 36
- 37
- 38
- 39
- 40
- 41
- 42
- 43
- 44
- 45
- 46
- 47
- 48
- 49
- 50
- 51
- 52
- 53
- 54
- 55
- 56
- 57
- 58
- 59
- 60
- 61
- 62
- 63
- 64
- 65
- 66
- 67
- 68
- 69
- 70
- 71
- 72
- 73
APP
#include#include #include #include #include #include /* */ int main(int argc, char **argv) { int fd; char buf[6]; int len; /* 2. 打开文件 */ fd = open("/dev/ap3216c", O_RDWR); if (fd == -1) { printf("can not open file /dev/hello\n"); return -1; } len = read(fd, buf, 6); printf("APP read : "); for (len = 0; len < 6; len++) printf("%02x ", buf[len]); printf("\n"); close(fd); return 0; } - 1
- 2
- 3
- 4
- 5
- 6
- 7
- 8
- 9
- 10
- 11
- 12
- 13
- 14
- 15
- 16
- 17
- 18
- 19
- 20
- 21
- 22
- 23
- 24
- 25
- 26
- 27
- 28
- 29
- 30
- 31
- 32
- 33
- 34
Makefile
# 1. 使用不同的开发板内核时, 一定要修改KERN_DIR # 2. KERN_DIR中的内核要事先配置、编译, 为了能编译内核, 要先设置下列环境变量: # 2.1 ARCH, 比如: export ARCH=arm64 # 2.2 CROSS_COMPILE, 比如: export CROSS_COMPILE=aarch64-linux-gnu- # 2.3 PATH, 比如: export PATH=$PATH:/home/book/100ask_roc-rk3399-pc/ToolChain-6.3.1/gcc-linaro-6.3.1-2017.05-x86_64_aarch64-linux-gnu/bin # 注意: 不同的开发板不同的编译器上述3个环境变量不一定相同, # 请参考各开发板的高级用户使用手册 KERN_DIR = /home/book/100ask_imx6ull-sdk/Linux-4.9.88/ all: make -C $(KERN_DIR) M=`pwd` modules clean: make -C $(KERN_DIR) M=`pwd` modules clean rm -rf modules.order obj-m += ap3216c_drv.o obj-m += ap3216c_client.o- 1
- 2
- 3
- 4
- 5
- 6
- 7
- 8
- 9
- 10
- 11
- 12
- 13
- 14
- 15
- 16
- 17
- 18
- 19
I2C_Adapter驱动框架讲解与编写
分配、设置、注册一个i2c_adpater结构体:
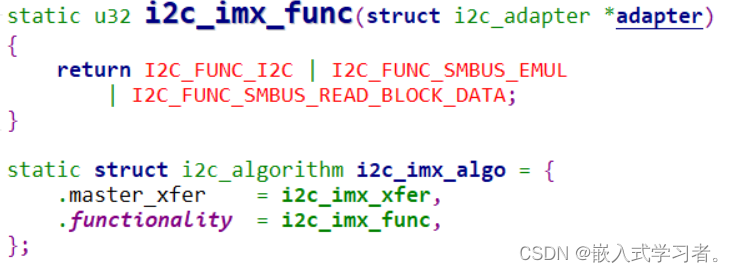
- i2c_adpater的核心是i2c_algorithm
- i2c_algorithm的核心是master_xfer函数
1. 所涉及的函数
-
分配
struct i2c_adpater *adap = kzalloc(sizeof(struct i2c_adpater), GFP_KERNEL);- 1
-
设置
adap->owner = THIS_MODULE; adap->algo = &stm32f7_i2c_algo;- 1
- 2
-
注册:i2c_add_adapter/i2c_add_numbered_adapter
ret = i2c_add_adapter(adap); // 不管adap->nr原来是什么,都动态设置adap->nr ret = i2c_add_numbered_adapter(adap); // 如果adap->nr == -1 则动态分配nr; 否则使用该nr- 1
- 2
-
反注册
i2c_del_adapter(adap);- 1
2. i2c_algorithm示例
- Linux-5.4中使用GPIO模拟I2C

- Linux-5.4中STM32F157的I2C驱动

- Linux-4.9.88中IMX6ULL的I2C驱动
3. 编写一个框架程序
3.1 设备树
在设备树里构造I2C Bus节点:
i2c-bus-virtual { compatible = "100ask,i2c-bus-virtual"; };- 1
- 2
- 3
3.2 platform_driver
分配、设置、注册platform_driver结构体。
核心是probe函数,它要做这几件事:
- 根据设备树信息设置硬件(引脚、时钟等)
- 分配、设置、注册i2c_apdater
3.3 i2c_apdater
i2c_apdater核心是master_xfer函数,它的实现取决于硬件,大概代码如下:
static int xxx_master_xfer(struct i2c_adapter *adapter, struct i2c_msg *msgs, int num) { for (i = 0; i < num; i++) { struct i2c_msg *msg = msgs[i]; { // 1. 发出S信号: 设置寄存器发出S信号 CTLREG = S; // 2. 根据Flag发出设备地址和R/W位: 把这8位数据写入某个DATAREG即可发出信号 // 判断是否有ACK if (!ACK) return ERROR; else { // 3. read / write if (read) { STATUS = XXX; // 这决定读到一个数据后是否发出ACK给对方 val = DATAREG; // 这会发起I2C读操作 } else if(write) { DATAREG = val; // 这会发起I2C写操作 val = STATUS; // 判断是否收到ACK if (!ACK) return ERROR; } } // 4. 发出P信号 CTLREG = P; } } return i; }- 1
- 2
- 3
- 4
- 5
- 6
- 7
- 8
- 9
- 10
- 11
- 12
- 13
- 14
- 15
- 16
- 17
- 18
- 19
- 20
- 21
- 22
- 23
- 24
- 25
- 26
- 27
- 28
- 29
- 30
- 31
- 32
- Linux内核文档:
-
相关阅读:
鹏城AI靶场助力大规模高质量中文语料数据集安全开放
RK3399_安卓SDK编译报错解决方案整理
嵌入式分享合集49
阿里春招JAVA后端面试总结
Stable DIffusion系统教程 | 局部重绘,增删修改的魔法棒
Android案例手册 - 定位点圆形水波纹和椭圆水波纹
DLG4NLP
Ubuntu入门04——目录与文件
LeetCode220726_50、填充每个节点的下一个右侧节点指针
Dify源码本地部署启动
- 原文地址:https://blog.csdn.net/afddasfa/article/details/132883561
