-
WebSocket
一.什么是WebSocket
【1】WebSocket是一种协议,设计用于提供低延迟,全双工和长期运行的连接。
全双工:通信的两个参与方可以同时发送和接收数据,不需要等待对方的响应或传输完成。
【2】比较
传统通信(http协议):电子邮件,网页游览,存在延迟,需要用户主动请求来更新数据。
实时通信(websocket协议):即时消息传递,音视频通话,在线会议和实时数据传输等,可以实现即时的数据传输和交流,不需要用户主动请求或刷新来获取更新数据。
【3】WebSocket之前的世界(基于http):
(1)轮询:客户端定期向服务器发送请求
缺点--会产生大量的请求和响应,导致不必要的网络开销和延迟。
(2)长轮询:在客户端发出请求后,保持连接打开,等待新数据相应后再关闭连接。
缺点--虽然消灭了了无效轮询,但是还是需要频繁的建立和关闭连接。
(3)Comet:保持长连接,在返回请求后继续保持连接打开,并允许服务器通过流式传输,frame等推送技术来主动向客户端推送数据。
缺点--虽然模拟了事实通信,但还是基于http模型,使用推送技巧来实现的。【4】那么怎么建立websocket连接呢?
需要通过HTTP发送一次常规的Get请求,并在请求头中带上Upgrade,告诉服务器,我想从HTTP升级成WebSocket,连接就建立成功了,之后客户端就可以像服务器发送信息。
二.入门案例
1.先搭建配置和程序的基本结构
【1】导入依赖(websocket和fastjson)
- springboot集成websocket,因为springboot项目都继承父项目,所以不用写依赖
- <dependency>
- <groupId>org.springframework.bootgroupId>
- <artifactId>spring-boot-starter-websocketartifactId>
- dependency>
- 在websocket中不能直接像controller那样直接将对象return,所以需要fastjson之类的工具将对象转化为json字符串再返回给前端。
- <dependency>
- <groupId>com.alibabagroupId>
- <artifactId>fastjsonartifactId>
- <version>1.2.62version>
- dependency>
【2】开启springboot对websocket的支持
- @Configuration
- public class WebSocketConfig {
- @Bean
- //注入ServerEndpointExporter,自动注册使用@ServerEndpoint注解的
- public ServerEndpointExporter serverEndpointExporter(){
- return new ServerEndpointExporter();
- }
- }
【3】定义EndPoint类实现(一个websocket的链接对应一个Endpoint类)
--实现向服务器端发送消息都返回666,建议使用postman进行测试:
怎么用postman连接websocket_飞翔的云中猪的博客-CSDN博客- /**
- * @ServerEndpoint 注解的作用
- *
- * @ServerEndpoint 注解是一个类层次的注解,它的功能主要是将目前的类定义成一个websocket服务器端,
- * 注解的值将被用于监听用户连接的终端访问URL地址,客户端可以通过这个URL来连接到WebSocket服务器端
- */
- @Slf4j
- @Component
- @ServerEndpoint("/websocket/{name}")
- public class WebSocket {
- /**
- * 与某个客户端的连接对话,需要通过它来给客户端发送消息
- */
- private Session session;
- /**
- * 标识当前连接客户端的用户名
- */
- private String name;
- /**
- * 用于存储每一个客户端对象对应的WebSocket对象,因为它是属于类的,所以要用static
- */
- private static ConcurrentHashMap
- //下面有三个生命周期
- //生命周期一:连接建立成功调用的方法
- //注意:这个方法的参数列表中只能使用@PathParam结束路径参数,而且必须使用至少一个@PathParam接收路径参数
- @OnOpen
- public void OnOpen(Session session, @PathParam(value = "name") String name){
- log.info("----------------------------------");
- this.session = session;
- this.name = name;
- // name是用来表示唯一客户端,如果需要指定发送,需要指定发送通过name来区分
- webSocketSet.put(name,this);
- log.info("[WebSocket] 连接成功,当前连接人数为:={}",webSocketSet.size());
- log.info("----------------------------------");
- log.info("");
- GroupSending(name+" 来了");
- }
- //生命周期二:连接建立关闭调用的方法
- @OnClose
- public void OnClose(){
- webSocketSet.remove(this.name);
- log.info("[WebSocket] 退出成功,当前连接人数为:={}",webSocketSet.size());
- GroupSending(name+" 走了");
- }
- //生命周期三:连接建立关闭调用的方法收到客户端消息后调用的方法
- @OnMessage
- public void OnMessage(String message_str){
- //只要某个客户端给服务端发送消息,就给它发送666
- AppointSending(this.name,"666");
- }
- //生命周期四:发生错误后调用的方法
- @OnError
- public void onError(Session session, Throwable error){
- log.info("发生错误");
- error.printStackTrace();
- }
- /**
- * 群发
- * @param message
- */
- public void GroupSending(String message){
- for (String name : webSocketSet.keySet()){
- try {
- webSocketSet.get(name).session.getBasicRemote().sendText(message);
- }catch (Exception e){
- e.printStackTrace();
- }
- }
- }
- /**
- * 指定发送
- * @param name
- * @param message
- */
- public void AppointSending(String name,String message){
- try {
- webSocketSet.get(name).session.getBasicRemote().sendText(message);
- }catch (Exception e){
- e.printStackTrace();
- }
- }
- }
简单说就是每有一个客户端连接这个websocket,就会给生成一个websocket对象,并调用OnOpen方法打印日志和存储用户信息。然后连接保持,中间如果这个连接出错,调用OnError方法,如果客户端给服务端发送信息,就调用OnMessage,直到连接关闭,才调用OnClose方法。
然后服务端给客户端发送消息是通过你定义的EndPoint类的session.getBasicRemote().sendText(message)方法,如果你要返回json对象要用fastjson之类进行转换成json格式的字符串。
2.案例一:如果数据库对应的数据改变就向前端发送新的数据信息,解决长轮询的问题
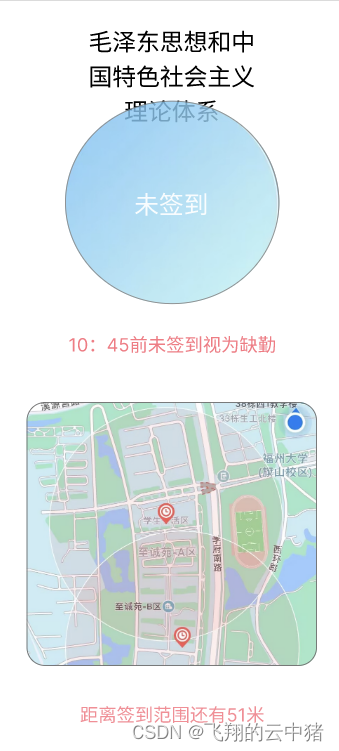
场景:签到页面显示对应的签到信息,要根据信息的改变,如课程的签到状态,需要签到什么课程等信息的改变来在客户端实时更新这些信息。使用webSocket代替轮询解决这个问题。
下面是ui界面:
【1】在configure中增加代码,主要是为了通过配置类进而使得websocket获取请求头中的token
- @Configuration
- @Slf4j
- public class WebSocketConfig extends ServerEndpointConfig.Configurator {
- // 创建ServerEndpointExporter的Bean,用于自动注册WebSocket端点
- @Bean
- public ServerEndpointExporter serverEndpointExporter() {
- return new ServerEndpointExporter();
- }
- /**
- * 建立握手时,连接前的操作
- * 在这个方法中可以修改WebSocket握手时的配置信息,并将一些额外的属性添加到用户属性中
- */
- @Override
- public void modifyHandshake(ServerEndpointConfig sec, HandshakeRequest request, HandshakeResponse response) {
- // 获取用户属性
- final Map
- // 获取HTTP请求头信息
- Map
- // 通过"Authorization"键从请求头中获取对应的token,并存储在用户属性中
- List
header1 = headers.get("Authorization"); - userProperties.put("Authorization", header1.get(0));
- }
- /**
- * 初始化端点对象,也就是被@ServerEndpoint所标注的对象
- * 在这个方法中可以自定义实例化过程,比如通过Spring容器获取实例
- */
- @Override
- public
T getEndpointInstance(Class clazz) throws InstantiationException { - return super.getEndpointInstance(clazz);
- }
- /**
- * 获取指定会话的指定请求头的值
- *
- * @param session WebSocket会话对象
- * @param headerName 请求头名称
- * @return 请求头的值
- */
- public static String getHeader(Session session, String headerName) {
- // 从会话的用户属性中获取指定请求头的值
- final String header = (String) session.getUserProperties().get(headerName);
- // 如果请求头的值为空或空白,则记录错误日志,并关闭会话
- if (StrUtil.isBlank(header)) {
- log.error("获取header失败,不安全的链接,即将关闭");
- try {
- session.close();
- } catch (IOException e) {
- e.printStackTrace();
- }
- }
- return header;
- }
- }
【2】编写ServerEndpoint
这里主要有三个技术点:
技术点一:注入mapper或service
这里注入如果按controller的方式直接注入无法注入成功,需要设置成静态变量然后写个方法赋值。
技术点二:获取请求头中的token,通过配置可以使用session.getUserProperties().get("")获取请求头
技术点三:建立线程,每隔一段时间检查数据库并更新客户端的数据- @Slf4j
- @Component
- @ServerEndpoint(value = "/websocket/studentNowAttendances/{userId}",configurator = WebSocketConfig.class)
- public class CourseAttendanceEndPoint {
- //技术点一:注入mapper或service
- //这里注入如果按controller的方式直接注入无法注入成功,需要设置成静态变量然后写个方法赋值。
- private static StudentMapper studentMapper;
- @Autowired
- public void setStudentMapper (StudentMapper studentMapper){
- CourseAttendanceEndPoint.studentMapper = studentMapper;
- }
- private static CourseAttendanceService courseAttendanceService;
- @Autowired
- public void setCourseAttendanceService (CourseAttendanceService courseAttendanceService){
- CourseAttendanceEndPoint.courseAttendanceService = courseAttendanceService;
- }
- private static RedisCache redisCache;
- @Autowired
- private void setRedisCache (RedisCache redisCache){
- CourseAttendanceEndPoint.redisCache = redisCache;
- }
- /**
- * 与某个客户端的连接对话,需要通过它来给客户端发送消息
- */
- private Session session;
- /**
- * 标识当前连接客户端的用userId
- */
- private String studentId;
- /**
- * 用于存所有的连接服务的客户端,这个对象存储是安全的
- * 注意这里的key和value,设计的很巧妙,value刚好是本类对象 (用来存放每个客户端对应的MyWebSocket对象)
- */
- private static ConcurrentHashMap
- //线程
- private ScheduledExecutorService scheduler;
- //存储该学生用户获取到的课程信息
- private StudentAttendanceNow lastCourseInfo = new StudentAttendanceNow();
- /**
- * 群发
- * @param message
- */
- public void groupSending(String message){
- for (String name : webSocketSet.keySet()){
- try {
- webSocketSet.get(name).session.getBasicRemote().sendText(message);
- }catch (Exception e){
- e.printStackTrace();
- }
- }
- }
- /**
- * 指定发送
- * @param studentId
- * @param message
- */
- public void appointSending(String studentId,String message){
- System.out.println(webSocketSet.get(studentId).session);
- try {
- webSocketSet.get(studentId).session.getBasicRemote().sendText(message);
- }catch (Exception e){
- e.printStackTrace();
- }
- }
- /**
- * 连接建立成功调用的方法
- * session为与某个客户端的连接会话,需要通过它来给客户端发送数据
- */
- @OnOpen
- public void OnOpen(Session session, EndpointConfig config,@PathParam("userId") String userId){
- log.info("----------------------------------");
- //技术点二:获取请求头中的token,通过配置可以使用session.getUserProperties().get("")获取请求头
- // 获取用户属性
- //获取HttpSession对象
- final String Authorization = (String) session.getUserProperties().get("Authorization");
- System.out.println(Authorization);
- Claims claims= JwtUtil.parseJwt(Authorization);
- userId=claims.getSubject();
- QueryWrapper
studentQueryWrapper=new QueryWrapper (); - studentQueryWrapper.eq("userid",userId);
- Student student=studentMapper.selectOne(studentQueryWrapper);
- //为这个websocket的studentId和session变量赋值,因为后面还要用到
- studentId=student.getId().toString();// studentId是用来表示唯一客户端,如果需要指定发送,需要指定发送通过studentId来区分
- this.session=session;//这句话一定要写,不然后面就会报错session为空
- //将studentId及其对应的websocket实例保存在属于类的webSocketSet中,便于后续发送信息时候可以知道要发送给哪个实例
- webSocketSet.put(studentId,this);
- //打印websocket信息
- log.info("[WebSocket] 连接成功,当前连接人数为:={}",webSocketSet.size());
- log.info("----------------------------------");
- log.info("");
- //技术点三:建立线程,每隔一段时间检查数据库并更新客户端的数据
- //建立线程,每个一段时间检查客户端对应在websocket中的数据有没有改变,有改变将信息重新发给客户端
- scheduler = Executors.newScheduledThreadPool(1);
- scheduler.scheduleAtFixedRate(this::checkDatabaseAndUpdateClients, 0, 5, TimeUnit.SECONDS);
- }
- //每个一段时间检查客户端对应在websocket中的数据有没有改变,有改变将信息重新发给客户端
- private void checkDatabaseAndUpdateClients() {
- // 模拟查询最新的课程信息
- // 假设从数据库或其他数据源中查询得到最新的课程信息
- System.out.println("666");
- try{
- //获取当前的信息
- StudentAttendanceNow currentCourseInfo = courseAttendanceService.getStudentAttendanceNow(studentId);
- //与之前的信息进行比较,如果说当前数据与上次存储的数据相比发生了改变,那就替换掉原来的数据并把新的数据发送给客户端
- if(lastCourseInfo.equals(currentCourseInfo)==false){
- lastCourseInfo=currentCourseInfo;
- System.out.println(studentId);
- appointSending(studentId, JSON.toJSONString(currentCourseInfo));
- }
- }catch (Exception e){
- //防止没有查询到数据等异常
- System.out.println(e);
- }
- }
- /**
- * 连接关闭调用的方法
- */
- @OnClose
- public void OnClose(){
- //退出时将用户从记录中删除,并在log中打印退出信息
- webSocketSet.remove(this.studentId);
- log.info("[WebSocket] 退出成功,当前连接人数为:={}",webSocketSet.size());
- // 关闭定时任务
- scheduler.shutdown();
- }
- /**
- * 收到客户端消息后调用的方法
- */
- @OnMessage
- public void OnMessage(Session session,String message){
- }
- /**
- * 发生错误时调用
- * @param session
- * @param error
- */
- @OnError
- public void onError(Session session, Throwable error){
- log.info("发生错误");
- error.printStackTrace();
- }
- }
-
相关阅读:
C++学习笔记03-类的默认成员函数
Kubernetes最小单元Pod的生命周期
HPA控制器
算法力扣刷题记录 四十一【N叉树遍历】
新能源车普及的弊端(劝退向)
SQL中的单行注释,多行注释
JavaWeb在线商城系统(java+jsp+servlet+MySQL+jdbc+css+js+jQuery)
64 最长公共子序列
docker-elasticsearch集群
Java面试题——基础篇二
- 原文地址:https://blog.csdn.net/bjjx123456/article/details/132527501
