-
TypeScript入门指南
TypeScript学习总结内容目录:
- TypeScript概述 TypeScript特性。
- Javascript与TypeScript的区别
* TypeScript安装及其环境搭建 - TypeScript类型声明
* 单个类型声明,多个类型声明
* 任意类型声明
* 函数类型声明
* unknown类型【未知类型】
* 对象类型声明
* 数组类型声明
* 元组
* 枚举 - TypeScript编译选项
* 自动编译文件
* 自动编译整个项目 - webpack打包TS代码
* 配置打包命令
* 创建build文件夹里面webpack.config.js配置 - TypeScript面向对象
* 定义类
* 修饰符
* 方法重载
* 抽象类
* 接口
* 扩展接口 - 类装饰器
- 映射类型
- 条件类型
TypeScript概述
TypeScript是JavaScript的一个超集,支持ECMAScript 6 ES6标准,TypeScript设计目标是开发大型应用,它可以编译成纯Javascript,编译出来的Javascript可以运行在任何浏览器上。
TypeScript特性。
TypeScript是一种给JavaScript添加特性的语言扩展,增加一下功能,类型批注和编译时类型检查,类型推断,类型擦除,接口,枚举,Mixin,泛型编程,名字空间,元组,Await,和冲ECMA2015移植过来的,类,模块,lambda函数的箭头语法,可选参数以及默认参数。
Javascript与TypeScript的区别
TypeScript是Javascript的超集,扩展了JavaScript的语法,因此现有的Javascript代码可以与TypeScript一起工作无需任何更改,TypeScript通过类型注解提供编译时静态类型检查,TypeScript可处理已有的JavaScript代码,并只对其中的TypeScript代码进行编译。


TypeScript安装及其环境搭建-
下载Node.js 并 安装Node.js
【下载NodeJS】


一直”next“

一直"next"
![TypeScript安装及其环境搭建]](https://img-blog.csdnimg.cn/931c7af0b93d4d729faf544f5119ab29.png)
选择安装路径


搭建完成~

-
使用全局安装typeScript

安装完成以后,接着输入命令
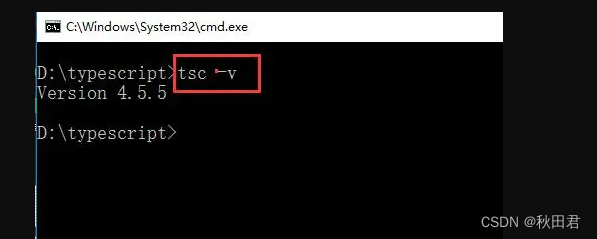
查看typescript编译器的版本信息,代表安装成功 -
创建一个ts文件并运行
nodePad++ 安装包
链接: https://pan.baidu.com/s/1YTb2NNK7HQ6YELlIxms0mg?pwd=3s8v 提取码: 3s8v
复制这段内容后打开百度网盘手机App,操作更方便哦

使用tsc new.ts 生成一个.js文件

使用 node new.ts 运行ts文件

TypeScript类型声明
强类型定义语言在数度上可能略逊色于弱类型定义语言,但是强类型定义语言带来的严谨性能够有效的避免许多错误。
- 单个声明类型、多个类型声明
//单个声明类型 var [变量名] : [类型]; var a: let a:number; //多个类型声明 var [变量名]:[类型1]|[类型2] let c:boolean|string; c = true c = "hello"- 1
- 2
- 3
- 4
- 5
- 6
- 7
- 8
- 任意类型声明
//任意类型,如果不指定类型,则ts解析器会自动判断变量的类型为any(隐式的any) //方式一、var [变量名] = 值; //方式二、let [变量名] :[any] let d:any; //任何类型 d = 1; d = "1" d = true;- 1
- 2
- 3
- 4
- 5
- 6
- 7
- 函数类型声明
// 函数类型 function sum(a:number,b:number):number{ //a,b只能是number类型,返回类型必须是number } function sum(a:number,b:number):number:boolen{ //返回值类型可以说number或者boolen } //没有返回值函数 function fun():void{ /* * viod 标识空,没有返回值,如果写return 会报错 * 可以返回null,undefined */ } // 永远都不会返回结果 function fun():never{ throw new Error("error") //never表示永远不会返回结果,会报错 } //设置函数结构的类型声明 希望d是函数,a,b是number,返回类型number let d:(a:number,b:number)=>number d = function(a:number,b:number):number{ return a + b }- 1
- 2
- 3
- 4
- 5
- 6
- 7
- 8
- 9
- 10
- 11
- 12
- 13
- 14
- 15
- 16
- 17
- 18
- 19
- 20
- 21
- 22
- 23
- 24
- unknown类型【未知类型】
//unknown类型,unknow类型变量不能随便赋值给其他变量, let e:unknown e=10; e="hellow"; e=true; let a:string; a=e; //unknow类型,赋值给其它会报错 //如果真的想赋值,可以通过如下方式 if(typeof(e)==="string"){ a = e } //或者通过类型断言:高数解析器变量的实际类型,跳过报错 a = e as string a = <string>e- 1
- 2
- 3
- 4
- 5
- 6
- 7
- 8
- 9
- 10
- 11
- 12
- 13
- 14
- 对象类型声明
// {}用来指定对象中可以包含哪些属性 let b:{ name:string, age?:number //加一个问好代表这个属性可有可无,可选属性 } b = {name:"张三",age:18} b = {name:"张三"} // name必填,[prop:string]:any 任意类型的属性 let c:{name:string,[prop:string]:any} c = {name:"李四",a:1,b:2,c:"aaaa"};- 1
- 2
- 3
- 4
- 5
- 6
- 7
- 8
- 9
- 10
- 11
- 数组类型声明
//格式 // Array<类型> // string[]表示字符串数组 let arr:string[]; arr = ['a','b','c'] //数值类型 let arr2:Array<number> arr2 = [1,2,3]- 1
- 2
- 3
- 4
- 5
- 6
- 7
- 8
- 9
- 元组
元组,元素就是固定长度的数组 语法: [类型,类型,类型] let h : [string,string] h = ["1","2"]- 1
- 2
- 3
- 4
- 枚举
//所有可能情况列举出来 enum Gender{ Male = 0, Fenake = 1 } let i : {name:string,gender:Gender} i={ name:"孙悟空", gender:Gender.male } console.log(i.gender === Gender.Male) // &表示同时满足类型 let j : {name:string} & {age:number} //类型别名 简化类型的使用 type myType = 1|2|3|4|5; let k : myType; let l : myType; let m : myType;- 1
- 2
- 3
- 4
- 5
- 6
- 7
- 8
- 9
- 10
- 11
- 12
- 13
- 14
- 15
- 16
- 17
- 18
- 19
- 20
- 21
TypeScript编译选项
-
自动编译文件
编译文件时,使用-w指令后,ts编译器会自动监视文件的变化,并在文件发生变化的时候对文件进行重新编辑。
tsc xxx.ts -w- 1
-
自动编译整个项目
tsc- 1
但是,使用tsc的前提,是要在项目根目录下创建一个ts的配置文件 tsconfig.json,添加完成后,只需要tsc命令就可以对整个项目的ts文件进行编译。
tsconfig.json是ts编译器的配置文件,可以根据他的信息可以对代码进行编译。配置如下
1. “include”:用来指定哪些ts文件需要编译
** 表示任意目录
* 表示任意文件
例如:“include”:[“./src/**/*”]
2. “exclude” 不需要被编译的文件目录例如:“exclude”:[".src/hello/**/“]
3.“extends” 继承 其他的配置文件
*例如:“extends”:”./config/base"
4.“files” 用来指定被编译的文件的列表,只需要编译的文件少时才会用到。
“files”:[
“code.te”,
“hellow.ts”,
“binder.ts”
]
5.“compilerOptions” 编译选项是配置文件中非常重要也比较复杂的配置选项,在compilerOptions中包含了许多哥子选项,用来完成对编译器的配置。
“compilerOptions”:{
“target”:“ES6”, //通设定ts被编译的ES的版本
“module”:“commonjs”, //指定要使用的模块化的规范
“lib”:[“dom”], //用来指定项目中的要使用的库
“outDir”:“./dist”, //用来指定编译后文件所在的目录
“outFile”:“./dist/app.js”, //将代码合并成一个文件,设置outFile后,所有的全局作用域中的代码会合并到同一个文件中
“allowJs”:false, //是否对JS文件进行编译,默认是false
“checkJs”:false, //是否检查JS代码符合语法的规范,默认是false
“removeComments”:true, //编译时候是否移除注释
“noEmit”:false, //不生成编译后的文件
“noEmitError”:true, //当有错误时候不生成编译后的文件
“alwaysStrict”:false, //用来设置编译后的文件是否使用严格模式,默认false
“noImplicitAny”:false //不允许隐式的数据类型
}添加tsconfig.json文件
可以使用tsc或者tsc -w进行运行,生成js文件,
WebPack打包TS代码
- 首先下载依赖,在集成终端打开后:
npm init -y tsc --init 产生对应的ts.config.js文件 npm install -D typescript npm install -D webpack@4.41.5 webpack-cli@3.3.10 npm install -D webpack-dev-server@3.10.2 启动开发服务器的 npm install -D html-webpack-plugin@4.0.0-alpha clean-webpack-plugin 对html内容进行打包 / 清除之前打包好的js文件 npm install -D ts-loader@8.0.11 针对ts文件进行编译处理 npm install -D cross-env 涉及跨平台命令- 1
- 2
- 3
- 4
- 5
- 6
- 7
- 8
- 配置打包命令:
"dev": "cross-env NODE_ENV=development webpack-dev-server --config build/webpack.config.js", "build": "cross-env NODE_ENV=production webpack --config build/webpack.config.js"- 1
- 2
- 创建build文件夹里面webpack.config.js配置如下:
const {CleanWebpackPlugin} = require('clean-webpack-plugin') const HtmlWebpackPlugin = require('html-webpack-plugin') const path = require('path') const isProd = process.env.NODE_ENV === 'production' // 是否生产环境 function resolve (dir) { return path.resolve(__dirname, '..', dir) } module.exports = { mode: isProd ? 'production' : 'development', //模式:生产模式还是开发模式 entry: { app: './src/main.ts' //程序主入口目录 }, output: { path: resolve('dist'), //将打包好的文件放到dist目录里面 filename: '[name].[contenthash:8].js' //产生的js文件是以app加上8位的哈希值.js来命名的 }, module: { rules: [ //rules主要是通过ts-loader这个包针对于ts文件,针对src目录里面的ts和tsx文件进行编译处理操作 { test: /\.tsx?$/, use: 'ts-loader', include: [resolve('src')] } ] }, plugins: [ new CleanWebpackPlugin({ //会将dist目录中以前打包的js文件进行清楚 }), new HtmlWebpackPlugin({ //针对于./public/index.html进行打包的 template: './public/index.html' }) ], resolve: { extensions: ['.ts', '.tsx', '.js'] //针对于'.ts', '.tsx', '.js'这三种文件进行处理引入文件可以不写他的扩展名 }, //针对于代码的错误提示 devtool: isProd ? 'cheap-module-source-map' : 'cheap-module-eval-source-map', devServer: { host: 'localhost', // 主机名 stats: 'errors-only', // 打包日志输出输出错误信息 port: 8081, //端口 open: true //自定打开浏览器 }, }- 1
- 2
- 3
- 4
- 5
- 6
- 7
- 8
- 9
- 10
- 11
- 12
- 13
- 14
- 15
- 16
- 17
- 18
- 19
- 20
- 21
- 22
- 23
- 24
- 25
- 26
- 27
- 28
- 29
- 30
- 31
- 32
- 33
- 34
- 35
- 36
- 37
- 38
- 39
- 40
- 41
- 42
- 43
- 44
- 45
- 46
- 47
- 48
- 49
- 50
- 51
- 52
- 53
- 最后创建src目录下的main.ts:
document.write('Hello Webpack TS!') npm run dev后在主页面中成功查看hellowebpackTS就说明成功运行- 1
- 2
TS面向对象
- 定义类
class 类名 { 属性名: 类型; constructor(参数: 类型){ this.属性名 = 参数; } 方法名(){ .... } }- 1
- 2
- 3
- 4
- 5
- 6
- 7
- 8
- 9
- 修饰符
static 静态属性,通过类即可直接使用,不能被子类共享
readonly 只读属性无法修改
public 默认值,可以在类、子类和对象中修改
protected 可以在类、子类中修改
private 可以在类中修改constructor(public name: string, public age: number) {} 可以直接将属性定义在构造函数中: //语法糖: name: string; age: number constructor(name: string, age: number) { this.name = name; this.age = age; } //Singleton 类 class Order { count: number = 0 private static instanceRef: Order private constructor() { } static getInstance(): Order { if (Order.instanceRef === undefined) Order.instanceRef = new Order() return Order.instanceRef } } // const order = new Order() => 构造函数是私有的,仅可在类声明中访问。 const order1 = Order.getInstance() const order2 = Order.getInstance() order1.count++; order2.count++; console.log(order1.count) //2 console.log(order2.count) //2 //---------------------------------- Order有一个private构造函数,不能用new实例化 Order,在 static getInstance()中完成调用该类构造函数, 这是调用该方法的唯一途径,两次 console.log 都是打印 2,因为只有一个 Order 的实例。 若想创建一个自身不能被实例化而子类能被实例化的类时,可以用 protected 修饰构造函数。 class OrderItem extends Order { pid: string constructor(pid: string, count: number) { super() this.productid = productid } }- 1
- 2
- 3
- 4
- 5
- 6
- 7
- 8
- 9
- 10
- 11
- 12
- 13
- 14
- 15
- 16
- 17
- 18
- 19
- 20
- 21
- 22
- 23
- 24
- 25
- 26
- 27
- 28
- 29
- 30
- 31
- 32
- 33
- 34
- 35
- 36
- 37
- 方法重载
声明多个同名的方法,但只能统一实现,结合条件判断,使用 | 表明多个类型的返回值。若声明方法的代码去掉,代码仍然正常运行,或者干脆设置不同的方法名。
重载目的:提供从参数类型到返回值类型的合适的映射。
应用场景:重载构造函数。
重构构造函数 < = > 用接口表示可能的参数 obj,constructor(properties?: 接口名){}
class Product { getProducts(): void getProducts(id: number): void getProducts(id?: number): void { if (typeof id == 'number'){ console.log(`Getting the product info for ${id}`) }else { console.log('Getting all products') } } }- 1
- 2
- 3
- 4
- 5
- 6
- 7
- 8
- 9
- 10
- 11
运行效果:


- 抽象类
抽象类是专门用来被其他类所继承的类,它只能被其他类所继承不能用来创建实例。
抽象方法,抽象方法没有方法体只能定义在抽象类中,继承抽象类时抽象方法必须要实现
abstract class Animal{ abstract run(): void; bark(){ console.log('动物在叫~'); } } class Dog extends Animals{ run(){ console.log('狗在跑~'); } }- 1
- 2
- 3
- 4
- 5
- 6
- 7
- 8
- 9
- 10
- 11
- 接口
再JS中并没有接口概念,接口interface通俗的来说就是对类中的属性和方法进行统一的类型声明,哪个类调用此接口,在一般情况下具有接口中相应的类型声明的属性和方法,接口中的属性和方法名后添加表示属性或方法是可选项,调用接口的类中可以根据具体的需要进行声明,一个类可以实现多个接口的调用,不同的接口用逗号隔开,需要注意的是,接口中声明的方法默认是抽象方法,也就是不具备方法体,需要我们调用接口的时候进行方法重写。
type myType = { name: string, age: number }; const obj: myType = { name: 'sss', age: 111 };- 1
- 2
- 3
- 4
- 5
- 6
- 7
- 8
Interface myInterface { name: string; age: number; } const obj: myInterface = { name: 'sss', age: 111 };- 1
- 2
- 3
- 4
- 5
- 6
- 7
- 8
上面代码中,进行了type和interface的比较
不能创建多个同名type,但是可以创建多个同名接口,采取合并策略。
接口用来定义一个类的结构,该类应该包含的属性/方法(不能同时),也可以当成类型声明。
接口只定义对象的结构,不考虑实际值。
在接口中,所有的属性都不赋实际值,所有的方法都是抽象方法。
不能在联合或交叉中使用接口类。interface Person { age: number } interface Customer { n ame: string } type cust = Person | Customer √ interface cust = Person | Customer ×- 1
- 2
- 3
- 4
- 5
- 6
- 7
- 8
- 接口实现
一个类可以实现多个接口,用逗号隔开
class MyClass implements myInter{ constructor(public name: string) { this.name = name; } sayHello(){ console.log('大家好~~'); } }- 1
- 2
- 3
- 4
- 5
- 6
- 7
- 8
- 扩展接口
interface B extends A{ 声明 B 新增的方法 }- 1
- 2
- 3
- getter 和 setter
在类中定义一组读取 getter、设置属性 setter 的方法,被称为属性的存取器。
private _name: string; private _age: number; constructor(name:string, age: number) { this._name = name; this._age = age; } get name(){ return this._name; } set name(value: string){ this._name = value; } get age(){ return this._age; } set age(value: number){ if(value >= 0){ this._age = value } }- 1
- 2
- 3
- 4
- 5
- 6
- 7
- 8
- 9
- 10
- 11
- 12
- 13
- 14
- 15
- 16
- 17
- 18
- 19
- 20
此时可以修改 per.name = ‘猪八戒’; per.age = -33;否则若为定义存取器,会报错。
- 泛型
(1),繁星差异:当x类可用,就可使用与X类兼容的其他对象或子类,即泛型差异适用于结构相同的对象。
(2),不指定泛型,TS可以自动对类型进行推断。function fn<T>(a: T): T{ //=> 箭头函数:const fn =(a: T):T =>{……} return a; } fn('huahua') //自动识别为string- 1
- 2
- 3
- 4
function fn2<T, K>(a: T, b: K):T{ console.log(b); return a; } fn2<number, string>(123, 'hello');- 1
- 2
- 3
- 4
- 5
interface Inter{ length: number } function fn3<T extends Inter>(a: T): number{ return a.length; }- 1
- 2
- 3
- 4
调用使用泛型的类或接口时,必须指定类型,若不确定类型 →
Solve:any 类型,extends A 或 > 声明默认参数类型 class A哑元类型,class A < T= {}>
实例——接口用于比较矩形大小和员工工资。
实例——接口用于比较矩形大小和员工工资。
interface Comparator<T> { compareTo(value: T): number; } class Rt implements Comparator<Rt>{ constructor( private width: number, private height: number){} compareTo(value: Rt): number { return this.width * this.height - value.width * value.height } } class Pg implements Comparator<Pg>{ constructor( public name: string, private salary: number) {} compareTo(value: Pg): number { return this.salary - value.salary; } } const rect1: Rect = new Rect(2, 5); const rect2: Rect = new Rect(2, 3); rect1.compareTo(rect2)>0?console.log("rect1 is bigger"):(rect1.compareTo(rect2)== 0 ? console.log("rects are equal") :console.log("rect1 is smaller")) const prog1: Pg = new Pg("John", 20000); const prog2: Pg = new Pg("Alex", 30000); prog1.compareTo(prog2) > 0 ?console.log(`${prog1.name} is richer`) :prog1.compareTo(prog2) == 0 ? console.log(`earn the same amounts`) : console.log(`${prog1.name} is poorer`)- 1
- 2
- 3
- 4
- 5
- 6
- 7
- 8
- 9
- 10
- 11
- 12
- 13
- 14
- 15
- 16
- 17
- 18
- 19
- 20
- 21
类装饰器
(1) 参数——类的构造函数
(2) 类装饰器返回类型为 void,不会替换类声明(观察类)。返回新函数,会修改构造函数。Eg:观察类 function whoAmI (target: Function): void{ console.log(`You are: ${target} `) } @whoAmI class Friend { constructor(private name: string, private age: number){} }- 1
- 2
- 3
- 4
- 5
- 6
- 7
- 8
观察类 2 function UIcomponent (html: string): Funcion { console.log(`The decorator received ${html} \n`); return function(target: Function) { console.log(`A UI component from \n ${target}`) } } @UIcomponent('Hello Shopper!
') class Shopper { constructor(private name: string) {} }- 1
- 2
- 3
- 4
- 5
- 6
- 7
- 8
- 9
- 10
- 11
(3)修改类声明的装饰器:
// 使用类型 any[]的 rest 参数,可以混合其他有构造函数的类 type constructorMixin = { new(...args: any[]): {} }; function useSalutation(salutation: string) { return function <T extends constructorMixin>(target: T) { return class extends target { name: string private message = 'Hello ' + salutation + this.name sayHello() { console.log(`${this.message}`); } } } } // 运行时 tsc ***.ts --target ES5 -w --experimentalDecorators @useSalutation("Mr. ") class Greeter { constructor(public name: string) { } sayHello() { console.log(`Hello ${this.name}`) }; } const grt = new Greeter('Smith'); grt.sayHello(); => Hello Mr. Smith- 1
- 2
- 3
- 4
- 5
- 6
- 7
- 8
- 9
- 10
- 11
- 12
- 13
- 14
- 15
- 16
- 17
- 18
- 19
(4)函数装饰器
(1) target 引用定义函数的实例类的对象 propertyKey 被装饰的函数的名称 descriptor 被装饰的函数的标识符,含一个 value 属性,存储被装饰函数的原始代码。 修改该属性,可以修改被装饰函数的原始代码。 function logTrade(target, propertyKey, descriptor) { descriptor.value = function () { console.log(`Invoked ${propertyKey} providing:`, arguments); } } class Trade { @logTrade placeOrder(stockName: string, quantity: number, operation: string, tradedID: number) {} } const trade = new Trade(); trade.placeOrder('IBM', 100, 'Buy', 123); => Invoked placeOrder providing: [Arguments] {'0':'IBM','1':100,'2':'Buy','3': 123}- 1
- 2
- 3
- 4
- 5
- 6
- 7
- 8
- 9
- 10
- 11
- 12
- 13
- 14
- 15
- 16
(5)执行顺序
属性 > 方法 > 方法参数 > 类,多个同样的装饰器,它会先执行后面的装饰器。 // 类装饰器 function anotationClass(id) { console.log('anotationClass evaluated', id); return (target) => console.log('Class executed', id); } // 方法装饰器 function anotationMethods(id) { console.log('anotationMethods evaluated', id); return (target, property, descriptor) => console.log('Methods executed', id); } @anotationClass(1) @anotationClass(2) class Example { @anotationMethods(1) @anotationMethods(2) method() { } } // Methods evaluated 1 // Methods evaluated 2 // Methods executed 2 // Methods executed 1 // Class evaluated 1 // Class evaluated 2 // Class executed 2 // Class executed 1- 1
- 2
- 3
- 4
- 5
- 6
- 7
- 8
- 9
- 10
- 11
- 12
- 13
- 14
- 15
- 16
- 17
- 18
- 19
- 20
- 21
- 22
- 23
- 24
- 25
- 26
映射类型
1.Readonly:只读映射类型,将先前声明的类型的所有属性都调整为 Readonly。
原理 : type Readonly<T> = { //索引类型查询,表示属性名的联合 Readonly [P in keyof T]: T[P] //表示将给定类型 T 的所用属性联合给 P,T[p]是查询类型,表示类型为 T[p]的属性。 } Eg:interface Person { name: string age: number } type propNames = keyof Person // type propNames = "name"|"age" type propTypes = Person[propNames] // type propTypes = string | number const worker: Person = { name: 'John', age: 22 } function doStuff(person: Readonly<Person>) { person.age = 25 =>无法分配到 "age" ,因为它是只读属性。 } keyof 和 T[p] 应用 interface Person { name: string; age: number; } const persons: Person[] = [ { name: 'John', age: 32 }, { name: 'Mary', age: 33 }, ]; function filterBy<T, P extends keyof T>( property: P, value: T[P], array: T[]) { return array.filter(item => item[property] === value); } console.log(filterBy('name', 'John', persons)); console.log(filterBy('lastName', 'John', persons)); // error console.log(filterBy('age', 'twenty', persons)); // error- 1
- 2
- 3
- 4
- 5
- 6
- 7
- 8
- 9
- 10
- 11
- 12
- 13
- 14
- 15
- 16
- 17
- 18
- 19
- 20
- 21
- 22
- 23
- 24
- 25
- 26
- 27
- 28
- 29
- 30
- 31
- 32
2.Partial:
//所有属性可选,原理 → type Partial<T> = { [P in keyof T]?: T[P] }- 1
- 2
- 3
- 4
3.Required
//所有属性都必须,原理 → type Required<T> = { [P in keyof T]-?: T[P] }- 1
- 2
- 3
- 4
4.Pick
//选择给定类型属性的子集声明新类型 type Pick<T, K extends keyof T> ={ [P in K]: T[P] }- 1
- 2
- 3
- 4
5.多个映射类型
Readonly<Partial<Person>>- 1
6.自定义
type Modifiable<T> = { -readonly [P in keyof T]: T[P] } type NewPromise<T> = T extends (...args: infer A) => infer R ? (...args: A) => Promise<R> : T; type Promisify<T> = { [P in keyof T]: NewPromise<T[P]> }- 1
- 2
- 3
- 4
- 5
- 6
- 7
- 8
条件类型
1.T extends U ? X : Y
含义:检查是否 T 可以分配给 U,如果为真,则使用类型 X,否则使用类型 Y。
2.Exclude 类型
原理: type Exclude
U,这保留它,否则过滤掉它。 Eg:删除 Person 类型中的 name 和 age 属性。class Person { id: number; name: string; age: number; } type RemoveProps<T, K> = Exclude<keyof T, K> type RemainingProps = RemoveProps<Person, 'name' | 'age'>; <=> 'id' | 'name' | 'age' extends 'name' | 'age' ? never : 'id' | 'name' | 'age' <=> RemainingProps = 'id' type PersonBlindAuditions = Pick<Person, RemainingProps>; <=> 表示 Person 类属性子集的联合被重新声明新类型 <=> 结果 type PersonBlindAuditions = { id: number}- 1
- 2
- 3
- 4
- 5
- 6
- 7
- 8
- 9
- 10
- 11
3.infer 关键字
type ReturnType = T extends (…args: infer A) => infer R ?
含义:该类型是一个函数,参数为任意数量的 infer A 类型,返回值为 infer R 类型。 应用:将类中的方法转化为异步方法interface SyncService { baseUrl: string; getA(): string; } type ReturnPromise<T> = T extends (...args: infer A) => infer R ? (...args: A) => Promise<R> : T; type Promisify<T> = { [P in keyof T]: ReturnPromise<T[P]>; }; class AsyncService implements Promisify<SyncService> { baseUrl: string; getA(): Promise<string> { return Promise.resolve(''); } } let service = new AsyncService(); let result = service.getA(); // hover answer——let result: Promise- 1
- 2
- 3
- 4
- 5
- 6
- 7
- 8
- 9
- 10
- 11
- 12
- 13
- 14
- 15
- 16
- 17
-
相关阅读:
基于阿里云GPU云服务器的AIACC助力UC搜索业务性能提效380%,每年节省数千万成本
二、主流的架构方法论
【c++&GDAL】IHS融合
LeetCode刷题
MySQL数据库基本操作
利用遥感影像计算大蒜种植面积
【DevOps】Git 图文详解(八):后悔药 - 撤销变更
安装rdkit报错:解决CondaHTTPError: HTTP 000 CONNECTION FAILED for url问题
SpringBoot集成RocketMQ实现分布式事务
解析分布式系统的缓存设计
- 原文地址:https://blog.csdn.net/qq_42696432/article/details/130103976
