-
uni-app的三种操作数据库方法
欢迎关注b站:小淼前端
有更多的视频讲解+源代码可领取哦~
欢迎关注b站:小淼前端
有更多的视频讲解+源代码可领取哦~
目录
欢迎大家关注:
b站:小淼前端
我会不定时的更新教程哦~
前端与后端(云端)分离实现数据库的操作
1.使用云函数来操作数据库
第一步:
创建一个云函数并部署
第二部:
在云函数中写入数据库的操作代码:
- const db = uniCloud.database();
- exports.main = async (event, context) => {
- //event为客户端上传的参数
- //返回数据给客户端
- return await db.collection("News_system").add({
- xingming:"张三"
- })
- };
第三步:
前端代码:
- <template>
- <view>
- <button @click="add">添加button>
- view>
- template>
- <script>
- // const db = uniCloud.database();
- export default {
- data() {
- return {
- }
- },
- onLoad() {
- },
- methods: {
- add(){
- // return db.collection("News_system").add({
- // xingming:"1111"
- // }).then(res=>{
- // console.log(res)
- // })
- uniCloud.callFunction({
- name:"hanshu1"
- }).then(res=>{
- console.log(res)
- })
- }
- }
- }
- script>
- <style>
- style>
显示数据库数据表信息添加情况:

2.使用云对象来操作数据库
第一步:
先创建一个云对象并写入相应的数据库操作的代码:
- const db = uniCloud.database();
- module.exports = {
- _before: function () { // 通用预处理器
- },
- add:()=>{
- db.collection("News_system").add({
- nianling:16
- })
- }
- }
第二步:
将其上传部署!
第三步前端代码:
- <template>
- <view>
- <button @click="add">添加button>
- view>
- template>
- <script>
- const duixiang1 = uniCloud.importObject("duixiang1")
- // const db = uniCloud.database();
- export default {
- data() {
- return {
- }
- },
- onLoad() {
- },
- methods: {
- add(){
- duixiang1.add().then(res=>{
- console.log(res)
- })
- // return db.collection("News_system").add({
- // xingming:"1111"
- // }).then(res=>{
- // console.log(res)
- // })
- // uniCloud.callFunction({
- // name:"hanshu1"
- // }).then(res=>{
- // console.log(res)
- // })
- }
- }
- }
- script>
- <style>
- style>
注意:我这里必选先调用一下我们写的云对象,然后调用后直接对我们新赋值的参数进行操作即可!
const duixiang1 = uniCloud.importObject("duixiang1")- duixiang1.add().then(res=>{
- console.log(res)
回到数据库:我们可以发现我们点击按钮时,我们想添加的数据已经在我们的数据库中了!

前端与后端(云端)结合实现客户端操作数据库
3.使用DB Schema结构规范实现客户端对数据库的操作
第一步:

我们线在数据库中创建一个数据表。
第二步:


在 uniCloud中的database中右键,后选择下载所有DB Schema及扩展校验函数。
等在下载完毕后我们会发现

我们的数据表:News_system已经在database中。
第三步:
然后我们打开它后,我们将原来的表文件改为:

注意:
将:
- "read": true,
- "create": true,
是将我们数据表中的权限的”读取“和”添加“打开!
properties中我们需要添加我们结合前端的需要在数据表中添加的数据(请结合第四步理解):
- "xingming": {
- "bsonType": "string",
- "title": "姓名"
- }
第四步:
- <template>
- <view>
- <button @click="add">添加button>
- view>
- template>
- <script>
- const db = uniCloud.database();
- export default {
- data() {
- return {
- }
- },
- onLoad() {
- },
- methods: {
- add(){
- return db.collection("News_system").add({
- xingming:"1111"
- }).then(res=>{
- console.log(res)
- })
- }
- }
- }
- script>
- <style>
- style>
我们直接在前端对数据库进行一系列的操作:
const db = uniCloud.database();- return db.collection("News_system").add({
- xingming:"1111"
- }).then(res=>{
- console.log(res)
- })
我们这里想要添加的
xingming:"1111"要必须在第三步中的数据表中进行xingming这个参数名的配置。
如第三步中的:
- "xingming": {
- "bsonType": "string",
- "title": "姓名"
- }
回到前端页面:

我们发现,当我们点击添加时,后台已经给我们打印出来了东西,说明我们的数据表的权限已经处于打开状态,并且此时我们的想要添加的数据已经成功的添加到数据库中。
回到后端(云端)数据库:
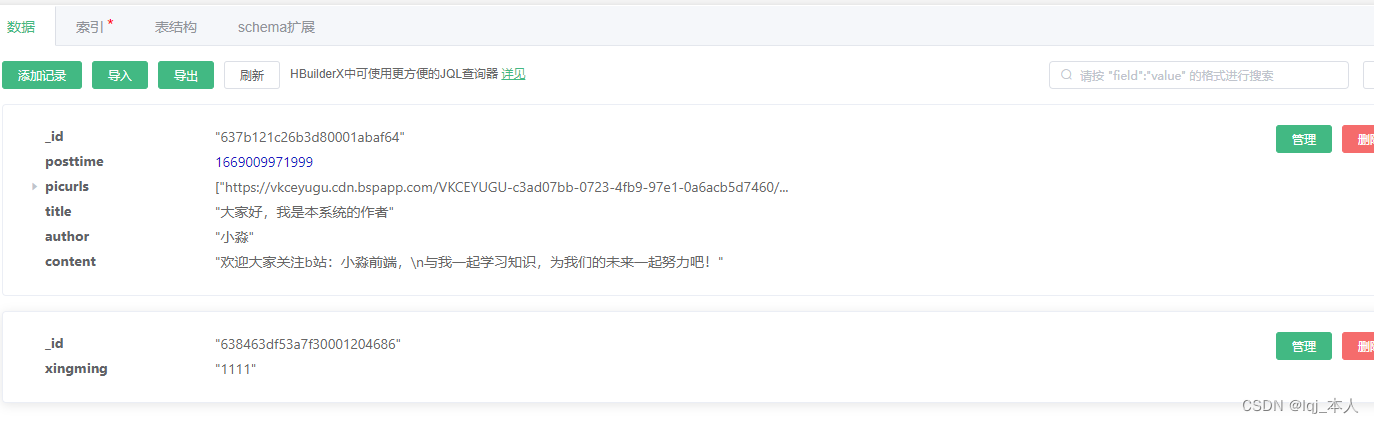
我们可以发现,我们通过修改数据表权限的方式能实现通过纯前端的操作就可以实现对数据库进行操作!
-
相关阅读:
反碎片化技术(外部碎片)的原理
适配器模式 ( Adapter Pattern )(6)
C++ 无符号类型
大数据培训企业开发案例实时读取目录文件到HDFS案例
Telink TLSR8258DK开发板zigbee开发
Ganache本地测试网+cpolar内网穿透实现公网访问内网
LLM(大语言模型)常用评测指标-MAP@R
VR全景中特效是如何编辑的?细节功能如何展示?
大爷,快来玩呀!带禁手规则的五子棋实践强化学习理论
基于Android studio智能快递柜存放取物系统java
- 原文地址:https://blog.csdn.net/lbcyllqj/article/details/128080468