-
Hive搭建
Hive系列第二章
第二章 Hive搭建
2.1 MySQL5.6安装
1、检查删除已有的 有就删除,没有就不用管。 rpm -qa | grep mysql rpm -e mysql-libs-5.1.73-8.el6_8.x86_64 --nodeps rpm -qa | grep mariadb rpm -e --nodeps mariadb-libs-5.5.56-2.el7.x86_64 2、删除mysql分散的文件夹 whereis mysql rm -rf /usr/lib64/mysql 3、 准备安装包 MySQL-5.6.27-1.linux_glibc2.5.x86_64.rpm-bundle.tar, 上传,解压 命令:tar -xvf MySQL-5.6.27-1.linux_glibc2.5.x86_64.rpm-bundle.tar 4、 安装 server rpm -ivh MySQL-server-5.6.27-1.linux_glibc2.5.x86_64.rpm 5、 安装客户端 rpm -ivh MySQL-client-5.6.27-1.linux_glibc2.5.x86_64.rpm 6、 登陆 MYSQL(登录之前千万记得一定要启动 mysql 服务) 启动MySQL服务 service mysql start 登录MySQL 然后登陆,初始密码在 /root/.mysql_secret 这个文件里 Cq2HDH3dUr1ggQIu mysql -uroot -pCq2HDH3dUr1ggQIu 7、 修改密码 set PASSWORD=PASSWORD('111111'); 8、退出登陆验证,看是否改密码成功 9、增加远程登陆权限,执行以下两个命令: >grant all privileges on *.* to 'root'@'%' identified by '111111' with grant option; >flush privileges; 10、至此 mysql 安装成功- 1
- 2
- 3
- 4
- 5
- 6
- 7
- 8
- 9
- 10
- 11
- 12
- 13
- 14
- 15
- 16
- 17
- 18
- 19
- 20
- 21
- 22
- 23
- 24
- 25
- 26
- 27
- 28
- 29
- 30
- 31
- 32
- 33
- 34
- 35
- 36
- 37
- 38
- 39
- 40
- 41
2.2 Hive1安装
1、安装mysql 2、上传安装包 apache-hive-1.2.1-bin.tar.gz 3、 解压安装包 tar -zxvf apache-hive-1.2.1-bin.tar.gz mv apache-hive-1.2.1-bin hive 4、 修改配置文件 目录下面没有,直接vim就可以了。 [root@hadoop0 conf]# vim hive-site.xmljavax.jdo.option.ConnectionURL jdbc:mysql://localhost:3306/hivedb?createDatabaseIfNotExist=true javax.jdo.option.ConnectionDriverName com.mysql.jdbc.Driver javax.jdo.option.ConnectionUserName root javax.jdo.option.ConnectionPassword 111111 hive.metastore.warehouse.dir /user/hive/warehouse --service serviceName Service List: beeline cli help hiveburninclient hiveserver2 hiveserver hwi jar lineage metastore metatool orcfiledump rcfilecat schemaTool version Parameters parsed: --auxpath : Auxillary jars --config : Hive configuration directory --service : Starts specific service/component. cli is default Parameters used: HADOOP_HOME or HADOOP_PREFIX : Hadoop install directory HIVE_OPT : Hive options For help on a particular service: ./hive --service serviceName --help Debug help: ./hive --debug --help 8、 初始化元数据库 注意:当 hive 依赖普通分布式 hadoop 集群,不做初始化也是 OK 的,当 hive 第一次启动的时候会自动进行初始化。 schematool -dbType mysql -initSchema 9、 启动 Hive 客户端 [root@hadoop0 bin]# hive --service cli Logging initialized using configuration in jar:file:/software/hive/lib/hive-common-1.2.1.jar!/hive-log4j.properties hive> 直接使用hive启动也行。 10、退出 Hive hive> quit; 或者 hive> exit; - 1
- 2
- 3
- 4
- 5
- 6
- 7
- 8
- 9
- 10
- 11
- 12
- 13
- 14
- 15
- 16
- 17
- 18
- 19
- 20
- 21
- 22
- 23
- 24
- 25
- 26
- 27
- 28
- 29
- 30
- 31
- 32
- 33
- 34
- 35
- 36
- 37
- 38
- 39
- 40
- 41
- 42
- 43
- 44
- 45
- 46
- 47
- 48
- 49
- 50
- 51
- 52
- 53
- 54
- 55
- 56
- 57
- 58
- 59
- 60
- 61
- 62
- 63
- 64
- 65
- 66
- 67
- 68
- 69
2.3 Hive2安装
1、安装mysql 2、上传安装包 apache-hive-2.3.8-bin.tar.gz 3、 解压安装包 tar -zxvf apache-hive-2.3.8-bin.tar.gz mv apache-hive-2.3.8-bin hive2 4、 修改配置文件 目录下面没有,直接vim就可以了。 [root@hadoop0 conf]# vim hive-site.xmljavax.jdo.option.ConnectionURL jdbc:mysql://localhost:3306/hivedb2?createDatabaseIfNotExist=true javax.jdo.option.ConnectionDriverName com.mysql.jdbc.Driver javax.jdo.option.ConnectionUserName root javax.jdo.option.ConnectionPassword 111111 hive.metastore.warehouse.dir /user/hive/warehouse --service serviceName Service List: beeline cli help hiveburninclient hiveserver2 hiveserver hwi jar lineage metastore metatool orcfiledump rcfilecat schemaTool version Parameters parsed: --auxpath : Auxillary jars --config : Hive configuration directory --service : Starts specific service/component. cli is default Parameters used: HADOOP_HOME or HADOOP_PREFIX : Hadoop install directory HIVE_OPT : Hive options For help on a particular service: ./hive --service serviceName --help Debug help: ./hive --debug --help 8、 初始化元数据库 注意:当 hive 依赖普通分布式 hadoop 集群,不做初始化也是 OK 的,当 hive 第一次启动的时候会自动进行初始化。 schematool -dbType mysql -initSchema 9、 启动 Hive 客户端 [root@hadoop0 lib]# hive SLF4J: Class path contains multiple SLF4J bindings. SLF4J: Found binding in [jar:file:/software/hadoop/share/hadoop/common/lib/slf4j-log4j12-1.7.10.jar!/org/slf4j/impl/StaticLoggerBinder.class] SLF4J: Found binding in [jar:file:/software/hive2/lib/log4j-slf4j-impl-2.6.2.jar!/org/slf4j/impl/StaticLoggerBinder.class] SLF4J: See http://www.slf4j.org/codes.html#multiple_bindings for an explanation. SLF4J: Actual binding is of type [org.slf4j.impl.Log4jLoggerFactory] 21/05/18 21:20:35 INFO conf.HiveConf: Found configuration file file:/software/hive2/conf/hive-site.xml Logging initialized using configuration in jar:file:/software/hive2/lib/hive-common-2.3.8.jar!/hive-log4j2.properties Async: true 21/05/18 21:20:38 INFO SessionState: Logging initialized using configuration in jar:file:/software/hive2/lib/hive-common-2.3.8.jar!/hive-log4j2.properties Async: true 21/05/18 21:20:39 INFO session.SessionState: Created HDFS directory: /tmp/hive/root/1a0eb4c0-a7eb-410a-9734-925ea5d03807 21/05/18 21:20:39 INFO session.SessionState: Created local directory: /tmp/root/1a0eb4c0-a7eb-410a-9734-925ea5d03807 21/05/18 21:20:39 INFO session.SessionState: Created HDFS directory: /tmp/hive/root/1a0eb4c0-a7eb-410a-9734-925ea5d03807/_tmp_space.db 21/05/18 21:20:39 INFO conf.HiveConf: Using the default value passed in for log id: 1a0eb4c0-a7eb-410a-9734-925ea5d03807 21/05/18 21:20:39 INFO session.SessionState: Updating thread name to 1a0eb4c0-a7eb-410a-9734-925ea5d03807 main Hive-on-MR is deprecated in Hive 2 and may not be available in the future versions. Consider using a different execution engine (i.e. spark, tez) or using Hive 1.X releases. 21/05/18 21:20:39 INFO CliDriver: Hive-on-MR is deprecated in Hive 2 and may not be available in the future versions. Consider using a different execution engine (i.e. spark, tez) or using Hive 1.X releases. hive> 10、退出 Hive hive> quit; 或者 hive> exit; - 1
- 2
- 3
- 4
- 5
- 6
- 7
- 8
- 9
- 10
- 11
- 12
- 13
- 14
- 15
- 16
- 17
- 18
- 19
- 20
- 21
- 22
- 23
- 24
- 25
- 26
- 27
- 28
- 29
- 30
- 31
- 32
- 33
- 34
- 35
- 36
- 37
- 38
- 39
- 40
- 41
- 42
- 43
- 44
- 45
- 46
- 47
- 48
- 49
- 50
- 51
- 52
- 53
- 54
- 55
- 56
- 57
- 58
- 59
- 60
- 61
- 62
- 63
- 64
- 65
- 66
- 67
- 68
- 69
- 70
- 71
- 72
- 73
- 74
- 75
- 76
- 77
- 78
- 79
- 80
- 81
- 82
- 83
- 84
- 85
上面中第8步骤中的初始化数据库
[root@hadoop0 lib]# schematool -dbType mysql -initSchema SLF4J: Class path contains multiple SLF4J bindings. SLF4J: Found binding in [jar:file:/software/hadoop/share/hadoop/common/lib/slf4j-log4j12-1.7.10.jar!/org/slf4j/impl/StaticLoggerBinder.class] SLF4J: Found binding in [jar:file:/software/hive2/lib/log4j-slf4j-impl-2.6.2.jar!/org/slf4j/impl/StaticLoggerBinder.class] SLF4J: See http://www.slf4j.org/codes.html#multiple_bindings for an explanation. SLF4J: Actual binding is of type [org.slf4j.impl.Log4jLoggerFactory] 21/05/18 21:16:45 INFO conf.HiveConf: Found configuration file file:/software/hive2/conf/hive-site.xml Metastore connection URL: jdbc:mysql://localhost:3306/hivedb2?createDatabaseIfNotExist=true Metastore Connection Driver : com.mysql.jdbc.Driver Metastore connection User: root Starting metastore schema initialization to 2.3.0 Initialization script hive-schema-2.3.0.mysql.sql Initialization script completed schemaTool completed- 1
- 2
- 3
- 4
- 5
- 6
- 7
- 8
- 9
- 10
- 11
- 12
- 13
- 14

2.4 MySQL5.7安装
MySQL下载地址: https://downloads.mysql.com/archives/community/

1、上传解压


2、删除原来Centos7上面已有的MySQL相关内容
[root@hadoop10 software]# rpm -qa|grep mysql [root@hadoop10 software]# rpm -qa|grep mariadb mariadb-libs-5.5.68-1.el7.x86_64 [root@hadoop10 software]# rpm -e --nodeps mariadb-libs-5.5.68-1.el7.x86_64 [root@hadoop10 software]# rpm -qa|grep mariadb [root@hadoop10 software]#- 1
- 2
- 3
- 4
- 5
- 6

3、安装MySQL相关服务
rpm -ivh mysql-community-common-5.7.32-1.el7.x86_64.rpm rpm -ivh mysql-community-libs-5.7.32-1.el7.x86_64.rpm rpm -ivh mysql-community-libs-compat-5.7.32-1.el7.x86_64.rpm rpm -ivh mysql-community-client-5.7.32-1.el7.x86_64.rpm rpm -ivh mysql-community-server-5.7.32-1.el7.x86_64.rpm- 1
- 2
- 3
- 4
- 5
注意安装的时候按照顺序安装。

4、初始化数据库,然后生成对应的临时密码

[root@hadoop10 mysql]# cat /var/log/mysqld.log [root@hadoop10 mysql]# pwd /software/mysql [root@hadoop10 mysql]# mysqld --initialize --user=mysql [root@hadoop10 mysql]# cat /var/log/mysqld.log 2021-09-18T09:35:50.147120Z 0 [Warning] TIMESTAMP with implicit DEFAULT value is deprecated. Please use --explicit_defaults_for_timestamp server option (see documentation for more details). 2021-09-18T09:35:51.244724Z 0 [Warning] InnoDB: New log files created, LSN=45790 2021-09-18T09:35:51.366111Z 0 [Warning] InnoDB: Creating foreign key constraint system tables. 2021-09-18T09:35:51.445145Z 0 [Warning] No existing UUID has been found, so we assume that this is the first time that this server has been started. Generating a new UUID: d023611d-1863-11ec-99e0-000c29c415d7. 2021-09-18T09:35:51.446228Z 0 [Warning] Gtid table is not ready to be used. Table 'mysql.gtid_executed' cannot be opened. 2021-09-18T09:35:52.168727Z 0 [Warning] CA certificate ca.pem is self signed. 2021-09-18T09:35:52.324359Z 1 [Note] A temporary password is generated for root@localhost: Uc5&LIwp6OU/- 1
- 2
- 3
- 4
- 5
- 6
- 7
- 8
- 9
- 10
- 11
- 12
- 13
5、找到对应的临时密码

[root@hadoop10 mysql]# cat /var/log/mysqld.log 2021-09-18T09:35:50.147120Z 0 [Warning] TIMESTAMP with implicit DEFAULT value is deprecated. Please use --explicit_defaults_for_timestamp server option (see documentation for more details). 2021-09-18T09:35:51.244724Z 0 [Warning] InnoDB: New log files created, LSN=45790 2021-09-18T09:35:51.366111Z 0 [Warning] InnoDB: Creating foreign key constraint system tables. 2021-09-18T09:35:51.445145Z 0 [Warning] No existing UUID has been found, so we assume that this is the first time that this server has been started. Generating a new UUID: d023611d-1863-11ec-99e0-000c29c415d7. 2021-09-18T09:35:51.446228Z 0 [Warning] Gtid table is not ready to be used. Table 'mysql.gtid_executed' cannot be opened. 2021-09-18T09:35:52.168727Z 0 [Warning] CA certificate ca.pem is self signed. 2021-09-18T09:35:52.324359Z 1 [Note] A temporary password is generated for root@localhost: Uc5&LIwp6OU/- 1
- 2
- 3
- 4
- 5
- 6
- 7
- 8
6、启动MySQL服务

[root@hadoop10 mysql]# systemctl start mysqld.service [root@hadoop10 mysql]# systemctl status mysqld.service ● mysqld.service - MySQL Server Loaded: loaded (/usr/lib/systemd/system/mysqld.service; enabled; vendor preset: disabled) Active: active (running) since Sat 2021-09-18 17:39:00 CST; 26s ago Docs: man:mysqld(8) http://dev.mysql.com/doc/refman/en/using-systemd.html Process: 13798 ExecStart=/usr/sbin/mysqld --daemonize --pid-file=/var/run/mysqld/mysqld.pid $MYSQLD_OPTS (code=exited, status=0/SUCCESS) Process: 13767 ExecStartPre=/usr/bin/mysqld_pre_systemd (code=exited, status=0/SUCCESS) Main PID: 13801 (mysqld) Tasks: 27 CGroup: /system.slice/mysqld.service └─13801 /usr/sbin/mysqld --daemonize --pid-file=/var/run/mysqld/mysqld.pid Sep 18 17:38:58 hadoop10 systemd[1]: Starting MySQL Server... Sep 18 17:39:00 hadoop10 systemd[1]: Started MySQL Server.- 1
- 2
- 3
- 4
- 5
- 6
- 7
- 8
- 9
- 10
- 11
- 12
- 13
- 14
- 15
- 16
- 17
7、使用临时密码登录MySQL
[root@hadoop10 mysql]# mysql -uroot -pF_xwRf7ejrUk mysql: [Warning] Using a password on the command line interface can be insecure. Welcome to the MySQL monitor. Commands end with ; or \g. Your MySQL connection id is 2 Server version: 5.7.32 Copyright (c) 2000, 2020, Oracle and/or its affiliates. All rights reserved. Oracle is a registered trademark of Oracle Corporation and/or its affiliates. Other names may be trademarks of their respective owners. Type 'help;' or '\h' for help. Type '\c' to clear the current input statement. mysql>- 1
- 2
- 3
- 4
- 5
- 6
- 7
- 8
- 9
- 10
- 11
- 12
- 13
- 14
- 15
- 16
8、修改密码,并退出重新登录验证
[root@hadoop10 mysql]# mysql -uroot -pF_xwRf7ejrUk mysql: [Warning] Using a password on the command line interface can be insecure. Welcome to the MySQL monitor. Commands end with ; or \g. Your MySQL connection id is 2 Server version: 5.7.32 Copyright (c) 2000, 2020, Oracle and/or its affiliates. All rights reserved. Oracle is a registered trademark of Oracle Corporation and/or its affiliates. Other names may be trademarks of their respective owners. Type 'help;' or '\h' for help. Type '\c' to clear the current input statement. mysql> set PASSWORD=PASSWORD('111111'); Query OK, 0 rows affected, 1 warning (0.00 sec) mysql> exit; Bye [root@hadoop10 mysql]# mysql -uroot -p111111 mysql: [Warning] Using a password on the command line interface can be insecure. Welcome to the MySQL monitor. Commands end with ; or \g. Your MySQL connection id is 3 Server version: 5.7.32 MySQL Community Server (GPL) Copyright (c) 2000, 2020, Oracle and/or its affiliates. All rights reserved. Oracle is a registered trademark of Oracle Corporation and/or its affiliates. Other names may be trademarks of their respective owners. Type 'help;' or '\h' for help. Type '\c' to clear the current input statement. mysql>- 1
- 2
- 3
- 4
- 5
- 6
- 7
- 8
- 9
- 10
- 11
- 12
- 13
- 14
- 15
- 16
- 17
- 18
- 19
- 20
- 21
- 22
- 23
- 24
- 25
- 26
- 27
- 28
- 29
- 30
- 31
- 32
- 33
- 34
- 35

9、修改远程访问权限

mysql> grant all privileges on *.* to 'root'@'%' identified by '111111' with grant option; Query OK, 0 rows affected, 1 warning (0.00 sec) mysql> flush privileges; Query OK, 0 rows affected (0.00 sec)- 1
- 2
- 3
- 4
- 5
- 6
补充:重新生成初始化密码:
[root@hadoop10 lib]# cd mysql [root@hadoop10 mysql]# ll total 110660 -rw-r-----. 1 mysql mysql 56 Sep 18 17:35 auto.cnf -rw-------. 1 mysql mysql 1676 Sep 18 17:35 ca-key.pem -rw-r--r--. 1 mysql mysql 1112 Sep 18 17:35 ca.pem -rw-r--r--. 1 mysql mysql 1112 Sep 18 17:35 client-cert.pem -rw-------. 1 mysql mysql 1680 Sep 18 17:35 client-key.pem -rw-r-----. 1 mysql mysql 301 Sep 18 17:45 ib_buffer_pool -rw-r-----. 1 mysql mysql 12582912 Sep 18 17:45 ibdata1 -rw-r-----. 1 mysql mysql 50331648 Sep 18 17:45 ib_logfile0 -rw-r-----. 1 mysql mysql 50331648 Sep 18 17:35 ib_logfile1 drwxr-x---. 2 mysql mysql 4096 Sep 18 17:35 mysql drwxr-x---. 2 mysql mysql 8192 Sep 18 17:35 performance_schema -rw-------. 1 mysql mysql 1680 Sep 18 17:35 private_key.pem -rw-r--r--. 1 mysql mysql 452 Sep 18 17:35 public_key.pem -rw-r--r--. 1 mysql mysql 1112 Sep 18 17:35 server-cert.pem -rw-------. 1 mysql mysql 1676 Sep 18 17:35 server-key.pem drwxr-x---. 2 mysql mysql 8192 Sep 18 17:35 sys [root@hadoop10 mysql]# pwd /var/lib/mysql [root@hadoop10 mysql]# rm -rf * [root@hadoop10 mysql]# pwd /var/lib/mysql [root@hadoop10 mysql]# ll total 0 [root@hadoop10 mysql]# [root@hadoop10 mysql]# mysqld --initialize --user=mysql- 1
- 2
- 3
- 4
- 5
- 6
- 7
- 8
- 9
- 10
- 11
- 12
- 13
- 14
- 15
- 16
- 17
- 18
- 19
- 20
- 21
- 22
- 23
- 24
- 25
- 26
- 27
- 28
- 29

2.5 Hive3安装
2.5.1 安装MySQL
见2.4MySQL5.7安装
2.5.2 上传解压重命名
[root@hadoop10 software]# tar -zxvf apache-hive-3.1.2-bin.tar.gz [root@hadoop10 software]# mv apache-hive-3.1.2-bin hive- 1
- 2

2.5.3 添加环境变量
export HIVE_HOME=/software/hive export PATH=$PATH:$HIVE_HOME/bin- 1
- 2

2.5.4 修改配置文件hive-site.xml
目录下面没有,直接vim就可以了。
[root@hadoop10 conf]# vim hive-site.xmljavax.jdo.option.ConnectionURL jdbc:mysql://localhost:3306/hivedb3?useSSL=false javax.jdo.option.ConnectionDriverName com.mysql.jdbc.Driver javax.jdo.option.ConnectionUserName root javax.jdo.option.ConnectionPassword 111111 hive.metastore.warehouse.dir /user/hive/warehouse - 1
- 2
- 3
- 4
- 5
- 6
- 7
- 8
- 9
- 10
- 11
- 12
- 13
- 14
- 15
- 16
- 17
- 18
- 19
- 20
- 21
- 22

2.5.5 给MySQL的jar包放到hive的lib下面
一定要记得加入 MySQL 驱动包(mysql-connector-java-5.1.40-bin.jar)
该 jar 包放置在 hive 的根路径下的 lib 目录在下面的路径里面,根据个人的配置略有不同。
/software/hive/lib- 1

2.5.6 初始化元数据库遇到的问题
[root@hadoop10 software]# schematool -dbType mysql -initSchema- 1
可能遇到的问题:
[root@hadoop10 software]# schematool -dbType mysql -initSchema SLF4J: Class path contains multiple SLF4J bindings. SLF4J: Found binding in [jar:file:/software/hive/lib/log4j-slf4j-impl-2.10.0.jar!/org/slf4j/impl/StaticLoggerBinder.class] SLF4J: Found binding in [jar:file:/software/hadoop/share/hadoop/common/lib/slf4j-log4j12-1.7.25.jar!/org/slf4j/impl/StaticLoggerBinder.class] SLF4J: See http://www.slf4j.org/codes.html#multiple_bindings for an explanation. SLF4J: Actual binding is of type [org.apache.logging.slf4j.Log4jLoggerFactory] Exception in thread "main" java.lang.NoSuchMethodError: com.google.common.base.Preconditions.checkArgument(ZLjava/lang/String;Ljava/lang/Object;)V at org.apache.hadoop.conf.Configuration.set(Configuration.java:1357) at org.apache.hadoop.conf.Configuration.set(Configuration.java:1338) at org.apache.hadoop.mapred.JobConf.setJar(JobConf.java:536) at org.apache.hadoop.mapred.JobConf.setJarByClass(JobConf.java:554) at org.apache.hadoop.mapred.JobConf.(JobConf.java:448) at org.apache.hadoop.hive.conf.HiveConf.initialize(HiveConf.java:5141) at org.apache.hadoop.hive.conf.HiveConf. (HiveConf.java:5104) at org.apache.hive.beeline.HiveSchemaTool. (HiveSchemaTool.java:96) at org.apache.hive.beeline.HiveSchemaTool.main(HiveSchemaTool.java:1473) at sun.reflect.NativeMethodAccessorImpl.invoke0(Native Method) at sun.reflect.NativeMethodAccessorImpl.invoke(NativeMethodAccessorImpl.java:62) at sun.reflect.DelegatingMethodAccessorImpl.invoke(DelegatingMethodAccessorImpl.java:43) at java.lang.reflect.Method.invoke(Method.java:498) at org.apache.hadoop.util.RunJar.run(RunJar.java:323) at org.apache.hadoop.util.RunJar.main(RunJar.java:236) - 1
- 2
- 3
- 4
- 5
- 6
- 7
- 8
- 9
- 10
- 11
- 12
- 13
- 14
- 15
- 16
- 17
- 18
- 19
- 20
- 21
- 22
- 23
{% asset_img image-20210921181507537.png %}
这是由于hadoop的common中的lib里面的包和hive的lib里面的包冲突导致的。可以参考如下方法解决:
hadoop中的路径为:
[root@hadoop10 lib]# pwd /software/hadoop/share/hadoop/common/lib- 1
- 2
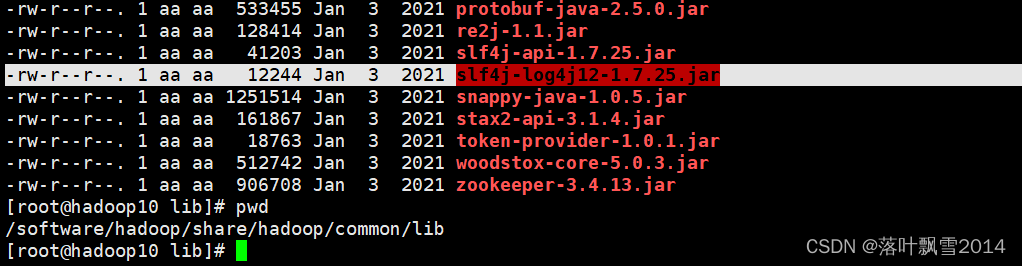
Hive中的路径:
[root@hadoop10 lib]# pwd /software/hive/lib- 1
- 2

保留一个就可以了。下面我们通过给hive的jar包注释掉的方式解决。
也就是给hive中的jar重命名让它不生效即可。
[root@hadoop10 lib]# mv log4j-slf4j-impl-2.10.0.jar log4j-slf4j-impl-2.10.0.jar.backup- 1
上面是解决了jar日志的冲突而已。看接着报错如下,其实报错信息没有变,只是上面的解决方案帮日志jar的冲突打印给解决了 。 需要接着解决下面的问题,下面的问题是guava不一致引起的。

1、给Hive的下面的包删除了,或者重命名让失效
[root@hadoop10 lib]# mv guava-19.0.jar guava-19.0.jar.backup- 1
2、给hadoop下面的包拷贝过来。
[root@hadoop10 lib]# pwd /software/hadoop/share/hadoop/common/lib [root@hadoop10 lib]# cp guava-27.0-jre.jar /software/hive/lib/- 1
- 2
- 3

2.5.7 再次初始化元数据库
解决了上面的问题之后,再次启动,提示需要先在MySQL中创建数据库hivedb3。这个和hive1和hive2版本都不一样。
在hive1和hive2版本中不需要自己提前创建。在hive3版本中需要自己提前创建。
[root@hadoop10 ~]# schematool -dbType mysql -initSchema Metastore connection URL: jdbc:mysql://localhost:3306/hivedb3?useSSL=false Metastore Connection Driver : com.mysql.jdbc.Driver Metastore connection User: root org.apache.hadoop.hive.metastore.HiveMetaException: Failed to get schema version. Underlying cause: com.mysql.jdbc.exceptions.jdbc4.MySQLSyntaxErrorException : Unknown database 'hivedb3' SQL Error code: 1049 Use --verbose for detailed stacktrace. *** schemaTool failed ***- 1
- 2
- 3
- 4
- 5
- 6
- 7
- 8
- 9

1、下面就先在MySQL中创建对应的元数据库
[root@hadoop10 ~]# mysql -uroot -p111111 mysql: [Warning] Using a password on the command line interface can be insecure. Welcome to the MySQL monitor. Commands end with ; or \g. Your MySQL connection id is 7 Server version: 5.7.32 MySQL Community Server (GPL) Copyright (c) 2000, 2020, Oracle and/or its affiliates. All rights reserved. Oracle is a registered trademark of Oracle Corporation and/or its affiliates. Other names may be trademarks of their respective owners. Type 'help;' or '\h' for help. Type '\c' to clear the current input statement. mysql> create database hivedb3; Query OK, 1 row affected (0.00 sec) mysql> quit; Bye [root@hadoop10 ~]#- 1
- 2
- 3
- 4
- 5
- 6
- 7
- 8
- 9
- 10
- 11
- 12
- 13
- 14
- 15
- 16
- 17
- 18
- 19
- 20
- 21
2、再次初始化元数据库就成功了
[root@hadoop10 ~]# schematool -dbType mysql -initSchema Metastore connection URL: jdbc:mysql://localhost:3306/hivedb3?useSSL=false Metastore Connection Driver : com.mysql.jdbc.Driver Metastore connection User: root Starting metastore schema initialization to 3.1.0 Initialization script hive-schema-3.1.0.mysql.sql (中间会有很多空白行,可以加上 -verbose 显示对应详细信息) Initialization script completed schemaTool completed [root@hadoop10 ~]#- 1
- 2
- 3
- 4
- 5
- 6
- 7
- 8
- 9
- 10
- 11
- 12
- 13
- 14


2.5.8 启动hive客户端
注意先启动MySQL和Hadoop
[root@hadoop10 ~]# hive which: no hbase in (.:.:.:/usr/local/sbin:/usr/local/bin:/usr/sbin:/usr/bin:/software/jdk/bin:/software/zk/bin:/software/hadoop/bin:/software/hadoop/sbin:/software/hive/bin:/root/bin) Hive Session ID = 68244266-325a-4600-8e91-d52d65f24629 Logging initialized using configuration in jar:file:/software/hive/lib/hive-common-3.1.2.jar!/hive-log4j2.properties Async: true Hive-on-MR is deprecated in Hive 2 and may not be available in the future versions. Consider using a different execution engine (i.e. spark, tez) or using Hive 1.X releases. Hive Session ID = 475cdcf6-2da2-48dd-8c13-1e4161527f92 hive> show databases; OK default Time taken: 0.495 seconds, Fetched: 1 row(s) hive>- 1
- 2
- 3
- 4
- 5
- 6
- 7
- 8
- 9
- 10
- 11
- 12
- 13

2.6 关于使用默认的derby数据库的补充说明
1、安装步骤
安装步骤是直接安装hive
上传、解压、重命名、添加环境变量
初始化元数据库
bin/schematool -dbType derby -initSchema- 1
2、使用derby的问题
在针对于同一份数据打开两个及两个以上的客户端进行操作的时候,会报错如下
Caused by: ERROR XSDB6: Another instance of Derby may have already booted the database ........- 1
这是因为 Hive 默认使用的元数据库为 derby,开启 Hive 之后就会占用元数据库,且不与其他客户端共享数据。也就相当于是单用户单客户端操作。
所以在企业中需要将 Hive 的元数据地址改为 MySQL。Derby数据库不做深究了,大家知道即可。
声明:
文章中代码及相关语句为自己根据相应理解编写,文章中出现的相关图片为自己实践中的截图和相关技术对应的图片,若有相关异议,请联系删除。感谢。转载请注明出处,感谢。
By luoyepiaoxue2014B站: https://space.bilibili.com/1523287361 点击打开链接
微博地址: http://weibo.com/luoyepiaoxue2014 点击打开链接 -
相关阅读:
ArcGIS QGIS学习二:图层如何只显示需要的部分几何面数据(附最新坐标边界下载全国省市区县乡镇)
黑客利用 MinIO 存储系统漏洞危害服务器
wordcloud—根据文本生成词云—Python第三方库
Java程序员毕业N年系列----毕业二年
C#.Net筑基-类型系统①基础
js正则表达式之中文验证(转)
MySQL进阶教程汇总
从零开始配置 vim(13)——标签页插件
QCommandLineOption、QCommandLineParser
git的基本操作
- 原文地址:https://blog.csdn.net/luoyepiaoxue2014/article/details/128036740
