-
Egg.js初步使用
Egg.js的简单初步使用
所使用代码已上传github, 注意数据库配置方面。如有问题可交流。
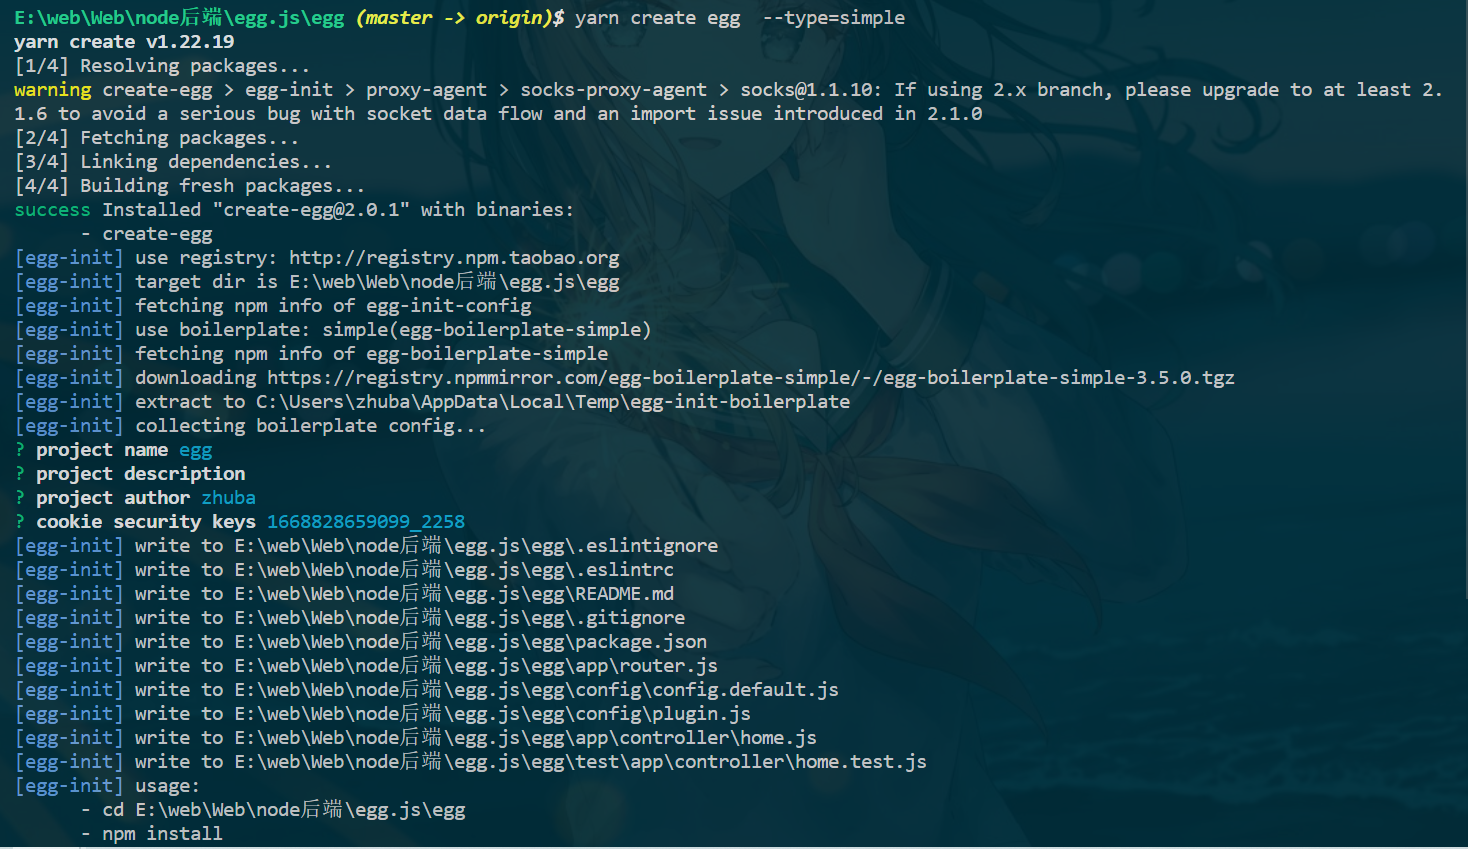
简单使用 – 骨架类型
eggjs 是阿里出品的企业级 node 框架,奉行 约定优于配置 ,一切基于约定开发,减少团队沟通成本,另一个比较重要的点是 egg 拥有完善的日志系统,对于 bug 定位等及其方便。
骨架类型 说明 simple 简单 egg 应用程序骨架 empty 空的 egg 应用程序骨架 plugin egg plugin 骨架 framework egg framework 骨架 安装依赖
yarn create egg --type=simple或者npm install -g yarn,然后yarn或者npm i安装npx egg-init --type=ts showcase cd showcase && npm i npm run dev- 1
- 2
- 3
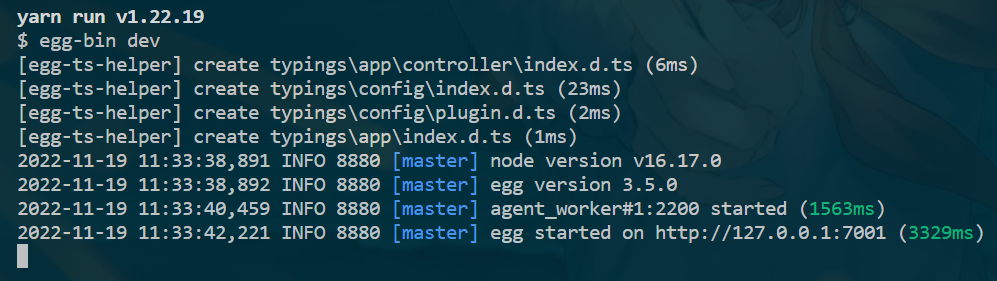
启动:
yarn dev- dev : 开发环境中使用,不用重启服务器,只要刷新。修改内容就会更改。
- start:生产环境中使用,也就是开发完成,正式运营之后。以服务的方式运行。修改后要停止和重启后才会发生改变。


- app - 项目开发的主目录,工作中的代码几乎都写在这里面 -- controller -- 控制器目录,所有的控制器都写在这个里面 -- router.js -- 项目的路由文件 - config - 项目配置目录,比如插件相关的配置 -- config.default.js -- 系统默认配置文件 -- plugin.js -- 插件配置文件 - logs -- 项目启动后的日志文件夹 - node_modules - 项目的运行/开发依赖包,都会放到这个文件夹下面 - test - 项目测试/单元测试时使用的目录 - run - 项目启动后生成的临时文件,用于保证项目正确运行 - typings - TypeScript配置目录,说明项目可以使用TS开发 - .eslintignore - ESLint配置文件 - .eslintrc - ESLint配置文件,语法规则的详细配置文件 - .gitignore - git相关配置文件,比如那些文件归于Git管理,那些不需要 - jsconfig.js - js配置文件,可以对所在目录下的所有JS代码个性化支持 - package.json - 项目管理文件,包含包管理文件和命令管理文件 - README.MD - 项目描述文件- 1
- 2
- 3
- 4
- 5
- 6
- 7
- 8
- 9
- 10
- 11
- 12
- 13
- 14
- 15
- 16
- 17
Egg.js与Koa/Express 对比
框架的设计理念 约定优于配置 .

编写controller 和 单元测试
同步单元测试 和 异步单元测试
// zhuba.js 'use strict'; const Controller = require('egg').Controller; class zhubaController extends Controller { async index() { const { ctx, } = this; ctx.body = 'This is zhuBaController
; } } module.exports = zhubaController; // zhuba.test.js 'use strict'; const { app, } = require('egg-mock/bootstrap'); describe('zhuba test', () => { it('zhuba index', () => { return app.httpRequest().get('/zhuba').expect(200) .expect(''
This is zhuBaController
); }); }); // describe( )方法有两个参数,第一个是测试的描述(字符串类型),这个描述一般都是用文件的路径。 // 第二个参数是一个回调函数,里边是对这个控制器里边的具体方法的测试用例。 // 官方的 home.test.js 'use strict'; const { app, assert, } = require('egg-mock/bootstrap'); describe('test/app/controller/home.test.js', () => { it('should assert', async () => { const pkg = require('../../../package.json'); assert(app.config.keys.startsWith(pkg.name)); }); it('should GET /', async () => { return app.httpRequest() .get('/') .expect('Hello World! Egg.js') .expect(200); }); });'
- 1
- 2
- 3
- 4
- 5
- 6
- 7
- 8
- 9
- 10
- 11
- 12
- 13
- 14
- 15
- 16
- 17
- 18
- 19
- 20
- 21
- 22
- 23
- 24
- 25
- 26
- 27
- 28
- 29
- 30
- 31
- 32
- 33
- 34
- 35
- 36
- 37
- 38
- 39
- 40
- 41
- 42
- 43
- 44
- 45
- 46
- 47
- 48
- 49
- 50
- 51
- 52
- 53
- 54

yarn test全绿即是没问题// zhuba.js 'use strict'; const Controller = require('egg').Controller; class zhubaController extends Controller { async index() { const { ctx, } = this; ctx.body = 'This is zhuBaController
; } async getGirls() { const { ctx, } = this; await new Promise(resolve => { setTimeout(() => { resolve(ctx.body = ''
kunkun,正在向你走来
'); }, 1000); }); } } module.exports = zhubaController; // zhuba.test.js 'use strict'; const { app, } = require('egg-mock/bootstrap'); describe('zhuba test', () => { it('zhuba index', () => { return app.httpRequest().get('/zhuba').expect(200) .expect('This is zhuBaController
); }); it('zhuba getGirls', async () => { await app.httpRequest().get('/getGirls').expect(200) .expect(''
kunkun,正在向你走来
'); }); });- 1
- 2
- 3
- 4
- 5
- 6
- 7
- 8
- 9
- 10
- 11
- 12
- 13
- 14
- 15
- 16
- 17
- 18
- 19
- 20
- 21
- 22
- 23
- 24
- 25
- 26
- 27
- 28
- 29
- 30
- 31
- 32
- 33
- 34
- 35
- 36
- 37
- 38
- 39
- 40
- 41
- 42
- 43
- 44
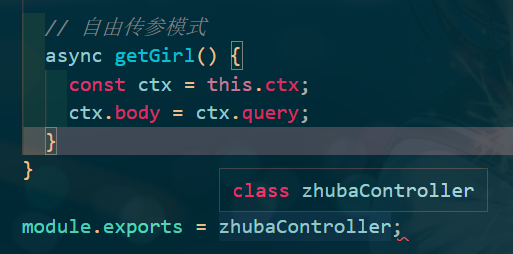
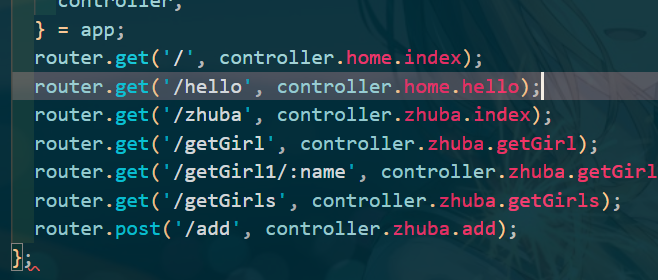
Get 请求和参数传递
自由传参
配置好router后

严格传参
少参数就会404


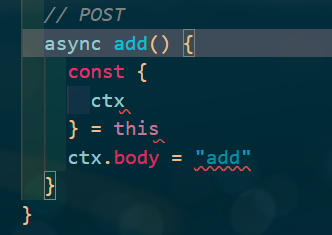
POST 请求
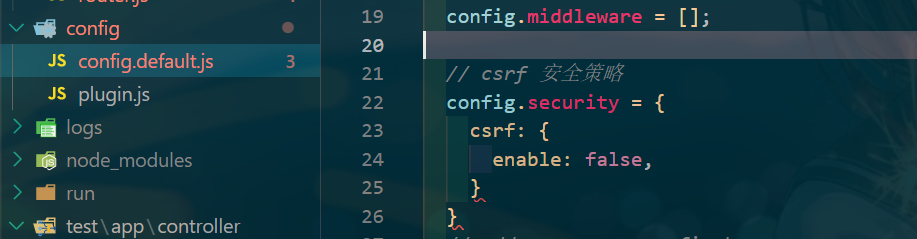
添加config/config.default.js, 关闭csrf安全策略CSRF的全名为 Cross-site request forgery, 它的中文名为 伪造跨站请求。
// csrf 安全策略 config.security = { csrf: { enable: false, } }- 1
- 2
- 3
- 4
- 5
- 6
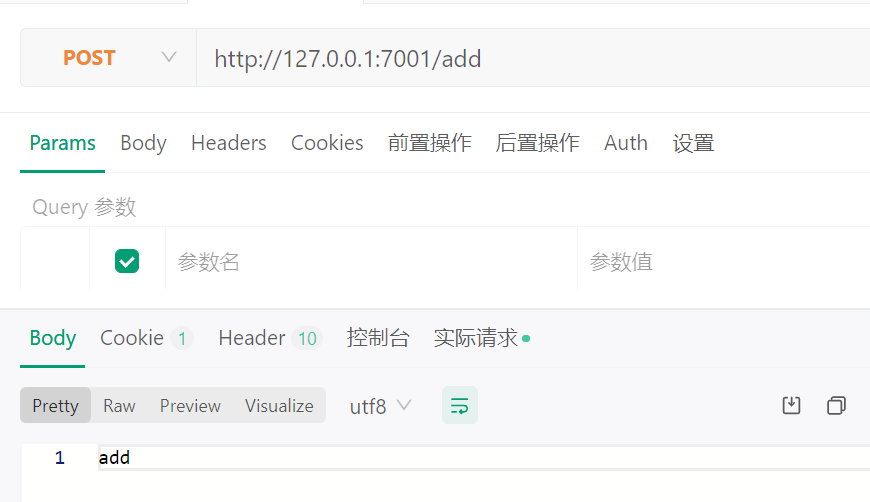
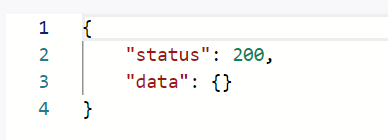
服务端接受请求:async add(){ const ctx = this.ctx ctx.body = { status: 200, data:ctx.request.body } }- 1
- 2
- 3
- 4
- 5
- 6
- 7
Service 服务
Service是用来编写和数据库直接交互的业务逻辑代码。Service就是在复杂业务场景下用于做业务逻辑封装的一个抽象层。
简单来说,就是把业务逻辑代码进一步细化和分类,所以和数据库交互的代码都放到Service中。这样作有三个明显的好处。
- 保持Controller中的逻辑更加简介,
- 保持业务逻辑的独立性,抽象出来的Service可以被多个Controller调用。
- 将逻辑和展现分离,更容易编写测试用例。
只要是和数据库的交互操作,都写在Service里,用了Egg框架,就要遵守它的约定。
在/app/service目录下编写自己的服务
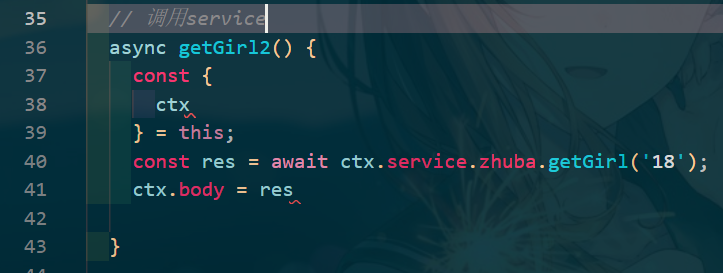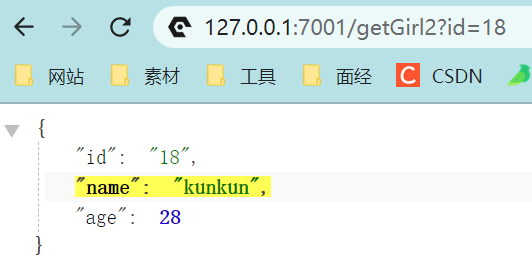
service方法的可调用性
一个service方法完成后,可以在其它的Controller里进行使用。比如在home.js中进行使用。打开/app/controller/home.js文件下,新建一个testGetGirl( )方法,然后新增好路由,这样id即可被数据库得到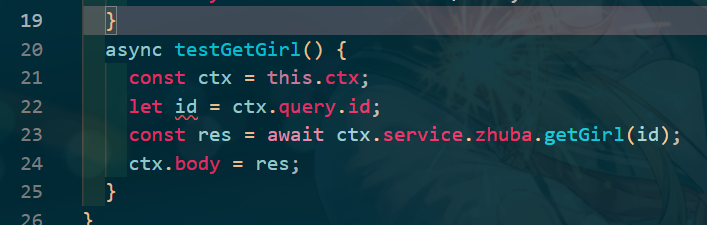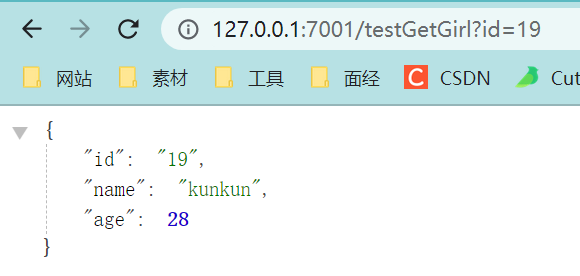
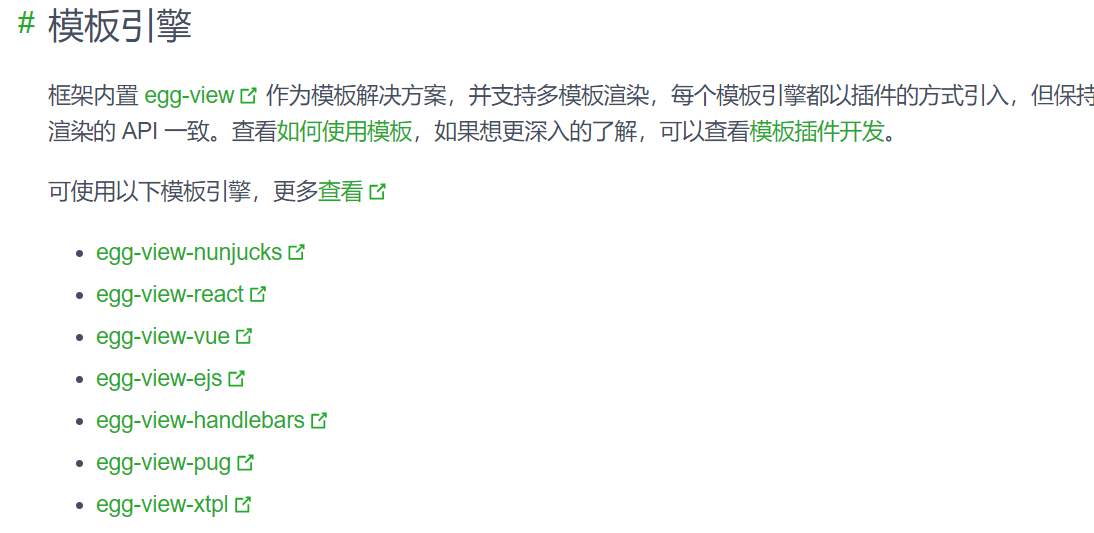
起名的时候最好和Controller对应起来。写法和Controller类似,并且在任何Controller下都可以得到Service提供的数据。View中使用EJS模板引擎
介绍
可选的模板不少,具体参考官方文档。
服务端渲染的好处- 对SEO非常友好,单页应用,比如Vue是到客户端才生成的。这种应用对于国内的搜索引擎是没办法爬取的,这样SEO就不会有好的结果。所以如果是官网、新闻网站、博客这些展示类、宣传类的网址,必须要使用服务端渲染技术。
- 后端渲染是老牌开发模式,渲染性能也是得到一致认可的。在PHP时代,这种后端渲染的技术达到了顶峰。
- 对前后端分离开发模式的补充,并不是所有的功能都可以实现前后端分离的。特别现在流行的中台系统,有很多一次登录,处处可用的原则。这时候就需要服务端渲染来帮忙。
EJS1
安装和配置、使用:
yarn add egg-view-ejs
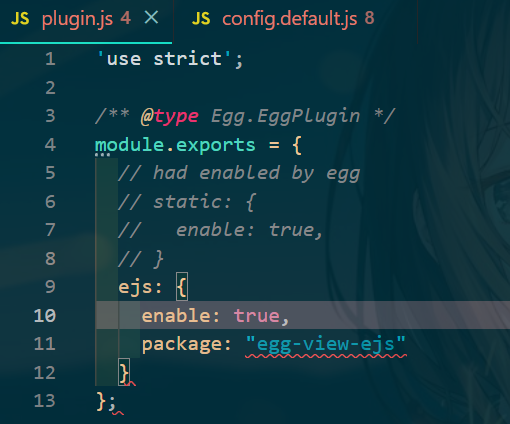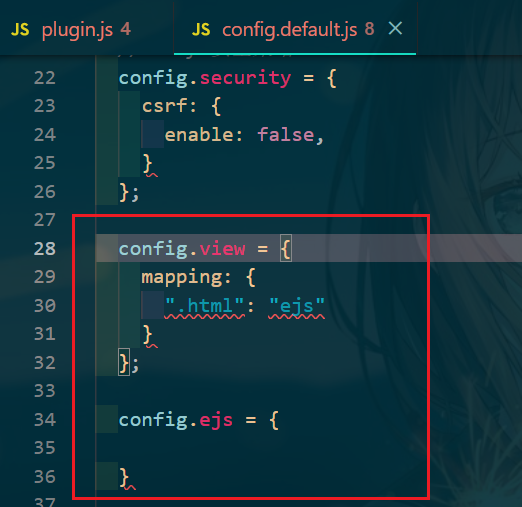
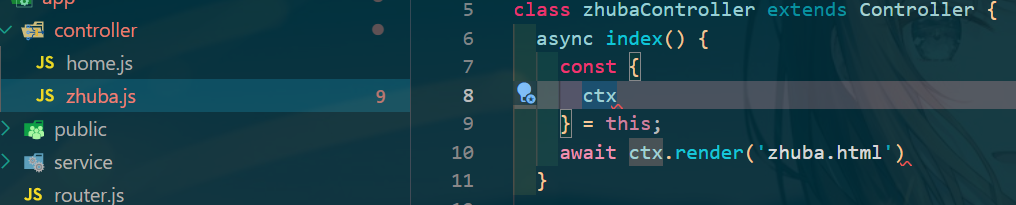
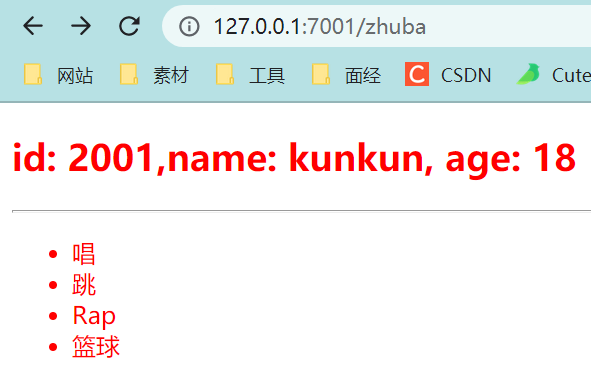
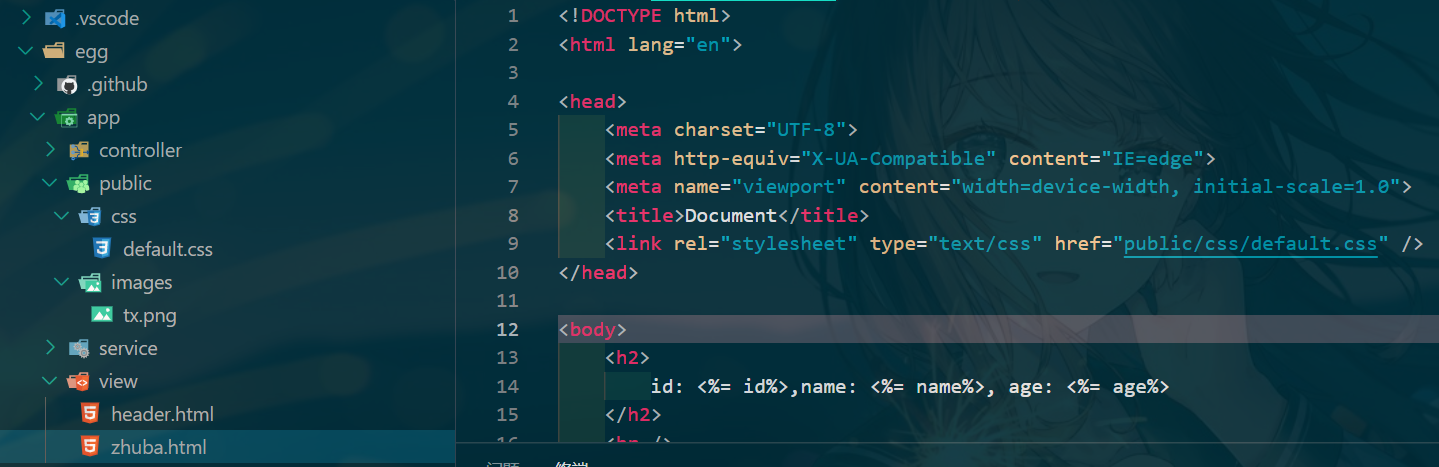
/app/view/下新建 zhuba.html文件即可被渲染,访问该路由地址即可
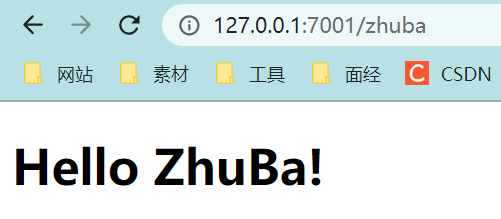EJS2
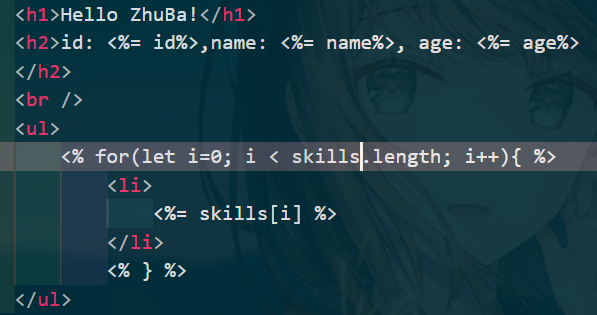
- 显示controller中数据 (<%= 参数 %>)
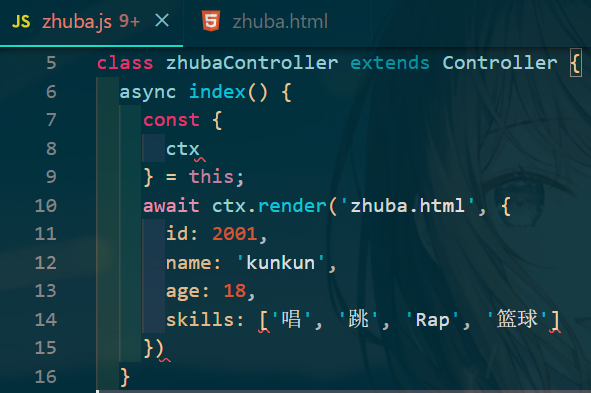
- 数据的循环显示 (for)
- 修改默认分隔符
config.ejs={ delimiter: "$" }- 1
- 2
- 3
EJS3
- 公共代码片段的使用 只需要写一些代码片段,即抽离公共部分(组件思想)
**<%- include('header.html') %>**

- 配置静态资源:/app/public目录下,可以直接访问,不需配置路由,直接显示文件内容,因为Egg使用了egg-static插件
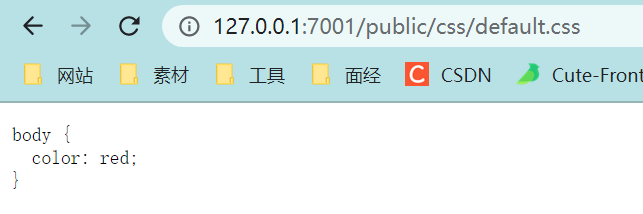
修改config.default.js可以将访问public变成assets,当然此时使用public会404onfig.static = { prefix:"/assets/" }- 1
- 2
- 3
- 使用静态资源 在.html中
和正常使用一致
Cookie
增删改查
HTTP请求是无状态的,但是在开发时,有些情况是需要知道请求的人是谁的。为了解决这个问题,HTTP协议设计了一个特殊的请求头:Cookie。服务端可以通过响应头(set-cookie)将少量数据响应给客户端,浏览器会遵循协议将数据保留,并在下一次请求同一个服务的时候带上。
// html中插入DOM和JS方法 <div> <button onclick="add()">增加Cookie</button> <button onclick="del()">删除Cookie</button> <button onclick="editor()">修改Cookie</button> <button onclick="show()">查看Cookie</button> </div> <script> function add(){ fetch("/add",{ method:"post", headers:{ "Content-type":"application/json" } }); } function del(){ fetch("/del",{ method:"post", headers:{ "Content-type":"application/json" } }); } function editor(){ fetch("/editor",{ method:"post", headers:{ "Content-type":"application/json" } }); } function show(){ fetch("/show",{ method:"post", headers:{ "Content-type":"application/json" } }); } </script>- 1
- 2
- 3
- 4
- 5
- 6
- 7
- 8
- 9
- 10
- 11
- 12
- 13
- 14
- 15
- 16
- 17
- 18
- 19
- 20
- 21
- 22
- 23
- 24
- 25
- 26
- 27
- 28
- 29
- 30
- 31
- 32
- 33
- 34
- 35
- 36
- 37
- 38
- 39
- 40
- 41
async add() { const ctx = this.ctx ctx.cookies.set("user", "jspang.com") ctx.body = { status:200, data:'Cookie添加成功' } } async del() { const ctx = this.ctx ctx.cookies.set("user", null) ctx.body = { status:200, data:'Cookie删除成功' } } async editor() { const ctx = this.ctx ctx.cookies.set("user",'bilibili') ctx.body = { status:200, data:'Cookie修改成功' } } async show() { const ctx = this.ctx const user=ctx.cookies.get("user") console.log(user) ctx.body = { status:200, data:'Cookie显示成功' } } // 配置路由 router.post('/add', controller.zhuba.add); router.post('/del', controller.zhuba.del); router.post('/editor', controller.zhuba.editor); router.post('/show', controller.zhuba.show);- 1
- 2
- 3
- 4
- 5
- 6
- 7
- 8
- 9
- 10
- 11
- 12
- 13
- 14
- 15
- 16
- 17
- 18
- 19
- 20
- 21
- 22
- 23
- 24
- 25
- 26
- 27
- 28
- 29
- 30
- 31
- 32
- 33
- 34
- 35
- 36
- 37
- 38
- 39

差:
配置和加密
一些配置选项,比如有效时间、服务端操作设置和中文编写加密这些操作。
ctx.cookies.set( ) 方法是有三个参数的,第一个参数是key,第二个参数是value,第三个参数就可以进行配置。比如你需要配置Cookie的有效时间,可以使用maxAge属性。(这个时间是毫秒。)- maxAge 时效设置
maxAge: 1000 * 2 (毫秒)
async add(){ const ctx = this.ctx ctx.cookies.set("user","jspang.com",{ maxAge:1000*2 }) ctx.body = { status:200, data:'Cookie添加成功' } }- 1
- 2
- 3
- 4
- 5
- 6
- 7
- 8
- 9
- 10
- HhttpOnly 是否只允许服务端来操作Cookie
httpOnly:false伪造Cookie来绕过登录是黑客经常使用的一种手段,所以为了安全,Egg.js默认设置只允许服务端来操作Cookie。
比如通过JS的方式document.cookie获取Cookie是不能获取的(需要在浏览器的控制台输入获取)。当我们想通过客户端操作Cookie时,可以通过下面的代码进行设置。sync add(){ const ctx = this.ctx ctx.cookies.set("user","jspang.com",{ maxAge:1000*60, httpOnly:false }) ctx.body = { status:200, data:'Cookie添加成功' } }- 1
- 2
- 3
- 4
- 5
- 6
- 7
- 8
- 9
- 10
- 11
- encrypt 设置中文Cookie (set加密 show解密)
加密只要在第三个参数中,加入
encrypt:true,就可以加密成功。ctx.cookies.set("user","zhuba",{ encrypt:true })- 1
- 2
- 3
直接通过ctx.cookies.get( )方法获取,获取的是undefind,也就是无法获取的。这时候需要再次配置解密才可以使用, 在show( )方法里配置代码如下。
const user=ctx.cookies.get("user",{ encrypt:true })- 1
- 2
- 3
Session
Cookie和Session非常类似,Egg中的Session就存储再Cookie中,但是Session比Cookie的安全性更高。所以在开发中经常使用Cookie来保存是否登录,而用Session来保存登录信息和用户信息。
添加、获取、删除
添加:在add()方法中
ctx.session.username = 'zhuba'
获取:直接获取const username = ctx.session.username
删除:把值赋为空即可ctx.session.username = null
session是支持中文的,不需要加密解密配置项
config.session = { key :"PANG_SESS", // 设置Key的默认值 httpOnly:true, // 设置服务端操作 maxAge:1000*60 , // 设置最大有效时间 renew: true, // 页面有访问动作自动刷新session }- 1
- 2
- 3
- 4
- 5
- 6
中间件的编写
Egg是对Koa的二次封装,所以中间件这部分和Koa框架是一样的,也追寻洋葱圈模型。
Egg.js约定中间件要写在/app/middleware文件夹下
module.exports = options => { return async (ctx, next) => { if (ctx.session.counter) { // 没学数据库先使用session ctx.session.counter++; } else { ctx.session.counter = 1; } await next(); } };- 1
- 2
- 3
- 4
- 5
- 6
- 7
- 8
- 9
- 10
手动挂载:config/config.default.js
config.middleware = ['counter'];
在index()中使用, 可以发现中间件现在的作用域是全局的。

要想只在某一页面使用需要在router(路由)中配置中间件的使用,并去除全局挂载。const counter = app.middleware.counter() const { router, controller, } = app; router.get('/', counter, controller.home.index);- 1
- 2
- 3
- 4
- 5
- 6
在实际开发中中间件还是有很多用处的,比如日志的记录、比如所有页面的Gzip压缩展示、比如全局埋点的使用。
Extend-application 方法扩展
eggjs的方法的扩展和编写
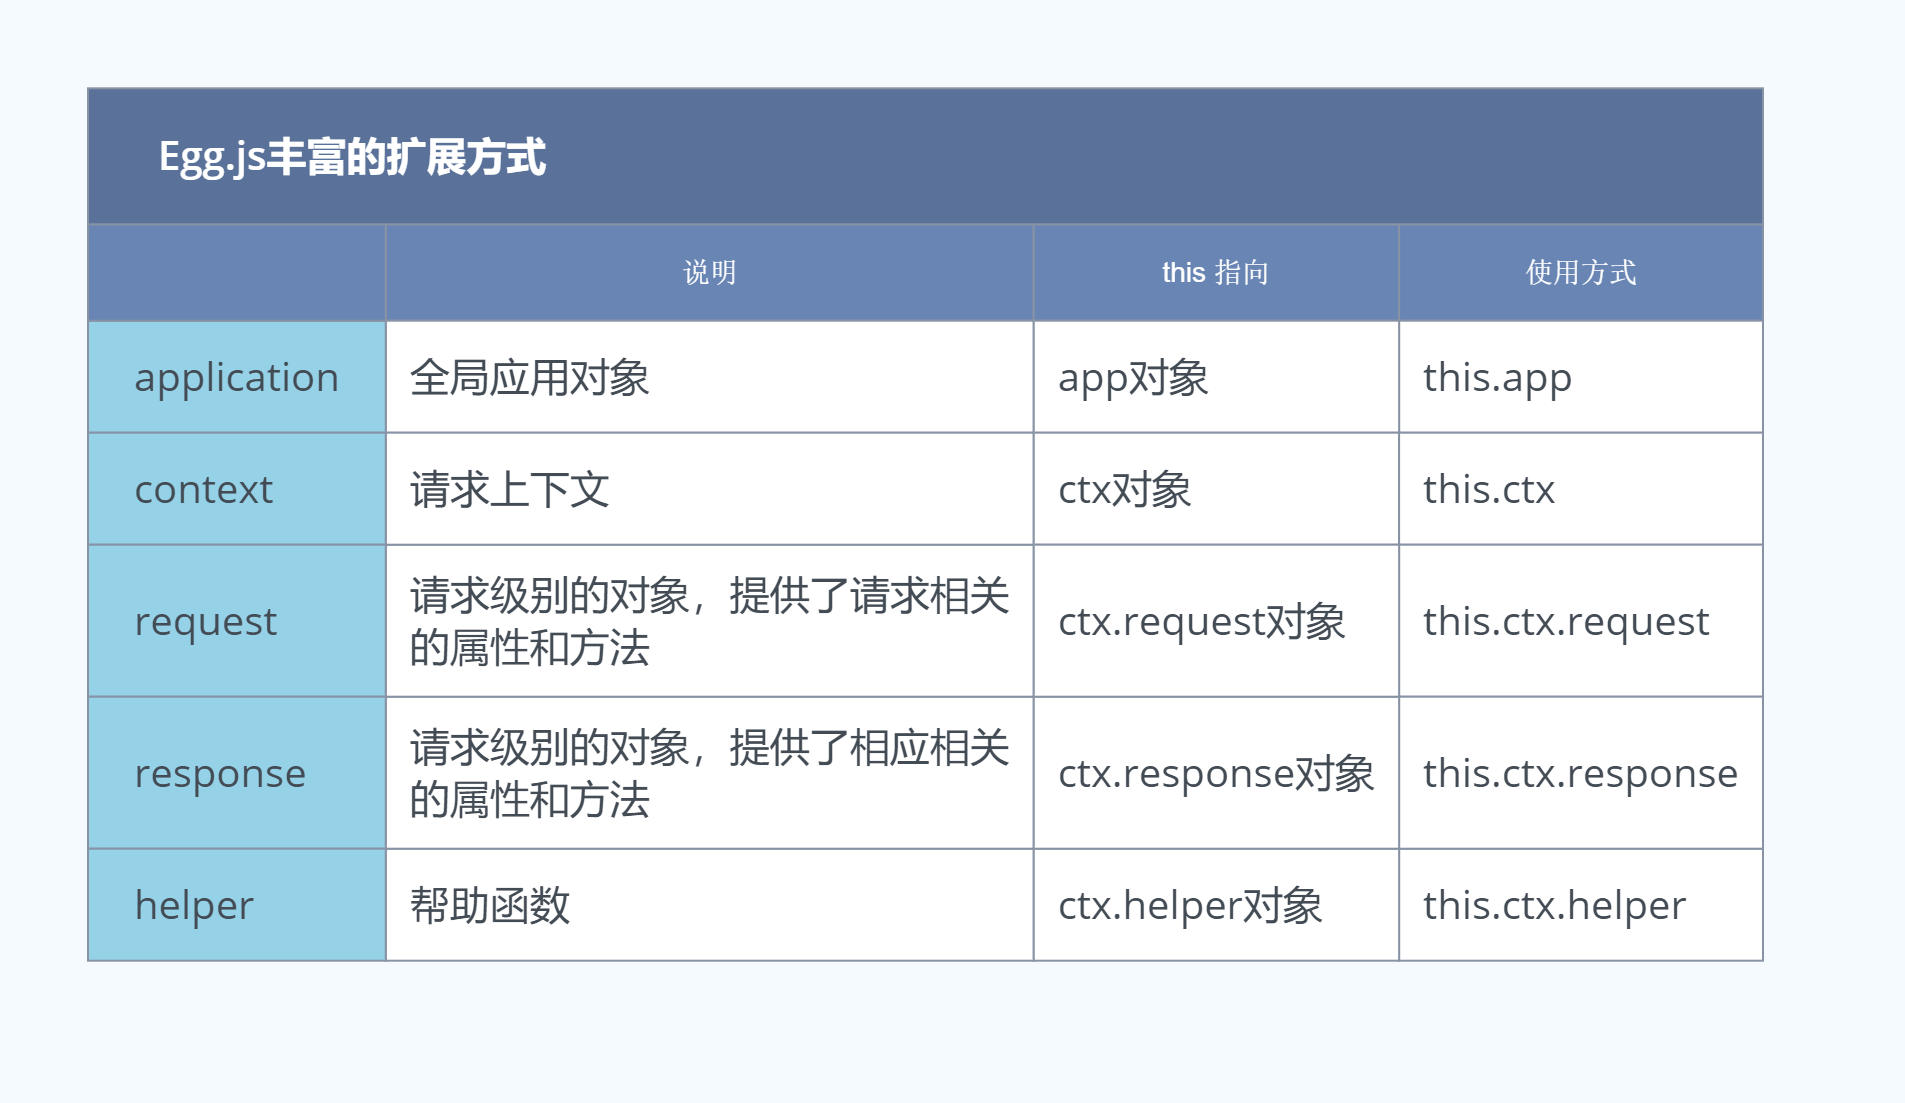
Egg.js可以对内部的五种对象进行扩展,以下是可扩展的对象、说明、this指向和使用方式。
application对象方法拓展
按照Egg的约定,扩展的文件夹和文件的名字必须是固定的。比如要对application扩展,要在/app目录下,新建一个/extend文件夹,然后在建立一个application.js文件。
module.exports = { // 方法扩展 currentTime() { const current = getTime(); return current; }, }; function getTime() { const now = new Date(); const year = now.getFullYear(); // 得到年份 const month = now.getMonth() + 1; // 得到月份 const date = now.getDate(); // 得到日期 const hour = now.getHours(); // 得到小时数 const minute = now.getMinutes(); // 得到分钟数 const second = now.getSeconds(); // 得到秒数 const nowTime = year + '年' + month + '月' + date + '日 ' + hour + ':' + minute + ':' + second; return nowTime; }- 1
- 2
- 3
- 4
- 5
- 6
- 7
- 8
- 9
- 10
- 11
- 12
- 13
- 14
- 15
- 16
- 17
- 18
使用:
// .js async index() { const { ctx ,app } = this; await ctx.render( 'zhuba.html',{ nowTime: app.currentTime() }) } // .html 模板 <%= nowTime %>- 1
- 2
- 3
- 4
- 5
- 6
- 7
- 8
- 9
- 10
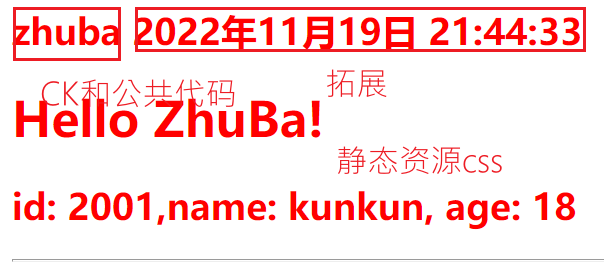
application对象属性拓展
对属性( property) 的扩展的关键字是get,也需要写在application.js文件里。
module.exports = { //方法扩展 currentTime(){ const current = getTime(); return current; }, //属性扩展 get timeProp(){ return getTime(); } };- 1
- 2
- 3
- 4
- 5
- 6
- 7
- 8
- 9
- 10
- 11
加入get,就会默认是一个属性,可以直接以属性的形式在controller方法里进行调用。
Extend-context 上下文对象的方法拓展
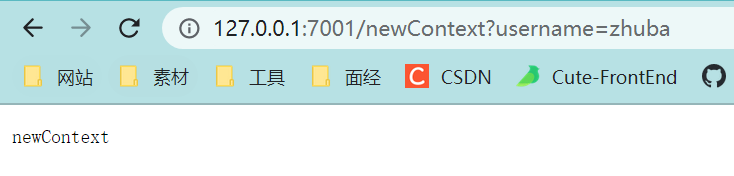
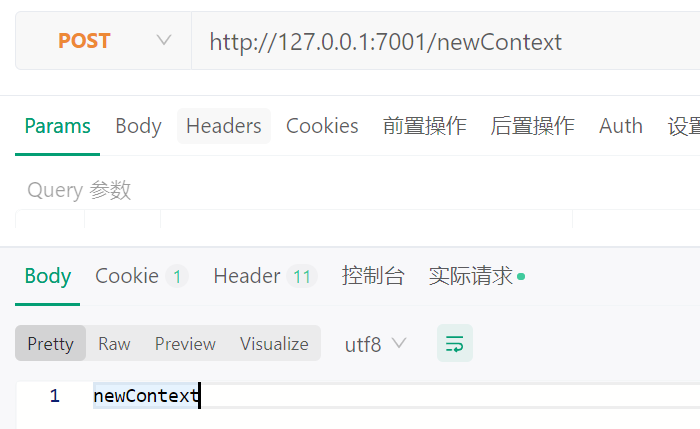
之前通过上下文来获取传递参数时,get方法请求和post方法请求的获取方式是不同的,我们编写的方法可以让这两个请求获取参数的方法统一化,都用params( )方法。新建context.js,配置好页面和路由后使用
// context.js module.exports = { params(key) { const method = this.request.method if (method === 'GET') { return key ? this.query[key] : this.query; } return key ? this.request.body[key] : this.request.body; }, }; // newContext zhuba.js async newContext() { const { ctx, } = this; const params = ctx.params(); console.log(params); ctx.body = 'newContext'; } // router.js router.get('/newContext', controller.zhuba.newContext); router.post('/newContext', controller.zhuba.newContext);- 1
- 2
- 3
- 4
- 5
- 6
- 7
- 8
- 9
- 10
- 11
- 12
- 13
- 14
- 15
- 16
- 17
- 18
- 19
- 20
- 21
- 22
- 23
Extend-request
Request 中的扩展一般是扩展的属性。比如扩展 Request 中的一个属性,通过属性直接得到请求头中的 token 属性。
// Extend-request async newRequest() { const { ctx, } = this; const token = ctx.request.token; ctx.body = { status: 200, body: token, }; }- 1
- 2
- 3
- 4
- 5
- 6
- 7
- 8
- 9
- 10
- 11
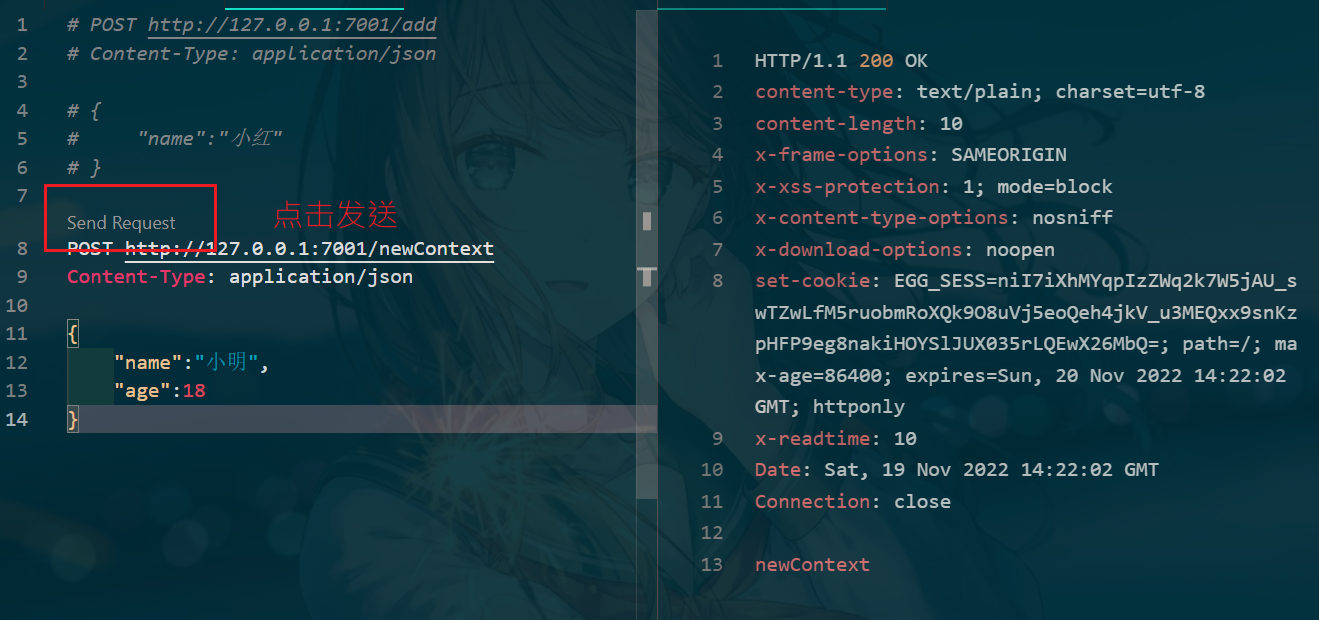
Egg.js 对 Request 的扩展也需要在/app/extend文件夹下,新建一个request.js文件,然后在这个文件里写扩展属性。
module.exports = { get token() { console.log('token', this.get('token')); return this.get('token'); }, }; // http测试 POST http://127.0.0.1:7001/newRequest Content-Type: application/json token: 'zhuba' { "name":"小红", "age":18 }- 1
- 2
- 3
- 4
- 5
- 6
- 7
- 8
- 9
- 10
- 11
- 12
- 13
- 14
- 15

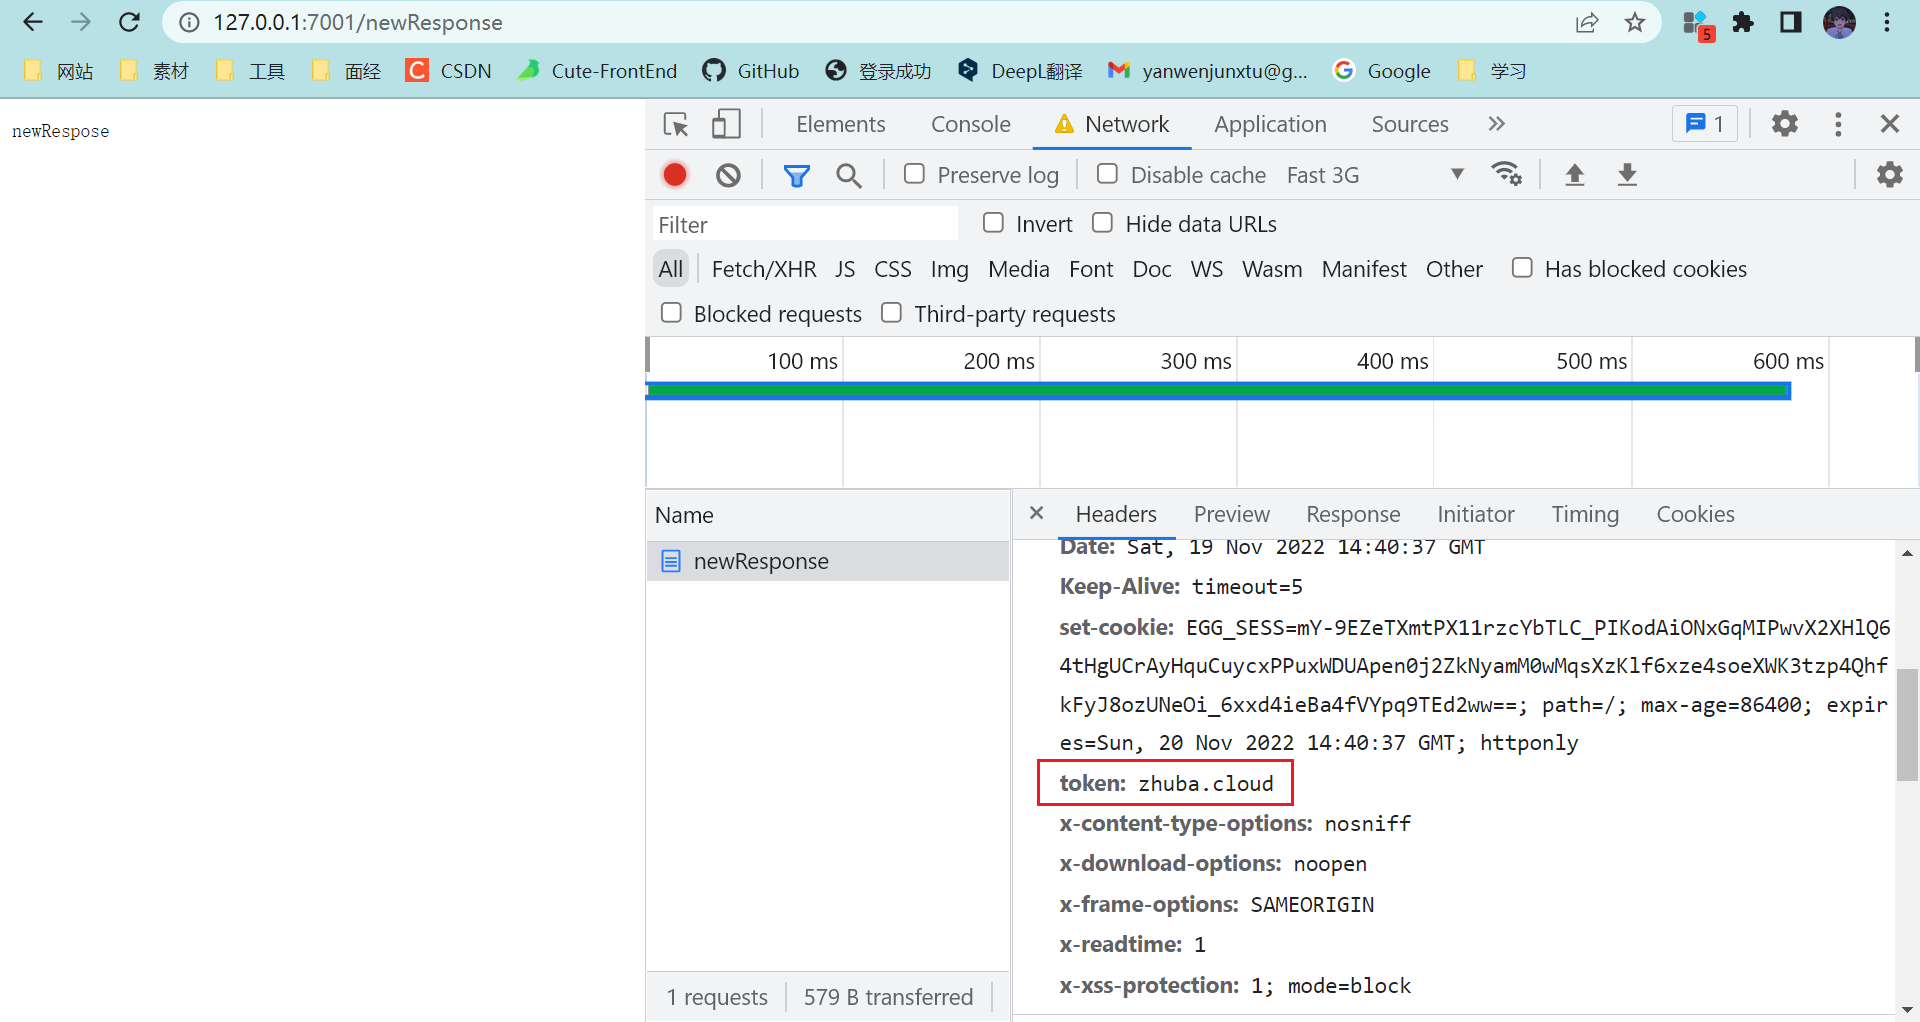
Extend-response、helper
response
和上一个是差不多的, 需要设置的方法以set关键字开头,然后用this.set( )就可以设置返回的token了。
module.exports = { set token(token) { this.set('token', token); }, }; // zhuba.js // newRespose async newResponse() { const { ctx, } = this; ctx.response.token = 'zhuba.cloud'; ctx.body = 'newRespose'; } // router.js router.get('/newResponse', controller.zhuba.newResponse);- 1
- 2
- 3
- 4
- 5
- 6
- 7
- 8
- 9
- 10
- 11
- 12
- 13
- 14
- 15
- 16
- 17
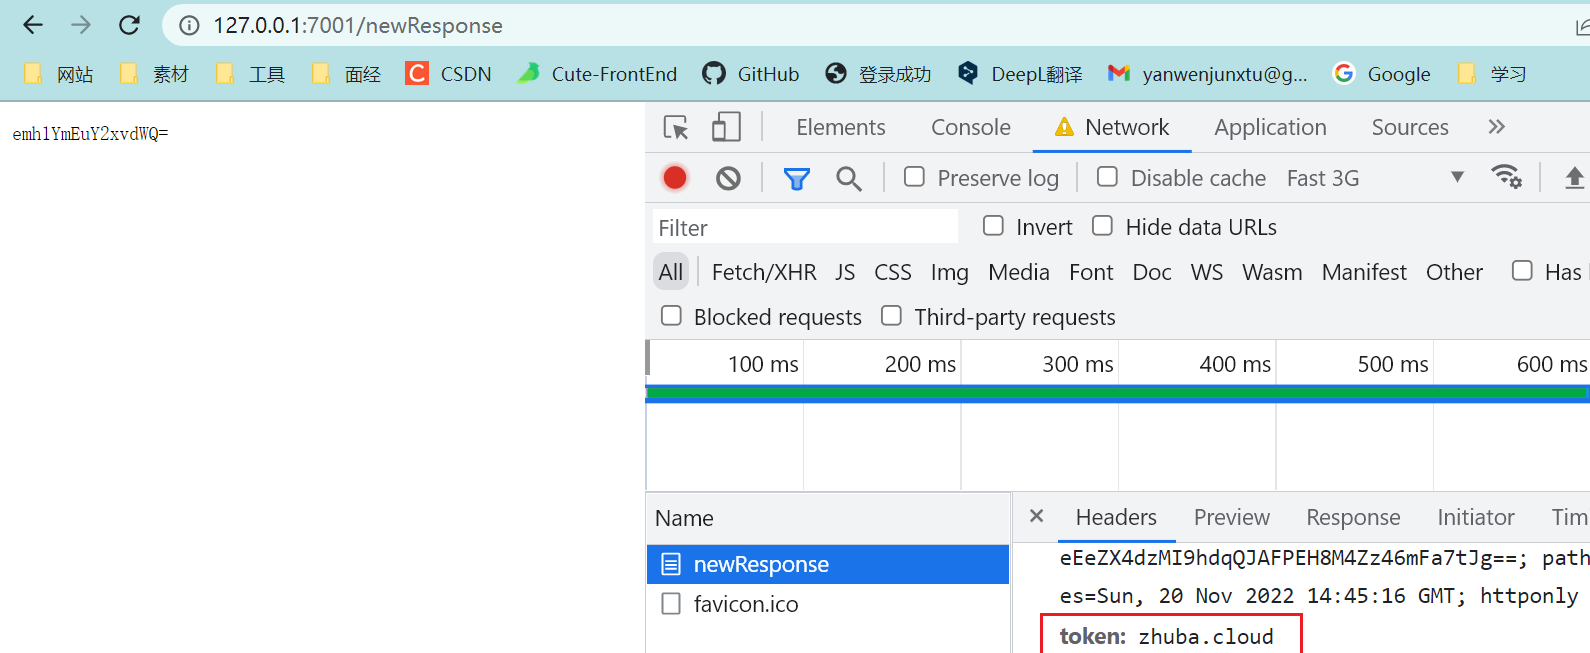
helper
demo是编写一个字符串进行base64加密的方法。
module.exports = { base64Encode(str = '') { return new Buffer(str).toString('base64'); }, }; // 重新利用一下原本的 newRespose // newRespose async newResponse() { const { ctx, } = this; ctx.response.token = 'zhuba.cloud'; // ctx.body = 'newRespose'; const testBase64 = ctx.helper.base64Encode('zhuba.cloud'); ctx.body = testBase64; }- 1
- 2
- 3
- 4
- 5
- 6
- 7
- 8
- 9
- 10
- 11
- 12
- 13
- 14
- 15
- 16
- 17
定时任务编写
定时任务需要按照Egg的约定,/app目录下,新建shedule文件夹。然后在shedule文件夹下,新建一个get_time.js文件。设置每3秒钟,在控制台输出当前时间戳。
const Subscription = require('egg').Subscription; class GetTime extends Subscription { static get schedule() { return { interval: '10s', type: 'worker', }; } async subscribe() { console.log(Date.now()); } } module.exports = GetTime;- 1
- 2
- 3
- 4
- 5
- 6
- 7
- 8
- 9
- 10
- 11
- 12
- 13
- 14
- 15
- 16
- 17
也可以使用更复杂的cron属性进行定时。cron属性有6个参数。
* * * * * * ┬ ┬ ┬ ┬ ┬ ┬ │ │ │ │ │ | │ │ │ │ │ └ day of week (0 - 7) (0 or 7 is Sun) │ │ │ │ └───── month (1 - 12) │ │ │ └────────── day of month (1 - 31) │ │ └─────────────── hour (0 - 23) │ └──────────────────── minute (0 - 59) └───────────────────────── second (0 - 59, optional) 比如设置每3秒钟,返回时间戳,可以写成下面的样子。 static get schedule(){ return { cron: '*/3 * * * * *', type:'worker' }; }- 1
- 2
- 3
- 4
- 5
- 6
- 7
- 8
- 9
- 10
- 11
- 12
- 13
- 14
- 15
- 16
- 17
- 18
配置连接MySql数据库
安装依赖和配置:
yarn add egg-mysql -S// /config/plugin.js 'use strict'; /** @type Egg.EggPlugin */ module.exports = { // had enabled by egg // static: { // enable: true, // } ejs: { enable: true, package: 'egg-view-ejs', }, mysql: { enable: true, package: 'egg-mysql', }, }; // /config/config.default.js // // ejs egg-mysql config.mysql = { app: true, // 是否挂载到app下面 agent: false, // 是否挂载到代理下面 client: { host: 'localhost', // 数据库地址 port: '3306', // 端口 user: 'root', // 用户名 password: '12345', // 密码 database: 'egg', // 连接的数据库名称 }, };- 1
- 2
- 3
- 4
- 5
- 6
- 7
- 8
- 9
- 10
- 11
- 12
- 13
- 14
- 15
- 16
- 17
- 18
- 19
- 20
- 21
- 22
- 23
- 24
- 25
- 26
- 27
- 28
- 29
- 30
- 31
- 32
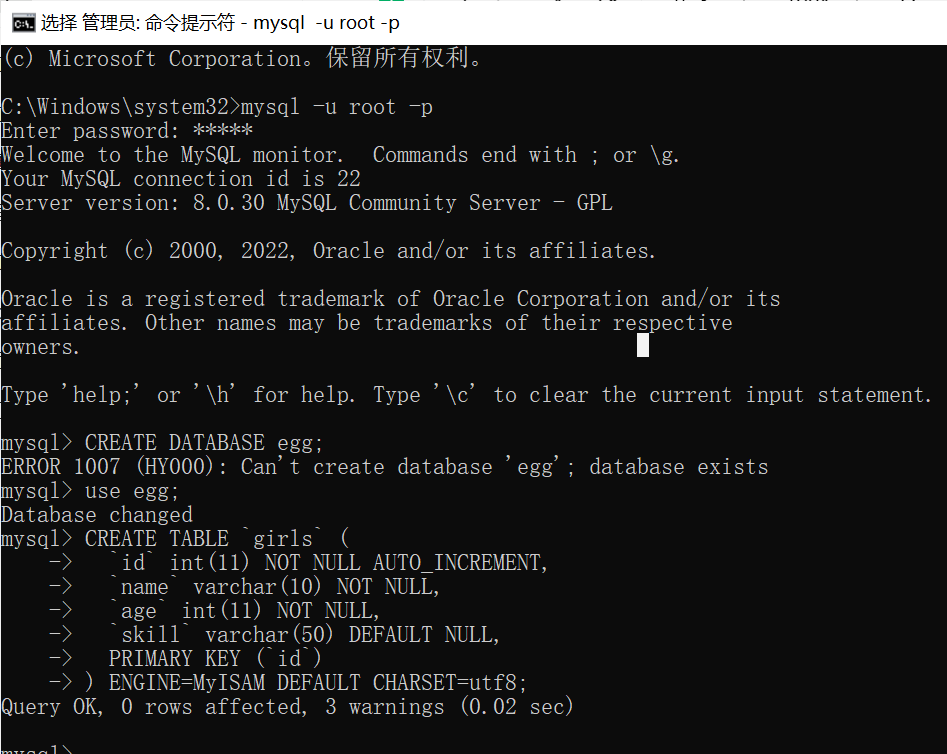
创建数据库和表
# 切换数据库 use egg # 创建表 CREATE TABLE `girls` ( `id` int(11) NOT NULL AUTO_INCREMENT, `name` varchar(10) NOT NULL, `age` int(11) NOT NULL, `skill` varchar(50) DEFAULT NULL, PRIMARY KEY (`id`) ) ENGINE=MyISAM DEFAULT CHARSET=utf8;- 1
- 2
- 3
- 4
- 5
- 6
- 7
- 8
- 9
- 10
- 11
// router.js // 操作数据库 router.get('/addGirl', controller.girlsManage.addGirl); router.get('/delGirl', controller.girlsManage.delGirl); router.get('/updateGirl', controller.girlsManage.updateGirl); router.get('/getGirls', controller.girlsManage.getGirls); // controller.girlsManage.js 'use strict'; const Controller = require('egg').Controller; class GirlManage extends Controller { async addG() { const { ctx, } = this; const params = { name: '小白', age: 18, skill: '头疗', }; const res = await ctx.service.testdb.addG(params); ctx.body = '添加女孩-成功!' + res; } async delG() { const { ctx, } = this; const id = { id: 3, }; const res = await ctx.service.testdb.delG(id); console.log(res); if (res) { ctx.body = '删除女孩-成功'; } else { ctx.body = '删除失败'; } } async updateG() { const { ctx, } = this; const params = { id: 3, name: '小白', age: 20, skill: '头疗', }; const res = await ctx.service.testdb.updateG(params); if (res) { ctx.body = '修改女孩-成功'; } else { ctx.body = '修改失败'; } } async getG() { const { ctx, } = this; const res = await ctx.service.testdb.getG(10); ctx.body = '查询女孩:' + JSON.stringify(res); } } module.exports = GirlManage; // server/testdb.js 'use strict'; const Service = require('egg').Service; class testdbService extends Service { // // 添加数据库 async addG(params) { try { const { app, } = this; const res = await app.mysql.insert('girls', params); return res; } catch (error) { console.log(error); return null; } } // // 删除数据库 async delG(id) { try { const { app, } = this; const res = await app.mysql.delete('girls', id); return res; } catch (error) { console.log(error); return null; } } // // 修改数据库 async updateG(params) { try { const { app, } = this; const res = await app.mysql.update('girls', params); return res; } catch (error) { console.log(error); return null; } } // // 查询数据库 async getG(id = 10) { console.log(id); // 没有数据意思一下 try { const app = this.app; const res = await app.mysql.select('girls'); return res; } catch (error) { console.log(error); return null; } } } module.exports = testdbService;- 1
- 2
- 3
- 4
- 5
- 6
- 7
- 8
- 9
- 10
- 11
- 12
- 13
- 14
- 15
- 16
- 17
- 18
- 19
- 20
- 21
- 22
- 23
- 24
- 25
- 26
- 27
- 28
- 29
- 30
- 31
- 32
- 33
- 34
- 35
- 36
- 37
- 38
- 39
- 40
- 41
- 42
- 43
- 44
- 45
- 46
- 47
- 48
- 49
- 50
- 51
- 52
- 53
- 54
- 55
- 56
- 57
- 58
- 59
- 60
- 61
- 62
- 63
- 64
- 65
- 66
- 67
- 68
- 69
- 70
- 71
- 72
- 73
- 74
- 75
- 76
- 77
- 78
- 79
- 80
- 81
- 82
- 83
- 84
- 85
- 86
- 87
- 88
- 89
- 90
- 91
- 92
- 93
- 94
- 95
- 96
- 97
- 98
- 99
- 100
- 101
- 102
- 103
- 104
- 105
- 106
- 107
- 108
- 109
- 110
- 111
- 112
- 113
- 114
- 115
- 116
- 117
- 118
- 119
- 120
- 121
- 122
- 123
- 124
- 125
- 126
- 127
- 128
- 129
- 130
- 131
- 132
- 133
- 134
- 135
- 136
- 137
TS版体验
安装依赖和配置
npm init egg --type=ts npm i // egg-cors 跨域包 egg-jwt token生成以及验证包 npm install egg-cors egg-jwt --save // config/plugin.ts import { EggPlugin } from 'egg'; const plugin: EggPlugin = { jwt: { enable: true, package: "egg-jwt" }, cors: { enable: true, package: 'egg-cors', } }; export default plugin; // config/config.default.ts config.jwt = { secret: "123456"//自定义 token 的加密条件字符串 }; config.security = { csrf: { enable: false, ignoreJSON: true }, domainWhiteList: ['http://localhost:8080'],//允许访问接口的白名单 }; config.cors = { origin:'*', allowMethods: 'GET,HEAD,PUT,POST,DELETE,PATCH' }; // typings/index.d.ts import 'egg'; declare module 'egg' { interface Application { jwt: any; } }- 1
- 2
- 3
- 4
- 5
- 6
- 7
- 8
- 9
- 10
- 11
- 12
- 13
- 14
- 15
- 16
- 17
- 18
- 19
- 20
- 21
- 22
- 23
- 24
- 25
- 26
- 27
- 28
- 29
- 30
- 31
- 32
- 33
- 34
- 35
- 36
- 37
- 38
- 39
- 40
- 41
- 42
- 43
- 44
- 45
- 46
- 47
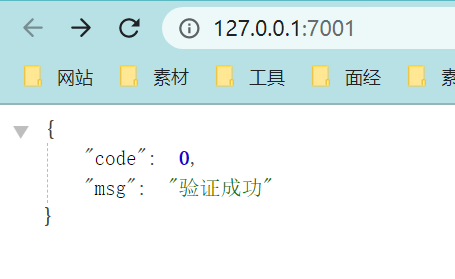
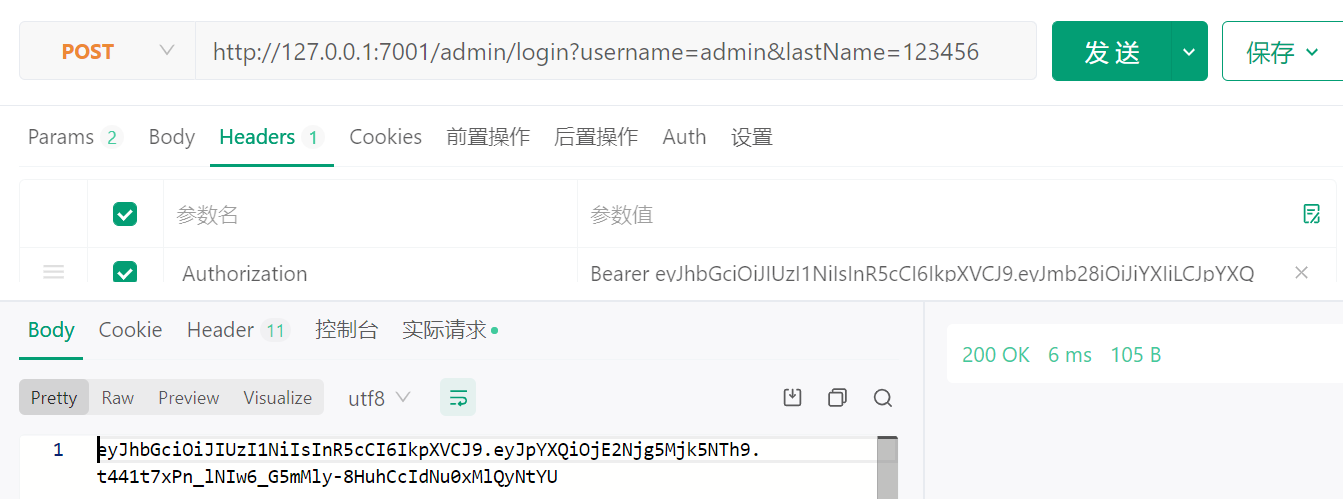
创建路由、编写控制器
// router.js import { Application } from "egg"; export default (app: Application) => { const { controller, router, jwt } = app; router.get("/", controller.home.index); // ----- // //正常路由 router.post("/admin/login", controller.home.login); /* * 这里的第二个对象不再是控制器,而是 jwt 验证对象,第三个地方才是控制器 * 只有在需要验证 token 的路由才需要第二个 是 jwt 否则第二个对象为控制器 **/ router.post("/admin", jwt, controller.home.index); // ----- // }; // home.ts import { Controller } from "egg"; export default class HomeController extends Controller { // public async index() { // const { ctx } = this; // ctx.body = await ctx.service.test.sayHi("egg"); // } // ----- // // 验证登录并且生成 token public async login() { const { ctx, app } = this; //获取用户端传递过来的参数 const data = ctx.request.body; // 进行验证 data 数据 登录是否成功 // ......... //成功过后进行一下操作 //生成 token 的方式 const token = app.jwt.sign( { username: data.username, //需要存储的 token 数据 //...... }, app.config.jwt.secret ); // 生成的token = eyJhbGciOiJIUzI1NiIsInR5cCI6IkpXVCJ9.eyJmb28iOiJiYXIiLCJpYXQiOjE1NjAzNDY5MDN9.B95GqH-fdRpyZIE5g_T0l8RgzNyWOyXepkLiynWqrJg // 返回 token 到前端 ctx.body = token; } //访问admin数据时进行验证token,并且解析 token 的数据 public async index() { const { ctx } = this; console.log(ctx.state.user); /* * 打印内容为:{ username : 'admin', iat: 1560346903 } * iat 为过期时间,可以单独写中间件验证,这里不做细究 * 除了 iat 之后,其余的为当时存储的数据 **/ ctx.body = { code: 0, msg: "验证成功" }; } // ----- // }- 1
- 2
- 3
- 4
- 5
- 6
- 7
- 8
- 9
- 10
- 11
- 12
- 13
- 14
- 15
- 16
- 17
- 18
- 19
- 20
- 21
- 22
- 23
- 24
- 25
- 26
- 27
- 28
- 29
- 30
- 31
- 32
- 33
- 34
- 35
- 36
- 37
- 38
- 39
- 40
- 41
- 42
- 43
- 44
- 45
- 46
- 47
- 48
- 49
- 50
- 51
- 52
- 53
- 54
- 55
- 56
- 57
- 58
- 59
- 60
- 61
- 62
- 63
- 64
- 65
axios测试 /admi/login
axios({ method: 'post', url: 'http://127.0.0.1:7001/admin', data: { username: 'admin', lastName: '123456' }, headers:{ // 切记 token 不要直接发送,要在前面加上 Bearer 字符串和一个空格 'Authorization':`Bearer ${token}` } }).then(res=>{ console.log(res.data)})- 1
- 2
- 3
- 4
- 5
- 6
- 7
- 8
- 9
- 10
- 11
- 12
- 13
汇总
egg-project ├── package.json ├── app.js (可选) ├── agent.js (可选) ├── app/ # 一定要按约定写 | ├── router.js # 用于配置 URL 路由规则 │ ├── controller/ # 用于存放控制器(解析用户的输入、加工处理、返回结果) │ ├── model/ (可选) # 用于存放数据库模型 │ ├── service/ (可选) # 用于编写业务逻辑层 │ ├── middleware/ (可选) # 用于编写中间件 │ ├── schedule/ (可选) # 用于设置定时任务 │ ├── public/ (可选) # 用于放置静态资源 │ ├── view/ (可选) # 用于放置模板文件 │ └── extend/ (可选) # 用于框架的扩展 │ ├── helper.js (可选) │ ├── request.js (可选) │ ├── response.js (可选) │ ├── context.js (可选) │ ├── application.js (可选) │ └── agent.js (可选) ├── config/ | ├── plugin.js # 用于配置需要加载的插件 | ├── config.{env}.js # 用于编写配置文件(env 可以是 default,prod,test,local,unittest)- 1
- 2
- 3
- 4
- 5
- 6
- 7
- 8
- 9
- 10
- 11
- 12
- 13
- 14
- 15
- 16
- 17
- 18
- 19
- 20
- 21
- 22
- 23
-
相关阅读:
Arrays 中的 asList()方法
Windows使用模拟器启动AOSP源码编译的镜像
使用Idea简单搭建springcloud项目
北大肖臻老师《区块链技术与应用》系列课程学习笔记[6]比特币脚本
《Redis设计与实现》阅读总结-4
【嵌入式项目应用】__cJSON在单片机的使用
ThreadLocal 源码浅析
CoDeSys系列-1、CoDeSys了解及资料收集
菜单子节点的写法
Nacos安装指南
- 原文地址:https://blog.csdn.net/qq_53904578/article/details/127949892
