-
JavaEE 进阶:Spring 核⼼与设计思想
一、Spring 是什么
Spring是当前Java开发的行业标准,第一框架。
我们通常所说的 Spring 指的是 Spring Framework(Spring 框架),它是⼀个开源框架。
⽤⼀句话概括 Spring:Spring 是包含了众多⼯具⽅法的 IoC 容器。1、什么是容器
容器是⽤来容纳某种物品的(基本)装置。
我们之前接触的容器有:
- List/Map -> 数据存储容器
- Tomcat -> Web 容器
2、什么是 IoC
我们之前提到 Spring 也是⼀个容器。
那么 Spring 是什么容器呢?Spring 是⼀个 IoC 容器。什么是 IoC?
IoC = Inversion of Control 翻译成中⽂是“控制反转”的意思,也就是说 Spring 是⼀个“控制反转”的容器。那么什么是 控制反转 呢?
① 传统程序开发
假如,我们现在构建⼀辆“⻋”的程序,我们的实现思路是这样的:

构建⼀辆⻋(Car Class),然⽽⻋需要依赖⻋身(FrameWork Class),⽽⻋身需要依赖底盘(Bottom Class),⽽底盘需要依赖轮胎(Tire Class)。Ⅰ 轮胎尺寸固定
a. 代码
- 先创建一个 old 包:

- Car:
package old; /** 1. 构建“车” */ public class Car { private Framework framework; public Car() { framework = new Framework(); } public static void main(String[] args) { // 构建并运行车 Car car = new Car(); car.init(); } // 运行 public void init() { System.out.println("Car init."); // 依赖 framework.init() 方法 framework.init(); } }- 1
- 2
- 3
- 4
- 5
- 6
- 7
- 8
- 9
- 10
- 11
- 12
- 13
- 14
- 15
- 16
- 17
- 18
- 19
- 20
- 21
- 22
- 23
- 24
- 25
- Framework:
package old; /** 1. 车身 */ public class Framework { private Bottom bottom; public Framework() { bottom = new Bottom(); } public void init() { System.out.println("Framework init."); // 依赖 bottom.init() 方法 bottom.init(); } }- 1
- 2
- 3
- 4
- 5
- 6
- 7
- 8
- 9
- 10
- 11
- 12
- 13
- 14
- 15
- 16
- 17
- 18
- Bottom:
package old; /** 1. 底盘 */ public class Bottom { private Tire tire; public Bottom() { tire = new Tire(); } public void init() { System.out.println("Bottom init."); // 依赖 tire.init() 方法 tire.init(); } }- 1
- 2
- 3
- 4
- 5
- 6
- 7
- 8
- 9
- 10
- 11
- 12
- 13
- 14
- 15
- 16
- 17
- 18
- Tire:
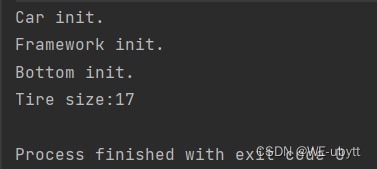
package old; /** 1. 轮胎 */ public class Tire { // 尺寸 private int size = 17; public void init() { System.out.println("Tire size:" + size); } }- 1
- 2
- 3
- 4
- 5
- 6
- 7
- 8
- 9
- 10
- 11
- 12
- 13
- 运行结果为:
b. 缺陷
以上程序中,轮胎的尺⼨的固定的,然⽽随着对的⻋的需求量越来越⼤,个性化需求也会越来越多,这时候我们就需要加⼯多种尺⼨的轮胎,那这个时候就要对上⾯的程序进⾏修改了。
Ⅱ 轮胎尺寸改变
a. 代码
- Car:
package old; /** * 构建“车” */ public class Car { private Framework framework; public Car(int size) { framework = new Framework(size); } public static void main(String[] args) { int size = 15; // 构建并运行车 Car car = new Car(size); car.init(); } // 运行 public void init() { System.out.println("Car init."); // 依赖 framework.init() 方法 framework.init(); } }- 1
- 2
- 3
- 4
- 5
- 6
- 7
- 8
- 9
- 10
- 11
- 12
- 13
- 14
- 15
- 16
- 17
- 18
- 19
- 20
- 21
- 22
- 23
- 24
- 25
- 26
- Framework:
package old; /** * 车身 */ public class Framework { private Bottom bottom; public Framework(int size) { bottom = new Bottom(size); } public void init() { System.out.println("Framework init."); // 依赖 bottom.init() 方法 bottom.init(); } }- 1
- 2
- 3
- 4
- 5
- 6
- 7
- 8
- 9
- 10
- 11
- 12
- 13
- 14
- 15
- 16
- 17
- 18
- Bottom:
package old; /** * 底盘 */ public class Bottom { private Tire tire; public Bottom(int size) { tire = new Tire(size); } public void init() { System.out.println("Bottom init."); // 依赖 tire.init() 方法 tire.init(); } }- 1
- 2
- 3
- 4
- 5
- 6
- 7
- 8
- 9
- 10
- 11
- 12
- 13
- 14
- 15
- 16
- 17
- 18
- Tire:
package old; /** 1. 轮胎 */ public class Tire { // 尺寸 private int size = 17; public Tire(int size) { this.size = size; } public void init() { System.out.println("Tire size:" + size); } }- 1
- 2
- 3
- 4
- 5
- 6
- 7
- 8
- 9
- 10
- 11
- 12
- 13
- 14
- 15
- 16
- 17
- 运行结果为:
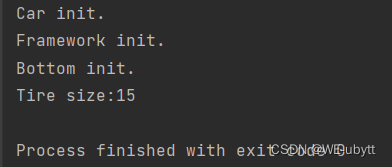
b. 缺陷
当底层类发生改变时,整个调⽤链上的所有代码都需要进行相应的修改!!!
需求是一直变换的,如果是通过传统的传参方式,每次修改都会导致整个调用类都要跟着一起修改!
② 控制反转式程序开发

Ⅰ 控制反转
- 先创建一个 v2 包:

- CarV2:
package v2; /** * 控制反转的车 */ public class CarV2 { private FrameworkV2 frameworkV2; public CarV2(FrameworkV2 frameworkV2) { // frameworkV2 = new FrameworkV2(); // 自己创建 (自己控制对象的生命周期) this.frameworkV2 = frameworkV2; // Car 构造方法不会再创建 } public void init() { System.out.println("Car v2 init."); frameworkV2.init(); } }- 1
- 2
- 3
- 4
- 5
- 6
- 7
- 8
- 9
- 10
- 11
- 12
- 13
- 14
- 15
- 16
- 17
- 18
- FrameworkV2:
package v2; public class FrameworkV2 { private BottomV2 bottomV2; public FrameworkV2(BottomV2 bottomV2) { this.bottomV2 = bottomV2; } public void init() { System.out.println("Framework v2 init."); bottomV2.init(); } }- 1
- 2
- 3
- 4
- 5
- 6
- 7
- 8
- 9
- 10
- 11
- 12
- 13
- 14
- BottomV2:
package v2; public class BottomV2 { private TireV2 tireV2; public BottomV2(TireV2 tireV2) { this.tireV2 = tireV2; } public void init() { System.out.println("Bottom v2 init."); tireV2.init(); } }- 1
- 2
- 3
- 4
- 5
- 6
- 7
- 8
- 9
- 10
- 11
- 12
- 13
- 14
- TireV2:
package v2; public class TireV2 { private int size = 17; public TireV2(int size) { this.size = size; } public void init() { System.out.println("Tire v2 size:" + size); } }- 1
- 2
- 3
- 4
- 5
- 6
- 7
- 8
- 9
- 10
- 11
- 12
- 13
- App:
package v2; public class App { public static void main(String[] args) { // 程序调用 int size = 15; TireV2 tireV2 = new TireV2(15); BottomV2 bottomV2 = new BottomV2(tireV2); FrameworkV2 frameworkV2 = new FrameworkV2(bottomV2); CarV2 carV2 = new CarV2(frameworkV2); carV2.init(); } }- 1
- 2
- 3
- 4
- 5
- 6
- 7
- 8
- 9
- 10
- 11
- 12
- 13
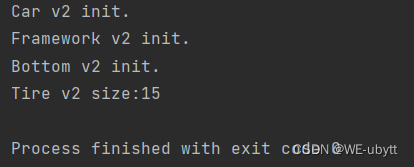
- 运行结果为:
Ⅱ 需求增加
当需求增加时,例如需要增加车轮的颜色:
- TireV2:
package v2; public class TireV2 { private int size = 17; private String color = "黑色"; public TireV2(int size, String color) { this.size = size; this.color = color; } public void init() { System.out.println("Tire v2 size:" + size); System.out.println("Tire v2 color:" + color); } }- 1
- 2
- 3
- 4
- 5
- 6
- 7
- 8
- 9
- 10
- 11
- 12
- 13
- 14
- 15
- 16
- App:
package v2; public class App { public static void main(String[] args) { // 程序调用 int size = 15; String color = "红色"; TireV2 tireV2 = new TireV2(15, color); BottomV2 bottomV2 = new BottomV2(tireV2); FrameworkV2 frameworkV2 = new FrameworkV2(bottomV2); CarV2 carV2 = new CarV2(frameworkV2); carV2.init(); } }- 1
- 2
- 3
- 4
- 5
- 6
- 7
- 8
- 9
- 10
- 11
- 12
- 13
- 14
- 运行结果为:

Ⅲ 优点
代码经过以上调整,⽆论底层类如何变化,整个调⽤链是不⽤做任何改变的,这样就完成了代码之间的解耦,从⽽实现了更加灵活、通⽤的程序设计了。
③ 对⽐总结规律
在传统的代码中对象创建顺序是:Car -> Framework -> Bottom -> Tire
改进之后解耦的代码的对象创建顺序是:Tire -> Bottom -> Framework -> Car
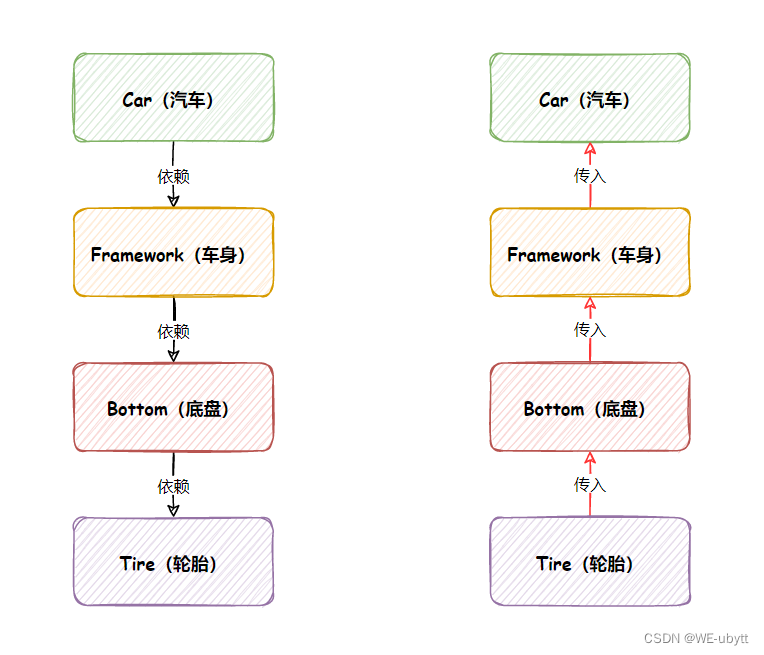
改进之后的控制权发⽣的反转,不再是上级对象创建并控制下级对象了,⽽是下级对象把注⼊将当前对象中,下级的控制权不再由上级类控制了,这样即使下级类发⽣任何改变,当前类都是不受影响的,这就是典型的控制反转,也就是 IoC 的实现思想。3、理解 Spring IoC
回到我们的主题:Spring,本⽂刚开始咱们就讲:Spring 是包含了多个⼯具⽅法的 IoC 容器,这就是对 Spring 最核⼼的总结。“集成多个⼯具⽅法”这事咱们以后慢慢再讲,那如何理解“Spring 是⼀个 IoC容器”这句话呢?
既然 Spring 是⼀个 IoC(控制反转)容器,重点还在“容器”⼆字上,那么它就具备两个最基础的功能:
- 将对象存⼊到容器;
- 从容器中取出对象。
也就是说学 Spring 最核⼼的功能,就是学如何将对象存⼊到 Spring 中,再从 Spring 中获取对象的过程。
将对象存放到容器中的好处:将对象存储在 IoC 容器相当于将以后可能⽤的所有⼯具制作好都放到仓库中,需要的时候直接取就⾏了,⽤完再把它放回到仓库。⽽ new 对象的⽅式相当于,每次需要⼯具了,才现做,⽤完就扔掉了也不会保存,下次再⽤的时候还得重新做,这就是 IoC 容器和普通程序开发的区别。
Spring 是⼀个 IoC 容器,说的是对象的创建和销毁的权利都交给 Spring 来管理了,它本身⼜具备了存储对象和获取对象的能⼒。
4、DI 概念说明
说到 IoC 不得不提的⼀个词就是“DI”。
DI(Dependency Injection ):依赖注入,即将依赖的类注入到当前类中。所谓依赖注⼊,就是由 IoC 容器在运⾏期间,动态地将某种依赖关系注⼊到对象之中。所以,依
赖注⼊(DI)和控制反转(IoC)是从不同的⻆度的描述的同⼀件事情,就是指通过引⼊ IoC 容
器,利⽤依赖关系注⼊的⽅式,实现对象之间的解耦。IoC 是“⽬标”也是⼀种思想,⽽⽬标和思想只是⼀种指导原则,最终还是要有可⾏的落地⽅案,⽽ DI 就属于具体的实现。
-
相关阅读:
Linux用户管理
Golang入门笔记(最后一章 17 封版)—— 映射map
只分享这一次。阿里软件架构师深入底层手写JDK源码
计算机网络(HTTP上)
[deeplearning]深度学习框架torch的概念以及数学内容
Spring Security(七) ——跨域配置
反序列化相关
DataX 数据迁移
抛砖系列之git仓库拆分工具git-filter-repo
【FPGA教程案例41】图像案例1——通过verilog读取图片
- 原文地址:https://blog.csdn.net/WZRbeliever/article/details/127678710
