-
75.【JavaWeb-03】
(十五)、JavaBean
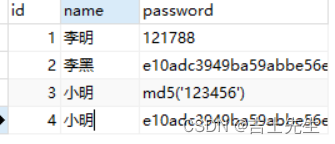
JavaBeans是Java中一种特殊的类,可以将多个对象封装到一个对象中。特点是:
可序列化,提供无参构造器,提供getter方法和setter方法访问对象的属性。一般用来和数据库的字段做映射 ORM。
ORM Objection-Relation-Mapping对象关系映射- 表----》类
- 字段—》属性(变量)
- 行记录—》对象
class People{ private int id; private String name; private String password; } public static void main(){ new People(1,"李明","121788"); }- 1
- 2
- 3
- 4
- 5
- 6
- 7
- 8
<%@ page import="com.Jsxs.pojo.Demo2" %> <%@ page contentType="text/html;charset=UTF-8" language="java" %> <html> <head> <title>Title</title> </head> <body> <%--相当于 new Demo1();--%> <jsp:useBean id="people" class="com.Jsxs.pojo.Demo2" scope="page"/> <jsp:setProperty name="people" property="password" value="456"/> <jsp:setProperty name="people" property="id" value="1"/> <jsp:setProperty name="people" property="name" value="2222"/> <jsp:getProperty name="people" property="id"/> <jsp:getProperty name="people" property="name"/> <jsp:getProperty name="people" property="password"/> </body> </html>- 1
- 2
- 3
- 4
- 5
- 6
- 7
- 8
- 9
- 10
- 11
- 12
- 13
- 14
- 15
- 16
- 17
- 18
- 19
- 20
- 21
- 22
package com.Jsxs.pojo; public class Demo1 { private int id; private String name; private String password; public int getId() { return id; } public void setId(int id) { this.id = id; } public String getName() { return name; } public void setName(String name) { this.name = name; } public String getPassword() { return password; } public void setPassword(String password) { this.password = password; } public Demo1() { } public Demo1(int id, String name, String password) { this.id = id; this.name = name; this.password = password; } @Override public String toString() { return "Demo1{" + "id=" + id + ", name='" + name + '\'' + ", password='" + password + '\'' + '}'; } }- 1
- 2
- 3
- 4
- 5
- 6
- 7
- 8
- 9
- 10
- 11
- 12
- 13
- 14
- 15
- 16
- 17
- 18
- 19
- 20
- 21
- 22
- 23
- 24
- 25
- 26
- 27
- 28
- 29
- 30
- 31
- 32
- 33
- 34
- 35
- 36
- 37
- 38
- 39
- 40
- 41
- 42
- 43
- 44
- 45
- 46
- 47
- 48
- 49

(十六)、MVC三层框架
1.什么是MVC三层框架: Model view Controller 模型视图控制器
1.早些年:

用户直接访问控制层: 控制层就可以直接操作数据库servlet==CRUD==数据库 弊端: 程序十分臃肿,不利于维护。 servlet的代码中、响应、视图跳转、处理JDBC、 处理业务代码、处理逻辑代码。 架构: 没有什么是加一层解决不了的。 eg: JDBC包的架构- 1
- 2
- 3
- 4
- 5
2.三层架构:
前期用户主要用的是: 利用命令的操作进行控制,后期利用MVC三层架构的方式,实现了三层架构 的方式进行了操作。- 1
- 2

CURD 它代表创建(Create)、更新(Update)、读取(Read)和删除(Delete)操作。 Model: (1).业务处理: 业务逻辑(Service) (2).数据持久层: CRUD (Dao) View: (1).展示数据 (2).提供链接发起Servlet请求 (a,form,img...) Controller (1).接受用户的请求 : (req 参数或session) (2).交给业务层处理对应的代码 (3).控制视图的跳转 eg: 点击登入==接受用户的请求====处理用户的请求(获取用户登入的参数: username,password)== 交给业务层处理登入业务(判断用户的名字和密码是否正确)===Dao查询数据库密码是否正确==数据库。 最后进行回滚的操作- 1
- 2
- 3
- 4
- 5
- 6
- 7
- 8
- 9
- 10
- 11
- 12
- 13
- 14
- 15
(十七)、Filter(过滤器)
Filter: 过滤器,用来过滤网站的作用。 eg: 处理中文乱码 登入验证。。。。- 1
- 2

1加入依赖
<dependencies> <dependency> <groupId>javax.servlet</groupId> <artifactId>servlet-api</artifactId> <version>2.5</version> </dependency> <dependency> <groupId>javax.servlet.jsp</groupId> <artifactId>javax.servlet.jsp-api</artifactId> <version>2.2.1</version> </dependency> <dependency> <groupId>javax.servlet.jsp.jstl</groupId> <artifactId>jstl-api</artifactId> <version>1.2</version> </dependency> <dependency> <groupId>taglibs</groupId> <artifactId>standard</artifactId> <version>1.1.2</version> </dependency> </dependencies>- 1
- 2
- 3
- 4
- 5
- 6
- 7
- 8
- 9
- 10
- 11
- 12
- 13
- 14
- 15
- 16
- 17
- 18
- 19
- 20
- 21
- 22
2.基本步骤
1.基本步骤: (1).导包 (2).继承过滤器 (3).编写方法 (4).配置web.xml过滤器- 1
- 2
- 3
- 4
- 5


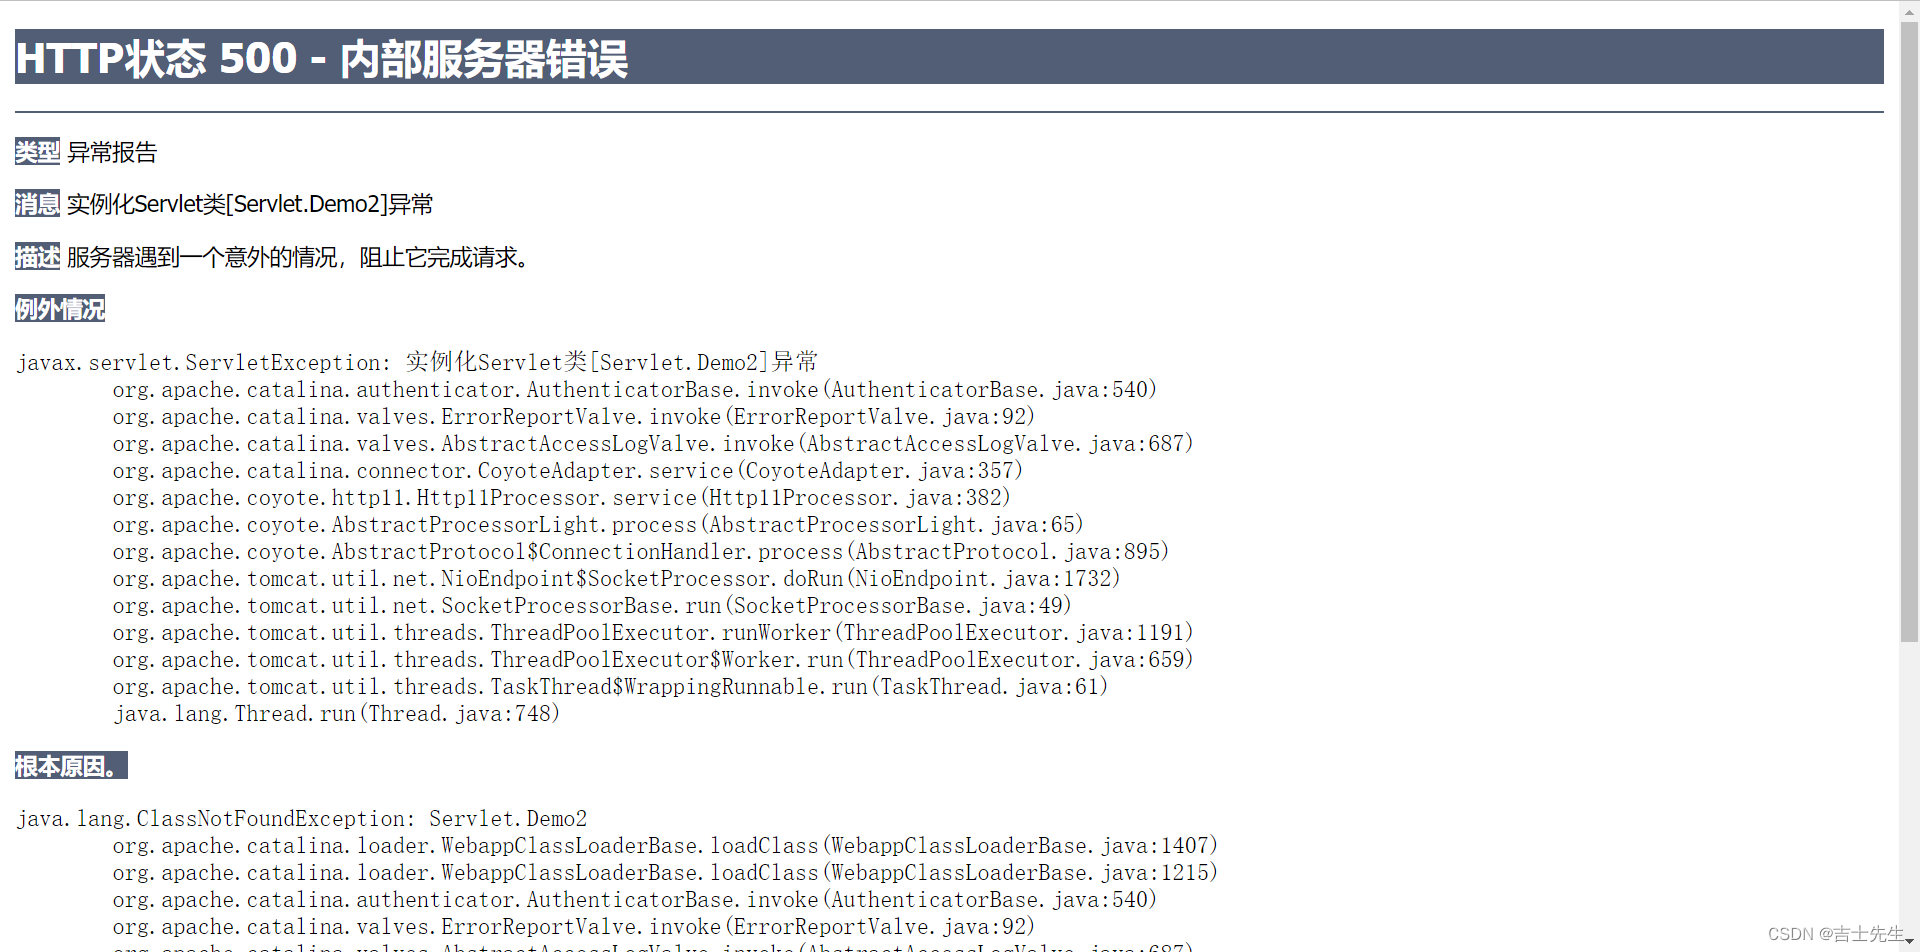
3.出现500错误的话
如果出现如下的错误: 请删除这一段- 1

4.案列演示
1.首先我们要进行导入filter的包 2.然后我们要引入接口filter== 这个是java-servlt的包别整错了 3.我们设置一个实列类:编写一段中文编码,在我们不设置编码格式的情况下肯定 会乱码的,然后web.xml对这个类进行注册的设置。 4.然后我们在DEMO2这个类中进行继承接口,然后重新三个方法: 第一个是:初始化 第二个是: 写方法,第三个是: 销毁。 5.配置web.xml- 1
- 2
- 3
- 4
- 5
- 6
- 7
- 8

chain : 链 1.过滤中的所有代码,在过滤特定请求的时候都会执行 2.必须要让过滤器继续同行,就是 chain.doFilter(request,response); chain.doFilter(request,response); //链的意思: 主要作用就是开启过滤器,如果不写,程序就会被拦截停止。可以写多个过滤器- 1
- 2
- 3
- 4
过滤器Demo1
package com.Jsxs.Filter; import javax.servlet.*; import java.io.IOException; public class Demo1 implements Filter { // web服务器启动的时候,他就开始初始化了 public void init(FilterConfig filterConfig) throws ServletException { System.out.println("初始化的操作"); } // chain /* 1.过滤中的所有代码,在过滤特定请求的时候都会执行 2.必须要让过滤器继续同行,就是 chain.doFilter(request,response); 3. */ public void doFilter(ServletRequest request, ServletResponse response, FilterChain chain) throws IOException, ServletException { request.setCharacterEncoding("utf-8"); response.setCharacterEncoding("utf-8"); response.setContentType("text/html;charset=UTF-8"); System.out.println("过滤器执行前..."); chain.doFilter(request,response); //链的意思: 主要作用就是开启过滤器,如果不写,程序就会被拦截停止 System.out.println("过滤器执行后"); } public void destroy() { System.out.println("进行销毁"); } }- 1
- 2
- 3
- 4
- 5
- 6
- 7
- 8
- 9
- 10
- 11
- 12
- 13
- 14
- 15
- 16
- 17
- 18
- 19
- 20
- 21
- 22
- 23
- 24
- 25
- 26
- 27
- 28
- 29
- 30
- 31
Demo2演示的类
package Servlet; import javax.servlet.ServletException; import javax.servlet.http.HttpServlet; import javax.servlet.http.HttpServletRequest; import javax.servlet.http.HttpServletResponse; import java.io.IOException; public class Demo2 extends HttpServlet { @Override protected void doGet(HttpServletRequest req, HttpServletResponse resp) throws ServletException, IOException { // resp.setCharacterEncoding("gbk"); // req.setCharacterEncoding("gbk"); resp.getWriter().write("你好呀,世界!"); } @Override protected void doPost(HttpServletRequest req, HttpServletResponse resp) throws ServletException, IOException { doGet(req, resp); } }- 1
- 2
- 3
- 4
- 5
- 6
- 7
- 8
- 9
- 10
- 11
- 12
- 13
- 14
- 15
- 16
- 17
- 18
- 19
- 20
- 21
- 22
web.xml配置
<?xml version="1.0" encoding="UTF-8"?> <web-app xmlns="http://xmlns.jcp.org/xml/ns/javaee" xmlns:xsi="http://www.w3.org/2001/XMLSchema-instance" xsi:schemaLocation="http://xmlns.jcp.org/xml/ns/javaee http://xmlns.jcp.org/xml/ns/javaee/web-app_4_0.xsd" version="4.0"> <servlet> <servlet-name>demo2</servlet-name> <servlet-class>Servlet.Demo2</servlet-class> </servlet> <servlet-mapping> <servlet-name>demo2</servlet-name> <url-pattern>/servlet/show</url-pattern> </servlet-mapping> <servlet-mapping> <servlet-name>demo2</servlet-name> <url-pattern>/servletshow</url-pattern> </servlet-mapping> <filter> <filter-name>demo1</filter-name> <filter-class>com.Jsxs.Filter.Demo1</filter-class> </filter> <filter-mapping> <filter-name>demo1</filter-name> <!-- 如果是Servlet下的所有目录,都可以用 --> <url-pattern>/servlet/*- 1
- 2
- 3
- 4
- 5
- 6
- 7
- 8
- 9
- 10
- 11
- 12
- 13
- 14
- 15
- 16
- 17
- 18
- 19
- 20
- 21
- 22
- 23
- 24
- 25
- 26
- 27
(十八)、Listener(监听器)
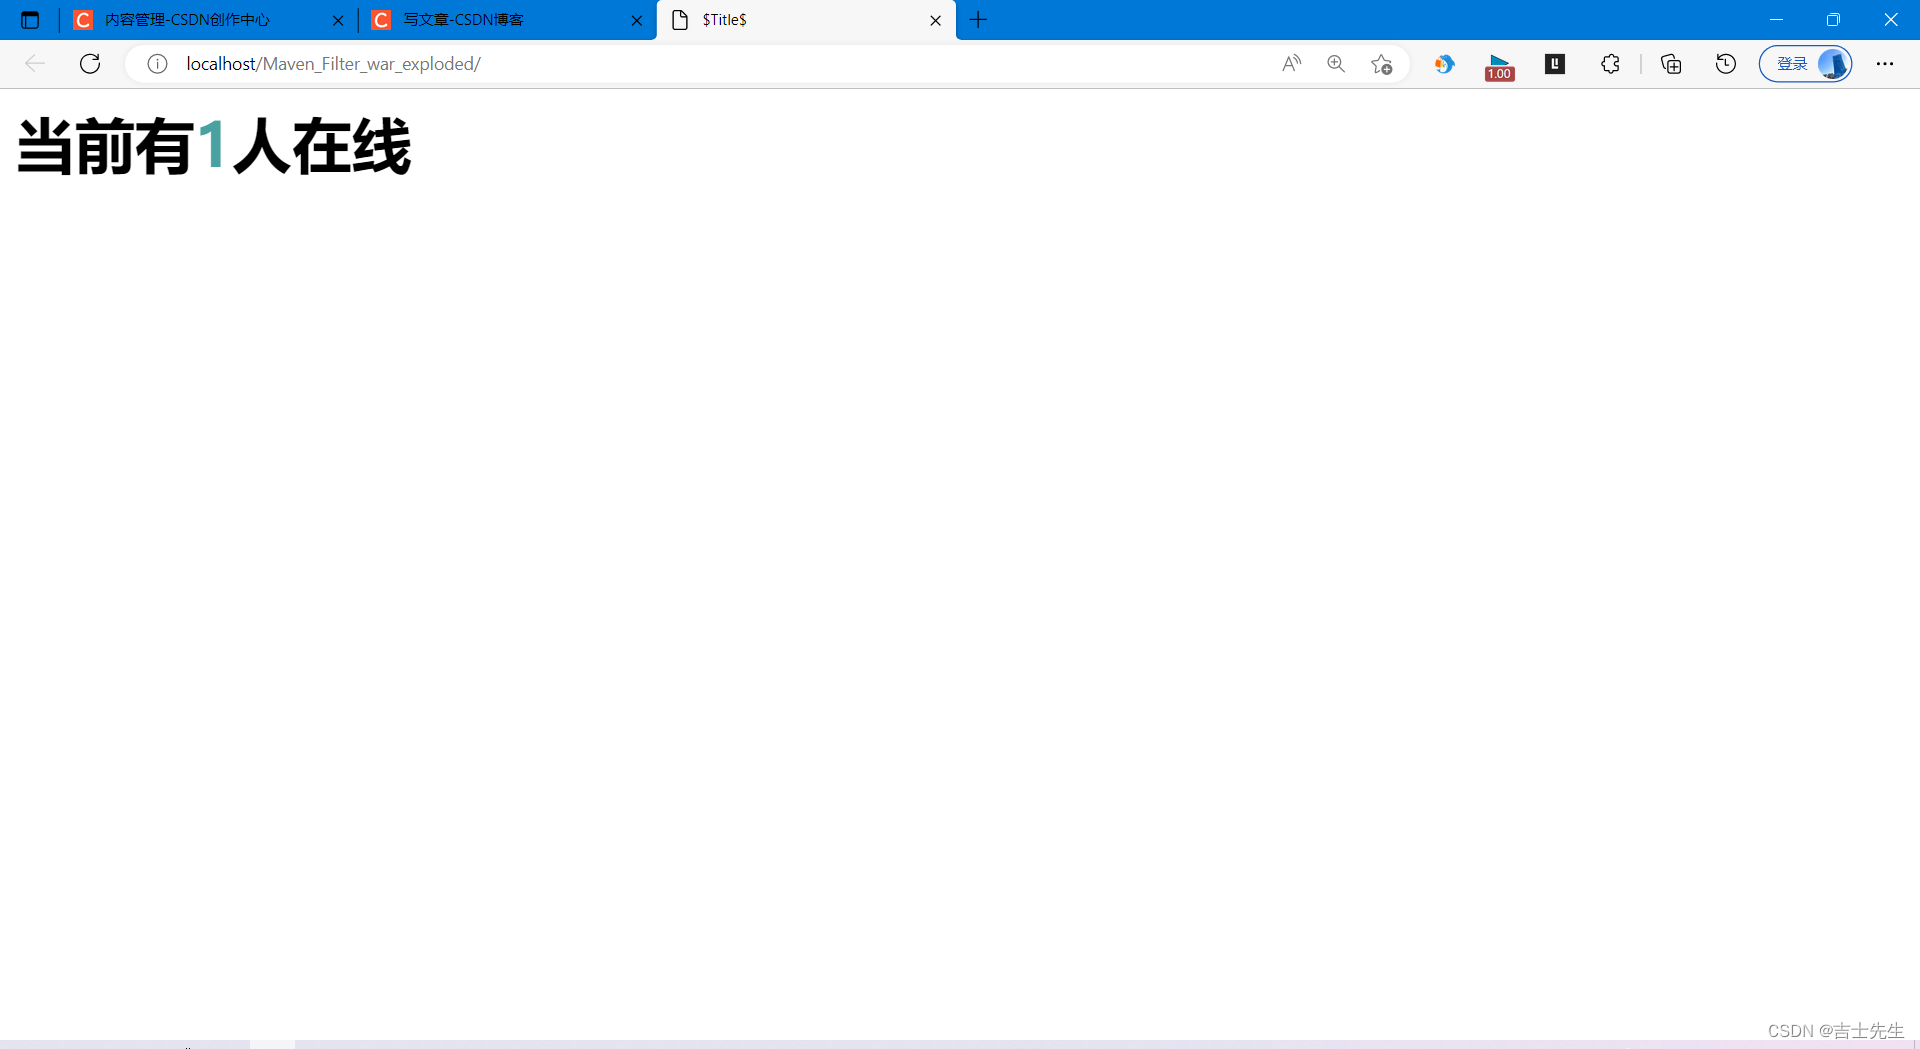
1.利用监听实现在线人数的统计
1.实现一个监听器的接口: (有N种) 2.重载方法 3.配置web.xml文件- 1
- 2
- 3
package com.Jsxs.Http; import javax.servlet.ServletContext; import javax.servlet.http.HttpSession; import javax.servlet.http.HttpSessionEvent; import javax.servlet.http.HttpSessionListener; public class Demo2 implements HttpSessionListener { @Override public void sessionCreated(HttpSessionEvent se) { HttpSession session = se.getSession(); // 为什么要使用servletContext? 因为能共享 ServletContext servletContext = session.getServletContext(); System.out.println(session.getId()); // 为什么使用Integer? 因为可以判断是否为空,而且可以直接设置 Integer count = (Integer) servletContext.getAttribute("Sum"); if(count==null){ // 赋值的操作 count=new Integer(1); }else { // 转换 int i = count.intValue(); count = new Integer(i + 1); } servletContext.setAttribute("Sum",count); } @Override public void sessionDestroyed(HttpSessionEvent se) { } }- 1
- 2
- 3
- 4
- 5
- 6
- 7
- 8
- 9
- 10
- 11
- 12
- 13
- 14
- 15
- 16
- 17
- 18
- 19
- 20
- 21
- 22
- 23
- 24
- 25
- 26
- 27
- 28
- 29
- 30
- 31
- 32
- 33
- 34
WEB.XML
<?xml version="1.0" encoding="UTF-8"?> <web-app xmlns="http://xmlns.jcp.org/xml/ns/javaee" xmlns:xsi="http://www.w3.org/2001/XMLSchema-instance" xsi:schemaLocation="http://xmlns.jcp.org/xml/ns/javaee http://xmlns.jcp.org/xml/ns/javaee/web-app_4_0.xsd" version="4.0"> <servlet> <servlet-name>demo1</servlet-name> <servlet-class>com.Jsxs.Http.Demo1</servlet-class> </servlet> <servlet-mapping> <servlet-name>demo1</servlet-name> <url-pattern>/demo1</url-pattern> </servlet-mapping> <listener> <listener-class>com.Jsxs.Http.Demo2</listener-class> </listener> </web-app>- 1
- 2
- 3
- 4
- 5
- 6
- 7
- 8
- 9
- 10
- 11
- 12
- 13
- 14
- 15
- 16
- 17
- 18
JSP
<%@ page import="java.util.Date" %> <%@ page contentType="text/html;charset=UTF-8" language="java" %> <html> <head> <title>$Title$</title> </head> <body> <div style="color: #073636">在线人数为<span><%=pageContext.findAttribute("Sum")%></span>人</div> <% %> <%-- GMT时间--%> <%=new Date()%>> </body> </html>- 1
- 2
- 3
- 4
- 5
- 6
- 7
- 8
- 9
- 10
- 11
- 12
- 13
- 14
- 15
- 16
(十九)、小结对18之前的
package com.Jsxs.Http; import javax.servlet.RequestDispatcher; import javax.servlet.ServletContext; import javax.servlet.ServletException; import javax.servlet.ServletOutputStream; import javax.servlet.http.*; import java.io.IOException; import java.io.InputStream; import java.net.URLDecoder; import java.util.Date; import java.util.Properties; public class Demo1 extends HttpServlet { @Override protected void doGet(HttpServletRequest req, HttpServletResponse resp) throws ServletException, IOException { // 1.如果想要输出的数据是gbk,那么只需要resp响应头即可,可以不用设置rep。 resp.setCharacterEncoding("gbk"); req.setCharacterEncoding("UTF-8"); resp.getWriter().write(resp.getCharacterEncoding()); resp.getWriter().write("你好,我是getWriter()!"); // 2.进行设置响应界面的设置,什么界面以及编码格式 resp.setContentType("text/html;charset=UTF-8"); resp.getWriter().write(resp.getContentType()); // 3.getOutputStream和getWriter这两个方法互相排斥,调用了其中的任何一个方法后,就不能再调用另一方法。 // ServletOutputStream outputStream = resp.getOutputStream(); // outputStream.println(12123); // 4.是为了解决相对路径的问题,可返回站点的根路径。 resp.getWriter().write(req.getContextPath()); resp.getWriter().write("你好"); //=========================================================================== // ServletContext ServletContext servletContext = this.getServletContext(); // 1.存servlet和取servlet. servletContext.setAttribute("name","吉士先生"); String name = (String) servletContext.getAttribute("name"); resp.getWriter().write(name); // 2.是为了解决相对路径的问题,可返回站点的根路径。 String contextPath = servletContext.getContextPath(); resp.getWriter().write(contextPath); // 3.请求转发.... // RequestDispatcher requestDispatcher = servletContext.getRequestDispatcher("/Demo2"); // requestDispatcher.forward(req,resp); // 4.获取资源 InputStream is = servletContext.getResourceAsStream("/WEB-INF/classes/db.properties"); Properties properties = new Properties(); properties.load(is); String username = properties.getProperty("username"); String password = properties.getProperty("password"); resp.getWriter().write(URLDecoder.decode(username,"gbk")); resp.getWriter().write(password); //=========================================================================== //COOKIE /* Cookie cookie=new Cookie("Secrity","121788"); resp.addCookie(cookie); Cookie[] cookies = req.getCookies(); if (cookies==null){ resp.getWriter().write("没有cookie"); }else { for (int i = 0; i < cookies.length; i++) { Cookie cookie1 = cookies[i]; if (cookie1.getName().equals("Secrity")) { cookie1.setSecure(true); cookie1.setComment("这是您的密码"); resp.getWriter().write(cookie1.getValue()+" "+cookie1.getName()+" "+cookie1.getComment() +" "+cookie1.getPath()+" "+cookie1.getMaxAge()+" "+cookie1.getSecure()+" "+cookie1.getVersion()); } } } */ //===================================================================== // Session HttpSession session = req.getSession(); // 1.设置session并且取session session.setAttribute("GOODS","密码是:12456"); String goods = (String) session.getAttribute("GOODS"); resp.getWriter().write(goods); // 2.注销指定的session // resp.getWriter().write("结束了"); // session.invalidate(); // session.removeAttribute("GOODS"); // resp.getWriter().write(goods); // 3.获取session创建的时间: 会返回一个时间戳 long creationTime = session.getCreationTime(); resp.getWriter().write(creationTime+""); Date date = new Date(creationTime); resp.getWriter().write(date.toString()); // 4.设置和获取session的有效时间. // session.setMaxInactiveInterval(10); // resp.getWriter().write(session.getMaxInactiveInterval()); // // 5.设置ServletContext的属性,以及获取。不能获取不是ServletContext创建的属性 resp.getWriter().write("你好"); ServletContext servletContext1 = session.getServletContext(); servletContext1.setAttribute("he","吉士先生"); String goods1 = (String) servletContext1.getAttribute("he"); resp.getWriter().write(goods1); } @Override protected void doPost(HttpServletRequest req, HttpServletResponse resp) throws ServletException, IOException { doGet(req, resp); } }- 1
- 2
- 3
- 4
- 5
- 6
- 7
- 8
- 9
- 10
- 11
- 12
- 13
- 14
- 15
- 16
- 17
- 18
- 19
- 20
- 21
- 22
- 23
- 24
- 25
- 26
- 27
- 28
- 29
- 30
- 31
- 32
- 33
- 34
- 35
- 36
- 37
- 38
- 39
- 40
- 41
- 42
- 43
- 44
- 45
- 46
- 47
- 48
- 49
- 50
- 51
- 52
- 53
- 54
- 55
- 56
- 57
- 58
- 59
- 60
- 61
- 62
- 63
- 64
- 65
- 66
- 67
- 68
- 69
- 70
- 71
- 72
- 73
- 74
- 75
- 76
- 77
- 78
- 79
- 80
- 81
- 82
- 83
- 84
- 85
- 86
- 87
- 88
- 89
- 90
- 91
- 92
- 93
- 94
- 95
- 96
- 97
- 98
- 99
- 100
- 101
- 102
- 103
- 104
- 105
- 106
- 107
- 108
- 109
- 110
- 111
- 112
(二十)、过滤器、监听器常见应用
1.过滤器注册和注销操作
用户登入之后就可以进入主页,注销之后就不能进入主页
1.创建 login.jsp.里面有一个表单,表单提交后转向LoginServlet.java这个类 的映射。 2.然后映射再找对应的LoginServlet.java,进行判断。再进行重定向。- 1
- 2
- 3
- 4
succes.jsp
<%@ page contentType="text/html;charset=UTF-8" language="java" %> <html> <head> <title>Title</title> </head> <body> <h1>主页</h1> <p><a href="Servlete/logout" >注销</a></p> </body> </html>- 1
- 2
- 3
- 4
- 5
- 6
- 7
- 8
- 9
- 10
- 11
- 12
login.jsp
<%@ page contentType="text/html;charset=UTF-8" language="java" %> <html> <head> <title>吉士先生登入界面</title> </head> <body> <form action="demo4 " method="get"> 用户名<input type="text" name="username" placeholder="请输入您的账号"> 密码<input type="password" name="password" placeholder="请输入您的密码"> <input type="submit" name="login"> <input type="reset" name="reset"> </form> </body> </html>- 1
- 2
- 3
- 4
- 5
- 6
- 7
- 8
- 9
- 10
- 11
- 12
- 13
- 14
- 15
error.jsp
<%@ page contentType="text/html;charset=UTF-8" language="java" %> <html> <head> <title>Title</title> </head> <body> <h1>您输入的信息有误</h1> <p><a href="http://localhost/Maven_Filter_war_exploded/login.jsp" >返回首页</a></p> </body> </html>- 1
- 2
- 3
- 4
- 5
- 6
- 7
- 8
- 9
- 10
- 11
web.xml
<?xml version="1.0" encoding="UTF-8"?> <web-app xmlns="http://xmlns.jcp.org/xml/ns/javaee" xmlns:xsi="http://www.w3.org/2001/XMLSchema-instance" xsi:schemaLocation="http://xmlns.jcp.org/xml/ns/javaee http://xmlns.jcp.org/xml/ns/javaee/web-app_4_0.xsd" version="4.0"> <servlet> <servlet-name>demo2</servlet-name> <servlet-class>Servlet.Demo2</servlet-class> </servlet> <servlet-mapping> <servlet-name>demo2</servlet-name> <url-pattern>/servlet/show</url-pattern> </servlet-mapping> <servlet-mapping> <servlet-name>demo2</servlet-name> <url-pattern>/servletshow</url-pattern> </servlet-mapping> <filter> <filter-name>demo1</filter-name> <filter-class>com.Jsxs.Filter.Demo1</filter-class> </filter> <filter-mapping> <filter-name>demo1</filter-name> <!-- 如果是Servlet下的所有目录,都可以用 --> <url-pattern>/succes.jsp</url-pattern> </filter-mapping> <!-- 注册监听器 --> <listener> <listener-class>Listener.OnionCount</listener-class> </listener> <servlet> <servlet-name>LoginServlet</servlet-name> <servlet-class>Servlet.LoginServlet</servlet-class> </servlet> <servlet-mapping> <servlet-name>LoginServlet</servlet-name> <url-pattern>/demo4</url-pattern> </servlet-mapping> <servlet> <servlet-name>logout</servlet-name> <servlet-class>Servlet.LogOut</servlet-class> </servlet> <servlet-mapping> <servlet-name>logout</servlet-name> <url-pattern>/Servlete/logout</url-pattern> </servlet-mapping> </web-app>- 1
- 2
- 3
- 4
- 5
- 6
- 7
- 8
- 9
- 10
- 11
- 12
- 13
- 14
- 15
- 16
- 17
- 18
- 19
- 20
- 21
- 22
- 23
- 24
- 25
- 26
- 27
- 28
- 29
- 30
- 31
- 32
- 33
- 34
- 35
- 36
- 37
- 38
- 39
- 40
- 41
- 42
- 43
- 44
- 45
- 46
- 47
- 48
- 49
log.java
package Servlet; import util.Constanta; import javax.servlet.ServletContext; import javax.servlet.ServletException; import javax.servlet.http.HttpServlet; import javax.servlet.http.HttpServletRequest; import javax.servlet.http.HttpServletResponse; import javax.servlet.http.HttpSession; import java.io.IOException; public class LogOut extends HttpServlet { @Override protected void doGet(HttpServletRequest req, HttpServletResponse resp) throws ServletException, IOException { HttpSession session = req.getSession(); if (session!=null){ session.removeAttribute(Constanta.USER_SESSION); System.out.println("注销成功"); resp.sendRedirect("http://localhost/Maven_Filter_war_exploded/login.jsp"); } } @Override protected void doPost(HttpServletRequest req, HttpServletResponse resp) throws ServletException, IOException { doGet(req, resp); } }- 1
- 2
- 3
- 4
- 5
- 6
- 7
- 8
- 9
- 10
- 11
- 12
- 13
- 14
- 15
- 16
- 17
- 18
- 19
- 20
- 21
- 22
- 23
- 24
- 25
- 26
- 27
- 28
- 29
logout.java
package Servlet; import util.Constanta; import javax.servlet.ServletContext; import javax.servlet.ServletException; import javax.servlet.http.HttpServlet; import javax.servlet.http.HttpServletRequest; import javax.servlet.http.HttpServletResponse; import javax.servlet.http.HttpSession; import java.io.IOException; public class LogOut extends HttpServlet { @Override protected void doGet(HttpServletRequest req, HttpServletResponse resp) throws ServletException, IOException { HttpSession session = req.getSession(); if (session!=null){ session.removeAttribute(Constanta.USER_SESSION); System.out.println("注销成功"); resp.sendRedirect("http://localhost/Maven_Filter_war_exploded/login.jsp"); } } @Override protected void doPost(HttpServletRequest req, HttpServletResponse resp) throws ServletException, IOException { doGet(req, resp); } }- 1
- 2
- 3
- 4
- 5
- 6
- 7
- 8
- 9
- 10
- 11
- 12
- 13
- 14
- 15
- 16
- 17
- 18
- 19
- 20
- 21
- 22
- 23
- 24
- 25
- 26
- 27
- 28
- 29
过滤器
package com.Jsxs.Filter; import util.Constanta; import javax.servlet.*; import javax.servlet.http.HttpServletRequest; import javax.servlet.http.HttpServletResponse; import java.io.IOException; public class Demo1 implements Filter { // web服务器启动的时候,他就开始初始化了 public void init(FilterConfig filterConfig) throws ServletException { System.out.println("初始化的操作"); } // chain /* 1.过滤中的所有代码,在过滤特定请求的时候都会执行 2.必须要让过滤器继续同行,就是 chain.doFilter(request,response); 3. */ public void doFilter(ServletRequest request, ServletResponse response, FilterChain chain) throws IOException, ServletException { request.setCharacterEncoding("utf-8"); response.setCharacterEncoding("utf-8"); response.setContentType("text/html;charset=UTF-8"); // 进行强制转换 HttpServletRequest request1 = (HttpServletRequest) request; HttpServletResponse response1 = (HttpServletResponse) response; // 经过过滤器进行操作 Object user_session = request1.getSession().getAttribute(Constanta.USER_SESSION); if(user_session==null){ response1.sendRedirect("http://localhost/Maven_Filter_war_exploded/login.jsp"); } chain.doFilter(request,response); //链的意思: 主要作用就是开启过滤器,如果不写,程序就会被拦截停止 System.out.println("过滤器正在监听..."); } public void destroy() { System.out.println("过滤器已进行销毁"); } }- 1
- 2
- 3
- 4
- 5
- 6
- 7
- 8
- 9
- 10
- 11
- 12
- 13
- 14
- 15
- 16
- 17
- 18
- 19
- 20
- 21
- 22
- 23
- 24
- 25
- 26
- 27
- 28
- 29
- 30
- 31
- 32
- 33
- 34
- 35
- 36
- 37
- 38
- 39
- 40
- 41
- 42
常量
package util; public class Constanta { public final static String USER_SESSION="USER_SESSION"; }- 1
- 2
- 3
- 4
- 5
- 6
- 7

(二十一)、Junit依赖的作用:
1.依赖
可以在不加main方法的基础上,进行测试输出- 1
junit依赖: <dependencies> <dependency> <groupId>junit</groupId> <artifactId>junit</artifactId> <version>4.12</version> <scope>test</scope> </dependency> junit的附属依赖 <dependency> <groupId>org.junit.jupiter</groupId> <artifactId>junit-jupiter</artifactId> <version>RELEASE</version> <scope>compile</scope> </dependency>- 1
- 2
- 3
- 4
- 5
- 6
- 7
- 8
- 9
- 10
- 11
- 12
- 13
- 14
- 15
使用junit的时候,上面要加上注解才能生效
package com.Jsxs; import org.junit.jupiter.api.Test; public class Test_Junit { @Test public void test(){ System.out.println("hello"); } }- 1
- 2
- 3
- 4
- 5
- 6
- 7
- 8
- 9
- 10
- 11

(二十三)、SMBMS项目搭建
1.模块图


2.项目搭建
1.搭建一个模板项目,然后进行补充和更新目录:,以及Tomcat. 2.测试服务器是否能打开 3.导入项目中会遇到的jar包: servlet, servlet-jsp, mysql,stl,standard 4.建文件目录- 1
- 2
- 3
- 4

4.编写实体类: 实现ORM映射 5.设置数据库配置文件 4.设置过滤器,并且进行配置 6.导入静态数据资源 7.设置首页 8.编写dao层用户登入的接口 9.编写dao接口的实现类- 1
- 2
- 3
- 4
- 5
- 6
- 7
(二十四)、密码使用的Ajax
1.阿里巴巴的: fastjson 2.MAVEN <!-- https://mvnrepository.com/artifact/com.alibaba/fastjson --> <dependency> <groupId>com.alibaba</groupId> <artifactId>fastjson</artifactId> <version>1.2.61</version> </dependency>- 1
- 2
- 3
- 4
- 5
- 6
- 7
- 8
- 9
- 10
- 11
-
相关阅读:
[Docker]六.Docker自动部署nodejs以及golang项目
HTML和CSS学习总结
向量数据库:新一代的数据处理工具
Java网络编程1
Python进行多线程爬取数据通用模板
Linux操作系统作业
【密码学】DES 介绍
【882. 细分图中的可到达节点】
人工智能的时代---AI的影响
java培训之实验代码(格式化数字)
- 原文地址:https://blog.csdn.net/qq_69683957/article/details/127796279
