-
TCGA的拷贝数变异CNV可视化
大家看文献时可能经常遇到各种
CNV gistic score的可视化,都很好看,但是不知道怎么画出来的:


GISTIC2会自动出一些结果,但是并不好看,而且扩增和删失是分开的:

网络上也没找到怎么画,只能自己操作一下了!
数据准备
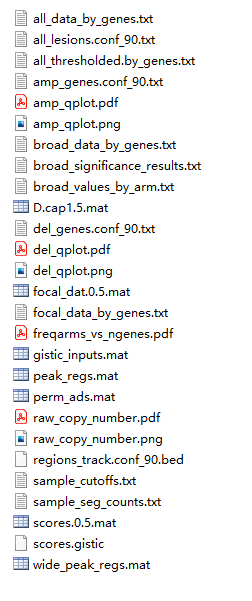
首先你要获得
GISTIC2.0的输出结果,这是一个linux软件,得到的结果如下:
至于这个软件怎么用,大家可以去百度一下~教程非常多,不过对于小白还是蛮复杂的!
使用maftools画图
maftools这个包可以做一些拷贝数变异的可视化,比如上面展示的那种图,但是画出来也不好看,也没有什么自定义选项,很明显是达不到各位的审美水平的。## 使用maftools分析 library(maftools) all.lesions <- "./TCGA_COAD_results/all_lesions.conf_90.txt" amp.genes <- "./TCGA_COAD_results/amp_genes.conf_90.txt" del.genes <- "./TCGA_COAD_results/del_genes.conf_90.txt" scores.gis <- "./TCGA_COAD_results/scores.gistic" coad.gistic = readGistic(gisticAllLesionsFile = all.lesions, gisticAmpGenesFile = amp.genes, gisticDelGenesFile = del.genes, gisticScoresFile = scores.gis, isTCGA = TRUE) ## -Processing Gistic files.. ## --Processing amp_genes.conf_90.txt ## --Processing del_genes.conf_90.txt ## --Processing scores.gistic ## --Summarizing by samples gisticChromPlot(gistic = coad.gistic ,markBands = "all" ,ref.build = "hg38" )- 1
- 2
- 3
- 4
- 5
- 6
- 7
- 8
- 9
- 10
- 11
- 12
- 13
- 14
- 15
- 16
- 17
- 18
- 19
- 20
- 21
- 22

# gisticBubblePlot(gistic = coad.gistic)- 1
这个图和文献里看到的还是差距很大的!下面我们学习下用
ggplot2画图!ggplot2画图
基础知识
首先要了解这个图是什么意思,横坐标是染色体(或基因组?),纵坐标是G-Score,红色表示扩增,蓝色表示删失,如果要用
ggplot2画这个图,那我们也要有这个数据才行!在GISTIC2.0的输出结果中,有一个
scores.gistic的文件,我们可以用VScode打开看看:

看看它的列名,真是太巧了,竟然和我们需要的数据非常相似,有gistic score,也有染色体位置,还有扩增或者删失!
但是这个文件理解还是需要一些基础知识的,说实话在学习画这个图之前我是不知道这些知识的,因为从来没用到过,所以也不会专门去学。。。
首先这个染色体位置,就
Start/End这两列,指的是在每一条染色体上的位置,第一条染色体上有3302046-3371973这个位置,那第2条,第3条等等都有这个位置区间,它并不是从0开始,一直过去的!那我们画图是需要从0开始的,所以我们就需要知道每一条染色体长度是多少,然后分别计算从0开始的位置坐标是多少!
真的是让人头大,这个又是我的知识盲区了!所以我去了bioconductor找它的一些文档看看,因为我知道里面是有很多基因组的注释包这些东西的。通过半天的学习,我知道了
BSgenome这个东西,还知道了人类的全基因组序列包BSgenome.Hsapiens.UCSC.hg38,这里面就有各个基因组的位置和长度信息。然后再继续学习下就知道
BSgenome也是一个对象,可以通过特定函数提取信息。OK,下面就开始提取信息了!
rm(list = ls()) library(BSgenome.Hsapiens.UCSC.hg38) # 加载R包 ## Loading required package: BSgenome ## Loading required package: BiocGenerics ## ## Attaching package: 'BiocGenerics' ## The following objects are masked from 'package:stats': ## ## IQR, mad, sd, var, xtabs ## The following objects are masked from 'package:base': ## ## anyDuplicated, append, as.data.frame, basename, cbind, colnames, ## dirname, do.call, duplicated, eval, evalq, Filter, Find, get, grep, ## grepl, intersect, is.unsorted, lapply, Map, mapply, match, mget, ## order, paste, pmax, pmax.int, pmin, pmin.int, Position, rank, ## rbind, Reduce, rownames, sapply, setdiff, sort, table, tapply, ## union, unique, unsplit, which.max, which.min ## Loading required package: S4Vectors ## Loading required package: stats4 ## ## Attaching package: 'S4Vectors' ## The following objects are masked from 'package:base': ## ## expand.grid, I, unname ## Loading required package: IRanges ## ## Attaching package: 'IRanges' ## The following object is masked from 'package:grDevices': ## ## windows ## Loading required package: GenomeInfoDb ## Loading required package: GenomicRanges ## Loading required package: Biostrings ## Loading required package: XVector ## ## Attaching package: 'Biostrings' ## The following object is masked from 'package:base': ## ## strsplit ## Loading required package: rtracklayer- 1
- 2
- 3
- 4
- 5
- 6
- 7
- 8
- 9
- 10
- 11
- 12
- 13
- 14
- 15
- 16
- 17
- 18
- 19
- 20
- 21
- 22
- 23
- 24
- 25
- 26
- 27
- 28
- 29
- 30
- 31
- 32
- 33
- 34
- 35
- 36
- 37
- 38
- 39
- 40
提取染色体名字及长度:
df <- data.frame(chromName = seqnames(BSgenome.Hsapiens.UCSC.hg38), # 染色体名字 chromlength = seqlengths(BSgenome.Hsapiens.UCSC.hg38)# 每条染色体长度 ) df$chromNum <- 1:length(df$chromName) # 染色体名字纯数字版,为了和scores.gistic里面的对应 # 我们用的原始CNV文件是没有性染色体信息的 df <- df[1:22,] # 只要前22条染色体信息 df ## chromName chromlength chromNum ## chr1 chr1 248956422 1 ## chr2 chr2 242193529 2 ## chr3 chr3 198295559 3 ## chr4 chr4 190214555 4 ## chr5 chr5 181538259 5 ## chr6 chr6 170805979 6 ## chr7 chr7 159345973 7 ## chr8 chr8 145138636 8 ## chr9 chr9 138394717 9 ## chr10 chr10 133797422 10 ## chr11 chr11 135086622 11 ## chr12 chr12 133275309 12 ## chr13 chr13 114364328 13 ## chr14 chr14 107043718 14 ## chr15 chr15 101991189 15 ## chr16 chr16 90338345 16 ## chr17 chr17 83257441 17 ## chr18 chr18 80373285 18 ## chr19 chr19 58617616 19 ## chr20 chr20 64444167 20 ## chr21 chr21 46709983 21 ## chr22 chr22 50818468 22 str(df) ## 'data.frame': 22 obs. of 3 variables: ## $ chromName : chr "chr1" "chr2" "chr3" "chr4" ... ## $ chromlength: int 248956422 242193529 198295559 190214555 181538259 170805979 159345973 145138636 138394717 133797422 ... ## $ chromNum : int 1 2 3 4 5 6 7 8 9 10 ...- 1
- 2
- 3
- 4
- 5
- 6
- 7
- 8
- 9
- 10
- 11
- 12
- 13
- 14
- 15
- 16
- 17
- 18
- 19
- 20
- 21
- 22
- 23
- 24
- 25
- 26
- 27
- 28
- 29
- 30
- 31
- 32
- 33
- 34
- 35
- 36
- 37
- 38
然后就是计算从0开始的每条染色体位置坐标,就是简单的线段长度加减法,不过对于我这种好久不搞数学的人来说也是很费脑子的!
在
scores.gistic这个文件里,第一条染色体位置是从0开始的,所以不用怎么改,但是第2条染色体的Start的坐标,应该是再加上第一条染色体的长度才是我们需要的,以此类推,不断相加!所以我们先计算下每条染色体从0开始的起始坐标是多少!第一条染色体起始位置就是0,第二条起始位置是第一条长度的位置,第3条是前两条长度的位置,以此类推!
# 小发现,在用cumsum前要把int变成numeric df$chromlengthCumsum <- cumsum(as.numeric(df$chromlength)) # 染色体累加长度 # 得到每条染色体从0开始的起始坐标 df$chormStartPosFrom0 <- c(0,df$chromlengthCumsum[-nrow(df)]) # 计算每条染色体中间位置坐标,用来最后加文字 tmp_middle <- diff(c(0,df$chromlengthCumsum)) / 2 df$chromMidelePosFrom0 <- df$chormStartPosFrom0 + tmp_middle df ## chromName chromlength chromNum chromlengthCumsum chormStartPosFrom0 ## chr1 chr1 248956422 1 248956422 0 ## chr2 chr2 242193529 2 491149951 248956422 ## chr3 chr3 198295559 3 689445510 491149951 ## chr4 chr4 190214555 4 879660065 689445510 ## chr5 chr5 181538259 5 1061198324 879660065 ## chr6 chr6 170805979 6 1232004303 1061198324 ## chr7 chr7 159345973 7 1391350276 1232004303 ## chr8 chr8 145138636 8 1536488912 1391350276 ## chr9 chr9 138394717 9 1674883629 1536488912 ## chr10 chr10 133797422 10 1808681051 1674883629 ## chr11 chr11 135086622 11 1943767673 1808681051 ## chr12 chr12 133275309 12 2077042982 1943767673 ## chr13 chr13 114364328 13 2191407310 2077042982 ## chr14 chr14 107043718 14 2298451028 2191407310 ## chr15 chr15 101991189 15 2400442217 2298451028 ## chr16 chr16 90338345 16 2490780562 2400442217 ## chr17 chr17 83257441 17 2574038003 2490780562 ## chr18 chr18 80373285 18 2654411288 2574038003 ## chr19 chr19 58617616 19 2713028904 2654411288 ## chr20 chr20 64444167 20 2777473071 2713028904 ## chr21 chr21 46709983 21 2824183054 2777473071 ## chr22 chr22 50818468 22 2875001522 2824183054 ## chromMidelePosFrom0 ## chr1 124478211 ## chr2 370053187 ## chr3 590297731 ## chr4 784552788 ## chr5 970429195 ## chr6 1146601314 ## chr7 1311677290 ## chr8 1463919594 ## chr9 1605686271 ## chr10 1741782340 ## chr11 1876224362 ## chr12 2010405328 ## chr13 2134225146 ## chr14 2244929169 ## chr15 2349446623 ## chr16 2445611390 ## chr17 2532409283 ## chr18 2614224646 ## chr19 2683720096 ## chr20 2745250988 ## chr21 2800828063 ## chr22 2849592288- 1
- 2
- 3
- 4
- 5
- 6
- 7
- 8
- 9
- 10
- 11
- 12
- 13
- 14
- 15
- 16
- 17
- 18
- 19
- 20
- 21
- 22
- 23
- 24
- 25
- 26
- 27
- 28
- 29
- 30
- 31
- 32
- 33
- 34
- 35
- 36
- 37
- 38
- 39
- 40
- 41
- 42
- 43
- 44
- 45
- 46
- 47
- 48
- 49
- 50
- 51
- 52
- 53
- 54
- 55
- 56
- 57
这样我们需要的信息基本都有了,接下来就可以读取文件进行操作了!
# 如果你不知道用哪个函数读取,多试几次就知道了! scores <- read.table("./TCGA_COAD_results/scores.gistic",sep="\t",header=T,stringsAsFactors = F) head(scores) ## Type Chromosome Start End X.log10.q.value. G.score average.amplitude ## 1 Amp 1 3302046 3371973 0 0.021837 0.339205 ## 2 Amp 1 3375059 3380822 0 0.021099 0.354653 ## 3 Amp 1 3381074 3449929 0 0.020520 0.368893 ## 4 Amp 1 3451503 3503571 0 0.022561 0.392242 ## 5 Amp 1 3505022 4071958 0 0.022036 0.376773 ## 6 Amp 1 4072066 4090117 0 0.022599 0.374114 ## frequency ## 1 0.036810 ## 2 0.036810 ## 3 0.034765 ## 4 0.034765 ## 5 0.032720 ## 6 0.032720- 1
- 2
- 3
- 4
- 5
- 6
- 7
- 8
- 9
- 10
- 11
- 12
- 13
- 14
- 15
- 16
- 17
- 18
每一个
G.score都对应一个坐标,这样才能画图,但其实每一个Amp或者Del是一个区间,为了方便,我们就用起始坐标代替了,当然你也可以用中点、结束点表示。chromID <- scores$Chromosome scores$StartPos <- scores$Start + df$chormStartPosFrom0[chromID] scores$EndPos <- scores$End + df$chormStartPosFrom0[chromID]- 1
- 2
- 3
- 4
我们得到的
G.score都是正数,需要把Del的G.score变成负数。range(scores$G.score) ## [1] 0.000000 0.564793 scores[scores$Type == "Del", "G.score"] <- scores[scores$Type == "Del", "G.score"] * -1 range(scores$G.score) ## [1] -0.564793 0.280607- 1
- 2
- 3
- 4
- 5
- 6
- 7
真的是很复杂!有没有大佬知道简单点的方法啊,求告知!
画图
library(ggplot2) library(ggsci) ggplot(scores, aes(StartPos, G.score))+ geom_area(aes(group=Type, fill=factor(Type,levels = c("Del","Amp"))))+ scale_fill_lancet(guide=guide_legend(reverse = T))+ geom_vline(data = df ,mapping=aes(xintercept=chromlengthCumsum),linetype=2)+ geom_text(data = df,aes(x=chromMidelePosFrom0,y=0.2,label=chromName))+ scale_x_continuous(expand = c(0,-1000),limits = c(0,2.9e9))+ ylim(-0.3,0.3)+ theme_minimal()- 1
- 2
- 3
- 4
- 5
- 6
- 7
- 8
- 9
- 10
- 11

文字有重叠,我们增加一点错落感。
df$ypos <- rep(c(0.2,0.25),11)- 1
ggplot(scores, aes(StartPos, G.score))+ geom_area(aes(group=Type, fill=factor(Type,levels = c("Del","Amp"))))+ scale_fill_lancet(guide=guide_legend(reverse = T),name="Type")+ geom_vline(data = df ,mapping=aes(xintercept=chromlengthCumsum),linetype=2)+ geom_text(data = df,aes(x=chromMidelePosFrom0,y=ypos,label=chromName))+ scale_x_continuous(expand = c(0,-1000),limits = c(0,2.9e9),name = NULL,labels = NULL)+ ylim(-0.3,0.3)+ theme_minimal()+ theme(legend.position = "top", axis.text.y = element_text(color = "black",size = 14), axis.title.y = element_text(color = "black",size = 16) )- 1
- 2
- 3
- 4
- 5
- 6
- 7
- 8
- 9
- 10
- 11
- 12

这就成了!
同理可画
frequency,这里就不演示了!画图3分钟,准备数据3小时!
本次示例使用的数据是
TCGA-COAD的Masked Copy Number Segment,经过GISTIC2.0软件得到的,大家完全可以自己搞出来。欢迎加入交流群交流讨论~
-
相关阅读:
Python——分支语句
手把手教你区块链java开发智能合约nft-第一篇
9月22日全球Web3加密行业重大资讯大汇总
【二分查找】【键值皆有序】1840最高建筑高度
Java-IO流之字节输入流(中篇)
HDLbits: Lemmings2
SpringCloud - Spring Cloud 之 Gateway网关(十三)
【mindspore】【训练】训练过程内存占用大
【网络协议】RPC、REST API深入理解及简单demo实现
【STM32】TIM2的PWM:脉冲宽度调制
- 原文地址:https://blog.csdn.net/Ayue0616/article/details/127824394
