-
File类
–File–
概述
java.io.File类是文件和目录路径名的抽象表示,主要用于文件和目录的创建、查找和删除等操作。
构造方法
public File(String pathname):通过将给定的路径名字符串转换为抽象路径名来创建新的 File实例。public File(String parent, String child):从父路径名字符串和子路径名字符串创建新的 File实例。public File(File parent, String child):从父抽象路径名和子路径名字符串创建新的 File实例。
File类创建文件对象的格式:
- File f = new File(“绝对路径/相对路径“);
- 绝对路径:从磁盘的盘符一路走到目的位置的路径。
- 绝对路径依赖具体的环境,一旦脱离环境,代码可能出错!!
- 一般是定位某个操作系统中的某个文件对象。
- 相对路径:不带盘符的。
- 默认是直接相对到工程目录下寻找文件的。
- 相对路径只能用于寻找工程下的文件,
- 能用相对路径就应该尽量使用,可以跨平台!
- 绝对路径:从磁盘的盘符一路走到目的位置的路径。
- File f = new File(“文件对象/文件夹对象“);
- 广义来说:文件是包含文件和文件夹的。
构造举例,代码如下:
// 文件路径名 String pathname = "D:\\aaa.txt"; File file1 = new File(pathname); // 文件路径名 String pathname2 = "D:\\aaa\\bbb.txt"; File file2 = new File(pathname2); // 通过父路径和子路径字符串 String parent = "d:\\aaa"; String child = "bbb.txt"; File file3 = new File(parent, child); // 通过父级File对象和子路径字符串 File parentDir = new File("d:\\aaa"); String child = "bbb.txt"; File file4 = new File(parentDir, child);- 1
- 2
- 3
- 4
- 5
- 6
- 7
- 8
- 9
- 10
- 11
- 12
- 13
- 14
- 15
- 16
- 17
小贴士:
- 一个File对象代表硬盘中实际存在的一个文件或者目录。
- 无论该路径下是否存在文件或者目录,都不影响File对象的创建。
常用方法
获取功能的方法
-
public String getAbsolutePath():返回此File的绝对路径名字符串。 -
public String getPath():将此File转换为路径名字符串(new File时使用的路径名)。 -
public String getName():返回由此File表示的文件或目录的名称。 -
public long length():返回由此File表示的文件的长度(1、文件大小。2、文件夹本身大小,不包含其中文件)。 -
public long lastModified():返回上次修改的时间方法演示,代码如下:
public class FileGet { public static void main(String[] args) { File f = new File("d:/aaa/bbb.java"); System.out.println("文件绝对路径:"+f.getAbsolutePath()); System.out.println("文件构造路径:"+f.getPath()); System.out.println("文件名称:"+f.getName()); System.out.println("文件长度:"+f.length()+"字节"); File f2 = new File("d:/aaa"); System.out.println("目录绝对路径:"+f2.getAbsolutePath()); System.out.println("目录构造路径:"+f2.getPath()); System.out.println("目录名称:"+f2.getName()); System.out.println("目录长度:"+f2.length()); } } 输出结果: 文件绝对路径:d:\aaa\bbb.java 文件构造路径:d:\aaa\bbb.java 文件名称:bbb.java 文件长度:636字节 目录绝对路径:d:\aaa 目录构造路径:d:\aaa 目录名称:aaa 目录长度:4096- 1
- 2
- 3
- 4
- 5
- 6
- 7
- 8
- 9
- 10
- 11
- 12
- 13
- 14
- 15
- 16
- 17
- 18
- 19
- 20
- 21
- 22
- 23
- 24
- 25
API中说明:length(),表示文件的长度。但是File对象表示目录,则返回值未指定。
绝对路径和相对路径
- 绝对路径:从盘符开始的路径,这是一个完整的路径。
- 相对路径:相对于项目目录的路径,这是一个便捷的路径,开发中经常使用。
public class FilePath { public static void main(String[] args) { // D盘下的bbb.java文件 File f = new File("D:\\bbb.java"); System.out.println(f.getAbsolutePath()); // 项目下的bbb.java文件 File f2 = new File("bbb.java"); System.out.println(f2.getAbsolutePath()); } } 输出结果: D:\bbb.java D:\idea_project_test4\bbb.java- 1
- 2
- 3
- 4
- 5
- 6
- 7
- 8
- 9
- 10
- 11
- 12
- 13
- 14
判断功能的方法
public boolean exists():此File表示的文件或目录是否实际存在。public boolean isDirectory():此File表示的是否为目录。public boolean isFile():此File表示的是否为文件。
方法演示,代码如下:
public class FileIs { public static void main(String[] args) { File f = new File("d:\\aaa\\bbb.java"); File f2 = new File("d:\\aaa"); // 判断是否存在 System.out.println("d:\\aaa\\bbb.java 是否存在:"+f.exists()); System.out.println("d:\\aaa 是否存在:"+f2.exists()); // 判断是文件还是目录 System.out.println("d:\\aaa 文件?:"+f2.isFile()); System.out.println("d:\\aaa 目录?:"+f2.isDirectory()); } } 输出结果: d:\aaa\bbb.java 是否存在:true d:\aaa 是否存在:true d:\aaa 文件?:false d:\aaa 目录?:true- 1
- 2
- 3
- 4
- 5
- 6
- 7
- 8
- 9
- 10
- 11
- 12
- 13
- 14
- 15
- 16
- 17
创建删除功能的方法
public boolean createNewFile():当且仅当具有该名称的文件尚不存在时,创建一个新的空文件。 (不常用)public boolean delete():删除由此File表示的文件或目录(删除目录时,只能删除空目录。若要删除非空目录,需要先删除里边的文件与文件夹)。public boolean mkdir():创建由此File表示的目录(一级目录)。public boolean mkdirs():创建由此File表示的目录,包括任何必需但不存在的父目录(多级不存在的目录)。
方法演示,代码如下:
public class FileCreateDelete { public static void main(String[] args) throws IOException { // 文件的创建 File f = new File("aaa.txt"); System.out.println("是否存在:"+f.exists()); // false System.out.println("是否创建:"+f.createNewFile()); // true System.out.println("是否存在:"+f.exists()); // true // 目录的创建 File f2= new File("newDir"); System.out.println("是否存在:"+f2.exists());// false System.out.println("是否创建:"+f2.mkdir()); // true System.out.println("是否存在:"+f2.exists());// true // 创建多级目录 File f3= new File("newDira\\newDirb"); System.out.println(f3.mkdir());// false File f4= new File("newDira\\newDirb"); System.out.println(f4.mkdirs());// true // 文件的删除 System.out.println(f.delete());// true // 目录的删除 System.out.println(f2.delete());// true System.out.println(f4.delete());// false } }- 1
- 2
- 3
- 4
- 5
- 6
- 7
- 8
- 9
- 10
- 11
- 12
- 13
- 14
- 15
- 16
- 17
- 18
- 19
- 20
- 21
- 22
- 23
- 24
- 25
- 26
- 27
- 28
API中说明:delete方法,如果此File表示目录,则目录必须为空才能删除。
目录的遍历
-
public String[] list():返回一个String数组,表示该File目录中的所有子文件名或目录名。 -
public File[] listFiles():返回一个File数组,表示该File目录中的所有的子文件对象或目录对象。
public class FileFor { public static void main(String[] args) { File dir = new File("d:\\java_code"); //获取当前目录下的文件以及文件夹的名称。 String[] names = dir.list(); for(String name : names){ System.out.println(name); } //获取当前目录下的文件以及文件夹对象,只要拿到了文件对象,那么就可以获取更多信息 File[] files = dir.listFiles(); for (File file : files) { System.out.println(file); } } }- 1
- 2
- 3
- 4
- 5
- 6
- 7
- 8
- 9
- 10
- 11
- 12
- 13
- 14
- 15
- 16
小贴士:
调用listFiles方法的File对象,表示的必须是实际存在的目录,否则返回null,无法进行遍历。
案例:文件搜索
package com.qsdbl.malldemo; import org.junit.jupiter.api.Test; import org.springframework.boot.test.context.SpringBootTest; import java.io.File; import java.text.SimpleDateFormat; import java.util.ArrayList; import java.util.Calendar; import java.util.HashMap; import java.util.Map; /** * @author: 轻率的保罗 * @since: 2022-11 */ @SpringBootTest public class MyTest01 { @Test void test() { //搜索的目录 String dir = "/Users/qsdbl/Documents/workspace/java"; //搜索的文件名 String filename = "banner"; // 调用搜索方法 HashMap<String, String> resultMap = searchFile(new File(dir), filename); System.out.println("\n一共搜索到【"+resultMap.size()+"】个文件,分别为:\n"+resultMap); } /** * 搜索文件,模糊查找 * @param dir 搜索目录(默认不查找node_modules目录下的文件) * @param filename 文件名 * @return 查找结果,保存在map中。key为绝对路径,value为文件名 */ public HashMap<String, String> searchFile(File dir, String filename){ //排除列表(不查找的目录) ArrayList<String> excludeList = new ArrayList<>(); excludeList.add("node_modules"); return searchFile(dir, filename,excludeList); } /** * 搜索文件,模糊查找 * @param dir 搜索目录 * @param filename 文件名 * @param excludeList 排除的目录 * @return 查找结果,保存在map中。key为绝对路径,value为文件名 */ public HashMap<String, String> searchFile(File dir, String filename,ArrayList<String> excludeList){ Calendar c1 = Calendar.getInstance(); System.out.println("\n--- 开始搜索(模糊查找)文件【"+filename+"】- "+new SimpleDateFormat("yyyy-MM-dd HH:mm:ss").format(c1.getTime())+" ---"); HashMap<String, String> resultMap = new HashMap<>(); if (!excludeList.contains(dir.getName())){ searchFile(dir,filename,resultMap,excludeList); } System.out.println("\n--- 搜索结束 - "+new SimpleDateFormat("yyyy-MM-dd HH:mm:ss").format(Calendar.getInstance().getTime())+" ---"); System.out.println("搜索文件【"+filename+"】,耗时 "+(Calendar.getInstance().getTimeInMillis() - c1.getTimeInMillis())+" 毫秒。\n"); return resultMap; } /** * 查找文件的方法,递归查找 * @param dir 搜索目录 * @param filename 文件名 * @param result 匹配的文件,保存在此map中 * @param excludeList 排除的目录 */ public void searchFile(File dir, String filename, Map result, ArrayList<String> excludeList){ //1、判断是否存在该路径,是否是文件夹 if(dir.exists() && dir.isDirectory()){ //2、提取当前目录下的全部一级文件对象 File[] files = dir.listFiles(); //3、判断是否存在一级文件对象,判断是否不为空目录(不存在、无权限会返回null) if(files != null && files.length > 0){ //4、判断一级文件对象 for (File file : files) { //5、判断file是文件还是文件夹 if(file.isFile()){ //6、判断文件是否是我们要找的(模糊查询) if(file.getName().contains(filename)){ result.put(file.getAbsolutePath(),file.getName()); System.out.println("-搜索到文件【"+file.getName()+"】,路径为【"+file.getAbsolutePath()+"】"); //扩展:找到文件后,启动/执行该文件。 // try { // Runtime runtime = Runtime.getRuntime(); // runtime.exec(file.getAbsolutePath()); // } catch (IOException e) { // throw new RuntimeException(e); // } } }else { //7、该文件是文件夹,文件夹要递归进入继续寻找 if (!excludeList.contains(dir.getName())){ searchFile(file,filename,result,excludeList); } } } } } } }- 1
- 2
- 3
- 4
- 5
- 6
- 7
- 8
- 9
- 10
- 11
- 12
- 13
- 14
- 15
- 16
- 17
- 18
- 19
- 20
- 21
- 22
- 23
- 24
- 25
- 26
- 27
- 28
- 29
- 30
- 31
- 32
- 33
- 34
- 35
- 36
- 37
- 38
- 39
- 40
- 41
- 42
- 43
- 44
- 45
- 46
- 47
- 48
- 49
- 50
- 51
- 52
- 53
- 54
- 55
- 56
- 57
- 58
- 59
- 60
- 61
- 62
- 63
- 64
- 65
- 66
- 67
- 68
- 69
- 70
- 71
- 72
- 73
- 74
- 75
- 76
- 77
- 78
- 79
- 80
- 81
- 82
- 83
- 84
- 85
- 86
- 87
- 88
- 89
- 90
- 91
- 92
- 93
- 94
- 95
- 96
- 97
- 98
- 99
- 100
- 101
- 102
- 103
- 104
- 105
使用了递归思想来完成查找,关于递归见这篇博客。
运行结果
--- 开始搜索(模糊查找)文件【banner.txt】- 2022-11-12 17:09:01 --- -搜索到文件【banner.txt】,路径为【/Users/qsdbl/Documents/workspace/java/java_workspace/cashier_system/src/main/resources/banner.txt】 -搜索到文件【banner.txt】,路径为【/Users/qsdbl/Documents/workspace/java/mall-demo/target/classes/banner.txt】 -搜索到文件【banner.txt】,路径为【/Users/qsdbl/Documents/workspace/java/mall-demo/src/main/resources/banner.txt】 -搜索到文件【banner.txt】,路径为【/Users/qsdbl/Documents/workspace/java/cashier_system/后端/cashier_system/target/classes/banner.txt】 -搜索到文件【banner.txt】,路径为【/Users/qsdbl/Documents/workspace/java/cashier_system/后端/cashier_system/src/main/resources/banner.txt】 --- 搜索结束 - 2022-11-12 17:09:01 --- 搜索文件【banner.txt】,耗时 147 毫秒。 一共搜索到【5】个文件,分别为: {。。。省略} 进程已结束,退出代码0- 1
- 2
- 3
- 4
- 5
- 6
- 7
- 8
- 9
- 10
- 11
- 12
- 13
- 14
- 15
–IO–
什么是IO
生活中,你肯定经历过这样的场景。当你编辑一个文本文件,忘记了
ctrl+s,可能文件就白白编辑了。当你电脑上插入一个U盘,可以把一个视频,拷贝到你的电脑硬盘里。那么数据都是在哪些设备上的呢?键盘、内存、硬盘、外接设备等等。我们把这种数据的传输,可以看做是一种数据的流动,按照流动的方向,以内存为基准,分为
输入input和输出output,即流向内存是输入流,流出内存的输出流。Java中I/O操作主要是指使用
java.io包下的内容,进行输入、输出操作。输入也叫做读取数据,输出也叫做作写出数据。
IO的分类
根据数据的流向分为:输入流和输出流。
- 输入流 :把数据从
其他设备上读取到内存中的流。 - 输出流 :把数据从
内存中写出到其他设备上的流。
根据数据的类型分为:字节流和字符流。
- 字节流 :以字节为单位,读写数据的流。
- 字符流 :以字符为单位,读写数据的流。
顶级父类们
输入流 输出流 字节流 字节输入流
InputStream字节输出流
OutputStream字符流 字符输入流
Reader字符输出流
Writer
字节流
一切皆为字节
一切文件数据(文本、图片、视频等)在存储时,都是以二进制数字的形式保存,都一个一个的字节,那么传输时一样如此。所以,字节流可以传输任意文件数据。在操作流的时候,我们要时刻明确,无论使用什么样的流对象,底层传输的始终为二进制数据。
字节输出流【OutputStream】
java.io.OutputStream抽象类是表示字节输出流的所有类的超类,将指定的字节信息写出到目的地。它定义了字节输出流的基本共性功能方法。public void close():关闭此输出流并释放与此流相关联的任何系统资源。- close方法一般会首先调用flush方法,然后再释放流占用的系统资源。
public void flush():刷新此输出流并强制任何缓冲的输出字节被写出。- 注意:文件输出流FileOutputStream,你可能会认为,调用flush方法会强制确保数据保存到硬盘上,但实际上不是这样,FileOutputStream没有缓冲,没有重写flush方法,调用flush方法没有任何效果。
public void write(byte[] b):将 b.length字节从指定的字节数组写入此输出流。public void write(byte[] b, int off, int len):从指定的字节数组写入 len字节,从偏移量 off开始输出到此输出流。public abstract void write(int b):将指定的字节输出流。
小贴士:
close方法,当完成流的操作时,必须调用此方法,释放系统资源。
FileOutputStream类
OutputStream有很多子类,我们从最简单的一个子类开始。java.io.FileOutputStream类是文件输出流,用于将数据写出到文件。构造方法
public FileOutputStream(File file):创建文件输出流以写入由指定的 File对象表示的文件。public FileOutputStream(String name): 创建文件输出流以指定的名称写入文件。
当你创建一个流对象时,必须传入一个文件路径。该路径下,如果没有这个文件,会创建该文件。如果有这个文件,会清空这个文件的数据。
- 构造举例,代码如下:
public class FileOutputStreamConstructor throws IOException { public static void main(String[] args) { // 使用File对象创建流对象 File file = new File("a.txt"); FileOutputStream fos = new FileOutputStream(file); // 使用文件名称创建流对象 FileOutputStream fos = new FileOutputStream("b.txt"); } }- 1
- 2
- 3
- 4
- 5
- 6
- 7
- 8
- 9
- 10
写出字节数据
- 写出字节:
write(int b)方法,每次可以写出一个字节数据,代码使用演示:
public class FOSWrite { public static void main(String[] args) throws IOException { // 使用文件名称创建流对象 FileOutputStream fos = new FileOutputStream("fos.txt"); // 写出数据 fos.write(97); // 写出第1个字节 fos.write(98); // 写出第2个字节 fos.write(99); // 写出第3个字节 // 关闭资源 fos.close(); } } 输出结果: abc- 1
- 2
- 3
- 4
- 5
- 6
- 7
- 8
- 9
- 10
- 11
- 12
- 13
- 14
- 15
小贴士:
- 虽然参数为int类型四个字节,但是只会保留一个字节的信息写出。
- 流操作完毕后,必须释放系统资源,调用close方法,千万记得。
- 写出字节数组:
write(byte[] b),每次可以写出数组中的数据,代码使用演示:
public class FOSWrite { public static void main(String[] args) throws IOException { // 使用文件名称创建流对象 FileOutputStream fos = new FileOutputStream("fos.txt"); // 字符串转换为字节数组 byte[] b = "黑马程序员".getBytes(); // 写出字节数组数据 fos.write(b); // 关闭资源 fos.close(); } } 输出结果: 黑马程序员- 1
- 2
- 3
- 4
- 5
- 6
- 7
- 8
- 9
- 10
- 11
- 12
- 13
- 14
- 写出指定长度字节数组:
write(byte[] b, int off, int len),每次写出从off索引开始,len个字节,代码使用演示:
public class FOSWrite { public static void main(String[] args) throws IOException { // 使用文件名称创建流对象 FileOutputStream fos = new FileOutputStream("fos.txt"); // 字符串转换为字节数组 byte[] b = "abcde".getBytes(); // 写出从索引2开始,2个字节。索引2是c,两个字节,也就是cd。 fos.write(b,2,2); // 关闭资源 fos.close(); } } 输出结果: cd- 1
- 2
- 3
- 4
- 5
- 6
- 7
- 8
- 9
- 10
- 11
- 12
- 13
- 14
数据追加续写
经过以上的演示,每次程序运行,创建输出流对象,都会清空目标文件中的数据。如何保留目标文件中数据,还能继续添加新数据呢?
public FileOutputStream(File file, boolean append): 创建文件输出流以写入由指定的 File对象表示的文件。public FileOutputStream(String name, boolean append): 创建文件输出流以指定的名称写入文件。
这两个构造方法,参数中都需要传入一个boolean类型的值,
true表示追加数据,false表示清空原有数据。这样创建的输出流对象,就可以指定是否追加续写了,代码使用演示:public class FOSWrite { public static void main(String[] args) throws IOException { // 使用文件名称创建流对象 FileOutputStream fos = new FileOutputStream("fos.txt",true); // 字符串转换为字节数组 byte[] b = "abcde".getBytes(); // 写出从索引2开始,2个字节。索引2是c,两个字节,也就是cd。 fos.write(b); // 关闭资源 fos.close(); } } 文件操作前:cd 文件操作后:cdabcde- 1
- 2
- 3
- 4
- 5
- 6
- 7
- 8
- 9
- 10
- 11
- 12
- 13
- 14
写出换行
Windows系统里,换行符号是
\r\n。把以指定是否追加续写了,代码使用演示:
public class FOSWrite { public static void main(String[] args) throws IOException { // 使用文件名称创建流对象 FileOutputStream fos = new FileOutputStream("fos.txt"); // 定义字节数组 byte[] words = {97,98,99,100,101}; // 遍历数组 for (int i = 0; i < words.length; i++) { // 写出一个字节 fos.write(words[i]); // 写出一个换行, 换行符号转成数组写出 fos.write("\r\n".getBytes()); } // 关闭资源 fos.close(); } } 输出结果: a b c d e- 1
- 2
- 3
- 4
- 5
- 6
- 7
- 8
- 9
- 10
- 11
- 12
- 13
- 14
- 15
- 16
- 17
- 18
- 19
- 20
- 21
- 22
- 23
- 24
- 回车符
\r和换行符\n:- 回车符:回到一行的开头(return)。
- 换行符:下一行(newline)。
- 系统中的换行:
- Windows系统里,每行结尾是
回车+换行,即\r\n; - Unix系统里,每行结尾只有
换行,即\n; - Mac系统里,每行结尾是
回车,即\r。从 Mac OS X开始与Linux统一。
- Windows系统里,每行结尾是
字节输入流【InputStream】
java.io.InputStream抽象类是表示字节输入流的所有类的超类,可以读取字节信息到内存中。它定义了字节输入流的基本共性功能方法。public void close():关闭此输入流并释放与此流相关联的任何系统资源。public abstract int read(): 从输入流读取数据的下一个字节。public int read(byte[] b): 从输入流中读取一些字节数,并将它们存储到字节数组 b中 。
小贴士:
close方法,当完成流的操作时,必须调用此方法,释放系统资源。
FileInputStream类
java.io.FileInputStream类是文件输入流,从文件中读取字节。构造方法
FileInputStream(File file): 通过打开与实际文件的连接来创建一个 FileInputStream ,该文件由文件系统中的 File对象 file命名。FileInputStream(String name): 通过打开与实际文件的连接来创建一个 FileInputStream ,该文件由文件系统中的路径名 name命名。
当你创建一个流对象时,必须传入一个文件路径。该路径下,如果没有该文件,会抛出
FileNotFoundException- 构造举例,代码如下:
public class FileInputStreamConstructor throws IOException{ public static void main(String[] args) { // 使用File对象创建流对象 File file = new File("a.txt"); FileInputStream fos = new FileInputStream(file); // 使用文件名称创建流对象 FileInputStream fos = new FileInputStream("b.txt"); } }- 1
- 2
- 3
- 4
- 5
- 6
- 7
- 8
- 9
- 10
读取字节数据
src/test/test.txt中的内容:
ab程序员- 1
- 读取字节:
read方法,每次可以读取一个字节的数据,提升为int类型,读取到文件末尾,返回-1,代码使用演示:
@Test void test() throws IOException{ // 使用文件名称创建流对象 FileInputStream fis = new FileInputStream("src/test/test.txt"); // 读取数据,返回一个字节 int read = fis.read(); System.out.print((char) read); read = fis.read(); System.out.print((char) read); read = fis.read(); System.out.print((char) read); read = fis.read(); System.out.print((char) read); read = fis.read(); System.out.print((char) read); // // 读取到末尾,返回-1 // read = fis.read(); // System.out.print( read); // 关闭资源 fis.close(); } //输出结果: ab程 进程已结束,退出代码0- 1
- 2
- 3
- 4
- 5
- 6
- 7
- 8
- 9
- 10
- 11
- 12
- 13
- 14
- 15
- 16
- 17
- 18
- 19
- 20
- 21
- 22
- 23
- 24
- 25
循环改进读取方式,代码使用演示:
@Test void test() throws IOException{ // 使用文件名称创建流对象 FileInputStream fis = new FileInputStream("src/test/test.txt"); // 定义变量,保存数据 int b; // 循环读取 while ((b = fis.read())!=-1) { System.out.print((char)b); } // 关闭资源 fis.close(); } //输出结果: ab程åºå‘˜ 进程已结束,退出代码0- 1
- 2
- 3
- 4
- 5
- 6
- 7
- 8
- 9
- 10
- 11
- 12
- 13
- 14
- 15
- 16
- 17
小贴士:
- 虽然读取了一个字节,但是会自动提升为int类型。
- 流操作完毕后,必须释放系统资源,调用close方法,千万记得。
- 使用字节数组读取:
read(byte[] b),每次读取b的长度个字节到数组中,返回读取到的有效字节个数,读取到末尾时,返回-1,代码使用演示:
@Test void test() throws IOException{ // 使用文件名称创建流对象. FileInputStream fis = new FileInputStream("src/test/test.txt"); // 文件中为abcde // 定义变量,作为有效个数 int len; // 定义字节数组,作为装字节数据的容器 byte[] b = new byte[8];//一般会设置为1024,不是越大越好 // 循环读取 while (( len= fis.read(b))!=-1) { // 每次读取后,把数组变成字符串打印 System.out.print(new String(b)); } // 关闭资源 fis.close(); } //输出结果: ab程序员��序 进程已结束,退出代码0- 1
- 2
- 3
- 4
- 5
- 6
- 7
- 8
- 9
- 10
- 11
- 12
- 13
- 14
- 15
- 16
- 17
- 18
- 19
- 20
错误数据
��序,是由于最后一次读取时,只读取3个字节员字(中文字符占3字节,英文字符占1字节),数组中,上次读取的数据没有被完全替换,所以要通过len,获取有效的字节,代码使用演示:@Test void test07() throws IOException{ // 使用文件名称创建流对象. FileInputStream fis = new FileInputStream("src/test/test.txt"); // 文件中为abcde // 定义变量,作为有效个数 int len; // 定义字节数组,作为装字节数据的容器 byte[] b = new byte[8];//一般会设置为1024,不是越大越好 // 循环读取 while (( len= fis.read(b))!=-1) { // 每次读取后,把数组的有效字节部分,变成字符串打印 System.out.print(new String(b,0,len));// len 每次读取的有效字节个数 } // 关闭资源 fis.close(); } //输出结果: ab程序员 进程已结束,退出代码0- 1
- 2
- 3
- 4
- 5
- 6
- 7
- 8
- 9
- 10
- 11
- 12
- 13
- 14
- 15
- 16
- 17
- 18
- 19
- 20
小贴士:
使用数组读取,每次读取多个字节(一般是1024个字节,不是越大越好),减少了系统间的IO操作次数,从而提高了读写的效率,建议开发中使用。
ByteArrayIn/OutputStream
ByteArrayInputStream、ByteArrayOutputStream它们的输入源和输出目标是字节数组
- 把字节数组转换为输入流
- 把输出流转换为字节数组
ByteArrayOutputStream
使用ByteArrayOutputStream,我们可以改进前面的读文件代码,确保将所有文件内容读入:
InputStream input = new FileInputStream("hello.txt"); try{ ByteArrayOutputStream output = new ByteArrayOutputStream(); byte[] buf = new byte[1024]; int bytesRead = 0; while((bytesRead=input.read(buf))! =-1){ output.write(buf, 0, bytesRead); } String data = output.toString("UTF-8"); System.out.println(data); }finally{ input.close(); }- 1
- 2
- 3
- 4
- 5
- 6
- 7
- 8
- 9
- 10
- 11
- 12
- 13
读入的数据先写入ByteArrayOutputStream中,读完后,再调用其toString方法获取完整数据。
ByteArrayInputStream
ByteArrayInputStream将byte数组包装为一个输入流。为什么要将byte数组转换为InputStream呢?
有很多代码是以InputStream/OutputSteam为参数构建的,它们构成了一个协作体系,将byte数组转换为InputStream可以方便地参与这种体系,复用代码。
练习:文件复制
案例实现
复制文件(适用于任何类型的文件),代码使用演示:
public class Copy { public static void main(String[] args) throws IOException { // 1.创建流对象 // 1.1 指定数据源 FileInputStream fis = new FileInputStream("D:\\test.jpg"); // 1.2 指定目的地 FileOutputStream fos = new FileOutputStream("test_copy.jpg"); // 2.读写数据 // 2.1 定义数组 byte[] b = new byte[1024]; // 2.2 定义长度 int len; // 2.3 循环读取 while ((len = fis.read(b))!=-1) { // 2.4 写出数据 fos.write(b, 0 , len); } // 3.关闭资源 fos.close(); fis.close(); } }- 1
- 2
- 3
- 4
- 5
- 6
- 7
- 8
- 9
- 10
- 11
- 12
- 13
- 14
- 15
- 16
- 17
- 18
- 19
- 20
- 21
- 22
- 23
- 24
缓冲流优化
使用字节缓冲流优化:
@Test public void fileTest(){ BufferedInputStream bis = null; BufferedOutputStream bos = null; FileInputStream fis = null; FileOutputStream fos = null; try { System.out.println("\n\n将文件1的内容复制到文件2中。。。。。。。"); File srcFile = new File(scanner("文件1路径"));//例如:/Users/qsdbl/Downloads/文件1.xlsx File destFile = new File(scanner("文件2路径"));//文件2不存在,则会新建。若文件名已存在,则会覆盖。 fis = new FileInputStream(srcFile); fos = new FileOutputStream(destFile); bis = new BufferedInputStream(fis);//缓冲流,提高读写的效率 bos = new BufferedOutputStream(fos); byte[] buffer = new byte[1024]; int len; while ((len = bis.read(buffer)) != -1) { bos.write(buffer, 0, len); } bos.flush(); System.out.println("完成!!!"); } catch (IOException e) { e.printStackTrace(); } finally { //流的关闭原则:先开后关,后开先关。 try { if (bos != null) { bos.close(); } if (fos != null) { fos.close(); } } catch (IOException e) { e.printStackTrace(); } try { if (bis != null) { bis.close(); } if (fis != null) { fis.close(); } } catch (IOException e) { e.printStackTrace(); } } } /** ** 读取控制台内容 *
*/ public static String scanner(String tip) { Scanner scanner = new Scanner(System.in); StringBuilder help = new StringBuilder(); help.append("请输入" + tip + ":"); System.out.println(help.toString()); if (scanner.hasNext()) { String ipt = scanner.next(); if (StringUtils.isNotBlank(ipt)) { return ipt; } } throw new RuntimeException("请输入正确的" + tip + "!"); }- 1
- 2
- 3
- 4
- 5
- 6
- 7
- 8
- 9
- 10
- 11
- 12
- 13
- 14
- 15
- 16
- 17
- 18
- 19
- 20
- 21
- 22
- 23
- 24
- 25
- 26
- 27
- 28
- 29
- 30
- 31
- 32
- 33
- 34
- 35
- 36
- 37
- 38
- 39
- 40
- 41
- 42
- 43
- 44
- 45
- 46
- 47
- 48
- 49
- 50
- 51
- 52
- 53
- 54
- 55
- 56
- 57
- 58
- 59
- 60
- 61
- 62
- 63
- 64
- 65
- 66
关闭资源的finally太长,可使用
try-with-resource语句来优化,见后边的“IO资源的处理”笔记。小贴士:
流的关闭原则:先开后关,后开先关。
扩展:复制文件夹
复制文件夹。
/** * 复制文件夹 * 源文件夹:/Users/qsdbl/Downloads/test01 * 目标文件夹:/Users/qsdbl/Downloads/test01_backup */ @Test void mytest(){ String srcDirPath = "/Users/qsdbl/Downloads/test01"; String destDirPath = "/Users/qsdbl/Downloads/test01_backup"; Map<Boolean, String> resultMap = copyDir(srcDirPath, destDirPath); if(resultMap.get(true) != null){ System.out.println("文件夹复制成功:"+"【"+srcDirPath+" -> "+destDirPath+"】"); }else { System.out.println("文件夹复制失败:"+resultMap.get(false)); } } /** * 复制文件夹 * @param srcDirPath 源文件夹 * @param destDirPath 目标文件夹 * @return map 返回结果,key表示成功/失败(true/false),value表示原因 */ public Map<Boolean, String> copyDir(String srcDirPath, String destDirPath){ Map<Boolean,String> resultMap = new HashMap<>(); //1、判断是否存在原路径,是否是文件夹 File srcDir = new File(srcDirPath); File destDir = new File(destDirPath); if(!srcDir.exists()){ resultMap.put(false,"原文件夹【"+srcDirPath+"】不存在!"); return resultMap; } if(!srcDir.isDirectory()){ resultMap.put(false,"\"原文件夹\"【"+srcDirPath+"】不是文件夹!"); return resultMap; } //2、判断是否存在目标文件夹 if(destDir.exists()){ resultMap.put(false,"目标文件夹【"+destDirPath+"】已存在!"); return resultMap; }else { destDir.mkdirs();//mkdirs:如果父目录不存在也会一并创建。mkdir:若上级目录不存在,则不创建。 } //3、提取源文件夹的一级文件对象(文件与文件夹) File[] files = srcDir.listFiles(); //4、判断是否存在一级文件对象 if( files != null && files.length > 0 ){//无权限访问会返回null //5、遍历 for (File file : files){ //6、判断是否是文件 if(file.isFile()){ //文件: //复制文件 copyFile(file,new File(destDir,file.getName())); }else{ //文件夹: //递归调用copyDir //当前文件夹作为新的"原文件夹",目标文件夹:上一个文件夹destDir+新文件夹名称 copyDir(file.getAbsolutePath(),destDirPath+File.separator+file.getName()); } } } resultMap.put(true,""); return resultMap; } /** * 复制文件 * @param srcFile 源文件对象 * @param destFile 复制后的目标文件对象 */ public void copyFile(File srcFile,File destFile){ try( BufferedInputStream bis = new BufferedInputStream(new FileInputStream(srcFile));//缓冲流,提高读写的效率 BufferedOutputStream bos = new BufferedOutputStream(new FileOutputStream(destFile)); ) { byte[] buffer = new byte[1024]; int len; while ((len = bis.read(buffer)) != -1) { bos.write(buffer, 0, len); } bos.flush(); } catch (IOException e) { e.printStackTrace(); } }- 1
- 2
- 3
- 4
- 5
- 6
- 7
- 8
- 9
- 10
- 11
- 12
- 13
- 14
- 15
- 16
- 17
- 18
- 19
- 20
- 21
- 22
- 23
- 24
- 25
- 26
- 27
- 28
- 29
- 30
- 31
- 32
- 33
- 34
- 35
- 36
- 37
- 38
- 39
- 40
- 41
- 42
- 43
- 44
- 45
- 46
- 47
- 48
- 49
- 50
- 51
- 52
- 53
- 54
- 55
- 56
- 57
- 58
- 59
- 60
- 61
- 62
- 63
- 64
- 65
- 66
- 67
- 68
- 69
- 70
- 71
- 72
- 73
- 74
- 75
- 76
- 77
- 78
- 79
- 80
- 81
- 82
- 83
- 84
- 85
- 86
- 87
- 88
- 89
运行结果:
文件夹复制成功:【/Users/qsdbl/Downloads/test01 -> /Users/qsdbl/Downloads/test01_backup】 进程已结束,退出代码0- 1
- 2
- 3
字符流
当使用字节流读取文本文件时,可能会有一个小问题。就是遇到中文字符时,可能不会显示完整的字符,那是因为一个中文字符可能占用多个字节存储。所以Java提供一些字符流类,以字符为单位读写数据,专门用于处理文本文件。
字符输入流【Reader】
java.io.Reader抽象类是表示用于读取字符流的所有类的超类,可以读取字符信息到内存中。它定义了字符输入流的基本共性功能方法。public void close():关闭此流并释放与此流相关联的任何系统资源。public int read(): 从输入流读取一个字符。public int read(char[] cbuf): 从输入流中读取一些字符,并将它们存储到字符数组 cbuf中 。
FileReader类
java.io.FileReader类是读取字符文件的便利类。构造时使用系统默认的字符编码和默认字节缓冲区。小贴士:
- 字符编码:字节与字符的对应规则。Windows系统的中文编码默认是GBK编码表。
idea中UTF-8
- 字节缓冲区:一个字节数组,用来临时存储字节数据。
构造方法
FileReader(File file): 创建一个新的 FileReader ,给定要读取的File对象。FileReader(String fileName): 创建一个新的 FileReader ,给定要读取的文件的名称。
当你创建一个流对象时,必须传入一个文件路径。类似于FileInputStream 。
- 构造举例,代码如下:
public class FileReaderConstructor throws IOException{ public static void main(String[] args) { // 使用File对象创建流对象 File file = new File("a.txt"); FileReader fr = new FileReader(file); // 使用文件名称创建流对象 FileReader fr = new FileReader("b.txt"); } }- 1
- 2
- 3
- 4
- 5
- 6
- 7
- 8
- 9
- 10
读取字符数据
src/test/test.txt中的内容:
ab程序员- 1
- 读取字符:
read方法,每次可以读取一个字符的数据,提升为int类型,读取到文件末尾,返回-1,循环读取,代码使用演示:
@Test void mytest() throws IOException{ // 使用文件名称创建流对象 FileReader fr = new FileReader("src/test/test.txt"); // 定义变量,保存数据 int b; // 循环读取 while ((b = fr.read())!=-1) { System.out.println((char)b); } // 关闭资源 fr.close(); } //输出结果: a b 程 序 员 进程已结束,退出代码0- 1
- 2
- 3
- 4
- 5
- 6
- 7
- 8
- 9
- 10
- 11
- 12
- 13
- 14
- 15
- 16
- 17
- 18
- 19
- 20
- 21
- 22
虽然“a、b”为英文字符占一个字节,”程、序、员“为中文字符占3个字节,但使用字符流来读取时是一个一个字符的读取,故不会出现乱码情况(对比字节流中的案例)。
小贴士:虽然读取了一个字符,但是会自动提升为int类型(4字节)。
- 使用字符数组读取:
read(char[] cbuf),每次读取b的长度个字符到数组中,返回读取到的有效字符个数,读取到末尾时,返回-1,代码使用演示:
@Test void mytest() throws IOException{ // 使用文件名称创建流对象 FileReader fr = new FileReader("src/test/test.txt"); // 定义变量,保存有效字符个数 int len; // 定义字符数组,作为装字符数据的容器 char[] cbuf = new char[2];//一般设置为1024 // 循环读取 while ((len = fr.read(cbuf))!=-1) { System.out.print(new String(cbuf)); } // 关闭资源 fr.close(); } //输出结果: ab程序员序 进程已结束,退出代码0- 1
- 2
- 3
- 4
- 5
- 6
- 7
- 8
- 9
- 10
- 11
- 12
- 13
- 14
- 15
- 16
- 17
- 18
- 19
最后边多读取了一个字符“序”,是因为数组中上次读取的数据没有被完全替换,所以要通过
len,获取有效的字符,代码使用演示:@Test void mytest() throws IOException{ // 使用文件名称创建流对象 FileReader fr = new FileReader("src/test/test.txt"); // 定义变量,保存有效字符个数 int len; // 定义字符数组,作为装字符数据的容器 char[] cbuf = new char[2];//一般设置为1024 // 循环读取 while ((len = fr.read(cbuf))!=-1) { System.out.print(new String(cbuf,0,len)); } // 关闭资源 fr.close(); } //输出结果: ab程序员 进程已结束,退出代码0- 1
- 2
- 3
- 4
- 5
- 6
- 7
- 8
- 9
- 10
- 11
- 12
- 13
- 14
- 15
- 16
- 17
- 18
- 19
字符输出流【Writer】
java.io.Writer抽象类是表示用于写出字符流的所有类的超类,将指定的字符信息写出到目的地。它定义了字节输出流的基本共性功能方法。public abstract void close():关闭此输出流并释放与此流相关联的任何系统资源。public abstract void flush():刷新此输出流并强制任何缓冲的输出字符被写出。public void write(int c):写出一个字符。public void write(char[] cbuf):将 b.length字符从指定的字符数组写出此输出流。public abstract void write(char[] b, int off, int len):从指定的字符数组写出 len字符,从偏移量 off开始输出到此输出流。public void write(String str):写出一个字符串。
FileWriter类
java.io.FileWriter类是写出字符到文件的便利类。构造时使用系统默认的字符编码和默认字节缓冲区。
构造方法
FileWriter(File file): 创建一个新的 FileWriter,给定要读取的File对象。FileWriter(String fileName): 创建一个新的 FileWriter,给定要读取的文件的名称。
当你创建一个流对象时,必须传入一个文件路径,类似于FileOutputStream。
- 构造举例,代码如下:
public class FileWriterConstructor { public static void main(String[] args) throws IOException { // 使用File对象创建流对象 File file = new File("a.txt"); FileWriter fw = new FileWriter(file); // 使用文件名称创建流对象 FileWriter fw = new FileWriter("b.txt"); } }- 1
- 2
- 3
- 4
- 5
- 6
- 7
- 8
- 9
- 10
基本写出数据
写出字符:
write(int b)方法,每次可以写出一个字符数据,代码使用演示:public class FWWrite { public static void main(String[] args) throws IOException { // 使用文件名称创建流对象 FileWriter fw = new FileWriter("fw.txt"); // 写出数据 fw.write(97); // 写出第1个字符 fw.write('b'); // 写出第2个字符 fw.write('C'); // 写出第3个字符 fw.write(30000); // 写出第4个字符,中文编码表中30000对应一个汉字。 /* 【注意】关闭资源时,与FileOutputStream不同。 如果不关闭,数据只是保存到缓冲区,并未保存到文件。 */ // fw.close(); } } 输出结果: abC田- 1
- 2
- 3
- 4
- 5
- 6
- 7
- 8
- 9
- 10
- 11
- 12
- 13
- 14
- 15
- 16
- 17
- 18
- 19
小贴士:
- 虽然参数为int类型四个字节,但是只会保留一个字符的信息写出。
- 未调用close方法,数据只是保存到了缓冲区,并未写出到文件中。
关闭和刷新
因为内置缓冲区的原因,如果不关闭输出流,无法写出字符到文件中。但是关闭的流对象,是无法继续写出数据的。如果我们既想写出数据,又想继续使用流,就需要
flush方法了。flush:刷新缓冲区,流对象可以继续使用。close:关闭流,释放系统资源。关闭前会刷新缓冲区。
代码使用演示:
public class FWWrite { public static void main(String[] args) throws IOException { // 使用文件名称创建流对象 FileWriter fw = new FileWriter("fw.txt"); // 写出数据,通过flush fw.write('刷'); // 写出第1个字符 fw.flush(); fw.write('新'); // 继续写出第2个字符,写出成功 fw.flush(); // 写出数据,通过close fw.write('关'); // 写出第1个字符 fw.close(); fw.write('闭'); // 继续写出第2个字符,【报错】java.io.IOException: Stream closed fw.close(); } }- 1
- 2
- 3
- 4
- 5
- 6
- 7
- 8
- 9
- 10
- 11
- 12
- 13
- 14
- 15
- 16
- 17
小贴士:即便是flush方法写出了数据,操作的最后还是要调用close方法,释放系统资源。
写出其他数据
- 写出字符数组 :
write(char[] cbuf)和write(char[] cbuf, int off, int len),每次可以写出字符数组中的数据,用法类似FileOutputStream,代码使用演示:
@Test void mytest() throws IOException{ // 使用文件名称创建流对象 FileWriter fw = new FileWriter("src/test/test.txt"); // 字符串转换为字节数组 char[] chars = "黑马程序员".toCharArray(); // 写出字符数组 fw.write(chars); // 黑马程序员 // 写出从索引2开始,2个字符(数组元素)。索引2是'程',两个字符(数组元素),也就是'程序'。 fw.write(chars,2,2); // 程序 // 关闭资源 fw.close(); }- 1
- 2
- 3
- 4
- 5
- 6
- 7
- 8
- 9
- 10
- 11
- 12
- 13
- 14
- 15
- 16
- 写出字符串:
write(String str)和write(String str, int off, int len),每次可以写出字符串中的数据,更为方便,代码使用演示:
@Test void mytest() throws IOException{ // 使用文件名称创建流对象 FileWriter fw = new FileWriter("src/test/test.txt"); // 字符串 String msg = "黑马程序员"; // 写出字符串 fw.write(msg); // 黑马程序员 // 写出从索引2开始,2个字符(数组元素)。索引2是'程',两个字符(数组元素),也就是'程序'。 fw.write(msg,2,2); // 程序 // 关闭资源 fw.close(); }- 1
- 2
- 3
- 4
- 5
- 6
- 7
- 8
- 9
- 10
- 11
- 12
- 13
- 14
- 15
- 16
- 续写和换行:操作类似于FileOutputStream。
@Test void mytest() throws IOException{ // 使用文件名称创建流对象,可以续写数据 FileWriter fw = new FileWriter("src/test/test.txt",true); // 写出字符串 fw.write("黑马"); // 写出换行 fw.write("\r\n"); // 写出字符串 fw.write("程序员"); // 关闭资源 fw.close(); } //文件内容:(“黑马程序员程序”,是上边例子写入的数据) 黑马程序员程序黑马 程序员- 1
- 2
- 3
- 4
- 5
- 6
- 7
- 8
- 9
- 10
- 11
- 12
- 13
- 14
- 15
- 16
- 17
小贴士:字符流,只能操作文本文件,不能操作图片,视频等非文本文件。
当我们单纯读或者写文本文件时 使用字符流 其他情况使用字节流
释放IO资源
JDK7前处理
之前的入门练习,我们一直把异常抛出,而实际开发中并不能这样处理,建议使用
try...catch...finally代码块,处理异常部分,代码使用演示:public class HandleException1 { public static void main(String[] args) { // 声明变量 FileWriter fw = null; try { //创建流对象 fw = new FileWriter("fw.txt"); // 写出数据 fw.write("黑马程序员"); //黑马程序员 } catch (IOException e) { e.printStackTrace(); } finally { try { if (fw != null) { fw.close(); } } catch (IOException e) { e.printStackTrace(); } } } }- 1
- 2
- 3
- 4
- 5
- 6
- 7
- 8
- 9
- 10
- 11
- 12
- 13
- 14
- 15
- 16
- 17
- 18
- 19
- 20
- 21
- 22
JDK7的处理
还可以使用JDK7优化后的
try-with-resource语句,该语句确保了每个资源在语句结束时关闭。所谓的资源(resource)是指在程序完成后,必须关闭的对象。什么是资源?资源类一定是实现了Closeable接口,实现这个接口的类就是资源。有close()方法,try-with-resource会自动调用它来关闭资源。
格式:
try (创建流对象语句,如果多个,使用';'隔开) {//只能放资源对象,且只能赋值一次。会自动调用close()关闭资源。 // 读写数据 } catch (IOException e) { e.printStackTrace(); }- 1
- 2
- 3
- 4
- 5
代码使用演示:
public class HandleException2 { public static void main(String[] args) { // 创建流对象 try ( FileWriter fw = new FileWriter("fw.txt"); ) { // 写出数据 fw.write("黑马程序员"); //黑马程序员 } catch (IOException e) { e.printStackTrace(); } } }- 1
- 2
- 3
- 4
- 5
- 6
- 7
- 8
- 9
- 10
- 11
缓冲流
昨天学习了基本的一些流,作为IO流的入门,今天我们要见识一些更强大的流。比如能够高效读写的缓冲流,能够转换编码的转换流,能够持久化存储对象的序列化流等等。这些功能更为强大的流,都是在基本的流对象基础之上创建而来的,就像穿上铠甲的武士一样,相当于是对基本流对象的一种增强。
概述
缓冲流,也叫高效流,是对4个基本的
FileXxx流的增强,所以也是4个流,按照数据类型分类:- 字节缓冲流:
BufferedInputStream,BufferedOutputStream - 字符缓冲流:
BufferedReader,BufferedWriter
缓冲流的基本原理,是在创建流对象时,会创建一个内置的默认大小的缓冲区数组,通过缓冲区读写,减少系统IO次数,从而提高读写的效率。
字节缓冲流
构造方法
public BufferedInputStream(InputStream in):创建一个 新的缓冲输入流。public BufferedOutputStream(OutputStream out): 创建一个新的缓冲输出流。
构造举例,代码如下:
// 创建字节缓冲输入流 BufferedInputStream bis = new BufferedInputStream(new FileInputStream("bis.txt")); // 创建字节缓冲输出流 BufferedOutputStream bos = new BufferedOutputStream(new FileOutputStream("bos.txt"));- 1
- 2
- 3
- 4
效率测试
查询API,缓冲流读写方法与基本的流是一致的,我们通过复制大文件(375MB),测试它的效率。
- 基本流,代码如下:
public class BufferedDemo { public static void main(String[] args) throws FileNotFoundException { // 记录开始时间 long start = System.currentTimeMillis(); // 创建流对象 try ( FileInputStream fis = new FileInputStream("jdk8.exe"); FileOutputStream fos = new FileOutputStream("copy.exe") ){ // 读写数据 int b; while ((b = fis.read()) != -1) { fos.write(b); } } catch (IOException e) { e.printStackTrace(); } // 记录结束时间 long end = System.currentTimeMillis(); System.out.println("普通流复制时间:"+(end - start)+" 毫秒"); } } 十几分钟过去了...- 1
- 2
- 3
- 4
- 5
- 6
- 7
- 8
- 9
- 10
- 11
- 12
- 13
- 14
- 15
- 16
- 17
- 18
- 19
- 20
- 21
- 22
- 23
- 24
- 缓冲流,代码如下:
public class BufferedDemo { public static void main(String[] args) throws FileNotFoundException { // 记录开始时间 long start = System.currentTimeMillis(); // 创建流对象 try ( BufferedInputStream bis = new BufferedInputStream(new FileInputStream("jdk8.exe")); BufferedOutputStream bos = new BufferedOutputStream(new FileOutputStream("copy.exe")); ){ // 读写数据 int b; while ((b = bis.read()) != -1) { bos.write(b); } } catch (IOException e) { e.printStackTrace(); } // 记录结束时间 long end = System.currentTimeMillis(); System.out.println("缓冲流复制时间:"+(end - start)+" 毫秒"); } } 缓冲流复制时间:8016 毫秒- 1
- 2
- 3
- 4
- 5
- 6
- 7
- 8
- 9
- 10
- 11
- 12
- 13
- 14
- 15
- 16
- 17
- 18
- 19
- 20
- 21
- 22
- 23
- 24
经典代码
如何更快呢?
使用数组的方式,代码如下:
public class BufferedDemo { public static void main(String[] args) throws FileNotFoundException { // 记录开始时间 long start = System.currentTimeMillis(); // 创建流对象 try ( BufferedInputStream bis = new BufferedInputStream(new FileInputStream("jdk8.exe")); BufferedOutputStream bos = new BufferedOutputStream(new FileOutputStream("copy.exe"));//注意:若要设置为追加模式,在new FileOutputStream时设置,而不是BufferedOutputStream ){ // 读写数据 int len; byte[] bytes = new byte[8*1024]; while ((len = bis.read(bytes)) != -1) { bos.write(bytes, 0 , len); } } catch (IOException e) { e.printStackTrace(); } // 记录结束时间 long end = System.currentTimeMillis(); System.out.println("缓冲流使用数组复制时间:"+(end - start)+" 毫秒"); } } 缓冲流使用数组复制时间:666 毫秒- 1
- 2
- 3
- 4
- 5
- 6
- 7
- 8
- 9
- 10
- 11
- 12
- 13
- 14
- 15
- 16
- 17
- 18
- 19
- 20
- 21
- 22
- 23
- 24
字符缓冲流
构造方法
public BufferedReader(Reader in):创建一个 新的缓冲输入流。public BufferedWriter(Writer out): 创建一个新的缓冲输出流。
构造举例,代码如下:
// 创建字符缓冲输入流 BufferedReader br = new BufferedReader(new FileReader("br.txt")); // 创建字符缓冲输出流 BufferedWriter bw = new BufferedWriter(new FileWriter("bw.txt"));- 1
- 2
- 3
- 4
特有方法
字符缓冲流的基本方法与普通字符流调用方式一致,不再阐述,我们来看它们具备的特有方法。
- BufferedReader:
public String readLine(): 读一行文字。 - BufferedWriter:
public void newLine(): 写一行行分隔符,由系统属性定义符号。
readLine方法演示,代码如下:public class BufferedReaderDemo { public static void main(String[] args) throws IOException { // 创建流对象 BufferedReader br = new BufferedReader(new FileReader("in.txt")); // 定义字符串,保存读取的一行文字 String line = null; // 循环读取,读取到最后返回null while ((line = br.readLine())!=null) { System.out.print(line); System.out.println("------"); } // 释放资源 br.close(); } }- 1
- 2
- 3
- 4
- 5
- 6
- 7
- 8
- 9
- 10
- 11
- 12
- 13
- 14
- 15
newLine方法演示,代码如下:public class BufferedWriterDemo throws IOException { public static void main(String[] args) throws IOException { // 创建流对象 BufferedWriter bw = new BufferedWriter(new FileWriter("out.txt"));//注意:若要设置为追加模式,在new FileWriter时设置,而不是BufferedWriter // 写出数据 bw.write("黑马"); // 写出换行 bw.newLine(); bw.write("程序"); bw.newLine(); bw.write("员"); bw.newLine(); // 释放资源 bw.close(); } } 输出效果: 黑马 程序 员- 1
- 2
- 3
- 4
- 5
- 6
- 7
- 8
- 9
- 10
- 11
- 12
- 13
- 14
- 15
- 16
- 17
- 18
- 19
- 20
经典代码
文本文件(txt、java、html等),逐行读取(BufferedReader),经典代码
@Test void mytest() throws IOException{ BufferedReader br = new BufferedReader(new FileReader("src/test/test.txt")); String line; while ((line = br.readLine())!=null){//文本文件(txt、java、html等),逐行读取,经典代码 System.out.println(line);//注意换行 } }- 1
- 2
- 3
- 4
- 5
- 6
- 7
- 8
练习:文本排序
请将文本信息恢复顺序。
3.侍中、侍郎郭攸之、费祎、董允等,此皆良实,志虑忠纯,是以先帝简拔以遗陛下。愚以为宫中之事,事无大小,悉以咨之,然后施行,必得裨补阙漏,有所广益。 8.愿陛下托臣以讨贼兴复之效,不效,则治臣之罪,以告先帝之灵。若无兴德之言,则责攸之、祎、允等之慢,以彰其咎;陛下亦宜自谋,以咨诹善道,察纳雅言,深追先帝遗诏,臣不胜受恩感激。 4.将军向宠,性行淑均,晓畅军事,试用之于昔日,先帝称之曰能,是以众议举宠为督。愚以为营中之事,悉以咨之,必能使行阵和睦,优劣得所。 2.宫中府中,俱为一体,陟罚臧否,不宜异同。若有作奸犯科及为忠善者,宜付有司论其刑赏,以昭陛下平明之理,不宜偏私,使内外异法也。 1.先帝创业未半而中道崩殂,今天下三分,益州疲弊,此诚危急存亡之秋也。然侍卫之臣不懈于内,忠志之士忘身于外者,盖追先帝之殊遇,欲报之于陛下也。诚宜开张圣听,以光先帝遗德,恢弘志士之气,不宜妄自菲薄,引喻失义,以塞忠谏之路也。 9.今当远离,临表涕零,不知所言。 6.臣本布衣,躬耕于南阳,苟全性命于乱世,不求闻达于诸侯。先帝不以臣卑鄙,猥自枉屈,三顾臣于草庐之中,咨臣以当世之事,由是感激,遂许先帝以驱驰。后值倾覆,受任于败军之际,奉命于危难之间,尔来二十有一年矣。 7.先帝知臣谨慎,故临崩寄臣以大事也。受命以来,夙夜忧叹,恐付托不效,以伤先帝之明,故五月渡泸,深入不毛。今南方已定,兵甲已足,当奖率三军,北定中原,庶竭驽钝,攘除奸凶,兴复汉室,还于旧都。此臣所以报先帝而忠陛下之职分也。至于斟酌损益,进尽忠言,则攸之、祎、允之任也。 5.亲贤臣,远小人,此先汉所以兴隆也;亲小人,远贤臣,此后汉所以倾颓也。先帝在时,每与臣论此事,未尝不叹息痛恨于桓、灵也。侍中、尚书、长史、参军,此悉贞良死节之臣,愿陛下亲之信之,则汉室之隆,可计日而待也。- 1
- 2
- 3
- 4
- 5
- 6
- 7
- 8
- 9
案例分析
- 逐行读取文本信息。
- 解析文本信息到集合中。
- 遍历集合,按顺序,写出文本信息。
案例实现
public class BufferedTest { public static void main(String[] args) throws IOException { // 创建map集合,保存文本数据,键为序号,值为文字 HashMap<String, String> lineMap = new HashMap<>(); // 创建流对象 BufferedReader br = new BufferedReader(new FileReader("in.txt")); BufferedWriter bw = new BufferedWriter(new FileWriter("out.txt")); // 读取数据 String line = null; while ((line = br.readLine())!=null) { // 解析文本 String[] split = line.split("\\.");//使用“.”分割拆分 // 保存到集合 lineMap.put(split[0],split[1]);//序号(3、8、4。。。)作为map的key,其他部分作为value } // 释放资源 br.close();//使用try-with-resource不需要手动释放资源 // 遍历map集合 for (int i = 1; i <= lineMap.size(); i++) {//本案例中,map的key就是1、2、3这些数字,不需要排序操作,直接使用for循环的index即可(注意i设置为从1开始) String key = String.valueOf(i); // 获取map中文本 String value = lineMap.get(key); // 写出拼接文本 bw.write(key+"."+value); // 写出换行 bw.newLine(); } // 释放资源 bw.close(); } }- 1
- 2
- 3
- 4
- 5
- 6
- 7
- 8
- 9
- 10
- 11
- 12
- 13
- 14
- 15
- 16
- 17
- 18
- 19
- 20
- 21
- 22
- 23
- 24
- 25
- 26
- 27
- 28
- 29
- 30
- 31
- 32
- 33
- 34
扩展
序号,由阿拉伯数字更改为汉字。
待排序文本内容:
三.侍中、侍郎郭攸之、费祎、董允等,此皆良实,志虑忠纯,是以先帝简拔以遗陛下。愚以为宫中之事,事无大小,悉以咨之,然后施行,必得裨补阙漏,有所广益。 八.愿陛下托臣以讨贼兴复之效,不效,则治臣之罪,以告先帝之灵。若无兴德之言,则责攸之、祎、允等之慢,以彰其咎;陛下亦宜自谋,以咨诹善道,察纳雅言,深追先帝遗诏,臣不胜受恩感激。 四.将军向宠,性行淑均,晓畅军事,试用之于昔日,先帝称之曰能,是以众议举宠为督。愚以为营中之事,悉以咨之,必能使行阵和睦,优劣得所。 二.宫中府中,俱为一体,陟罚臧否,不宜异同。若有作奸犯科及为忠善者,宜付有司论其刑赏,以昭陛下平明之理,不宜偏私,使内外异法也。 一.先帝创业未半而中道崩殂,今天下三分,益州疲弊,此诚危急存亡之秋也。然侍卫之臣不懈于内,忠志之士忘身于外者,盖追先帝之殊遇,欲报之于陛下也。诚宜开张圣听,以光先帝遗德,恢弘志士之气,不宜妄自菲薄,引喻失义,以塞忠谏之路也。 九.今当远离,临表涕零,不知所言。 六.臣本布衣,躬耕于南阳,苟全性命于乱世,不求闻达于诸侯。先帝不以臣卑鄙,猥自枉屈,三顾臣于草庐之中,咨臣以当世之事,由是感激,遂许先帝以驱驰。后值倾覆,受任于败军之际,奉命于危难之间,尔来二十有一年矣。 七.先帝知臣谨慎,故临崩寄臣以大事也。受命以来,夙夜忧叹,恐付托不效,以伤先帝之明,故五月渡泸,深入不毛。今南方已定,兵甲已足,当奖率三军,北定中原,庶竭驽钝,攘除奸凶,兴复汉室,还于旧都。此臣所以报先帝而忠陛下之职分也。至于斟酌损益,进尽忠言,则攸之、祎、允之任也。 五.亲贤臣,远小人,此先汉所以兴隆也;亲小人,远贤臣,此后汉所以倾颓也。先帝在时,每与臣论此事,未尝不叹息痛恨于桓、灵也。侍中、尚书、长史、参军,此悉贞良死节之臣,愿陛下亲之信之,则汉室之隆,可计日而待也。- 1
- 2
- 3
- 4
- 5
- 6
- 7
- 8
- 9
代码实现:
@Test void mytest(){ /** * 分析: * 1、创建一个 缓冲字符输入流对象 包装 字符输入流对象 接通源文件。 * 2、定义一个List集合用于存储每段文章。 * 3、定义一个循环按照行读取每段文章,存入到List集合中去。 * 4、对List集合中的每个元素按照首字符排序。 * - 定义一个List,按顺序添加汉字(零到十)。排序时,将首字符转换为索引,用于比较大小 * 5、创建一个 缓冲字符输出流 管道通向目标文件。 * 6、遍历List集合中的每个元素,通过缓冲字符输出管道写出到目标文件。 * 7、释放资源(使用try-with-resource不需要手动释放资源) */ try( BufferedReader br = new BufferedReader(new FileReader("src/test/test-src.txt")); BufferedWriter bw = new BufferedWriter(new FileWriter("src/test/test-res.txt")); ) { //1、创建一个 缓冲字符输入流对象 包装 字符输入流对象 接通源文件。 // BufferedReader br = new BufferedReader(new FileReader("src/test/test-src.txt")); //2、定义一个List集合用于存储每段文章。 List<String> datas = new ArrayList<>(); //3、定义一个循环按照行读取每段文章,存入到List集合中去。 String line; while ((line = br.readLine())!=null){//文本文件(txt、java、html等),逐行读取,经典代码 datas.add(line); } //4、对List集合中的每个元素按照首字符排序。 //4.1 定义一个List,按顺序添加汉字(零到十)。排序时,将首字符转换为索引,用于比较大小 List<Character> sizes = new ArrayList<>(); Collections.addAll(sizes,'零','一','二','三','四','五','六','七','八','九','十'); //4.2 自定义比较器,排序 // Collections.sort(datas, new Comparator() { // @Override // public int compare(String s1, String s2) { // //若s1要排在s2后边,则返回正数(默认升序,从小到大) // //若s1要排在s2前边,则返回负数 // //示例: // //s1 = 三.侍中、侍郎。。。 // //s2 = 八.愿陛下托臣。。。 // //return 3 - 8 -》 return -5 // // //charAt(0) 获取文本的第一个字符 // //indexOf 获取元素在List集合中的索引 // return sizes.indexOf(s1.charAt(0)) - sizes.indexOf(s2.charAt(0)); // } // }); //使用lambda优化: Collections.sort(datas, ( s1, s2)-> sizes.indexOf(s1.charAt(0)) - sizes.indexOf(s2.charAt(0)) ); //5、创建一个 缓冲字符输出流 管道通向目标文件。 // BufferedWriter bw = new BufferedWriter(new FileWriter("src/test/test-res.txt")); //6、遍历List集合中的每个元素,通过缓冲字符输出管道写出到目标文件。 for (String data : datas){ bw.write(data); bw.newLine();//注意:需要换行 } } catch (IOException e) { throw new RuntimeException(e); }finally { //7、释放资源 //释放br、bw //使用try-with-resource不需要手动释放资源 } }- 1
- 2
- 3
- 4
- 5
- 6
- 7
- 8
- 9
- 10
- 11
- 12
- 13
- 14
- 15
- 16
- 17
- 18
- 19
- 20
- 21
- 22
- 23
- 24
- 25
- 26
- 27
- 28
- 29
- 30
- 31
- 32
- 33
- 34
- 35
- 36
- 37
- 38
- 39
- 40
- 41
- 42
- 43
- 44
- 45
- 46
- 47
- 48
- 49
- 50
- 51
- 52
- 53
- 54
- 55
- 56
- 57
- 58
- 59
- 60
- 61
- 62
- 63
运行结果:
排序后的文本内容:
一.先帝创业未半而中道崩殂,今天下三分,益州疲弊,此诚危急存亡之秋也。然侍卫之臣不懈于内,忠志之士忘身于外者,盖追先帝之殊遇,欲报之于陛下也。诚宜开张圣听,以光先帝遗德,恢弘志士之气,不宜妄自菲薄,引喻失义,以塞忠谏之路也。 二.宫中府中,俱为一体,陟罚臧否,不宜异同。若有作奸犯科及为忠善者,宜付有司论其刑赏,以昭陛下平明之理,不宜偏私,使内外异法也。 三.侍中、侍郎郭攸之、费祎、董允等,此皆良实,志虑忠纯,是以先帝简拔以遗陛下。愚以为宫中之事,事无大小,悉以咨之,然后施行,必得裨补阙漏,有所广益。 四.将军向宠,性行淑均,晓畅军事,试用之于昔日,先帝称之曰能,是以众议举宠为督。愚以为营中之事,悉以咨之,必能使行阵和睦,优劣得所。 五.亲贤臣,远小人,此先汉所以兴隆也;亲小人,远贤臣,此后汉所以倾颓也。先帝在时,每与臣论此事,未尝不叹息痛恨于桓、灵也。侍中、尚书、长史、参军,此悉贞良死节之臣,愿陛下亲之信之,则汉室之隆,可计日而待也。 六.臣本布衣,躬耕于南阳,苟全性命于乱世,不求闻达于诸侯。先帝不以臣卑鄙,猥自枉屈,三顾臣于草庐之中,咨臣以当世之事,由是感激,遂许先帝以驱驰。后值倾覆,受任于败军之际,奉命于危难之间,尔来二十有一年矣。 七.先帝知臣谨慎,故临崩寄臣以大事也。受命以来,夙夜忧叹,恐付托不效,以伤先帝之明,故五月渡泸,深入不毛。今南方已定,兵甲已足,当奖率三军,北定中原,庶竭驽钝,攘除奸凶,兴复汉室,还于旧都。此臣所以报先帝而忠陛下之职分也。至于斟酌损益,进尽忠言,则攸之、祎、允之任也。 八.愿陛下托臣以讨贼兴复之效,不效,则治臣之罪,以告先帝之灵。若无兴德之言,则责攸之、祎、允等之慢,以彰其咎;陛下亦宜自谋,以咨诹善道,察纳雅言,深追先帝遗诏,臣不胜受恩感激。 九.今当远离,临表涕零,不知所言。- 1
- 2
- 3
- 4
- 5
- 6
- 7
- 8
- 9
转换流
字符编码和字符集
计算机中储存的信息都是用二进制数表示的,而我们在屏幕上看到的数字、英文、标点符号、汉字等字符是二进制数转换之后的结果。按照某种规则,将字符存储到计算机中,称为编码 。反之,将存储在计算机中的二进制数按照某种规则解析显示出来,称为解码 。比如说,按照A规则存储,同样按照A规则解析,那么就能显示正确的文本f符号。反之,按照A规则存储,再按照B规则解析,就会导致乱码现象。
- 字符编码
Character Encoding: 就是一套自然语言的字符与二进制数之间的对应规则。
前置知识:字符集&乱码
编码引出的问题
在IDEA中,使用
FileReader读取项目中的文本文件。由于IDEA的设置,都是默认的UTF-8编码,所以没有任何问题。但是,当读取Windows系统中创建的文本文件时,由于Windows系统的默认是GBK编码,就会出现乱码。public class ReaderDemo { public static void main(String[] args) throws IOException { FileReader fileReader = new FileReader("E:\\File_GBK.txt"); int read; while ((read = fileReader.read()) != -1) { System.out.print((char)read); } fileReader.close(); } } 输出结果: ���- 1
- 2
- 3
- 4
- 5
- 6
- 7
- 8
- 9
- 10
- 11
- 12
那么如何读取GBK编码的文件呢?
InputStreamReader类
转换流
java.io.InputStreamReader,是Reader的子类,是从字节流到字符流的桥梁。它读取字节,并使用指定的字符集将其解码为字符。它的字符集可以由名称指定,也可以接受平台的默认字符集。构造方法
InputStreamReader(InputStream in): 创建一个使用默认字符集的字符流。InputStreamReader(InputStream in, String charsetName): 创建一个指定字符集的字符流。
构造举例,代码如下:
InputStreamReader isr = new InputStreamReader(new FileInputStream("in.txt")); InputStreamReader isr2 = new InputStreamReader(new FileInputStream("in.txt") , "GBK");- 1
- 2
指定编码读取
public class ReaderDemo2 { public static void main(String[] args) throws IOException { // 定义文件路径,文件为gbk编码 String FileName = "E:\\file_gbk.txt"; // 创建流对象,默认UTF8编码 InputStreamReader isr = new InputStreamReader(new FileInputStream(FileName)); // 创建流对象,指定GBK编码 InputStreamReader isr2 = new InputStreamReader(new FileInputStream(FileName) , "GBK"); // 定义变量,保存字符 int read; // 使用默认编码字符流读取,乱码 while ((read = isr.read()) != -1) { System.out.print((char)read); // ��Һ� } isr.close(); // 使用指定编码字符流读取,正常解析 while ((read = isr2.read()) != -1) { System.out.print((char)read);// 大家好 } isr2.close(); } }- 1
- 2
- 3
- 4
- 5
- 6
- 7
- 8
- 9
- 10
- 11
- 12
- 13
- 14
- 15
- 16
- 17
- 18
- 19
- 20
- 21
- 22
- 23
- 24
- 25
OutputStreamWriter类
转换流
java.io.OutputStreamWriter,是Writer的子类,是从字符流到字节流的桥梁。使用指定的字符集将字符编码为字节。它的字符集可以由名称指定,也可以接受平台的默认字符集。构造方法
OutputStreamWriter(OutputStream in): 创建一个使用默认字符集的字符流。OutputStreamWriter(OutputStream in, String charsetName): 创建一个指定字符集的字符流。
构造举例,代码如下:
OutputStreamWriter isr = new OutputStreamWriter(new FileOutputStream("out.txt")); OutputStreamWriter isr2 = new OutputStreamWriter(new FileOutputStream("out.txt") , "GBK");- 1
- 2
指定编码写出
public class OutputDemo { public static void main(String[] args) throws IOException { // 定义文件路径 String FileName = "E:\\out.txt"; // 创建流对象,默认UTF8编码 OutputStreamWriter osw = new OutputStreamWriter(new FileOutputStream(FileName)); // 写出数据 osw.write("你好"); // 保存为6个字节 osw.close(); // 定义文件路径 String FileName2 = "E:\\out2.txt"; // 创建流对象,指定GBK编码 OutputStreamWriter osw2 = new OutputStreamWriter(new FileOutputStream(FileName2),"GBK"); // 写出数据 osw2.write("你好");// 保存为4个字节 osw2.close(); } }- 1
- 2
- 3
- 4
- 5
- 6
- 7
- 8
- 9
- 10
- 11
- 12
- 13
- 14
- 15
- 16
- 17
- 18
- 19
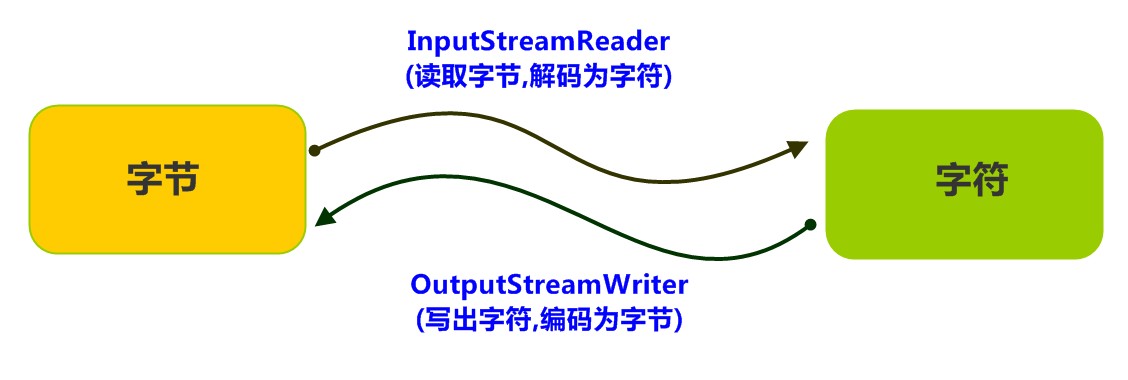
转换流理解图解
转换流是字节与字符间的桥梁!
练习:转换文件编码
将GBK编码的文本文件,转换为UTF-8编码的文本文件。
案例分析
- 指定GBK编码的转换流,读取文本文件。
- 使用UTF-8编码的转换流,写出文本文件。
案例实现
@Test void mytest(){ /** * 文件编码转换 * 问题: * GBK 可以转换为 UTF-8、UTF-16 * GBK 无法转换为 windows-1252、ISO-8859-1 */ Map<Boolean, String> resultMap = myTranscoding("src/test/test-res.txt", "GBK", "UTF-8"); if(resultMap.get(true) != null){ System.out.println("文件转换成功:"+resultMap.get(true)); }else { System.out.println("文件转换失败:"+resultMap.get(false)); } } /** * 文件编码转换。转换后在相同目录下生成一个新的文件,命名规则为"文件名[原编码_to_新编码]",例如:test.txt -> test[GBK_to_UTF-8].txt * @param fileName 文件名(绝对路径或相对路径) * @param chartsetName 文件原始编码方式 * @param tran2chartsetName 文件需要转换的编码方式 * @return map 返回转换结果,key表示成功/失败(true/false),value表示原因 */ public Map<Boolean, String> myTranscoding(String fileName,String chartsetName,String tran2chartsetName){ //返回结果,key表示成功或失败(true/false),value表示原因 Map<Boolean, String> resultMap = new HashMap<>(); //检查字符集是否支持 for (String name : new String[]{chartsetName, tran2chartsetName}){ if(!Charset.isSupported(name)){ resultMap.put(false,"不支持的字符集【"+name+"】"); return resultMap; } } //检查文件是否存在 if(!new File(fileName).exists()){ resultMap.put(false,"文件不存在!!!"); return resultMap; } if(!new File(fileName).isFile()){ resultMap.put(false,"请选择文件!!!"); return resultMap; } //方案一:转换后,文件名相同 //临时文件名(保存转码后的数据) // String fileName2 = fileName; // while (new File(fileName2).exists()){ // fileName2 = fileName2.substring(0, fileName2.lastIndexOf('.'))+"02"+fileName2.substring( fileName2.lastIndexOf('.')); // } //方案二:转换后,保留原文件,新文件与原文件的文件名不同(注意:若重名会覆盖) String fileName2 = fileName.substring(0, fileName.lastIndexOf('.'))+"["+chartsetName+"_to_"+tran2chartsetName+"]"+fileName.substring( fileName.lastIndexOf('.')); //转换 try( //创建流对象 //字节输入流,转换为UTF-8编码的字符输入流,再包装为缓存字符输入流 BufferedReader br = new BufferedReader(new InputStreamReader(new FileInputStream(fileName),chartsetName)); //字节输出流,转换为GBK编码的字符输出流,再包装为缓存字符输出流 BufferedWriter bw = new BufferedWriter(new OutputStreamWriter(new FileOutputStream(fileName2),tran2chartsetName)); ) { // 读写数据 // 定义数组 char[] arr = new char[1024]; // 定义长度 int len; // 循环读取 while ( (len = br.read(arr)) != -1) { // 循环写出 bw.write(arr,0,len); } } catch (IOException e) { throw new RuntimeException(e); } //方案一:转换后,文件名相同 //删除原文件,新文件更名为原文件名 // File file1 = new File(fileName); // File file2 = new File(fileName2); // boolean isSuccess = true; // if(file1.delete()){ // if(!file2.renameTo(file1)){ // isSuccess = false; // } // }else{ // file2.delete(); // isSuccess = false; // } // // if(!isSuccess){ // resultMap.put(false,"文件重命名失败!"); // return resultMap; // }else { // resultMap.put(true,"文件转换成功!"); // return resultMap; // } resultMap.put(true,"【"+chartsetName+" -> "+tran2chartsetName+"】"); return resultMap; }- 1
- 2
- 3
- 4
- 5
- 6
- 7
- 8
- 9
- 10
- 11
- 12
- 13
- 14
- 15
- 16
- 17
- 18
- 19
- 20
- 21
- 22
- 23
- 24
- 25
- 26
- 27
- 28
- 29
- 30
- 31
- 32
- 33
- 34
- 35
- 36
- 37
- 38
- 39
- 40
- 41
- 42
- 43
- 44
- 45
- 46
- 47
- 48
- 49
- 50
- 51
- 52
- 53
- 54
- 55
- 56
- 57
- 58
- 59
- 60
- 61
- 62
- 63
- 64
- 65
- 66
- 67
- 68
- 69
- 70
- 71
- 72
- 73
- 74
- 75
- 76
- 77
- 78
- 79
- 80
- 81
- 82
- 83
- 84
- 85
- 86
- 87
- 88
- 89
- 90
- 91
- 92
- 93
- 94
- 95
- 96
- 97
- 98
- 99
- 100
序列化
概述
Java 提供了一种对象序列化的机制。用一个字节序列可以表示一个对象,该字节序列包含该
对象的数据、对象的类型和对象中存储的属性等信息。字节序列写出到文件之后,相当于文件中持久保存了一个对象的信息。反之,该字节序列还可以从文件中读取回来,重构对象,对它进行反序列化。
对象的数据、对象的类型和对象中存储的数据信息,都可以用来在内存中创建对象。
ObjectOutputStream类
java.io.ObjectOutputStream类,将Java对象的原始数据类型写出到文件,实现对象的持久存储。构造方法
public ObjectOutputStream(OutputStream out): 创建一个指定OutputStream的ObjectOutputStream。
构造举例,代码如下:
FileOutputStream fileOut = new FileOutputStream("employee.txt"); ObjectOutputStream out = new ObjectOutputStream(fileOut);- 1
- 2
序列化操作
- 一个对象要想序列化,必须满足两个条件:
- 该类必须实现
java.io.Serializable接口,Serializable是一个标记接口,不实现此接口的类将不会使任何状态序列化或反序列化,会抛出NotSerializableException。 - 该类的所有属性必须是可序列化的。如果有一个属性不需要可序列化的,则该属性必须注明是瞬态的,使用
transient关键字修饰。
public class Employee implements java.io.Serializable { public String name; public String address; public transient int age; // transient瞬态修饰成员,不会被序列化 public void addressCheck() { System.out.println("Address check : " + name + " -- " + address); } }- 1
- 2
- 3
- 4
- 5
- 6
- 7
- 8
2.写出对象方法
public final void writeObject (Object obj): 将指定的对象写出。
@Test void mytest(){ Employee e = new Employee(); e.name = "zhangsan"; e.address = "北京"; e.age = 20; try( //try-with-resource,不需要手动释放资源 ObjectOutputStream out = new ObjectOutputStream(new FileOutputStream("src/test/employee.txt")); ) { // 创建序列化流对象 // ObjectOutputStream out = new ObjectOutputStream(new FileOutputStream("src/test/employee.txt")); // 写出对象 out.writeObject(e); // 释放资源 // out.close();//try-with-resource,不需要手动释放资源 System.out.println("Serialized data is saved"); // 姓名,地址被序列化,年龄没有被序列化。 } catch(IOException i) { i.printStackTrace(); } } //输出结果: Serialized data is saved- 1
- 2
- 3
- 4
- 5
- 6
- 7
- 8
- 9
- 10
- 11
- 12
- 13
- 14
- 15
- 16
- 17
- 18
- 19
- 20
- 21
- 22
- 23
- 24
序列化后得到的employee.txt文件:
��srcom.qsdbl.malldemo.Employeej��S��LaddresstLjava/lang/String;Lnameq~xpt北京tzhangsan- 1
ObjectInputStream类
ObjectInputStream反序列化流,将之前使用ObjectOutputStream序列化的原始数据恢复为对象。
构造方法
public ObjectInputStream(InputStream in): 创建一个指定InputStream的ObjectInputStream。
反序列化操作1
如果能找到一个对象的class文件,我们可以进行反序列化操作,调用
ObjectInputStream读取对象的方法:public final Object readObject (): 读取一个对象。
@Test void mytest(){ Employee e = null; try { // 创建反序列化流 FileInputStream fileIn = new FileInputStream("src/test/employee.txt"); ObjectInputStream in = new ObjectInputStream(fileIn); // 读取一个对象 // e = (Employee) in.readObject(); //优化:先判断,再转换 Object obj = in.readObject(); if(obj instanceof Employee){ e = (Employee) obj; } // 释放资源 in.close();//可使用try-with-resource优化,不需要手动释放资源 fileIn.close(); }catch(IOException i) { // 捕获其他异常 i.printStackTrace(); return; }catch(ClassNotFoundException c) { // 捕获类找不到异常 System.out.println("Employee class not found"); c.printStackTrace(); return; } // 无异常,直接打印输出 System.out.println("Name: " + e.name); // zhangsan System.out.println("Address: " + e.address); // 北京 System.out.println("age: " + e.age); // 0 } //运行结果: Name: zhangsan Address: 北京 age: 0 进程已结束,退出代码0- 1
- 2
- 3
- 4
- 5
- 6
- 7
- 8
- 9
- 10
- 11
- 12
- 13
- 14
- 15
- 16
- 17
- 18
- 19
- 20
- 21
- 22
- 23
- 24
- 25
- 26
- 27
- 28
- 29
- 30
- 31
- 32
- 33
- 34
- 35
- 36
- 37
- 38
- 39
对于JVM可以反序列化对象,它必须是能够找到class文件的类。如果找不到该类的class文件,则抛出一个
ClassNotFoundException异常。
反序列化操作2
**另外,当JVM反序列化对象时,能找到class文件,但是class文件在序列化对象之后发生了修改,那么反序列化操作也会失败,抛出一个
InvalidClassException异常。**发生这个异常的原因如下:- 该类的序列版本号与从流中读取的类描述符的版本号不匹配
- 该类包含未知数据类型
- 该类没有可访问的无参数构造方法
Serializable接口给需要序列化的类,提供了一个序列版本号。serialVersionUID该版本号的目的在于验证序列化的对象和对应类是否版本匹配。public class Employee implements java.io.Serializable { // 加入序列版本号 private static final long serialVersionUID = 1L; public String name; public String address; // 添加新的属性 ,重新编译, 可以反序列化,该属性赋为默认值. public int eid; public void addressCheck() { System.out.println("Address check : " + name + " -- " + address); } }- 1
- 2
- 3
- 4
- 5
- 6
- 7
- 8
- 9
- 10
- 11
- 12
练习:序列化集合
- 将存有多个自定义对象的集合序列化操作,保存到
list.txt文件中。 - 反序列化
list.txt,并遍历集合,打印对象信息。
案例分析
- 把若干学生对象 ,保存到集合中。
- 把集合序列化。
- 反序列化读取时,只需要读取一次,转换为集合类型。
- 遍历集合,可以打印所有的学生信息
案例实现
public class SerTest { public static void main(String[] args) throws Exception { // 创建 学生对象 Student student = new Student("老王", "laow"); Student student2 = new Student("老张", "laoz"); Student student3 = new Student("老李", "laol"); ArrayList<Student> arrayList = new ArrayList<>(); arrayList.add(student); arrayList.add(student2); arrayList.add(student3); // 序列化操作 // serializ(arrayList); // 反序列化 ObjectInputStream ois = new ObjectInputStream(new FileInputStream("list.txt")); // 读取对象,强转为ArrayList类型 ArrayList<Student> list = (ArrayList<Student>)ois.readObject(); for (int i = 0; i < list.size(); i++ ){ Student s = list.get(i); System.out.println(s.getName()+"--"+ s.getPwd()); } } private static void serializ(ArrayList<Student> arrayList) throws Exception { // 创建 序列化流 ObjectOutputStream oos = new ObjectOutputStream(new FileOutputStream("list.txt")); // 写出对象 oos.writeObject(arrayList); // 释放资源 oos.close(); } }- 1
- 2
- 3
- 4
- 5
- 6
- 7
- 8
- 9
- 10
- 11
- 12
- 13
- 14
- 15
- 16
- 17
- 18
- 19
- 20
- 21
- 22
- 23
- 24
- 25
- 26
- 27
- 28
- 29
- 30
- 31
- 32
- 33
- 34
打印流
概述
平时我们在控制台打印输出,是调用
print方法和println方法完成的,这两个方法都来自于java.io.PrintStream类,该类能够方便地打印各种数据类型的值,是一种便捷的输出方式。PrintStream类
public PrintStream(String fileName): 使用指定的文件名创建一个新的打印流。
构造举例,代码如下:
PrintStream ps = new PrintStream("ps.txt");- 1
可以直接输出字符到指定文件中。
扩展
扩展:改变“System.out.print”的输出流向(重定向),输出到指定的文件中。
System.out就是PrintStream类型的,只不过它的流向是系统规定的,打印在控制台上。不过,既然是流对象,我们就可以玩一个"小把戏",将数据输出到指定文本文件中。public class PrintDemo { public static void main(String[] args) throws IOException { // 调用系统的打印流,控制台直接输出97 System.out.println(97); // 创建打印流,指定文件的名称 PrintStream ps = new PrintStream("ps.txt"); // 设置系统的打印流流向,输出到ps.txt System.setOut(ps); // 调用系统的打印流,ps.txt中输出97 System.out.println(97); } }- 1
- 2
- 3
- 4
- 5
- 6
- 7
- 8
- 9
- 10
- 11
- 12
- 13
- 14
属性集
框架底层使用,了解即可。
概述
java.util.Properties继承于Hashtable,来表示一个持久的属性集。它使用键值结构存储数据,每个键及其对应值都是一个字符串。该类也被许多Java类使用,比如获取系统属性时,System.getProperties方法就是返回一个Properties对象。Properties类
构造方法
public Properties():创建一个空的属性列表(本质是一个map集合)。
基本的存储方法
public Object setProperty(String key, String value): 保存一对属性。public String getProperty(String key):使用此属性列表中指定的键搜索属性值。public Set:所有键的名称的集合。stringPropertyNames()
public class ProDemo { public static void main(String[] args) throws FileNotFoundException { // 创建属性集对象 Properties properties = new Properties(); // 添加键值对元素 properties.setProperty("filename", "a.txt"); properties.setProperty("length", "209385038"); properties.setProperty("location", "D:\\a.txt"); // 打印属性集对象 System.out.println(properties); // 通过键,获取属性值 System.out.println(properties.getProperty("filename")); System.out.println(properties.getProperty("length")); System.out.println(properties.getProperty("location")); // 遍历属性集,获取所有键的集合 Set<String> strings = properties.stringPropertyNames(); // 打印键值对 for (String key : strings ) { System.out.println(key+" -- "+properties.getProperty(key)); } } } 输出结果: {filename=a.txt, length=209385038, location=D:\a.txt} a.txt 209385038 D:\a.txt filename -- a.txt length -- 209385038 location -- D:\a.txt- 1
- 2
- 3
- 4
- 5
- 6
- 7
- 8
- 9
- 10
- 11
- 12
- 13
- 14
- 15
- 16
- 17
- 18
- 19
- 20
- 21
- 22
- 23
- 24
- 25
- 26
- 27
- 28
- 29
- 30
- 31
与流相关的方法
读取
public synchronized void load(InputStream inStream):参数为字节输入流public synchronized void load(Reader reader):参数为字符输入流- 从字节输入流中读取键值对。
参数中使用了字节输入流,通过流对象,可以关联到某文件上,这样就能够加载文本中的数据了。文本数据格式:
filename=a.txt length=209385038 location=D:\a.txt- 1
- 2
- 3
加载代码演示:
public class ProDemo2 { public static void main(String[] args) throws FileNotFoundException { // 创建属性集对象 Properties pro = new Properties(); // 加载文本中信息到属性集 pro.load(new FileInputStream("read.txt")); // 遍历集合并打印 Set<String> strings = pro.stringPropertyNames(); for (String key : strings ) { System.out.println(key+" -- "+pro.getProperty(key)); } } } //输出结果: filename -- a.txt length -- 209385038 location -- D:\a.txt- 1
- 2
- 3
- 4
- 5
- 6
- 7
- 8
- 9
- 10
- 11
- 12
- 13
- 14
- 15
- 16
- 17
- 18
小贴士:文本中的数据,必须是键值对形式,可以使用空格、等号、冒号等符号分隔。
输出
public void store(OutputStream out, String comments)public void store(Writer writer, String comments)- 将此属性表中的此属性列表(键和元素对)以适合使用load(InputStream)方法加载到属性表的格式写入输出流。
输出代码演示:
@Test void mytest() throws IOException { //a.创建一个属性集对象:Properties对象 Properties properties = new Properties(); properties.setProperty("admin","M123456"); properties.setProperty("xiaohei","34534"); // properties.put("lily","123456");//本质是一个map System. out.println(properties); // b.把属性集对象的数据存入到属性文件中去(重点) OutputStream os = new FileOutputStream("src/test/myproperties.properties"); //参数一:被保存数据的输出管道 //参数二:备注 properties.store(os,"qsdbl - 属性集配置文件!!!"); }- 1
- 2
- 3
- 4
- 5
- 6
- 7
- 8
- 9
- 10
- 11
- 12
- 13
- 14
生成的文件内容:
#qsdbl - \u5C5E\u6027\u96C6\u914D\u7F6E\u6587\u4EF6\uFF01\uFF01\uFF01 #Sat Nov 19 20:55:28 CST 2022 admin=M123456 xiaohei=34534- 1
- 2
- 3
- 4
- 5
扩展:commons-io
概述
commons-io是apache开源基金组织提供的一组有关IO操作的类库,可以挺提高IO功能开发的效率。commons-io工具包提供了很多有关io操作的类,见下表:
包 功能描述 org.apache.commons.io 有关Streams、Readers、Writers、Files的工具类 org.apache.commons.io.input 输入流相关的实现类,包含Reader和InputStream org.apache.commons.io.output 输出流相关的实现类,包含Writer和OutputStream org.apache.commons.io.serialization 序列化相关的类 使用
步骤:
- 下载commons-io相关jar包;http://commons.apache.org/proper/commons-io/
- 把commons-io-2.6.jar包复制到指定的Module的lib目录中
- 将commons-io-2.6.jar加入到classpath中
常用API介绍
- commons-io提供了一个工具类 org.apache.commons.io.IOUtils,封装了大量IO读写操作的代码。其中有两个常用方法:
- public static int copy(InputStream in, OutputStream out); 把input输入流中的内容拷贝到output输出流中,返回拷贝的字节个数(适合文件大小为2GB以下)
- public static long copyLarge(InputStream in, OutputStream out);把input输入流中的内容拷贝到output输出流中,返回拷贝的字节个数(适合文件大小为2GB以上)
文件复制案例演示:
public static void main(String[] args) throws Exception { // 文件路径需要修改,改成自己文件的路径 File file = new File("src/test.txt"); FileInputStream is = new FileInputStream(file); // 文件路径需要修改 File file1 = new File("src/test1.txt"); FileOutputStream os = new FileOutputStream(file1); // 文件复制 IOUtils.copy(is, os); }- 1
- 2
- 3
- 4
- 5
- 6
- 7
- 8
- 9
- 10
- commons-io还提供了一个工具类org.apache.commons.io.FileUtils,封装了一些对文件操作的方法:
- public static void copyFileToDirectory(final File srcFile, final File destFile) //复制文件到另外一个目录下。
- public static void copyDirectoryToDirectory( file1 , file2 );//复制file1目录到file2位置。
文件夹复制案例演示:
public static void main(String[] args) throws IOException { //1.将d:\\视频.itcast文件复制到e:\\下 FileUtils.copyFileToDirectory(new File("d:\\视频.itcast"), new File("e:\\")); //2.将"d:\\多级目录"复制到"e:\\"下。 FileUtils.copyDirectoryToDirectory(new File("d:\\多级目录"), new File("e:\\")); }- 1
- 2
- 3
- 4
- 5
- 6
扩展
sun公司提供的文件复制api
@Test void mytest() throws IOException { //Java从1.7开始提供了一些nio, 也有一行代码完成复制的技术 String src_img = "/Users/qsdbl/Public/file-test/imghttps://1000bd.com/contentImg/e639ff5b-a35f-4d76-80cc-efdf96103fe9.png"; String dest_img = "/Users/qsdbl/Public/file-test/testCopy.png"; Files.copy(Paths.get(src_img),new FileOutputStream(dest_img)); System.out.println("复制文件!!!");//若已存在会报错 }- 1
- 2
- 3
- 4
- 5
- 6
- 7
- 8
案例总结
-
File:文件搜索
- File类的使用、递归函数的使用
-
字节流:文件复制
- 字节流的使用、循环读取循环写成的经典代码
-
字节流:复制文件夹
- File类的使用、字节流的使用、递归函数的使用
-
缓存流:文本排序
- 缓存流的使用(例如字符缓冲输入流逐行读取文本信息)、自定义比较器、lambda表达式、try-with-resource方式释放资源等
-
转换流:转换文件编码
- 转换流的使用、字节流按指定编码(例如GBK)转换为字符流、字符集Charset类的使用
-
序列化:序列化集合
- 将存有多个自定义对象的集合序列化到文件中。反序列化,从该文件中加载对象消息。
-
- 改变“System.out.print”的输出流向(重定向),输出到指定的文件中。
-
属性集:属性集保存到文件&从文件加载数据
- 属性集保存到文件&从文件加载数据。框架中的应用:springboot的application.properties文件。
学习自B站深入学习Java编程-黑马
-
相关阅读:
俄罗斯方块(升级版)
【Unity】流体模拟(更新ing)
【Bond随你温故Kubernetes之】壹图复盘service与内部通信
使用百度EasyDL语音识别打造Smart汽车原创音乐
Spring之IOC(一)
adb 查找应用包名,应用 Activity 等信息
STC单片机15——MPU6050六轴数据融合,互补滤波,时间常数可调,可稳定运行,串口显示角度值
Lua中如何实现类似gdb的断点调试—07支持通过函数名称添加断点
AOP、IOC、注解、反射
二分专题训练
- 原文地址:https://blog.csdn.net/weixin_44773109/article/details/127823105
