-
【双十一特辑】爱心代码(程序员的浪漫)-李峋

前言
最近《点燃我温暖你》中李峋的爱心代码超级火,看着特别心动,这不,光棍节快到了,给兄弟们教学一波爱心代码,赶在双十一前表白,让这个双十一不在是孤单一个人!

目录
SetConsoleTextAttribute(GetStdHandle(STD_OUTPUT_HANDLE),字体色)
C语言简易爱心代码
原理
心形线直角坐标式(x^2+y^2-1)^3=x^2*y^3
让a=x^2+y^2-1,那么a*a*a就是(x^2+y^2-1)^3,有数学定理易得(x^2+y^2-1)^3<=x^2*y^3是为心形线里面的部分包括心形线,那么只要满足(x^2+y^2-1)^3<=x^2*y^3就输出某个指定符号,不满足就输出空格,就可以获得由这个字符组成的爱心,下面我使用的是'v'当指定字符,用三目运算符判断是否满足(x^2+y^2-1)^3<=x^2*y^3,注意输出完一行要换行。
代码
- #include <stdio.h>
- int main() {
- for (float y = 2.0f; y > -2.0f; y -= 0.1f) {
- for (float x = -2.0f; x < 2.0f; x += 0.05f) {
- float a = x * x + y * y - 1;
- putchar(a * a * a - x * x * y * y * y <= 0.0f ? 'v' : ' ');
- }
- putchar('\n');
- }
- }
执行结果

C语言动态爱心代码
涉及知识点
SetConsoleTextAttribute(GetStdHandle(STD_OUTPUT_HANDLE),字体色)
SetConsoleTextAttribute()是Windows系统中一个可以设置控制台窗口字体颜色和背景色的计算机函数,常用的几种颜色:
0=黑色 1=蓝色 2=绿色 4=红色 3=湖蓝色 5=紫色 6=黄色 7=白色 8=灰色
sheep()
执行挂起一段时间
代码
- #include <stdio.h>
- #include <math.h>
- #include <windows.h>
- #include <tchar.h>
- float f(float x, float y, float z) {
- float a = x * x + 9.0f / 4.0f * y * y + z * z - 1;
- return a * a * a - x * x * z * z * z - 9.0f / 80.0f * y * y * z * z * z;
- }
- float h(float x, float z) {
- for (float y = 1.0f; y >= 0.0f; y -= 0.001f)
- if (f(x, y, z) <= 0.0f)
- return y;
- return 0.0f;
- }
- int main() {
- SetConsoleTextAttribute(GetStdHandle(STD_OUTPUT_HANDLE),
- 0xc);//SetConsoleTextAttribute()是Windows系统中一个可以设置控制台窗口字体颜色和背景色的计算机函数
- HANDLE o = GetStdHandle(STD_OUTPUT_HANDLE);// GetStdHandle()检索指定标准设备的句柄(标准输入、标准输出或标准错误)
- _TCHAR buffer[25][80] = { _T(' ') };
- _TCHAR ramp[] = _T("vvvvvvvv");
- int count = 0;
- int count1 = 0;
- for (float t = 0.0f;; t += 0.1f) {
- int sy = 0;
- float s = sinf(t);
- float a = s * s * s * s * 0.2f;
- for (float z = 1.3f; z > -1.2f; z -= 0.1f) {
- _TCHAR *p = &buffer[sy++][0];
- float tz = z * (1.2f - a);
- for (float x = -1.5f; x < 1.5f; x += 0.05f) {
- float tx = x * (1.2f + a);
- float v = f(tx, 0.0f, tz);
- if (v <= 0.0f) {
- float y0 = h(tx, tz);
- float ny = 0.01f;
- float nx = h(tx + ny, tz) - y0;
- float nz = h(tx, tz + ny) - y0;
- float nd = 1.0f / sqrtf(nx * nx + ny * ny + nz * nz);
- float d = (nx + ny - nz) * nd * 0.5f + 0.5f;
- *p++ = ramp[(int)(d * 5.0f)];
- } else
- *p++ = ' ';
- }
- }
- for (sy = 0; sy < 25; sy++) {
- COORD coord = { 0, sy };
- SetConsoleCursorPosition(o, coord);//作用是设置控制台(cmd)光标位置
- WriteConsole(o, buffer[sy], 79, NULL, 0);//从当前光标位置开始,将字符串写入控制台屏幕缓冲区
- }
- if (count <= 22) {
- printf("I Love You") ;//表白内容
- printf(" To CSDN");// 被表白者的名字
- count++;
- } else {
- printf("You Are My Best Lover.\n");
- count++;
- if (count >= 44) {
- count = 0;
- }
- }
- Sleep(36);//Sleep函数:执行挂起一段时间,也就是等待一段时间在继续执行
- }
- }
执行结果

Python简易爱心代码
准备工作
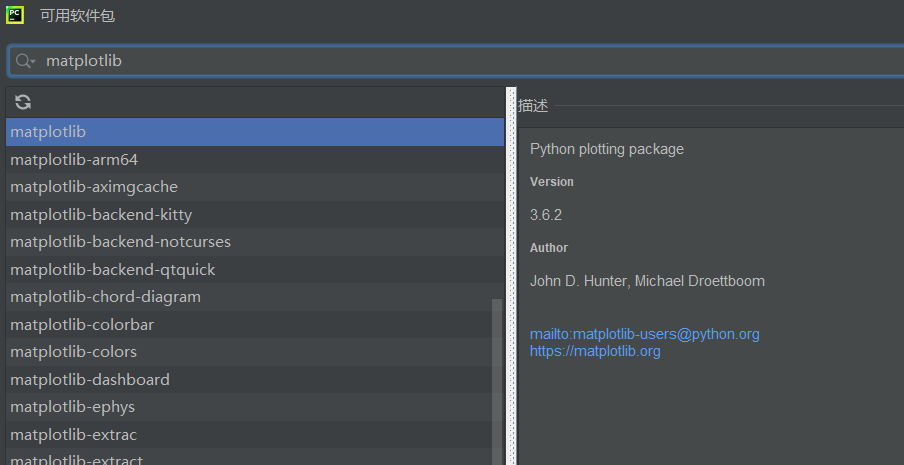
下载matplotlib软件包

涉及知识点
np.linspace()
用于返回指定区间等间隔的数组,例如np.linspace(0,2*np.pi)就是0到2π等间隔的数组
np.sin(θ)
对中θ元素取正弦值
np.cos(θ)
对中θ元素取余弦值
plt.plot()
是matplotlib.pyplot模块下的一个函数, 用于画图,它可以绘制点和线
plt.show()
展示图像
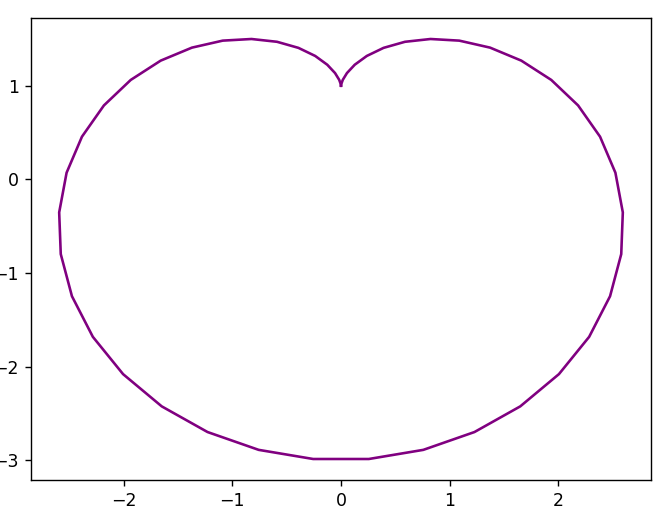
原理
原始的心形线的极坐标方程为r=a(1-cosθ)
与其对应的参数方程是:
x(θ)=2r(sinθ-(sin2θ)/2)
y(θ)= 2r(cosθ-(cos2θ)/2),(0<=θ<=2π)
代码
- import numpy as np
- import matplotlib.pyplot as plt
- t=np.linspace(0,2*np.pi)#用于返回指定区间等间隔的数组
- x=2*1*(np.cos(t)-np.cos(2*t)/2)
- y=2*1*(np.sin(t)-np.sin(2*t)/2)
- plt.plot(y,x,c='purple')#c=''控制颜色
- plt.show()
执行结果
Python动态爱心代码
这个也是最还原的,代码过长,下面仅展示爱心的基础函数,需要的朋友可以去《点燃我温暖你》中李峋的同款爱心代码-Python文档类资源-CSDN文库下载,我设置的是免费下载
代码
- x = 16 * (sin(t) ** 3)
- y = -(13 * cos(t) - 5 * cos(2 * t) - 2 * cos(3 * t) - cos(4 * t))
执行结果

HTML动态爱心代码
代码
由于代码过长,源码放在资源html网页做的动态爱心(超好看)-Javascript文档类资源-CSDN文库里,可以免费下载
执行结果

真表白使用的(不懂编程也能学会)
直达:💗
代码
- <!DOCTYPE html>
- <html>
- <head>
- <meta charset="utf-8" />
- <title>💗</title>
- <style>
- html,
- body {
- height: 100%;
- padding: 0;
- margin: 0;
- background: #000;
- }
- canvas {
- position: absolute;
- width: 100%;
- height: 100%;
- animation: anim 1.5s ease-in-out infinite;
- -webkit-animation: anim 1.5s ease-in-out infinite;
- -o-animation: anim 1.5s ease-in-out infinite;
- -moz-animation: anim 1.5s ease-in-out infinite;
- }
- #name {
- position: absolute;
- top: 50%;
- left: 50%;
- transform: translate(-50%, -50%);
- margin-top: -20px;
- font-size: 46px;
- color: #ea80b0;
- }
- @keyframes anim {
- 0% {
- transform: scale(0.8);
- }
- 25% {
- transform: scale(0.7);
- }
- 50% {
- transform: scale(1);
- }
- 75% {
- transform: scale(0.7);
- }
- 100% {
- transform: scale(0.8);
- }
- }
- @-webkit-keyframes anim {
- 0% {
- -webkit-transform: scale(0.8);
- }
- 25% {
- -webkit-transform: scale(0.7);
- }
- 50% {
- -webkit-transform: scale(1);
- }
- 75% {
- -webkit-transform: scale(0.7);
- }
- 100% {
- -webkit-transform: scale(0.8);
- }
- }
- @-o-keyframes anim {
- 0% {
- -o-transform: scale(0.8);
- }
- 25% {
- -o-transform: scale(0.7);
- }
- 50% {
- -o-transform: scale(1);
- }
- 75% {
- -o-transform: scale(0.7);
- }
- 100% {
- -o-transform: scale(0.8);
- }
- }
- @-moz-keyframes anim {
- 0% {
- -moz-transform: scale(0.8);
- }
- 25% {
- -moz-transform: scale(0.7);
- }
- 50% {
- -moz-transform: scale(1);
- }
- 75% {
- -moz-transform: scale(0.7);
- }
- 100% {
- -moz-transform: scale(0.8);
- }
- }
- </style>
- </head>
- <body>
- <canvas id="pinkboard"></canvas>
- <!-- 在下面加名字 -->
- <div id="name" style="color: blue;">CSDN</div>
- <script>
- var settings = {
- particles: {
- length: 500,
- duration: 2,
- velocity: 100,
- effect: -0.75,
- size: 30,
- },
- };
- (function () {
- var b = 0;
- var c = ["ms", "moz", "webkit", "o"];
- for (var a = 0; a < c.length && !window.requestAnimationFrame; ++a) {
- window.requestAnimationFrame = window[c[a] + "RequestAnimationFrame"];
- window.cancelAnimationFrame =
- window[c[a] + "CancelAnimationFrame"] ||
- window[c[a] + "CancelRequestAnimationFrame"];
- }
- if (!window.requestAnimationFrame) {
- window.requestAnimationFrame = function (h, e) {
- var d = new Date().getTime();
- var f = Math.max(0, 16 - (d - b));
- var g = window.setTimeout(function () {
- h(d + f);
- }, f);
- b = d + f;
- return g;
- };
- }
- if (!window.cancelAnimationFrame) {
- window.cancelAnimationFrame = function (d) {
- clearTimeout(d);
- };
- }
- })();
- var Point = (function () {
- function Point(x, y) {
- this.x = typeof x !== "undefined" ? x : 0;
- this.y = typeof y !== "undefined" ? y : 0;
- }
- Point.prototype.clone = function () {
- return new Point(this.x, this.y);
- };
- Point.prototype.length = function (length) {
- if (typeof length == "undefined")
- return Math.sqrt(this.x * this.x + this.y * this.y);
- this.normalize();
- this.x *= length;
- this.y *= length;
- return this;
- };
- Point.prototype.normalize = function () {
- var length = this.length();
- this.x /= length;
- this.y /= length;
- return this;
- };
- return Point;
- })();
- var Particle = (function () {
- function Particle() {
- this.position = new Point();
- this.velocity = new Point();
- this.acceleration = new Point();
- this.age = 0;
- }
- Particle.prototype.initialize = function (x, y, dx, dy) {
- this.position.x = x;
- this.position.y = y;
- this.velocity.x = dx;
- this.velocity.y = dy;
- this.acceleration.x = dx * settings.particles.effect;
- this.acceleration.y = dy * settings.particles.effect;
- this.age = 0;
- };
- Particle.prototype.update = function (deltaTime) {
- this.position.x += this.velocity.x * deltaTime;
- this.position.y += this.velocity.y * deltaTime;
- this.velocity.x += this.acceleration.x * deltaTime;
- this.velocity.y += this.acceleration.y * deltaTime;
- this.age += deltaTime;
- };
- Particle.prototype.draw = function (context, image) {
- function ease(t) {
- return --t * t * t + 1;
- }
- var size = image.width * ease(this.age / settings.particles.duration);
- context.globalAlpha = 1 - this.age / settings.particles.duration;
- context.drawImage(
- image,
- this.position.x - size / 2,
- this.position.y - size / 2,
- size,
- size
- );
- };
- return Particle;
- })();
- var ParticlePool = (function () {
- var particles,
- firstActive = 0,
- firstFree = 0,
- duration = settings.particles.duration;
- function ParticlePool(length) {
- particles = new Array(length);
- for (var i = 0; i < particles.length; i++)
- particles[i] = new Particle();
- }
- ParticlePool.prototype.add = function (x, y, dx, dy) {
- particles[firstFree].initialize(x, y, dx, dy);
- firstFree++;
- if (firstFree == particles.length) firstFree = 0;
- if (firstActive == firstFree) firstActive++;
- if (firstActive == particles.length) firstActive = 0;
- };
- ParticlePool.prototype.update = function (deltaTime) {
- var i;
- if (firstActive < firstFree) {
- for (i = firstActive; i < firstFree; i++)
- particles[i].update(deltaTime);
- }
- if (firstFree < firstActive) {
- for (i = firstActive; i < particles.length; i++)
- particles[i].update(deltaTime);
- for (i = 0; i < firstFree; i++) particles[i].update(deltaTime);
- }
- while (
- particles[firstActive].age >= duration &&
- firstActive != firstFree
- ) {
- firstActive++;
- if (firstActive == particles.length) firstActive = 0;
- }
- };
- ParticlePool.prototype.draw = function (context, image) {
- if (firstActive < firstFree) {
- for (i = firstActive; i < firstFree; i++)
- particles[i].draw(context, image);
- }
- if (firstFree < firstActive) {
- for (i = firstActive; i < particles.length; i++)
- particles[i].draw(context, image);
- for (i = 0; i < firstFree; i++) particles[i].draw(context, image);
- }
- };
- return ParticlePool;
- })();
- (function (canvas) {
- var context = canvas.getContext("2d"),
- particles = new ParticlePool(settings.particles.length),
- particleRate =
- settings.particles.length / settings.particles.duration,
- time;
- function pointOnHeart(t) {
- return new Point(
- 160 * Math.pow(Math.sin(t), 3),
- 130 * Math.cos(t) -
- 50 * Math.cos(2 * t) -
- 20 * Math.cos(3 * t) -
- 10 * Math.cos(4 * t) +
- 25
- );
- }
- var image = (function () {
- var canvas = document.createElement("canvas"),
- context = canvas.getContext("2d");
- canvas.width = settings.particles.size;
- canvas.height = settings.particles.size;
- function to(t) {
- var point = pointOnHeart(t);
- point.x =
- settings.particles.size / 2 +
- (point.x * settings.particles.size) / 350;
- point.y =
- settings.particles.size / 2 -
- (point.y * settings.particles.size) / 350;
- return point;
- }
- context.beginPath();
- var t = -Math.PI;
- var point = to(t);
- context.moveTo(point.x, point.y);
- while (t < Math.PI) {
- t += 0.01;
- point = to(t);
- context.lineTo(point.x, point.y);
- }
- context.closePath();
- context.fillStyle = "#ea80b0";
- context.fill();
- var image = new Image();
- image.src = canvas.toDataURL();
- return image;
- })();
- function render() {
- requestAnimationFrame(render);
- var newTime = new Date().getTime() / 1000,
- deltaTime = newTime - (time || newTime);
- time = newTime;
- context.clearRect(0, 0, canvas.width, canvas.height);
- var amount = particleRate * deltaTime;
- for (var i = 0; i < amount; i++) {
- var pos = pointOnHeart(Math.PI - 2 * Math.PI * Math.random());
- var dir = pos.clone().length(settings.particles.velocity);
- particles.add(
- canvas.width / 2 + pos.x,
- canvas.height / 2 - pos.y,
- dir.x,
- -dir.y
- );
- }
- particles.update(deltaTime);
- particles.draw(context, image);
- }
- function onResize() {
- canvas.width = canvas.clientWidth;
- canvas.height = canvas.clientHeight;
- }
- window.onresize = onResize;
- setTimeout(function () {
- onResize();
- render();
- }, 10);
- })(document.getElementById("pinkboard"));
- </script>
- </body>
- </html>
首先建一个txt文件
打开将代码粘进去并保存
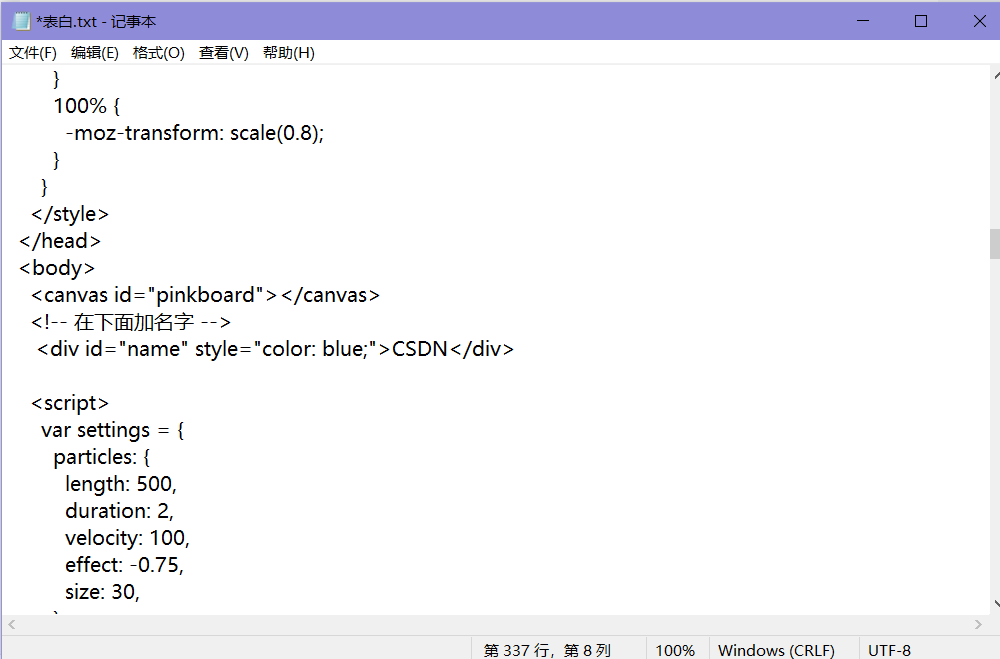
找到
这里加你想要加的文字如果你想要修改文字颜色的话,将上面的blue修改为你想要的颜色
然后保存退出,将文件名修改为表白.html,回车双击
如果修改完文件名还是代码就看看文件>查看>文件拓展名选了没
 效果图
效果图
彩蛋-红色炫酷爱心
链接
直达:💗
效果图

👍+✏️+⭐️是对博主最大的鼓励与支持!!!
-
相关阅读:
Java基础知识点
js 轮播图 (原生)
实验九—基本统计分析(二)
VINS学习(二)IMU预积分原理与实现
Web前端开发技术课程大作业——南京旅游景点介绍网页代码html+css+javascript
Pytorch模型训练实用教程学习笔记:四、优化器与学习率调整
springCloud在pom中快速修改运行环境,让配置不再繁琐
java并发编程:LinkedBlockingQueue详解
Mysql——三、SQL语句(上篇)
机器学习各个算法的优缺点!(下篇) 建议收藏。
- 原文地址:https://blog.csdn.net/m0_67388084/article/details/127728441
