-
docker-compose 微服务编排部署
docker-compose 微服务编排部署
记录一次docker微服务编排部署经历!
打jar包
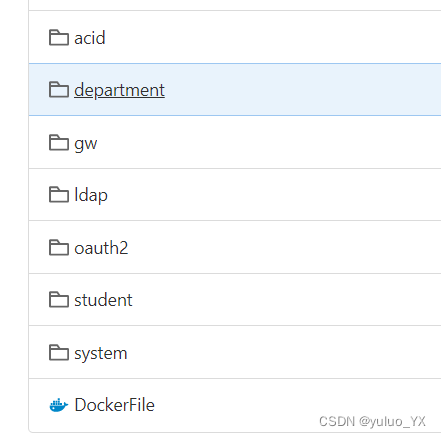
代码结构
在微服务种,我们一般采用的是多模块开发的方式,代码架构如下
|--cloud |---commons.ldxy.edu.cn |-----普通spring boot项目结构 |---data.ldxy.edu.cn |-----…… |---api.ldxy.edu.cn |-----…… |---docker |-----之后详述 |---service.student.ldxy.edu.cn |-----…… |---service.oauth2.ldxy.edu.cn |----- …… |---service.gateway.ldxy.ed.cn |-----…… |---service.ldap.ldxy.edu.cn |----…… |---service.system.ldxy.edu.cn |-----…… |--pom.xml |--LICENCE |--README.md- 1
- 2
- 3
- 4
- 5
- 6
- 7
- 8
- 9
- 10
- 11
- 12
- 13
- 14
- 15
- 16
- 17
- 18
- 19
- 20
- 21
- 22

需要注意的问题
-
在微服务打包的时候,是不需要打包公共模块,也不需要生成可执行的jar包。maven会一起打包进依赖中。
-
打jar包时如果出现缺少主类等情况,没有主清单属性等,一般是加入了spring-boot-plugin的的打包插件,这个插件会在maven打包之后进行二次打包,用以生成可执行的jar包文件,然而在一些公共的模块中是不需要打包的,此时我们就需要在commons,data,api中去除这个依赖。在需要启动的jar包中加入此插件之后再进行打包。
<build> <plugins> <plugin> <groupId>org.springframework.bootgroupId> <artifactId>spring-boot-maven-pluginartifactId> plugin> plugins> build>- 1
- 2
- 3
- 4
- 5
- 6
- 7
- 8
-
公共模块打包完成之后,出现找不到符号的情况,此时需要在root模块管理中点击
install安装一下模块,在继续打包,即可完成。 -
打包之后把jar包更名为app.jar放到docker的apps下面对应的目录中
-
打完jar包之后,先本地运行jar包测试,没问题之后再上传到docker的apps文件夹下。避免线上环境部署时出错
编写docker容器配置
编写docker-compose需要运行的脚本文件。
目录结构
文件目录结构如下:
|--docker |----apps |-----oauth2 |-------app.jar |-------application-docker.yml |-----……(其他模块) |-----DockerFile |----nacos |-------docker-compose.yml |----nginx |-------ssl |-------default.conf |-------docker-compose.yml |----mysql/mongodb |-------init |-------docker-compose.yml |---.env |---.gitignore |---docker-compose.yml- 1
- 2
- 3
- 4
- 5
- 6
- 7
- 8
- 9
- 10
- 11
- 12
- 13
- 14
- 15
- 16
- 17
- 18
- 19
目录作用
-
apps
放置jar包和applcaition-docker.yml文件,DockerFile:docker环境配置文件
-
nacos
nacos下面放置nacos的docker-compose.yml文件
-
nginx
ssl存放ssl证书,nginx的docker-compose.yml文件,default.conf是nginx的配置文件
-
mongodb/mysql
存放数据库的docker-compose.yml文件,init存放数据库初始化脚本文件。
-
.env
存放各个微服务的配置信息
DOCKERFILE=./apps/DockerFile APP_HOME=/service/ldxy-cloud-platform # 镜像前缀和容器名称前缀 DOCKER_PREFIX=ldxy_cloud_platform # 定位每个服务的位置 # 目录下要包含一个app.jar和一个config文件夹,config文件夹中放application-docker.yml或application-docker.properties SYSTEM_SERVICE=./apps/system SYSTEM_SERVICE_PORT=10030 STUDENT_SERVICE=./apps/student STUDENT_SERVICE_PORT=9030 OAUTH2_SERVICE=./apps/oauth2 OAUTH2_SERVICE_PORT=9015 LDAP_SERVICE=./apps/ldap LDAP_SERVICE_PORT=10020 GW_SERVICE=./apps/gw GW_SERVICE_PORT=9010 DEPARTMENT_SERVICE=./apps/department DEPARTMENT_SERVICE_PORT=9011 ACID_SERVICE=./apps/acid ACID_SERVICE_PORT=10010- 1
- 2
- 3
- 4
- 5
- 6
- 7
- 8
- 9
- 10
- 11
- 12
- 13
- 14
- 15
- 16
- 17
- 18
- 19
- 20
- 21
- 22
- 23
- 24
- 25
- 26
- 27
- 28
-
.gitignore
设置上传时需要忽略文件
**/logs **/*.jar mongo/data nginx/html/**- 1
- 2
- 3
- 4
-
docker-compose.yml
docker-compose启动文件
version: '3' # 除了80端口是浏览器访问的,其他的端口都是容器所在的内部网络开放 # 不用映射其他端口出来,如果需要外部访问数据库的话,可以把27017映射到主机的其他端口上面来 services: # captcha: # image: ${DOCKER_PREFIX}-service-captcha # build: # dockerfile: ${DOCKERFILE} # context: . # args: # APP_HOME: ${APP_HOME} # container_name: ${DOCKER_PREFIX}-service-captcha # restart: always # environment: # - SERVER_PORT=${CAPTCHA_SERVICE_PORT} # - NACOS_ADDR=${NACOS_ADDR} # volumes: # - ${CAPTCHA_SERVICE}:${APP_HOME} # 将jar包映射进来 # - ./files:/usr/app/files # 上传的静态文件映射到nginx下面去 # - ./apps/logs:/usr/app/logs # 将springboot应用的日志映射出来 # - /etc/localtime:/etc/localtime # expose: # - ${CAPTCHA_SERVICE_PORT} # # ports: # # - ${CAPTCHA_SERVICE_PORT}:${CAPTCHA_SERVICE_PORT} # # depends_on: # # - db # networks: # - hqf # extra_hosts: # - mongodb.hqfang.com.cn:${MONGO_DB_IP} system-service: image: ${DOCKER_PREFIX}-service-system build: dockerfile: ${DOCKERFILE} context: . args: APP_HOME: ${APP_HOME} container_name: ${DOCKER_PREFIX}-service-system restart: always environment: - SERVER_PORT=${SYSTEM_SERVICE_PORT} volumes: - ${SYSTEM_SERVICE}:${APP_HOME} # 将jar包映射进来 - ./apps/logs:/service/ldxy-cloud-platform/logs # 将springboot应用的日志映射出来 - /etc/localtime:/etc/localtime expose: - ${SYSTEM_SERVICE_PORT} # ports: # - ${CUSTOMER_SERVICE_PORT}:${CUSTOMER_SERVICE_PORT} # depends_on: # - db networks: - nginx student-service: image: ${DOCKER_PREFIX}-service-student build: dockerfile: ${DOCKERFILE} context: . args: APP_HOME: ${APP_HOME} container_name: ${DOCKER_PREFIX}-service-student restart: always environment: - SERVER_PORT=${STUDENT_SERVICE_PORT} volumes: - ${STUDENT_SERVICE}:${APP_HOME} # 将jar包映射进来 - ./apps/logs:/service/ldxy-cloud-platform/logs # 将springboot应用的日志映射出来 - /etc/localtime:/etc/localtime expose: - ${STUDENT_SERVICE_PORT} networks: - nginx oauth2-service: image: ${DOCKER_PREFIX}-service-oauth2 build: dockerfile: ${DOCKERFILE} context: . args: APP_HOME: ${APP_HOME} container_name: ${DOCKER_PREFIX}-service-oauth2 restart: always environment: - SERVER_PORT=${OAUTH2_SERVICE_PORT} volumes: - ${OAUTH2_SERVICE}:${APP_HOME} # 将jar包映射进来 - ./apps/logs:/service/ldxy-cloud-platform/logs # 将springboot应用的日志映射出来 - /etc/localtime:/etc/localtime expose: - ${OAUTH2_SERVICE_PORT} networks: - nginx gw-service: image: ${DOCKER_PREFIX}-service-gw build: dockerfile: ${DOCKERFILE} context: . args: APP_HOME: ${APP_HOME} container_name: ${DOCKER_PREFIX}-service-gw restart: always environment: - SERVER_PORT=${GW_SERVICE_PORT} volumes: - ${GW_SERVICE}:${APP_HOME} # 将jar包映射进来 - ./apps/logs:/service/ldxy-cloud-platform/logs # 将springboot应用的日志映射出来 - /etc/localtime:/etc/localtime expose: - ${GW_SERVICE_PORT} ports: - ${GW_SERVICE_PORT}:${GW_SERVICE_PORT} # depends_on: # - db networks: - nginx ldap-service: image: ${DOCKER_PREFIX}-service-ldap build: dockerfile: ${DOCKERFILE} context: . args: APP_HOME: ${APP_HOME} container_name: ${DOCKER_PREFIX}-service-ldap restart: always environment: - SERVER_PORT=${LDAP_SERVICE_PORT} volumes: - ${LDAP_SERVICE}:${APP_HOME} # 将jar包映射进来 - ./apps/logs:/service/ldxy-cloud-platform/logs # 将springboot应用的日志映射出来 - /etc/localtime:/etc/localtime expose: - ${LDAP_SERVICE_PORT} networks: - nginx # api-service: # image: ${DOCKER_PREFIX}-service-api # build: # dockerfile: ${DOCKERFILE} # context: . # args: # APP_HOME: ${APP_HOME} # container_name: ${DOCKER_PREFIX}-service-api # restart: always # environment: # - SERVER_PORT=${API_SERVICE_PORT} # volumes: # - ${API_SERVICE}:${APP_HOME} # 将jar包映射进来 # - ./apps/logs:/service/ldxy-cloud-platform/logs # 将springboot应用的日志映射出来 # - /etc/localtime:/etc/localtime # expose: # - ${API_SERVICE_PORT} # networks: # - nginx acid-service: image: ${DOCKER_PREFIX}-service-acid build: dockerfile: ${DOCKERFILE} context: . args: APP_HOME: ${APP_HOME} container_name: ${DOCKER_PREFIX}-service-acid restart: always environment: - SERVER_PORT=${ACID_SERVICE_PORT} volumes: - ${ACID_SERVICE}:${APP_HOME} # 将jar包映射进来 - ./apps/logs:/service/ldxy-cloud-platform/logs # 将springboot应用的日志映射出来 - /etc/localtime:/etc/localtime expose: - ${ACID_SERVICE_PORT} networks: - nginx # data-service: # image: ${DOCKER_PREFIX}-service-data # build: # dockerfile: ${DOCKERFILE} # context: . # args: # APP_HOME: ${APP_HOME} # container_name: ${DOCKER_PREFIX}-service-data # restart: always # environment: # - SERVER_PORT=${DATA_SERVICE_PORT} # volumes: # - ${DATA_SERVICE}:${APP_HOME} # 将jar包映射进来 # - ./apps/logs:/service/ldxy-cloud-platform/logs # 将springboot应用的日志映射出来 # - /etc/localtime:/etc/localtime # expose: # - ${DATA_SERVICE_PORT} # networks: # - nginx # commons-service: # image: ${DOCKER_PREFIX}-service-commons # build: # dockerfile: ${DOCKERFILE} # context: . # args: # APP_HOME: ${APP_HOME} # container_name: ${DOCKER_PREFIX}-service-commons # restart: always # environment: # - SERVER_PORT=${COMMONS_SERVICE_PORT} # volumes: # - ${COMMONS_SERVICE}:${APP_HOME} # 将jar包映射进来 # - ./apps/logs:/service/ldxy-cloud-platform/logs # 将springboot应用的日志映射出来 # - /etc/localtime:/etc/localtime # expose: # - ${COMMONS_SERVICE_PORT} # networks: # - nginx # nginx: # image: nginx # container_name: ${DOCKER_PREFIX}-nginx # restart: always # volumes: # # - ./docker/nginx/conf/proxy.conf:/etc/nginx/proxy.conf # # - ./docker/nginx/conf/nginx.conf:/etc/nginx/nginx.conf # - ./nginx/conf/conf.d:/etc/nginx/conf.d # 里面的default.conf是nginx的配置 # - ./nginx/html:/usr/share/nginx/html # 前端的页面放在这里 # - ./nginx/logs:/var/log/nginx # 把log映射出来 # - ./files:/usr/share/nginx/files # 上传的所有静态文件都在这里 # ports: # - 443:443 # depends_on: # - gw-service # networks: # - nginx networks: nginx: external: true- 1
- 2
- 3
- 4
- 5
- 6
- 7
- 8
- 9
- 10
- 11
- 12
- 13
- 14
- 15
- 16
- 17
- 18
- 19
- 20
- 21
- 22
- 23
- 24
- 25
- 26
- 27
- 28
- 29
- 30
- 31
- 32
- 33
- 34
- 35
- 36
- 37
- 38
- 39
- 40
- 41
- 42
- 43
- 44
- 45
- 46
- 47
- 48
- 49
- 50
- 51
- 52
- 53
- 54
- 55
- 56
- 57
- 58
- 59
- 60
- 61
- 62
- 63
- 64
- 65
- 66
- 67
- 68
- 69
- 70
- 71
- 72
- 73
- 74
- 75
- 76
- 77
- 78
- 79
- 80
- 81
- 82
- 83
- 84
- 85
- 86
- 87
- 88
- 89
- 90
- 91
- 92
- 93
- 94
- 95
- 96
- 97
- 98
- 99
- 100
- 101
- 102
- 103
- 104
- 105
- 106
- 107
- 108
- 109
- 110
- 111
- 112
- 113
- 114
- 115
- 116
- 117
- 118
- 119
- 120
- 121
- 122
- 123
- 124
- 125
- 126
- 127
- 128
- 129
- 130
- 131
- 132
- 133
- 134
- 135
- 136
- 137
- 138
- 139
- 140
- 141
- 142
- 143
- 144
- 145
- 146
- 147
- 148
- 149
- 150
- 151
- 152
- 153
- 154
- 155
- 156
- 157
- 158
- 159
- 160
- 161
- 162
- 163
- 164
- 165
- 166
- 167
- 168
- 169
- 170
- 171
- 172
- 173
- 174
- 175
- 176
- 177
- 178
- 179
- 180
- 181
- 182
- 183
- 184
- 185
- 186
- 187
- 188
- 189
- 190
- 191
- 192
- 193
- 194
- 195
- 196
- 197
- 198
- 199
- 200
- 201
- 202
- 203
- 204
- 205
- 206
- 207
- 208
- 209
- 210
- 211
- 212
- 213
- 214
- 215
- 216
- 217
- 218
- 219
- 220
- 221
- 222
- 223
- 224
- 225
- 226
- 227
- 228
- 229
- 230
- 231
- 232
- 233
- 234
- 235
- 236
- 237
- 238
- 239
- 240
- 241
- 242
- 243
编写配置文件时需要注意的问题
-
application-docker.yml文件的编写:
server: port: ${DEPARTMENT_SERVICE_PORT=9011} logging: file: name: /usr/app/logs/department-service.log pattern: dateformat: yyyy-MM-dd HH:mm:ss.SSS,GMT+8 spring: cloud: nacos: discovery: server-addr: **** namespace: **** group: **** data: mongodb: uri: **** authentication-database: **** database: **** # redis用的是docker容器中的redis redis: database: 0 host: **** port: **** password: ****- 1
- 2
- 3
- 4
- 5
- 6
- 7
- 8
- 9
- 10
- 11
- 12
- 13
- 14
- 15
- 16
- 17
- 18
- 19
- 20
- 21
- 22
- 23
- 24
- 25
- 26
- 27
- 28
- 29
- 如果在不同容器中部署,不需要声明端口,网关会自己寻找对应的服务
- 使用nginx代理的时候,要确保各个容器在和nginx相同的网络下。才能被正确代理
- .env文件就是类似于环境变量的配置
- 如果不需要使用ngingx,依赖于其他服务器的nginx或者数据库服务、nacos服务等,可以不用单独编写nginx和nacos的docker文件
- 结合实时场景,根据自己的需求分析去实践。
安装docker及docker-compose
docker安装
部署在linux系统时,使用的是centos。在线上测试时出现了网络不通的问题,后来经排查是docker版本太低的原因,不要使用yum源安装,要查阅官方文档!
centos安装docker地址:https://docs.docker.com/engine/install/centos/
ubuntu安装docker地址:https://docs.docker.com/engine/install/ubuntu/
安装完成之后使用
docker version查看自己安装的docker版本。一定不能太低,完成之后可以将docker的镜像源换成国内源,加快下载镜像的速度。docker-compose安装
本文介绍shell的安装方式,更多方式查看官方文档:https://docs.docker.com/compose/install/
sudo curl -L https://github.com/docker/compose/releases/download/1.16.1/docker-compose-`uname -s`-`uname -m` -o /usr/local/bin/docker-compose- 1
为安装脚本添加权限
chmod +x /usr/local/bin/docker-compose- 1
执行完之后,可以使用
docker-compose --version- 1
查看安装是否成功
nginx代理
nginx部署的时候使用的是nginxproxymanager,提供图形化界面,配置简单。作为新手来说。不推荐使用此种方式,不能更好的了解底层nginx配置文件的书写方式和细节。
前端代理部署的时候,需要在nginx的配置文件中声明路径位置
location /acid/ { alias /data/acid/dist/; index index.html; }- 1
- 2
- 3
- 4
需要注意的问题
-
nginx是运维系统,不能暴露在公网下,只能在内网访问。
-
如果使用docker部署nginx和其他微服务,需要docker容器和ngin容器在同一个网络下,ngingx才能代理网关服务。
关于npm,自行查阅资料
运行测试
确保docker容器运行无误之后,访问nginx的静态路径位置登录前端服务即可!
-
相关阅读:
【云原生】一文带你搞懂Docker容器的核心基石Cgroups
C51单片机使用1-工程创建和Led闪烁灯
Learning with Mini-Batch
人事管理系统
3.spring admin和sentinel
LeetCode【128】最长连续序列
Python入门自学进阶-Web框架——27、DjangoAdmin项目应用-数据记录操作2
设计模式之命令模式
电脑怎么安装xp系统原版镜像
基于FPGA的图像白平衡算法实现,包括tb测试文件和MATLAB辅助验证
- 原文地址:https://blog.csdn.net/qq_52397471/article/details/127714624
