-
Metersphere本地环境部署---非微服务版本
Metersphere本地环境部署—非微服务版本+图片定制化
JDK
下面是我的jdk版本

nodejs版本
安装node-v16.12.0,不要安装太高的,我尝试了三个版本,这个版本亲测可用
下载地址
选择对应的版本后,下载msi格式即可

然后安装,如果你之前安装过其他的版本,那需要先卸载再安装,重启一下电脑下载
为什么单独拿出来说,因为自从V2.3.0版本之后,就成了微服务模式了,但是我又不会,所以选择了下载老版本的V2.2.1
这是他的git地址
git
下载命令git clone -b v2.2.1 https://github.com/metersphere/metersphere.git- 1
maven配置文件
可以参考我这个
<settings xmlns="http://maven.apache.org/SETTINGS/1.2.0" xmlns:xsi="http://www.w3.org/2001/XMLSchema-instance" xsi:schemaLocation="http://maven.apache.org/SETTINGS/1.2.0 https://maven.apache.org/xsd/settings-1.2.0.xsd"> <localRepository>C:\\Program Files\\maven_repositorylocalRepository> <pluginGroups> pluginGroups> <proxies> proxies> <servers> servers> <mirrors> <mirror> <id>nexus-aliyunid> <mirrorOf>centralmirrorOf> <name>Nexus aliyunname> <url>http://maven.aliyun.com/nexus/content/groups/public/url> mirror> <mirror> <id>alimavenid> <mirrorOf>centralmirrorOf> <name>aliyun mavenname> <url>http://maven.aliyun.com/nexus/content/repositories/central/url> mirror> <mirror> <id>repo1id> <mirrorOf>centralmirrorOf> <name>Human Readable Name for this Mirror.name> <url>http://repo1.maven.org/maven2/url> mirror> <mirror> <id>repo2id> <mirrorOf>centralmirrorOf> <name>Human Readable Name for this Mirror.name> <url>http://repo2.maven.org/maven2/url> mirror> mirrors> <profiles> profiles> settings>- 1
- 2
- 3
- 4
- 5
- 6
- 7
- 8
- 9
- 10
- 11
- 12
- 13
- 14
- 15
- 16
- 17
- 18
- 19
- 20
- 21
- 22
- 23
- 24
- 25
- 26
- 27
- 28
- 29
- 30
- 31
- 32
- 33
- 34
- 35
- 36
- 37
- 38
- 39
- 40
- 41
- 42
- 43
- 44
- 45
- 46
- 47
- 48
- 49
- 50
- 51
- 52
- 53
- 54
- 55
- 56
- 57
- 58
- 59
- 60
- 61
- 62
- 63
- 64
- 65
- 66
- 67
- 68
- 69
- 70
- 71
- 72
- 73
- 74
- 75
- 76
- 77
- 78
- 79
- 80
- 81
- 82
- 83
- 84
- 85
- 86
- 87
- 88
- 89
- 90
- 91
- 92
- 93
- 94
- 95
- 96
- 97
- 98
- 99
- 100
- 101
- 102
- 103
- 104
- 105
- 106
- 107
- 108
- 109
- 110
- 111
- 112
- 113
- 114
- 115
- 116
- 117
- 118
- 119
- 120
- 121
- 122
- 123
- 124
- 125
- 126
- 127
- 128
- 129
- 130
- 131
- 132
- 133
- 134
- 135
- 136
- 137
- 138
- 139
- 140
- 141
- 142
- 143
- 144
- 145
- 146
- 147
- 148
- 149
- 150
- 151
- 152
- 153
- 154
- 155
- 156
- 157
- 158
- 159
- 160
- 161
- 162
- 163
- 164
- 165
- 166
- 167
- 168
- 169
- 170
- 171
- 172
- 173
- 174
- 175
- 176
- 177
- 178
- 179
- 180
- 181
- 182
- 183
- 184
- 185
- 186
- 187
- 188
- 189
- 190
- 191
- 192
- 193
- 194
- 195
- 196
- 197
- 198
- 199
- 200
- 201
- 202
- 203
- 204
- 205
- 206
- 207
- 208
- 209
- 210
- 211
- 212
- 213
- 214
- 215
- 216
- 217
- 218
- 219
- 220
- 221
- 222
- 223
- 224
- 225
- 226
- 227
- 228
- 229
- 230
- 231
- 232
- 233
- 234
- 235
- 236
- 237
- 238
- 239
- 240
- 241
- 242
- 243
- 244
- 245
- 246
- 247
- 248
- 249
- 250
- 251
- 252
- 253
- 254
- 255
- 256
- 257
- 258
- 259
- 260
- 261
- 262
- 263
- 264
- 265
- 266
- 267
- 268
- 269
- 270
- 271
- 272
- 273
- 274
- 275
- 276
- 277
- 278
- 279
- 280
- 281
- 282
- 283
- 284
- 285
- 286
- 287
- 288
环境配置准备工作
安装mysql、redis、kafka、zookeeper在linux的安装,可以看我其他的博客
mysql
安装的话看我的另一篇博客
linux安装mysql
配置的修改,我们根据官方的手册来修改
官方手册[root@MeterSphere ~]$vi /etc/my.cnf- 1
将如下内容复制到文件中保存,default-storage-engine=INNODB 这个配置由于我的mysql本来就是这样的,所以就没复制
lower_case_table_names=1 table_open_cache=128 max_connections=2000 max_connect_errors=6000 innodb_file_per_table=1 innodb_buffer_pool_size=1G max_allowed_packet=64M transaction_isolation=READ-COMMITTED innodb_flush_method=O_DIRECT innodb_lock_wait_timeout=1800 innodb_flush_log_at_trx_commit=0 sync_binlog=0 server-id=1 log-bin=mysql-bin expire_logs_days = 2 binlog_format=mixed sql_mode=STRICT_TRANS_TABLES,NO_ZERO_IN_DATE,NO_ZERO_DATE,ERROR_FOR_DIVISION_BY_ZERO,NO_AUTO_CREATE_USER,NO_ENGINE_SUBSTITUTION skip-name-resolve- 1
- 2
- 3
- 4
- 5
- 6
- 7
- 8
- 9
- 10
- 11
- 12
- 13
- 14
- 15
- 16
- 17
- 18
- 19
- 20
然后重启mysql服务
systemctl restart mysqld- 1
然后我们连接上这个mysql,我在本地用的是DataGrip,执行sql
CREATE DATABASE `metersphere_dev` /*!40100 DEFAULT CHARACTER SET utf8mb4 */- 1

jmeter-core下载打包
然后下载jmeter-core,需要先去github上下载对应版本的,比如说我的metersphere版本是v2.2.1,那jmeter-core也下载相同版本的
git clone -b v2.2.1 https://github.com/metersphere/ms-jmeter-core.git- 1
下载好之后
mvn clean install- 1
core的org.apache.maven.plugins爆红不用管,也可以打包成功

生成了对应的jar包如果你不先打包jmeter-core,就会报下面这些错误
[ERROR] Failed to execute goal on project sdk: Could not resolve dependencies for project io.metersphere:sdk:jar:main: io.metersphere:ms-jmeter-core:jar:main was not found in https://maven.aliyun.com/repository/public during a previ ous attempt. This failure was cached in the local repository and resolution is not reattempted until the update interval of aliyunmaven has elapsed or updates are forced -> [Help 1]- 1
- 2

[ERROR] Failed to execute goal on project sdk: Could not resolve dependencies for project io.metersphere:sdk:jar:main: Could not find artifact io.metersphere:ms-jmeter-core:jar:main in nexus-aliyun (http://maven.aliyun.com/nexus/con tent/groups/public) -> [Help 1]- 1
- 2

前端准备工作
其实前端准备工作完全可以只做一项,那就是直接将build和build-win这两个指令的内容互换。因为直接在metersphere的主路径下面就可以用mvn clean install命令,为前端代码及后端代码下载依赖并打包。

先进入前端代码目录,然后下载对应的前端依赖,最后打包D:\metersphere> cd .\frontend\ D:\metersphere\frontend> npm install PS D:\metersphere\frontend> npm run build-win- 1
- 2
- 3
打包的命令,取决于你电脑的系统
如果你的是windows的,那就用:npm run build-win
如果你的是mac或者linux的,那就用: npm run build
我的推荐是如果你用windows的话,直接将build和build-win这两个指令的内容互换。
原因是export命令在windows上是没有的,但是可以用set命令来代替
配置文件目录
jmeter.home

比如说我的metersphere下载到了D盘,那直接在D盘新建这个目录即可

把整个目录复制到/opt/jmeter下

metersphere.properties

和jmeter的配置文件一样,我们需要新建对应目录,然后新建一个metersphere.properties文件,内容为
官方文档


并将内容修改为你自己项目的配置自动建表
由于我的表是由于之前搭建过spring-cloud版本的,没有完全搭建成功,但是表建立成功了,所以这里抄了一部分其他人的
flyway enable(第一次可以用true用来自动建表,之后最好手工升级,要不然每次启动要跑很久)
spring.flyway.enabled=false但是吧,我这里一直是true没改过,也没问题

尝试启动后端项目
首先通过mvn clean install打包后端项目

会构建失败,是因为使用了xpack,收费的,咱们没有
把爆红的行数全部注释掉即可
再次mvn claen install
然后就打包成功了,但是我们看右边,ms-jmeter-core还是没有

主要集中有下面几个问题
我们先不管,直接启动项目

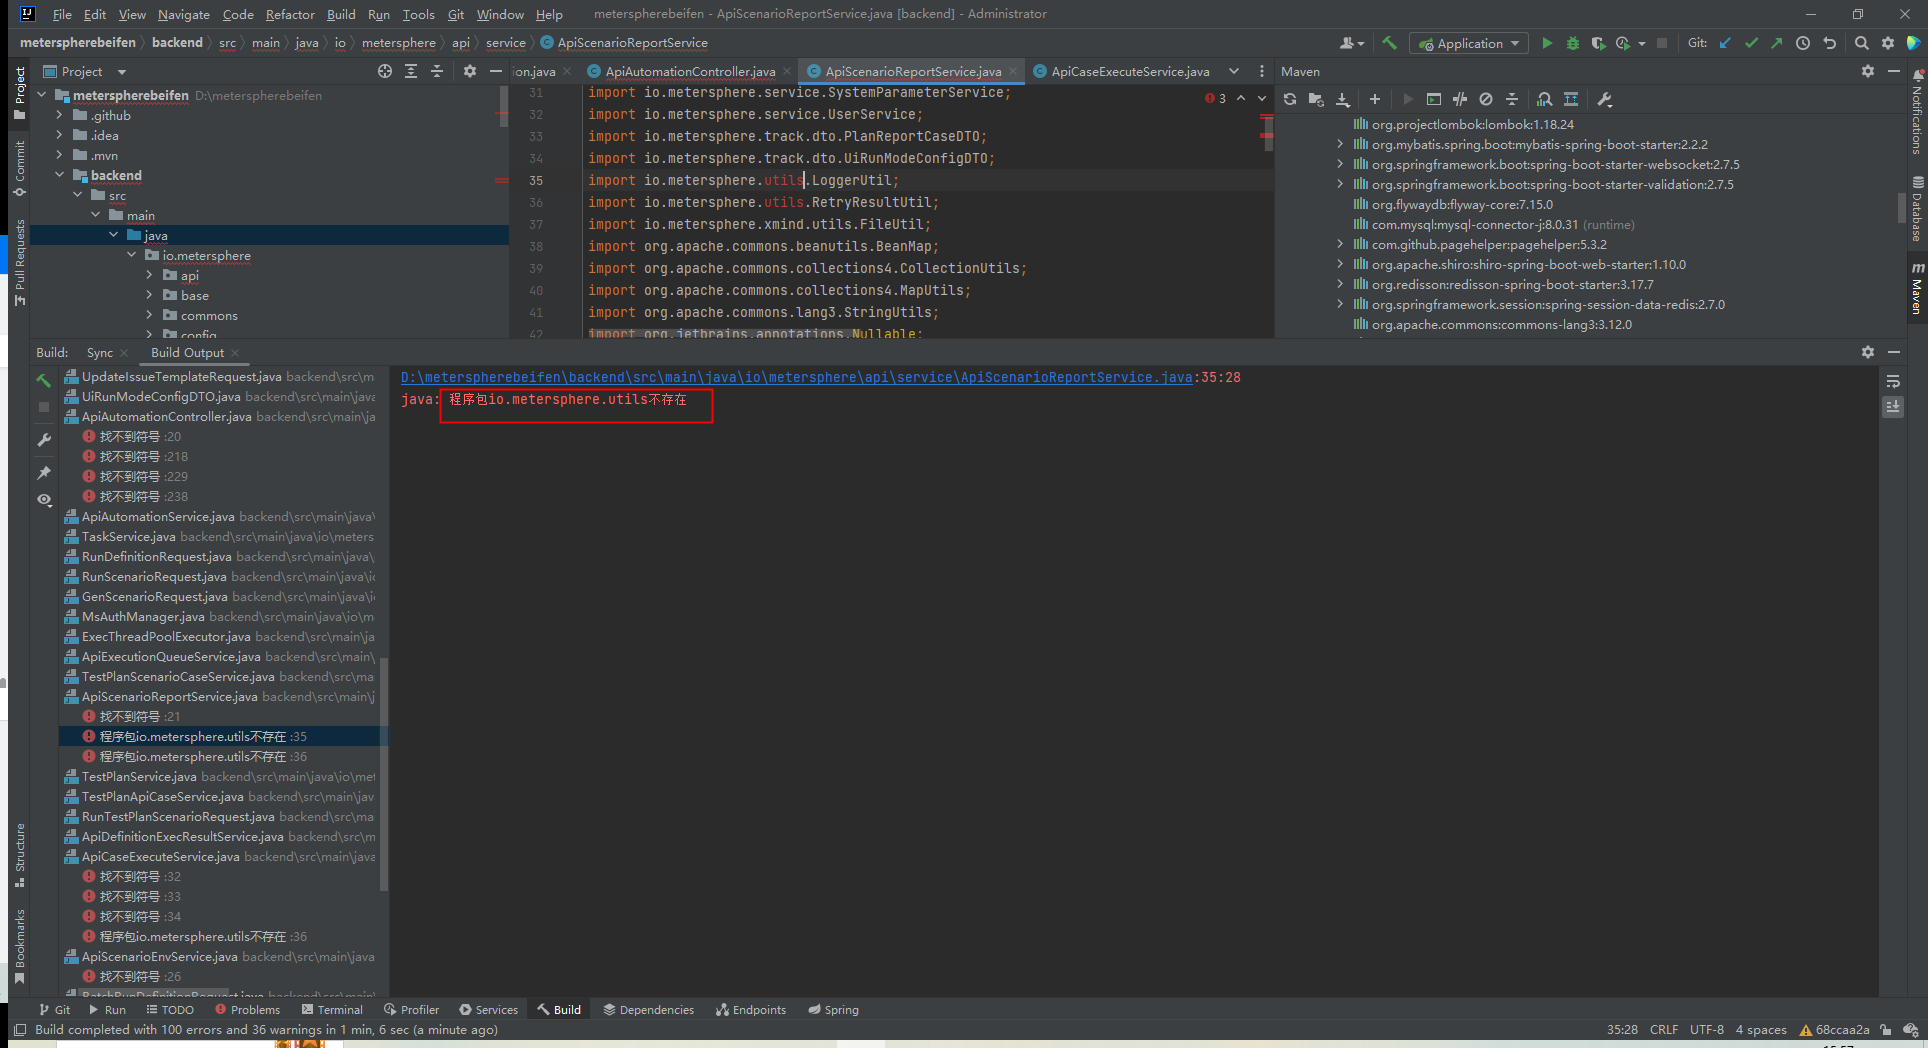

可我们明明已经有了,为什么没有发现呢,这个和每个人环境的设置有关系,比如我的maven就弄了自己的目录,没有按照默认的来,所以需要修改一下项目对应的maven环境

再次mvn clean install

再次启动项目
还是报错

org.apache.ibatis.builder.BuilderException: Error parsing Mapper XML. The XML location is 'io/metersphere/base/mapper/UiScenarioReferenceMapper.xml'. Cause: org.apache.ibatis.builder.BuilderException: Error resolving class. Cause: org.apache.ibatis.type.TypeException: Could not resolve type alias 'io.metersphere.xpack.ui.dto.RefReq'. Cause: java.lang.ClassNotFoundException: Cannot find class: io.metersphere.xpack.ui.dto.RefReq- 1
发现这个报错的文件不就是在上面咱们npm clean install报错的时候注释掉的mapper对应的xml文件么
再把这个文件中对应报错的代码注释掉

再启动一下
成功了
至于下面这个报错,不重要,反正可用

下载整体依赖及打包
项目根目录下执行打包命令,就会自动下载前端及后端的依赖,并给后端打包成jar包,前端打包出dist文件夹

启动
前端的话,进入前端目录

启动后发现,前端的请求到了https上,说明我们的后端出问题了

我们先看前端的配置
port是我自己改的,这个没啥关系,只是vue的端口,重要的是target,应该是http而不是https

同时呢,在后端也有一个类,就是下面这个类,将http转换成了https

直接删除即可后端的话,可以直接找target里的jar包,或者直接就idea启动都没关系
进入前端页面后,发现很多图片都是缺失的,那就在前端目录里重新打包一下
npm run build- 1
就可以解决了
kafka
其实我的kafka一直没有连接成功,在报错,但是并没有影响我的接口测试,具体原因,等之后再研究

部署在服务器上
你可以将在本地修改好的代码上传到服务器上,但是要记得修改几个点
1、我是先在服务器上用git重新下载了jmeter-core的代码然后重新打包的,然后再将已修改的代码上传到服务器上
2、前端打包的命令记得改回来,因为你要在linux上启动嘛
3、修改/opt/metersphere/conf/metersphere.properties,比如我原来在window上,连接的jmeter、kafka、mysql,都是在这台服务器上,那我在windows的配置文件里对应的ip,就是这台服务器,那我现在这些服务和我的代码都在这台服务器了,那就不能用ip了,直接将ip修改为localhost即可
4、和windows一样新建对应的目录并添加对应的文件
5、在项目的根目录执行打包命令 mvn clean install,应该是会报错的,前端会有很多东西下载不下来,原因是npm下载的地址需要配置一下镜像
这是我的镜像,供大家参考metersphere-server io.metersphere ${revision} pom 4.0.0 frontend UTF-8 UTF-8 1.9.1 com.github.eirslett frontend-maven-plugin ${frontend-maven-plugin.version} install node and npm install-node-and-npm generate-resources v16.10.0 6.14.15 http://npm.taobao.org/mirrors/node/ http://npm.taobao.org/mirrors/npm/ http://npm.thunisoft.com npm install npm install npm run build npm run build maven-clean-plugin dist ** false - 1
- 2
- 3
- 4
- 5
- 6
- 7
- 8
- 9
- 10
- 11
- 12
- 13
- 14
- 15
- 16
- 17
- 18
- 19
- 20
- 21
- 22
- 23
- 24
- 25
- 26
- 27
- 28
- 29
- 30
- 31
- 32
- 33
- 34
- 35
- 36
- 37
- 38
- 39
- 40
- 41
- 42
- 43
- 44
- 45
- 46
- 47
- 48
- 49
- 50
- 51
- 52
- 53
- 54
- 55
- 56
- 57
- 58
- 59
- 60
- 61
- 62
- 63
- 64
- 65
- 66
- 67
- 68
- 69
- 70
- 71
- 72
- 73
- 74
- 75
- 76
- 77
- 78
- 79
- 80
- 81
- 82
- 83
- 84
- 85
- 86
- 87
- 88
- 89
- 90
- 91
那后端服务启动很好说,以我的项目为例
[root@MeterSphere /usr/local/metersphere/backend/target]$ls antrun backend-2.2.jar backend-2.2.jar.original classes generated-sources maven-archiver maven-status nohup.out test-classes [root@MeterSphere /usr/local/metersphere/backend/target]$nohp java -jar backend-2.2.jar &- 1
- 2
- 3
这样就可以后台启动了
那前端项目怎么办,总不能npm run serve运行吧。然后我就去扒代码,看他们的到底是怎么做到https访问的,去了解证书、秘钥、nginx部署,很繁琐,后来我就想,我只会http的方式,那我就把这个项目的水平拉到和我一样认知的水平不就可以了,于是,我这样做了
首先,修改后端

然后删除了HTTPSConfig.java
然后修改前端配置

然后重新打包,将生成的dist文件里的内容全部导入到nginx的html文件夹下
再设置nginx,重启nginx
我的配置文件如下,其中比较重要的是对websocket的支持,如果没有这个的话,在接口测试的时候就会报错,别问我怎么知道的,这个配置文件也是误打误撞成功的,因为websocket默认是443端口的,我把它配置到了80端口下,http的还是,竟然也成功了。暂时就这样吧。#user nobody; worker_processes 1; #error_log logs/error.log; #error_log logs/error.log notice; #error_log logs/error.log info; #pid logs/nginx.pid; events { worker_connections 1024; } http { include mime.types; default_type application/octet-stream; #log_format main '$remote_addr - $remote_user [$time_local] "$request" ' # '$status $body_bytes_sent "$http_referer" ' # '"$http_user_agent" "$http_x_forwarded_for"'; #access_log logs/access.log main; sendfile on; #tcp_nopush on; #keepalive_timeout 0; keepalive_timeout 65; #gzip on; server { listen 80; server_name localhost; #charset koi8-r; #access_log logs/host.access.log main; location / { root html; index index.html index.htm; proxy_pass http://localhost:8443/; # 配置 websocket 支持 proxy_http_version 1.1; proxy_set_header Upgrade $http_upgrade; proxy_set_header Connection "upgrade"; } #error_page 404 /404.html; # redirect server error pages to the static page /50x.html # error_page 500 502 503 504 /50x.html; location = /50x.html { root html; } # proxy the PHP scripts to Apache listening on 127.0.0.1:80 # #location ~ \.php$ { # proxy_pass http://127.0.0.1; #} # pass the PHP scripts to FastCGI server listening on 127.0.0.1:9000 # #location ~ \.php$ { # root html; # fastcgi_pass 127.0.0.1:9000; # fastcgi_index index.php; # fastcgi_param SCRIPT_FILENAME /scripts$fastcgi_script_name; # include fastcgi_params; #} # deny access to .htaccess files, if Apache's document root # concurs with nginx's one # #location ~ /\.ht { # deny all; #} } # another virtual host using mix of IP-, name-, and port-based configuration # #server { # listen 8000; # listen somename:8080; # server_name somename alias another.alias; # location / { # root html; # index index.html index.htm; # } #} # HTTPS server # #server { # listen 443 ssl; # server_name localhost; # ssl_certificate cert.pem; # ssl_certificate_key cert.key; # ssl_session_cache shared:SSL:1m; # ssl_session_timeout 5m; # ssl_ciphers HIGH:!aNULL:!MD5; # ssl_prefer_server_ciphers on; # location / { # root html; # index index.html index.htm; # } #} }- 1
- 2
- 3
- 4
- 5
- 6
- 7
- 8
- 9
- 10
- 11
- 12
- 13
- 14
- 15
- 16
- 17
- 18
- 19
- 20
- 21
- 22
- 23
- 24
- 25
- 26
- 27
- 28
- 29
- 30
- 31
- 32
- 33
- 34
- 35
- 36
- 37
- 38
- 39
- 40
- 41
- 42
- 43
- 44
- 45
- 46
- 47
- 48
- 49
- 50
- 51
- 52
- 53
- 54
- 55
- 56
- 57
- 58
- 59
- 60
- 61
- 62
- 63
- 64
- 65
- 66
- 67
- 68
- 69
- 70
- 71
- 72
- 73
- 74
- 75
- 76
- 77
- 78
- 79
- 80
- 81
- 82
- 83
- 84
- 85
- 86
- 87
- 88
- 89
- 90
- 91
- 92
- 93
- 94
- 95
- 96
- 97
- 98
- 99
- 100
- 101
- 102
- 103
- 104
- 105
- 106
- 107
- 108
- 109
- 110
- 111
- 112
- 113
- 114
- 115
- 116
- 117
- 118
- 119
- 120
- 121
- 122
图片定制化

-
相关阅读:
20221122非累加的m3u8的ts切片列表的补全步骤
保研计网复习笔记:IP层
微信销售技巧和话术
css心跳动画
java毕业设计基于web的学校工资管理系统Mybatis+系统+数据库+调试部署
(Java)中的数据类型和变量
【二分法查找】
uniapp-从后台返回的一串地址信息上,提取省市区进行赋值
docker-rabbitMQ
什么牌子的蓝牙耳机音质好?2022好音质蓝牙耳机推荐
- 原文地址:https://blog.csdn.net/qq13933506749/article/details/127668046
