-
python 接口自动化测试
request
requests.post() data和json 的区别
postdata = {'jobId': '1', 'jobType': 'predict', 'targetClass': 'vm', 'targetId': 123} requests.post('http://127.0.0.1:5000/api/getPredictInfo', json=postdata, headers={'Content-Type': 'application/json'}) 或者 requests.post('http://127.0.0.1:5000/api/getPredictInfo', data=json.dunps(postdata))- 1
- 2
- 3
- 4
- 5
- 6
- 7
- 8
data传参表示表单传参:默认的请求头是Content-Type:application/x-www-formurlencoded,请求参数的格式:(k1=v1&k2=v2),参数是纯键值对的dict.,如:
{key1:value1,key2:value2}
data传参表示文本传参:默认的请求头:text/plain。参数:str类型
json传参表示json传参:默认的请求头:application/json,参数是dict类型
json是包括有键值对和列表的Dict类型文件上传
postdata = {'midea':open('./test.jpg',"rb")} requests.post('http://127.0.0.1:5000/api/getPredictInfo', files=postdata)- 1
- 2
带cookie测试
rep= requests.get() 通过get请求获取到登陆的token,然后登陆测试 headers = {"Accept":"aplication/json,text/javascript,*/*;q=0.01", "X-Requested-With":"XMLHttpRequest"} rep = requests.post(url,data=data,headers=headers,cookies=rep.cookies)- 1
- 2
- 3
- 4
- 5
同一个session中完成多个请求测试
可以将上面的
requests.post,requests.get等换成requests.session().request("post",xxx) requests.session().request("get",xxx)- 1
- 2
这样统一接口,
requests.post都是调用的requests.request()pytest
1.模块名必须以test_或_test开头
2.测试类必须以Test开头,并且不能有init方法
3.测试方法必须以test_开头
4.Pytest有很多的强大的插件。pip install安装pytest-html 生成简易报告
pytest-xdist 多线程
pytest-orderding 控制测试用例的执行顺序
pytest-rerunfailures 失败用例重跑
pytest-base-url 基础路径的配置
allure-pytest 生成allure报告命令行
pytest -vs pytest -k “add” 执行所有测试用例名中含有“add”的用例 pytest - s 打印测试用例中print语句 pytest -v 增加打印细节 pytest - x 一旦发现失败用例,停止运行 pytest -maxfail=2 当测试遇到两条失败,立刻停止运行 pytest -m “标签名” 给测试用例加标签 pytest -n 多线程(需要安装pytest-xdist) pytest --reruns=2 失败用例重跑2次 pytest --html='./report.html' 生成简易报告- 1
- 2
- 3
- 4
- 5
- 6
- 7
- 8
- 9
- 10
配置文件
注意:
1.不管是命令行方式还是主函数的方式都会自动的读取这个配置文件
2.pytest.ini文件可以改变pytest默认的测试用例的规则
3.这个文件一般是放在项目的根目录下[pytest] #配置参数 addopts = ‐vs #配置测试用例文件夹 testpaths = ./testcases #配置测试模块的规则 python_files = test_*.py #配置测试类的规则 python_classes = Test* #配置测试方法的规则 python_functions = test_* #配置接口测试的基础路径 base_url = http://127.0.0.1/ #给用例分组 markers = smoke:冒烟测试 usermanage:用户管理- 1
- 2
- 3
- 4
- 5
- 6
- 7
- 8
- 9
- 10
- 11
- 12
- 13
- 14
- 15
- 16
- 17
冒烟和用户管理要在用例上面加上装饰器:
@pytest.mark.smoke @pytest.mark.usermanage- 1
- 2
在执行时需要使用:
-m 分组名 or 分组名- 1
Pytest用例执行顺序默认:是从上到下的顺序
可以通过如下标记改变测试用例的执行顺序@pytest.mark.run(order=1)Pytest前后置条件
在所有类,所有用例之前或之后
def setup_class(self): print("在类之前的操作") def teardown_class(self): print("在类之后的操作") def setup(self): print("在所有用例之前的前置操作") def teardown(self): print("在所有用例之后的后置操作")- 1
- 2
- 3
- 4
- 5
- 6
- 7
- 8
- 9
- 10
- 11
希望在部分用例之前或之后执行。使用Fixture
Fixture装饰器完整结构如下:@pytest.fixture(scope="作用域",autouser="自动执行",params="数据驱 动",ids="参数别名",name="fixture别名")- 1
- 2
scope:标记fixture的作用域function:函数级别(可以手动,也可以自动)class:类级别(一般是自动)module:模块级别(一般是自动)package/session:会话级别(一般是自动):明天封装框架用法。
autouser=True自动执行
params数据驱动
name表示fixture的别名,当使用了name起别名之后,那么原来的fixture的名称就失效了。部分前置的用例,测试用例直接把前置函数的函数名传入
import pytest # 部分测试用例前置 @pytest.fixture() def conn_database(): print("连接数据") yield print("关闭") class TestALL: def test_A(self): print("test A") def test_B(self,conn_database): print("test B") def test_C(self): print("test C") if __name__ == '__main__': pytest.main(['-vs'])- 1
- 2
- 3
- 4
- 5
- 6
- 7
- 8
- 9
- 10
- 11
- 12
- 13
- 14
- 15
- 16
- 17
- 18
- 19
- 20
- 21
- 22
- 23
优化
一般情况下fixture会和conftest.py文件一起使用。conftest.py是专门用于存放fixture的,是固定名称 conftest.py文件的方法使用时不需要导包 conftest.py文件可以有多个- 1
- 2
- 3
将上面的conn_database函数放入新建的conftest.py文件中
@pytest.fixture(scope="session",autouse=True) def claer_yaml(): YamlUtil().clear_yaml()- 1
- 2
- 3
claer_yaml函数自动执行,不需要当作参数传入生成allure报告
1,下载安装
2,pip install allure-pytest
3,addopts = ‐vs --allurdir ./temp# 生成的json 文件的保存路径
4,通过json 生成报告os.system("allure generate temp -o report")生成到report目录中数据驱动的测试
import pytest class TestApi: @pytest.mark.parametrize("args",["a","b","c"]) def test_api(self,args): print(args) if __name__ == '__main__': pytest.main(['test_2.py'])- 1
- 2
- 3
- 4
- 5
- 6
- 7
- 8
postman
接口关联

其他接口需要用到上面接口的返回值,如下操作
环境切换


动态传参
{{$timestamp}}生成当前时间的时间戳
{{$randomInt}}生成0-1000之间的随机数(很少用)
{{$guid}}生成速记GUID字符串自定义动态参数

请求的时候通过{{time}}引用

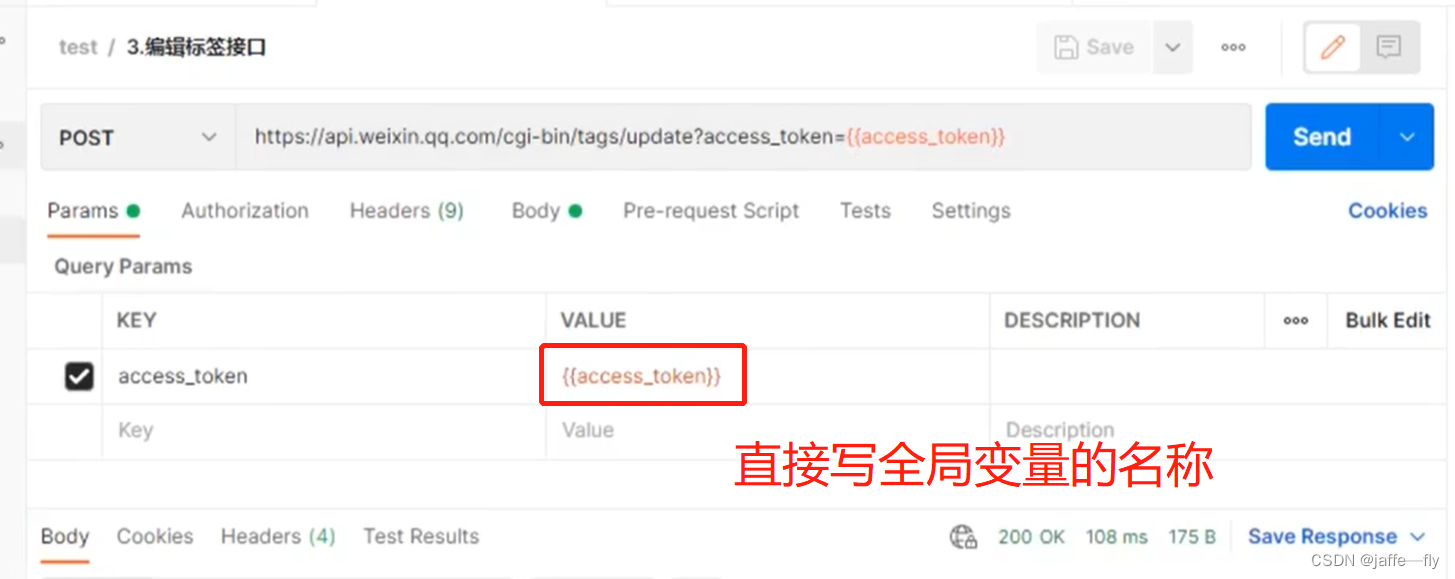
业务闭环(增删改查)
利用全局变量,然后删改查直接引用全局变量

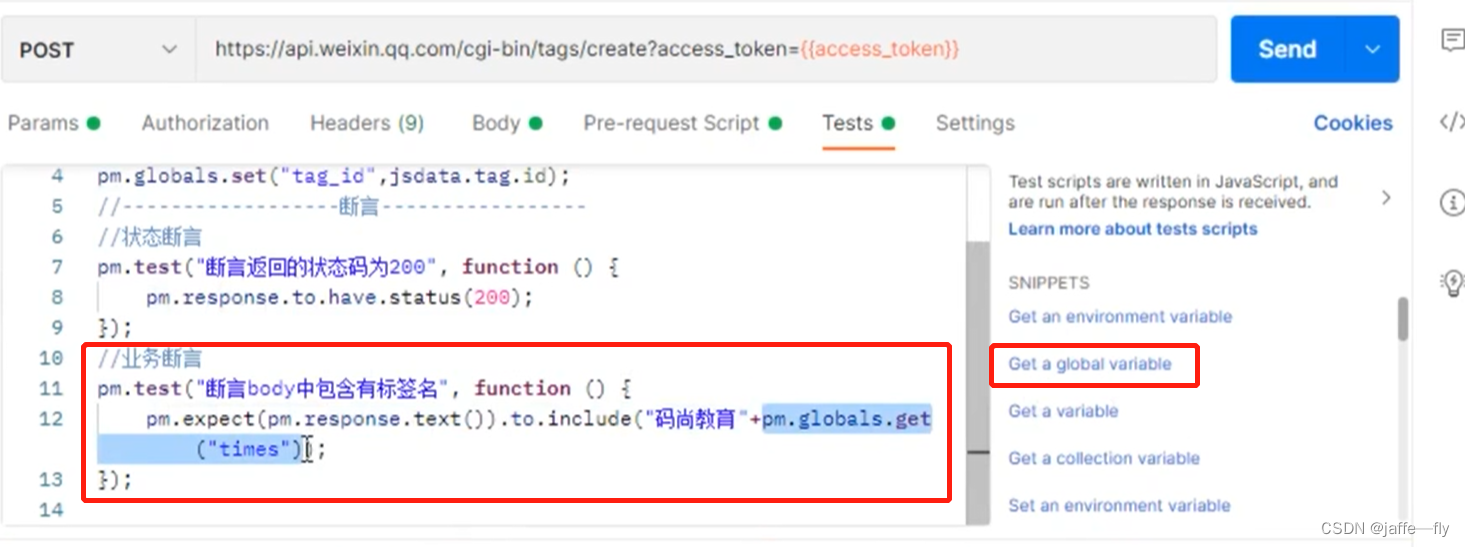
断言
在
Pre-request-Script模块中

状态断言

业务断言

在tests页签里面不能通过{{}}方式获取全局变量,只能通过以下方式获取

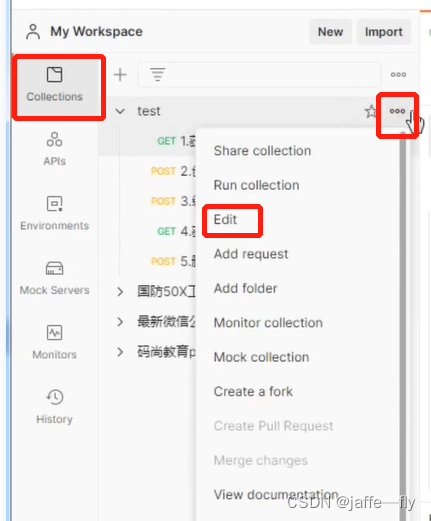
完全相同的断言,可以作为全局断言,不用在每个脚本中重复

文件上传

批量测试
一次测试多个脚本


文件上传批量测试接口报错
postman软件更改设置
Settings->General->Location
1,打开Allow reading files outside working drectory
2,把要上传测试的文件复制到默认目录下(postman会在默认目录下读取文件)数据驱动测试
一般CSV或者JSON文件

批量测试的时候,遇到返回的结果一样,可能是之前Params中参数值写死了,需要改成按照变量获取

取文件中变量的值,采用data.变量名不是之前的global.带请求头的测试
需要用到抓包工具Telerik Fiddler

复制到Headers中,删除掉一些地址,不必要的信息Cookie 鉴权测试
Cookie是一小段的文本信息,在客户端第一次请求服务端的时候生成
第一次请求时在请求头是没有Cookie的,在响应头的set-cookie中生成Cookie并返回传给客户端,以后请求的时候会在请求头中带上Cookiepostman 会自动保存Cookie
postman 的 Mock Server服务器
使用场景:前后端分离,后端接口没有完成,但是前端已经完成,前端的业务流程依赖于后端的接口

相当于可以自己创建一个后端接口,用来测试前端,可以自定义返回信息接口测试加密解密
加密解密测试网站
Pre-Script-Request中写代码加密文档之后设置成全局变量测试Newman
到处postman 中的测试用例,全局变量,环境变量,数据文件
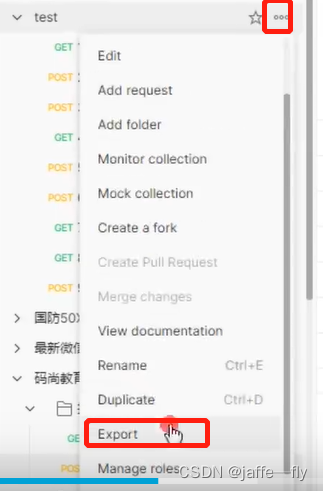
NewMan安装newman run 接口脚本.json -e 环境变量.json -r html --reporter-html-export test.html- 1
RobotFrameWork
安装 Robot Framework
pip install robotframework- 1
安装GUI界面
pip install –i https://pypi.douban.com/simple robotframework-ride- 1
自定义关键字


右键新建的文件
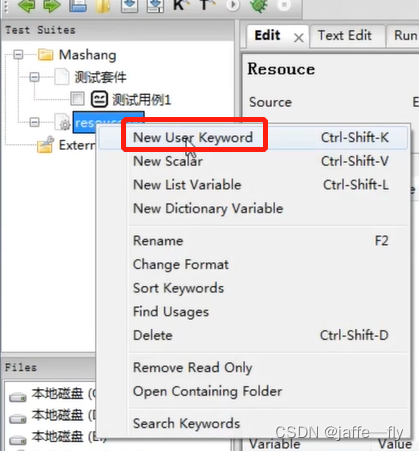
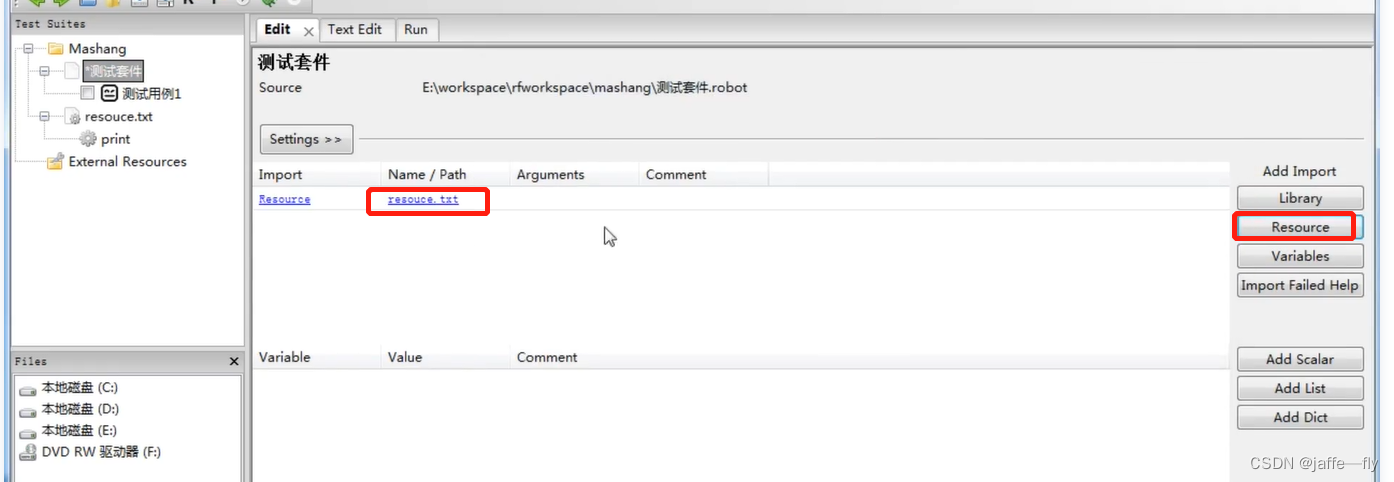
刚创建的还不能被使用,必须在套件中导入资源文件
常用库
扩展库
1)web自动化库–Seleniumpip install –i https://pypi.douban.com/simple robotframework- seleniumlibrary- 1
2)api自动化库–
requestspip install -i https://pypi.python.org/pypi/robotframework-requests- 1
3)app自动胡库
pip install robotframework-AppiumLibrary- 1
-
相关阅读:
【飞书ChatGPT机器人】飞书接入ChatGPT,打造智能问答助手
斐波那契数列的递推与递归求法
2022年湖北省住建厅特种作业操作证怎么报考?甘建二
观察者模式-对象间的联动
Java多线程核心技术第一阶段-Java多线程基础 02
SSC mode
C#值类型设置为null
科普向丨语音芯片烧录工艺的要求
46从零开始用Rust编写nginx,数据还能这么传,多层代理(IP多级代理)搭建
Linux 485驱动通信异常
- 原文地址:https://blog.csdn.net/weixin_44831720/article/details/124733774
