-
2-38 JSP01
JSP(Java Server Pages)
什么JSP?
JSP的全称Java Server Pages .Java的服务器页面,简化Servlet设计,在HTML标签中嵌套Java代码,用于高效的开发Web应用界面【动态网页技术】
JSP的作用?
在之前已经学了Servlet,服务器通过Servlet响应客户端页面,有一些不知之处?
开发方式麻烦:继承父类,覆盖方法,添加注解或配置web.xml
代码修改麻烦: 重新编译、部署、重启服务器
显示方式麻烦: 如果需要服务器端将数据回传到前端页面中,只能用过获取流对象通过println方法逐行打印
协同开发麻烦:UI负责美化页面,程序猿负责编写代码,UI不懂Java,程序猿又不能将所有的前端页面内容有输出流进行打印
在学习JSP技术之前,如果需要往前端页面展示数据,我只能使用流进行打印【例如:EmpProject】
为了解决这个问题【sun】公司推出一种叫做JSP的动态网页技术帮组开发人员解决页面输出数据的繁琐问题
JSP替换Servlet在前端页面中需要展示数据的操作,但是需要使用文件名称需要是: 【XXX.jsp】
PS:JSP页面不能再像之前访问HTML页面一样,如果需要访问JSP页面那么就需要用过Tomcat服务器启动之后在访问JSP页面
如何创建开发JSP
JSP页面创建
在web目录下 --》鼠标右键—》new —》JSP/JSPX —》写一个JSP的名字即可以创建出JSP文件
PS:一般JSP与WEB-INF是平级关系
<%@ page contentType="text/html;charset=UTF-8" language="java" %>第一个JSP页面 <%--可以这里书写Java代码--%> <%-- 如果需要使用Java代码那么需要使用标签 <%=在这个范围内就可以写Java代码了%>--%> <%= new java.util.Date()%>- 1
- 2
- 3
- 4
- 5
- 6
- 7
- 8
- 9
- 10
- 11
- 12
- 13
访问JSP页面
启动Tomcat工程–》在网页中输入JSP所在位置—》即可以访问
JSP是在web目录下的所以访问是地址路径就是
例如:
a.jsp 页面 访问地址是 ==============》 http://ip:port/工程名字/a.jsp
JSP的本质是什么
JSP页面的本质就是一个Servlet程序
JSP与Servlet
关系:JSP文件在容器中会转换成Servlet执行,JSP是对Servlet的一种高级封装,本质还是Servlet
区别:与Servlet相比:JSP可以很方便的编写或者修改HTML网页,而不用去大量使用流进行打印语句输出

JSP实现原理
需要寻找存储JSP页面的目录,是存储JSP执行文件的目录即存储在Tomcat中JSP文件
使用IDEA开发工具的时候,IDEA会自动整合Tomcat,就需要去IDEA中所提供Tomcat的目录中
在IDEA控制输出Tomcat执行初始过程时有一个路径可以查找到Tomcat目录
Using CATALINA_BASE: “C:\Users\jkmaster.IntelliJIdea2019.3\system\tomcat\Tomcat_8_5_53_Java2002_web_JSP”
参考路径:
“C:\用户名\账号名.IntelliJIdea2019.3\system\tomcat\项目名称”
可以在这个路径下查看work\Catalina\localhost\jsp\org\apache\jsp
这个目录下就是存储所有JSP文件的目录,也就说当我们第一次访问JSP页面的时候,Tomcat服务器会帮助我们将JSP页面编译成一个【.java】源文件,并对这个源文件进行编译,编译【.class】文件,编译文件【.java】默认继承于HttpJspBase类,这个类默认是继承HttpServlet,并且还是先了HttpJspPage接口,这样就可以证明JSP就是一个Servlet程序

总结:通过查看JSP的源文件所在看可以得知JSP其实就是一个Servlet程序,Tomcat会将JSP文件转换为Java代码,然后进行编译,最终通过response影响给客户端【这个过程无需再由程序猿实现】
PS:这个就是JSP页面中原码的输出 out.write("\r\n"); out.write("\r\n"); out.write("\r\n"); out.write("\r\n"); out.write("第一个JSP页面 \r\n"); out.write("\r\n"); out.write("\r\n"); out.write(" "); out.write("\r\n"); out.write(" "); out.write("\r\n"); out.write(" "); out.print( new java.util.Date()); out.write("\r\n"); out.write("\r\n"); out.write("\r\n"); out.write("\r\n");- 1
- 2
- 3
- 4
- 5
- 6
- 7
- 8
- 9
- 10
- 11
- 12
- 13
- 14
- 15
- 16
- 17
- 18
- 19
JSP与HTML集成开发
JSP注释
JSP注释主要有两个作用:为脚本代码【jsp代码】作为注释以及HTML内容注释
注释语法
语法 描述 <%–注释–%> JSP注释,注释内容不会被发送至浏览器也不会被JSP进行编译【适用于JSP页面所代码】 HTML注释,通过浏览器查看网页源代码时可以查看的注释【适用于注释HTML代码】,被注释的内容会被编译到JSP的Java原码中 / /单行的Java注释 / * 多行Java代码注释* / 这个注释需使用在JSP的脚本代码编写使用即在编写java代码时可以使用,使用这个注释时会被编译到原码中 <%@ page contentType="text/html;charset=UTF-8" language="java" %>JSP注释 <%-- JSP注释 在网页中是不会被显示出来--%> <!-- HTML注释 在网页中源代码中会被显示出 --> <% //单行注释 /*多行注释*/ int i = 1; %>- 1
- 2
- 3
- 4
- 5
- 6
- 7
- 8
- 9
- 10
- 11
- 12
- 13
- 14
- 15
- 16
- 17
JSP脚本
JSP脚本可以编写Java语句、变量、方法或表达式
普通脚本
ps:普通脚本也可以叫做代码脚本
语法: <% Java代码 %>
代码脚本的作用是:可以在JSP页面中,编写我们自己需要的工程【就是写Java语句】
代码脚本的特点:
1、代表脚本编译之后都在【 _jspService方法中】
2、代码脚本由于翻译到【 _jspService方法中】,所以在【 _jspService方法中】的现有对象可以直接使用
3、还可以由多个代码脚本组合成一个完成的java语句。
4、代码脚本还可以和表达式脚本一起组合使用,在JSP页面上输出数据
<%-- Created by IntelliJ IDEA. User: jkmaster Date: 2020/10/14 Time: 11:08 To change this template use File | Settings | File Templates. --%> <%@ page contentType="text/html;charset=UTF-8" language="java" %>JSP的基本使用【脚本代码】 <%-- 以下这种写法可以输出到控制台--%> <% //这里写但就是纯Java代码 int i = 13; if(i == 12){ System.out.println("赢了"); }else{ System.out.println("输了"); } %> <%-- 多个代码块组合输出 --%> <% for(int j = 0; j<10;j++){ %> <% System.out.println(j); } %> <%--将数据写到页面上--%> <% int a =13; if(a == 12){ %>赢了
<% }else{ %>输出了
<% } %>
<% for(int m = 0;m <10 ;m++){ %>
第 <%= m+1%> 行
<% response.getWriter().println("我是输出值");%>- 1
- 2
- 3
- 4
- 5
- 6
- 7
- 8
- 9
- 10
- 11
- 12
- 13
- 14
- 15
- 16
- 17
- 18
- 19
- 20
- 21
- 22
- 23
- 24
- 25
- 26
- 27
- 28
- 29
- 30
- 31
- 32
- 33
- 34
- 35
- 36
- 37
- 38
- 39
- 40
- 41
- 42
- 43
- 44
- 45
- 46
- 47
- 48
- 49
- 50
- 51
- 52
- 53
- 54
- 55
- 56
- 57
- 58
- 59
- 60
- 61
- 62
- 63
总结:
脚本代码可以使用所有Java语法,除了定义函数[方法],脚本与脚本之间不可以嵌套,脚本与HTML标签不可以嵌套
声明脚本(极少使用)
语法: <%! 定义变量、函数(方法)%>
作用:可以给jSP页面定义出来类似于Java类定义属性和方法甚至静态代码块和内部类等
<%@ page import="java.util.Map" %> <%@ page import="java.util.HashMap" %> <%@ page contentType="text/html;charset=UTF-8" language="java" %> <html> <head> <title>JSP的基本使用【声明脚本】</title> </head> <body> <%-- 1.声明类的属性--%> <%! private Integer id; private String name; private static Map<String,Object> map; %> <%--2.声明静态代码块--%> <%! static { map = new HashMap<>(); map.put("key1","value1"); } %> <%--3.声明类方法--%> <%! public int getInteger(){ return 12; } %> <%--4.声明内部类--%> <%! public static class A{ private Integer id =12; } %> </body> </html>- 1
- 2
- 3
- 4
- 5
- 6
- 7
- 8
- 9
- 10
- 11
- 12
- 13
- 14
- 15
- 16
- 17
- 18
- 19
- 20
- 21
- 22
- 23
- 24
- 25
- 26
- 27
- 28
- 29
- 30
- 31
- 32
- 33
- 34
- 35
- 36
- 37
- 38
这些是写JSP文件中定义,运行之后会出现在JSP源中,在声明脚本中,声明变量是全局变量,声明脚本内容必须在普通脚本中使用<% %>,声明脚本中如果有方法并且具有返回值,可以在输出脚本中使用
输出脚本(常用)
ps:输出脚本也可以叫做表达式脚本
语法:<%= Java表达式 %>
表达式脚本的作用是:可以将数据输出到JSP页面上
表达式脚本的特点:
1、所有的表达式脚本都被翻译到园中【_jspService()】方法中
2、表达式脚本都会被翻译成【out.print()】并且输出到页面上
3、由于表达式脚本翻译的内容在【 _jspService()】方法中,所有【 _jspService()】方法中的对象都可以直接使用
4、表达式脚本中表达式不能以【分号结束】
<%@ page import="java.util.Map" %> <%@ page contentType="text/html;charset=UTF-8" language="java" %>JSP的基本使用【输出脚本】 <%!private static Map- 1
- 2
- 3
- 4
- 5
- 6
- 7
- 8
- 9
- 10
- 11
- 12
- 13
- 14
- 15
- 16
- 17
- 18
- 19
- 20
ps:输出脚本还可以输出带有返回值的函数
JSP指令
JSP指令是用来设置这个JSP页面的相关属性使用
指令 描述 <%@ page …%> 定义页面的依赖属性,比如脚本语言、error页面、缓存需求等等 <%@ include … %> 包含其他文文件 <%@ taglib …%> 引入标签库的定义, 可以自定义标签 page指令
语法: <%@ page attribute1=“value1” attribute2=“value2”%>
jsp的page指定可以修改jsp页面中一些重要属性或者行为
最常见的就是创建JSP页面的时候,出现在页面的头部位的的page指令
<%@ page contentType="text/html;charset=UTF-8" language="java" %> 说明: contentType 属性 表示JSP页面返回数据之后的数据类型是什么 在源码中相当于是 response.setContentType("text/html;charset=UTF-8") 这个属性可以执行JSP页面的MIME类型和编码集 language 属性 表示JSP翻译后以什么语言形成文件,暂时只支持Java语言 import 属性 导入需要在JSP页面中使用的Java类的包 ps:page指令还可以导入在JSP页面中使用Java类的包 page指令中还有其他属性,pageEncoding 表示当前JSP页面文件本身的字符集 buffer 代表out缓冲区的大小,默认是8KB autoFlush 设置当前out缓冲入如果满了之后,自动刷新缓冲区,默认值是true ps:这两个属性很少动,因为8KB是经过反复计算得来的 errorPage 可以设置如果JSP页面出错,可以执行一个错误界面 参数是一个路径 /jsp文件存储的位置,这里的/代表的是工程路径--》http://ip:port/工程名/ isErrorPage 设置当前jsp页面是否有错误信息页面 默认值是false ,如果设置为true可以获取到异常信息 extends 设JSP页面翻译成java文件之后可以继承哪些类- 1
- 2
- 3
- 4
- 5
- 6
- 7
- 8
- 9
- 10
- 11
- 12
- 13
- 14
- 15
- 16
seesion属性:设置访问当前JSP页面,是否会创建HttpSession对象,默认值是true
PS:开中不建议修改, 如果值为true立即创建,false使用时创建
include指令
静态包含
<%@ include file=“路径”%> 就是静态包含
file属性指你要包含的JSP页面的路径
路径中第一个 / 表示为 http://ip:port/工程名/
场景:例如页面中有一些固定显示,所有页面中都会显示一样的信息,我们就可以使用静态包含的方式来完成一次编写,处处使用
<%@ page contentType="text/html;charset=UTF-8" language="java" %>页脚 页脚信息
<%@ page contentType="text/html;charset=UTF-8" language="java" %>主页 头部信息
主体内容
<%@include file="/footer.jsp"%>- 1
- 2
- 3
- 4
- 5
- 6
- 7
- 8
- 9
- 10
- 11
- 12
- 13
- 14
- 15
- 16
- 17
- 18
- 19
- 20
- 21
- 22
- 23
静态包含的特点:
1.静态包含不会翻译被包含的JSP页面
2.静态包含其实就是把被包含的JSP页面的代码拷贝到包含的位置并执行输出
包含文件中避免使用可能会影响原有JSP页面中标签元素
静态包含中只有一个file,静态包含可以放在JSP页面的任意位置,其file属性的路径是相对路径
特别注意:不能两个页面中定义相同变量名,会出现包含重复的问题【代码中局部变量重名了】
动态包含
语法:
page属性是指定你要包含JSP页面的路径
ps:动态包含可以像静态包含一样,把被包含的内容执行输出到包含的位置
<%@ page contentType="text/html;charset=UTF-8" language="java" %>主页 头部信息
主体内容
<%-- 参数传递,这个传给谁? 指向那个页面参数就出现在哪个页面中--%>- 1
- 2
- 3
- 4
- 5
- 6
- 7
- 8
- 9
- 10
- 11
- 12
- 13
- 14
- 15
- 16
- 17
动态包含的特点
1.动态包含会把包含JSP页面翻译成java代码
2.动态包含底层代码使用是以下方式进行JSP页面输出
org.apache.jasper.runtime.JspRuntimeLibrary.include(request, response, "/footer.jsp" )- 1
- 2
3.动态包含如果包含的是(html)静态文件,只会生一个servlet类,如果包含的是动态文件(JSP),就会生成两个文件
4.动态包含可以进行值的传递,使用方式其实使用过request和response进行通信
forward请求转换【重要】
是请求转发标签,他的功能就是请求转换,page属性设置的式请求转发的地址
- 1
- 2
taglib指令
ps:这里就进行简单介绍,在JSTL的时候详细讲解
语法:<%@ taglib uri=“外部标签库路径” prefix=“前缀” %>
引入JSP的标准标签库
<%@ taglib uri="http://java.sun.com/jsp/jstl/core" prefix="c"%>- 1
- 2
userBean
语法
jsp:useBean 动作用来健在一个将z在JSP页面中使用JavaBean
需要注意是:在JSP页面中使用useBean那么必须遵守useBean的规范【属性私有化、有参无参构造方法、get和set方法】
<%-- 需要一个User类属性是username和password --%> <%@ page contentType="text/html;charset=UTF-8" language="java" %>JSP动作之useBean - 1
- 2
- 3
- 4
- 5
- 6
- 7
- 8
- 9
- 10
- 11
- 12
- 13
- 14
- 15
setProperty
可以在jsp:useBean元素之后使用 jsp:setProperty进行属性赋值
属性 描述 name name属性是必须的,它表示要设置属性的是哪个Bean property property属性是必须的,它表示要设置哪个属性【类中属性】 value value属性是可选的,该属性用来指定Bean属性的值 <%@ page contentType="text/html;charset=UTF-8" language="java" %>JSP动作之useBean <%--这句话的作用:就是在页面加载过程中,创建一个User类的一个对象user--%>- 1
- 2
- 3
- 4
- 5
- 6
- 7
- 8
- 9
- 10
- 11
- 12
- 13
- 14
- 15
- 16
getProperty
jsp:getProperty动作提取指定Bean属性值,转换为字符串,然后输出【输出位置就是当前页面】
属性 描述 name 要搜索的Bean属性名称,Bean必须已经被定义了 property 表示要提取Bean属性的值 <%@ page contentType="text/html;charset=UTF-8" language="java" %>JSP动作之useBean <%--这句话的作用:就是在页面加载过程中,创建一个User类的一个对象user--%>- 1
- 2
- 3
- 4
- 5
- 6
- 7
- 8
- 9
- 10
- 11
- 12
- 13
- 14
- 15
- 16
- 17
- 18
九大内置对象
JSP中内置了对象,是指Tomcat在翻译JSP页面称为Servlet原码之后,内部提供的九大对象,叫做内置对象
ps:这些对象是右JSP自动创建的对象,可以直接使用
对象名称 类型 说明 request HttpServletRequest 请求对象 response HttpServletResponse 响应对象 session HttpSession 会话对象【受page指令的影响(session属性)】 application ServletContext ServletContext对象 pageContext javax.servlet.jsp.PageContext JSP上下文对象 page Object 指当前JSP对象【当前Servlet实例】 out javax.servlet.jsp.JspWriter 输出流对象 config ServletConfig Config对象 exception Throwable 异常对象【受page指定影响(isErrorPage)】 四大作用域对象
JSP有四大作用域对象,存数据和获取数据的方式是一样,不同的式【取值范围的差别】
pageContext ===》作用域范围 ===》当前JSP页面范围内有效
request ===》 作用域范围 ===》一次请求有效
session ===》 作用域范围 ===》 一次会话有效(打开浏览器访问服务器,直到关闭浏览器【关闭浏览器失效】)
application ===》 作用域范围 ===》在JSP中application是【ServletContext】整个web应用有效(只要web工程不停止,数据都在)
<%-- Created by IntelliJ IDEA. User: jkmaster Date: 2020/10/14 Time: 15:38 To change this template use File | Settings | File Templates. --%> <%@ page contentType="text/html;charset=UTF-8" language="java" %>作用域 <%-- 分别往四个作用域中保存数据--%> <% pageContext.setAttribute("key","pageContext"); request.setAttribute("key","request"); session.setAttribute("key","session"); application.setAttribute("key","application"); %> <%-- 访问这些数据--%> pageContext域是否有值:<%=pageContext.getAttribute("key")%>
request域是否有值:<%=request.getAttribute("key")%>
session域是否有值:<%=session.getAttribute("key")%>
application域是否有值:<%=application.getAttribute("key")%>
<%-- 进行请求转发在JSP页面中有两种写法--%> <%-- <%--%> <%-- request.getRequestDispatcher("/scope2.jsp").forward(request,response);--%> <%-- %>--%>- 1
- 2
- 3
- 4
- 5
- 6
- 7
- 8
- 9
- 10
- 11
- 12
- 13
- 14
- 15
- 16
- 17
- 18
- 19
- 20
- 21
- 22
- 23
- 24
- 25
- 26
- 27
- 28
- 29
- 30
- 31
- 32
- 33
- 34
- 35
- 36
- 37
页面2中
<%-- Created by IntelliJ IDEA. User: jkmaster Date: 2020/10/14 Time: 15:46 To change this template use File | Settings | File Templates. --%> <%@ page contentType="text/html;charset=UTF-8" language="java" %>转发界面 <%--不在原有JSP页面,所有没有值了--%> pageContext域是否有值:<%=pageContext.getAttribute("key")%>
<%--请求转发是一次请求:所以【request、session、application】中的数据可以显示--%> <%--直接访问scope2.jsp页面,request无法在获取数据了,因为二次请求--%> request域是否有值:<%=request.getAttribute("key")%>
<%--虽然二次请求但是浏览器没关闭:所以【session、application】中的数据可以显示--%> session域是否有值:<%=session.getAttribute("key")%>
<%--关闭浏览器所以session无法获取因为被删除了--%> <%--但还服务器还没有关闭,所以application依旧有值--%> <%--关闭或重新服务器application中就没有值--%> application域是否有值:<%=application.getAttribute("key")%>
- 1
- 2
- 3
- 4
- 5
- 6
- 7
- 8
- 9
- 10
- 11
- 12
- 13
- 14
- 15
- 16
- 17
- 18
- 19
- 20
- 21
- 22
- 23
- 24
- 25
- 26
- 27
- 28
ps:域对象可以向Map一样存储数据和获取数据,四个作用域的功能都一样,不同的是他们对数据的取范围不同,虽然四个域对爱那个都可以存取数据,在使用上他们是有优先顺序的
四个域在使用时候,优先熟悉怒分别是:他们是从小到大排序
pageContext ===》 request ===》 session ===》 application
建议使用pageContext,因为,页面所存的这些数据,还是要占用服务器内存的,如果选用pageContextname可以在最短的时间内访问拿到数据,减少数据所存在时间,减少服务器内存压力【这个是建议】
pageContext对象
pageContext对象是JSP页面的实例,拥有作用域,用来代表整个JSP页面,当前页面的作用域对象,一旦跳转则失效
通过setAttribute存储值 getAttribute获取值,【可以使用pageContext对象获取其他8个内置对象或者操作其他对象的作用域】
获取其他内置对象
<%@ page contentType="text/html;charset=UTF-8" language="java" %>获取其他内置对象 <%--在实际开发中,会出现无法获取内置对象的情况,所以需要进行手动获取--%> <% pageContext.getRequest();//返回request对象 pageContext.getResponse();//返回response对象 pageContext.getServletContext();//返回application对象 pageContext.getServletConfig();//返回config对象 pageContext.getSession();//返回session对象 pageContext.getPage();//返回page对象 pageContext.getOut();//返回out对象 pageContext.getException();//返回Exception对象 %>- 1
- 2
- 3
- 4
- 5
- 6
- 7
- 8
- 9
- 10
- 11
- 12
- 13
- 14
- 15
- 16
- 17
- 18
- 19
- 20
- 21
- 22
pageContext可以操作其他内置对象作用域
<%@ page contentType="text/html;charset=UTF-8" language="java" %>获取其他内置对象化作用域 <% //通过pageContext对象化对数据进行存储 pageContext.setAttribute("page","1234"); pageContext.setAttribute("req","aaa",PageContext.REQUEST_SCOPE); pageContext.setAttribute("sess","bbb",PageContext.SESSION_SCOPE); pageContext.setAttribute("app","ccc",PageContext.APPLICATION_SCOPE); %> <%-- 获取值时,返回值类型是Object类型,所以需要强制类型转换--%> <%=pageContext.getAttribute("page")%> <%=pageContext.getAttribute("req",PageContext.REQUEST_SCOPE)%> <%=pageContext.getAttribute("sess",PageContext.SESSION_SCOPE)%> <%=pageContext.getAttribute("app",PageContext.APPLICATION_SCOPE)%> <%-- 查找属性获取全局搜索 一次从 pageContext、request、session、application获取,哪里有就在那里获取 如果没有找到就返回null值--%> <%=pageContext.findAttribute("req")%>- 1
- 2
- 3
- 4
- 5
- 6
- 7
- 8
- 9
- 10
- 11
- 12
- 13
- 14
- 15
- 16
- 17
- 18
- 19
- 20
- 21
- 22
- 23
- 24
- 25
- 26
- 27
EmpProject综合案例
案例阶段一:环境搭建
1.创建数据库
create databas emp;- 1
2.需要两张表
emp员工信息表和empmanager管理员表
create table emp( id int PRIMARY KEY AUTO_INCREMENT, name varchar(20) not null, salary double not null, age int not null ); create table empmanager( username varchar(20) not null, password varchar(20) not null );- 1
- 2
- 3
- 4
- 5
- 6
- 7
- 8
- 9
- 10
3.插入一些测试数据
insert into emp(name, salary, age)value('tom',2000,16); insert into emp(name, salary, age)value('jerry',2500,14); insert into emp(name, salary, age)value('dog',1900,18); insert into empmanager(username, password) value ('admin','123456')- 1
- 2
- 3
- 4
- 5
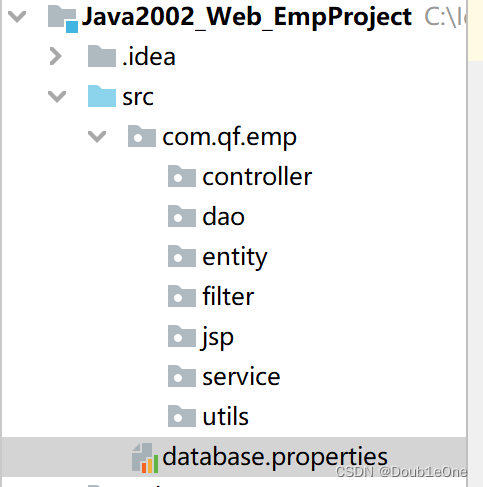
4.创建Web项目分层目录
com.qf.emp.controller 调用业务逻辑Servlet
com.qf.emp.jsp 打印显示页面Servlet
com.qf.emp.dao 数据访问层
com.qf.emp.dao.impl 数据访问层实现类
com.qf.emp.entity 实体类
com.qf.emp.filter 过滤器类
com.qf.emp.service 业务逻辑层
com.qf.emp.service.impl 业务逻辑层实现类
com.qf.emp.utils 工具类
database.properties 数据库连接池配置文件
在WEB-INF目录下创建lib包,导入要使用jar
commons-dbutils-1.7.jar
druid-1.1.5.jar
mysql-connector-java-5.1.25-bin.jar
ValidateCode.jar
编写database.properties数据库资源文件
#jdbc连接驱动配置 driver=com.mysql.jdbc.Driver url=jdbc:mysql://localhost:3306/emp username=root password=123456 #连接池配置 【连接池初始容量,最大连接数量, 最小空闲连接, 最大等待时长】 initialSize=10 maxActive=20 minIdle=5 maxWait=3000- 1
- 2
- 3
- 4
- 5
- 6
- 7
- 8
- 9
- 10
<div STYLE="page-break-after: always;">div>- 1
案例阶段二:代码编写
1.编写DBUtils工具类
ps:utils包下
package com.qf.emp.utils; import com.alibaba.druid.pool.DruidDataSource; import com.alibaba.druid.pool.DruidDataSourceFactory; import com.alibaba.druid.pool.DruidPooledConnection; import java.io.IOException; import java.io.InputStream; import java.sql.Connection; import java.sql.ResultSet; import java.sql.SQLException; import java.sql.Statement; import java.util.Properties; /** * 做一个数据库连接工具类 */ public class DbUtils { private DbUtils(){} //数据库连接池对象 private static DruidDataSource ds; //事务的控制 ThreadLocal private static final ThreadLocal<Connection> THREAD_LOCAL = new ThreadLocal<>(); //使用静态代码块对文件进行进行加载 static { //1.创建properties文件 Properties properties = new Properties(); //创建字节流对象读取数据【建议通过反射】 InputStream resourceAsStream = DbUtils.class.getResourceAsStream("/database.properties"); //加载文件 try { properties.load(resourceAsStream); //获取连接池对象 ds = (DruidDataSource) DruidDataSourceFactory.createDataSource(properties); } catch (IOException e) { e.printStackTrace(); } catch (Exception e) { e.printStackTrace(); } } /** * 获取Connection对象 */ public static Connection getConnection(){ //1.通过ThreadLocal来获取Connection对象 Connection connection = THREAD_LOCAL.get(); try { if(connection == null){ //通过连接池获获取Connection对象 connection = ds.getConnection(); //存储到ThradLocal中 THREAD_LOCAL.set(connection); } } catch (SQLException e) { e.printStackTrace(); } return connection; } /** * 开启事务 * */ public static void begin(){ Connection connection = null; try { connection = getConnection(); connection.setAutoCommit(false); } catch (SQLException e) { e.printStackTrace(); } } /** * 提交事务 */ public static void commit(){ Connection connection = null; try { connection = getConnection(); connection.commit();//提交 } catch (SQLException e) { e.printStackTrace(); }finally { closeAll(connection,null,null); } } /** * 回滚 */ public static void rollback(){ Connection connection = null; try { connection = getConnection(); connection.rollback();//回滚 } catch (SQLException e) { e.printStackTrace(); }finally { closeAll(connection,null,null); } } /** * 统一资源释放 */ public static void closeAll(Connection connection, Statement statement, ResultSet resultSet){ try{ if(resultSet != null){ resultSet.close(); } if(statement != null){ statement.close(); } if(connection != null){ connection.close(); THREAD_LOCAL.remove(); } }catch (Exception e){ e.printStackTrace(); } } }- 1
- 2
- 3
- 4
- 5
- 6
- 7
- 8
- 9
- 10
- 11
- 12
- 13
- 14
- 15
- 16
- 17
- 18
- 19
- 20
- 21
- 22
- 23
- 24
- 25
- 26
- 27
- 28
- 29
- 30
- 31
- 32
- 33
- 34
- 35
- 36
- 37
- 38
- 39
- 40
- 41
- 42
- 43
- 44
- 45
- 46
- 47
- 48
- 49
- 50
- 51
- 52
- 53
- 54
- 55
- 56
- 57
- 58
- 59
- 60
- 61
- 62
- 63
- 64
- 65
- 66
- 67
- 68
- 69
- 70
- 71
- 72
- 73
- 74
- 75
- 76
- 77
- 78
- 79
- 80
- 81
- 82
- 83
- 84
- 85
- 86
- 87
- 88
- 89
- 90
- 91
- 92
- 93
- 94
- 95
- 96
- 97
- 98
- 99
- 100
- 101
- 102
- 103
- 104
- 105
- 106
- 107
- 108
- 109
- 110
- 111
- 112
- 113
- 114
- 115
- 116
- 117
- 118
- 119
- 120
- 121
- 122
- 123
- 124
- 125
<div STYLE="page-break-after: always;">div>- 1
2.实现具体功能
2.1实现管理员登录功能
2.1.1在entity包下创建实体类EmpManager类
package com.qf.emp.entity; public class EmpManager { //因为要做实体映射[ORM],所以类名和属性名尽量和表名和列名一致 private String username; private String password; public EmpManager() { } public EmpManager(String username, String password) { this.username = username; this.password = password; } public String getUsername() { return username; } public void setUsername(String username) { this.username = username; } public String getPassword() { return password; } public void setPassword(String password) { this.password = password; } @Override public String toString() { return "EmpManager{" + "username='" + username + '\'' + ", password='" + password + '\'' + '}'; } }- 1
- 2
- 3
- 4
- 5
- 6
- 7
- 8
- 9
- 10
- 11
- 12
- 13
- 14
- 15
- 16
- 17
- 18
- 19
- 20
- 21
- 22
- 23
- 24
- 25
- 26
- 27
- 28
- 29
- 30
- 31
- 32
- 33
- 34
- 35
- 36
- 37
- 38
<div STYLE="page-break-after: always;">div>- 1
2.2编写dao数据层
2.2.1编写EmpManagerDao接口,此接口完成登录查询
package com.qf.emp.dao; import com.qf.emp.entity.EmpManager; //管理员登录接口 public interface EmpManagerDao { //查询用户名 public EmpManager select(String name); }- 1
- 2
- 3
- 4
- 5
- 6
- 7
- 8
- 9
- 10
2.2.2编写接口实现类EmpManagerDaoImpl
package com.qf.emp.dao.impl; import com.qf.emp.dao.EmpManagerDao; import com.qf.emp.entity.EmpManager; import com.qf.emp.utils.DbUtils; import org.apache.commons.dbutils.QueryRunner; import org.apache.commons.dbutils.handlers.BeanHandler; import java.sql.SQLException; public class EmpManagerDaoImpl implements EmpManagerDao { //通过DBUtil类中提供的QueryRunner对象来进行查询 private QueryRunner queryRunner = new QueryRunner(); @Override public EmpManager select(String name) { try { EmpManager empManager = queryRunner.query (DbUtils.getConnection(), "select * from empmanager where username = ?", new BeanHandler<EmpManager>(EmpManager.class), name); return empManager; } catch (SQLException e) { e.printStackTrace(); } return null; } }- 1
- 2
- 3
- 4
- 5
- 6
- 7
- 8
- 9
- 10
- 11
- 12
- 13
- 14
- 15
- 16
- 17
- 18
- 19
- 20
- 21
- 22
- 23
- 24
- 25
- 26
- 27
- 28
<div STYLE="page-break-after: always;">div>- 1
2.3service业务层实现
2.3.1 创建EmpManagerService接口提供登录方法
package com.qf.emp.service; import com.qf.emp.entity.EmpManager; public interface EmpManagerService { //登录方法 public EmpManager login(String username,String password); }- 1
- 2
- 3
- 4
- 5
- 6
- 7
- 8
- 9
2.3.2实现EmpManagerService接口EmpManagerServiceImpl
package com.qf.emp.service.impl; import com.qf.emp.dao.EmpManagerDao; import com.qf.emp.dao.impl.EmpManagerDaoImpl; import com.qf.emp.entity.EmpManager; import com.qf.emp.service.EmpManagerService; import com.qf.emp.utils.DbUtils; import java.util.Objects; public class EmpManagerServiceImpl implements EmpManagerService { //获取访问数据层的对象 private EmpManagerDao empManagerDao = new EmpManagerDaoImpl(); @Override public EmpManager login(String username, String password) { //定义一个变量用来存储查找到的EmpManager对象 EmpManager em = null; try { DbUtils.begin(); //通过数据访问层对象获取EmpManager对象 EmpManager empManager = empManagerDao.select(username); //判断对象是否存在并判断密码是否正确 if(Objects.nonNull(empManager)){ if(empManager.getPassword().equals(password)){ em = empManager; } } DbUtils.commit(); } catch (Exception e) { //回滚 DbUtils.rollback(); e.printStackTrace(); } return em; } }- 1
- 2
- 3
- 4
- 5
- 6
- 7
- 8
- 9
- 10
- 11
- 12
- 13
- 14
- 15
- 16
- 17
- 18
- 19
- 20
- 21
- 22
- 23
- 24
- 25
- 26
- 27
- 28
- 29
- 30
- 31
- 32
- 33
- 34
- 35
- 36
- 37
<div STYLE="page-break-after: always;">div>- 1
2.4对登录Servlet进行处理
2.4.1在Controller包下,创建EmpManagerLoginController
package com.qf.emp.controller; import com.qf.emp.entity.EmpManager; import com.qf.emp.service.EmpManagerService; import com.qf.emp.service.impl.EmpManagerServiceImpl; import javax.servlet.ServletException; import javax.servlet.annotation.WebServlet; import javax.servlet.http.HttpServlet; import javax.servlet.http.HttpServletRequest; import javax.servlet.http.HttpServletResponse; import javax.servlet.http.HttpSession; import java.io.IOException; //这里这样写路径的目的是为了以后区分操作,即管理员都写manager路径 @WebServlet(name = "EmpManagerLoginController",value="/manager/EmpManagerLoginController") public class EmpManagerLoginController extends HttpServlet { protected void doPost(HttpServletRequest request, HttpServletResponse response) throws ServletException, IOException { doGet(request,response); } protected void doGet(HttpServletRequest request, HttpServletResponse response) throws ServletException, IOException { //1.收参数 String username = request.getParameter("username"); String password = request.getParameter("password"); String inputVCode = request.getParameter("inputVCode"); //2.校验验证码的值 String codes = (String)request.getSession().getAttribute("codes"); if(!inputVCode.isEmpty() && inputVCode.equalsIgnoreCase(codes)){ //此时就开始处理业务逻辑 EmpManagerService empManagerService = new EmpManagerServiceImpl(); EmpManager empManager = empManagerService.login(username, password); if(empManager != null){ //登录成功,存当前对象到Session作用域中,以便后续使用 HttpSession session = request.getSession(); session.setAttribute("empManager",empManager); //跳转到查询所有的信息的界面 }else{ //登录失败重定向到登录界面 response.sendRedirect(request.getContextPath()+"/login.html"); } }else{ //验证码错误重定向到登录界面 response.sendRedirect(request.getContextPath()+"/login.html"); } } }- 1
- 2
- 3
- 4
- 5
- 6
- 7
- 8
- 9
- 10
- 11
- 12
- 13
- 14
- 15
- 16
- 17
- 18
- 19
- 20
- 21
- 22
- 23
- 24
- 25
- 26
- 27
- 28
- 29
- 30
- 31
- 32
- 33
- 34
- 35
- 36
- 37
- 38
- 39
- 40
- 41
- 42
- 43
- 44
- 45
- 46
- 47
- 48
- 49
<div STYLE="page-break-after: always;">div>- 1
- 2
2.4.2在Controller包下,创建创建验证码的Servlet
package com.qf.emp.controller; import cn.dsna.util.images.ValidateCode; import javax.servlet.ServletException; import javax.servlet.annotation.WebServlet; import javax.servlet.http.HttpServlet; import javax.servlet.http.HttpServletRequest; import javax.servlet.http.HttpServletResponse; import javax.servlet.http.HttpSession; import java.io.IOException; @WebServlet(name = "CreateCodeServlet",value="/createCode") public class CreateCodeServlet extends HttpServlet { protected void doPost(HttpServletRequest request, HttpServletResponse response) throws ServletException, IOException { doGet(request,response); } protected void doGet(HttpServletRequest request, HttpServletResponse response) throws ServletException, IOException { //生成验证码 ValidateCode vc = new ValidateCode(200,30,4,10); //获取生成验证码的值 String code = vc.getCode(); //存储到Session让EmpManagerLoginController使用 HttpSession session = request.getSession(); session.setAttribute("codes",code); //2.响应客户端 vc.write(response.getOutputStream()); } }- 1
- 2
- 3
- 4
- 5
- 6
- 7
- 8
- 9
- 10
- 11
- 12
- 13
- 14
- 15
- 16
- 17
- 18
- 19
- 20
- 21
- 22
- 23
- 24
- 25
- 26
- 27
- 28
- 29
- 30
- 31
<div STYLE="page-break-after: always;">div>- 1
2.4.3在Controller包下,创建查询所有结果的Servlet
package com.qf.emp.controller; import javax.servlet.ServletException; import javax.servlet.annotation.WebServlet; import javax.servlet.http.HttpServlet; import javax.servlet.http.HttpServletRequest; import javax.servlet.http.HttpServletResponse; import java.io.IOException; @WebServlet(name = "ShowAllEmpController",value="/manager/safe/showAllEmpController") public class ShowAllEmpController extends HttpServlet { protected void doPost(HttpServletRequest request, HttpServletResponse response) throws ServletException, IOException { doGet(request,response); } protected void doGet(HttpServletRequest request, HttpServletResponse response) throws ServletException, IOException { //先做一个提示,后续补全 System.out.println("登录成功,查询所有!"); } }- 1
- 2
- 3
- 4
- 5
- 6
- 7
- 8
- 9
- 10
- 11
- 12
- 13
- 14
- 15
- 16
- 17
- 18
- 19
- 20
- 21
回头在EmpManagerLoginController类中补全跳转
//跳转到查询所有的信息的界面 response.sendRedirect(request.getContextPath()+"/manager/safe/showAllEmpController");- 1
- 2
2.5.完成登录界面进行验证
DOCTYPE html> <html lang="en"> <head> <meta charset="UTF-8"> <title>登录界面title> head> <body> <div> <form action="/empproject/manager/EmpManagerLoginController" method="post"> 用户名:<input type="text" name="username"/><br/> 密码:<input type="password" name="password"/><br/> 验证码:<input type="text" name="inputVcode"/><img src="//empproject/createCode/createCode"><br/> <input type="submit" value = "登录"> form> div> body> html>- 1
- 2
- 3
- 4
- 5
- 6
- 7
- 8
- 9
- 10
- 11
- 12
- 13
- 14
- 15
- 16
- 17
- 18
<div STYLE="page-break-after: always;">div>- 1
3.1查询所有员工功能
3.1.1在entity包下创建emp实体类进行使用
package com.qf.emp.entity; //emp实体类 public class Emp { private int id; private String name; private double salary; private int age; public Emp() { } public Emp(int id, String name, double salary, int age) { this.id = id; this.name = name; this.salary = salary; this.age = age; } public int getId() { return id; } public void setId(int id) { this.id = id; } public String getName() { return name; } public void setName(String name) { this.name = name; } public double getSalary() { return salary; } public void setSalary(double salary) { this.salary = salary; } public int getAge() { return age; } public void setAge(int age) { this.age = age; } @Override public String toString() { return "Emp{" + "id=" + id + ", name='" + name + '\'' + ", salary=" + salary + ", age=" + age + '}'; } }- 1
- 2
- 3
- 4
- 5
- 6
- 7
- 8
- 9
- 10
- 11
- 12
- 13
- 14
- 15
- 16
- 17
- 18
- 19
- 20
- 21
- 22
- 23
- 24
- 25
- 26
- 27
- 28
- 29
- 30
- 31
- 32
- 33
- 34
- 35
- 36
- 37
- 38
- 39
- 40
- 41
- 42
- 43
- 44
- 45
- 46
- 47
- 48
- 49
- 50
- 51
- 52
- 53
- 54
- 55
- 56
- 57
- 58
- 59
- 60
<div STYLE="page-break-after: always;">div>- 1
3.2在Dao包下创建EmpDao 进行查询方法编写
package com.qf.emp.dao; import com.qf.emp.entity.Emp; import java.util.List; public interface EmpDao { public List<Emp> selectAll(); }- 1
- 2
- 3
- 4
- 5
- 6
- 7
- 8
- 9
- 10
3.3在编写EmpDao的实现类EmpDaoImpl
package com.qf.emp.dao.impl; import com.qf.emp.dao.EmpDao; import com.qf.emp.entity.Emp; import com.qf.emp.utils.DbUtils; import org.apache.commons.dbutils.QueryRunner; import org.apache.commons.dbutils.handlers.BeanListHandler; import java.sql.SQLException; import java.util.List; public class EmpDaoImpl implements EmpDao { private QueryRunner queryRunner = new QueryRunner(); @Override public List<Emp> selectAll() { try { List<Emp> emps = queryRunner.query(DbUtils.getConnection(), "select * from emp", new BeanListHandler<Emp>(Emp.class)); return emps; } catch (SQLException e) { e.printStackTrace(); } return null; } }- 1
- 2
- 3
- 4
- 5
- 6
- 7
- 8
- 9
- 10
- 11
- 12
- 13
- 14
- 15
- 16
- 17
- 18
- 19
- 20
- 21
- 22
- 23
- 24
- 25
- 26
<div STYLE="page-break-after: always;">div>- 1
3.3编写业务层逻辑处理查询emp业务,创建EmpService
package com.qf.emp.service; import com.qf.emp.entity.Emp; import java.util.List; public interface EmpService { public List<Emp> showAllEmp(); }- 1
- 2
- 3
- 4
- 5
- 6
- 7
- 8
- 9
- 10
3.4编写EmpService的实现EmpServiceImpl
package com.qf.emp.service.impl; import com.qf.emp.dao.EmpDao; import com.qf.emp.dao.impl.EmpDaoImpl; import com.qf.emp.entity.Emp; import com.qf.emp.service.EmpService; import com.qf.emp.utils.DbUtils; import jdk.nashorn.internal.ir.CallNode; import java.util.ArrayList; import java.util.List; import java.util.Objects; public class EmpServiceImpl implements EmpService { private EmpDao empDao = new EmpDaoImpl(); @Override public List<Emp> showAllEmp() { List<Emp> emps = new ArrayList<>(); try { DbUtils.begin(); List<Emp> temps = empDao.selectAll(); if (Objects.nonNull(temps)) { emps = temps; } DbUtils.commit(); } catch (Exception e) { DbUtils.rollback(); e.printStackTrace(); } return emps; } }- 1
- 2
- 3
- 4
- 5
- 6
- 7
- 8
- 9
- 10
- 11
- 12
- 13
- 14
- 15
- 16
- 17
- 18
- 19
- 20
- 21
- 22
- 23
- 24
- 25
- 26
- 27
- 28
- 29
- 30
- 31
- 32
- 33
- 34
<div STYLE="page-break-after: always;">div>- 1
3.5修改Controller包下ShowAllEmpController逻辑
package com.qf.emp.controller; import com.qf.emp.entity.Emp; import com.qf.emp.service.EmpService; import com.qf.emp.service.impl.EmpServiceImpl; import javax.servlet.ServletException; import javax.servlet.annotation.WebServlet; import javax.servlet.http.HttpServlet; import javax.servlet.http.HttpServletRequest; import javax.servlet.http.HttpServletResponse; import java.io.IOException; import java.util.List; @WebServlet(name = "ShowAllEmpController",value="/manager/safe/showAllEmpController") public class ShowAllEmpController extends HttpServlet { protected void doPost(HttpServletRequest request, HttpServletResponse response) throws ServletException, IOException { doGet(request,response); } protected void doGet(HttpServletRequest request, HttpServletResponse response) throws ServletException, IOException { EmpService empService = new EmpServiceImpl(); List<Emp> list = empService.showAllEmp(); request.setAttribute("emps",list); //通过请求转换,将数据转发另外一个Servlet进行处理[页面Servlet] request.getRequestDispatcher("/manager/safe/showAllEmpJSP").forward(request,response); } }- 1
- 2
- 3
- 4
- 5
- 6
- 7
- 8
- 9
- 10
- 11
- 12
- 13
- 14
- 15
- 16
- 17
- 18
- 19
- 20
- 21
- 22
- 23
- 24
- 25
- 26
- 27
- 28
- 29
ps:只有登录之后才对后台进行访问,所以我们需要对当前访问进行权限限制
<div STYLE="page-break-after: always;">div>- 1
3.6在Filter包创建Filter类进行权限限制
package com.qf.emp.filter; import com.qf.emp.entity.EmpManager; import javax.servlet.*; import javax.servlet.annotation.WebFilter; import javax.servlet.http.HttpServletRequest; import javax.servlet.http.HttpServletResponse; import javax.servlet.http.HttpSession; import java.io.IOException; import java.util.Objects; @WebFilter(value="/manager/safe/*") public class CheckFilter implements Filter { public void destroy() { } public void doFilter(ServletRequest req, ServletResponse resp, FilterChain chain) throws ServletException, IOException { HttpServletRequest request = (HttpServletRequest) req; HttpServletResponse response = (HttpServletResponse)resp; //通过Session获取存储的登录对象 HttpSession session = request.getSession(); EmpManager empManager = (EmpManager)session.getAttribute("empManager"); if(Objects.nonNull(empManager)){//登录过 //就传递 chain.doFilter(req, resp); }else{ response.sendRedirect(request.getContextPath()+"/login.html"); } } public void init(FilterConfig config) throws ServletException { } }- 1
- 2
- 3
- 4
- 5
- 6
- 7
- 8
- 9
- 10
- 11
- 12
- 13
- 14
- 15
- 16
- 17
- 18
- 19
- 20
- 21
- 22
- 23
- 24
- 25
- 26
- 27
- 28
- 29
- 30
- 31
- 32
- 33
- 34
- 35
- 36
- 37
- 38
- 39
- 40
在当前报下提供编码统一处理
package com.qf.emp.filter; import javax.servlet.*; import javax.servlet.annotation.WebFilter; import java.io.IOException; @WebFilter(value="/manager/*") public class EncodingFilter implements Filter { public void destroy() { } public void doFilter(ServletRequest req, ServletResponse resp, FilterChain chain) throws ServletException, IOException { req.setCharacterEncoding("UTF-8"); resp.setContentType("text/html;charset=UTF-8"); chain.doFilter(req, resp); } public void init(FilterConfig config) throws ServletException { } }- 1
- 2
- 3
- 4
- 5
- 6
- 7
- 8
- 9
- 10
- 11
- 12
- 13
- 14
- 15
- 16
- 17
- 18
- 19
- 20
- 21
- 22
- 23
<div STYLE="page-break-after: always;">div>- 1
3.7在JSP包下创建显示查询所有结果页面
ps:JSP就是页面版本Servlet
package com.qf.emp.jsp; import com.qf.emp.entity.Emp; import javax.servlet.ServletException; import javax.servlet.annotation.WebServlet; import javax.servlet.http.HttpServlet; import javax.servlet.http.HttpServletRequest; import javax.servlet.http.HttpServletResponse; import java.io.IOException; import java.io.PrintWriter; import java.util.List; @WebServlet(name = "ShowAllEmpJSP",value ="/manager/safe/showAllEmpJSP") public class ShowAllEmpJSP extends HttpServlet { protected void doPost(HttpServletRequest request, HttpServletResponse response) throws ServletException, IOException { doGet(request,response); } protected void doGet(HttpServletRequest request, HttpServletResponse response) throws ServletException, IOException { //1.全新页面写法 //1.获取集合数据进行展示 List<Emp> emps = (List<Emp>)request.getAttribute("emps"); PrintWriter out = response.getWriter(); out.println(""); out.println(" "); out.println(" "); out.println("查询所有员工信息页面 "); out.println(" "); out.println(" "); out.println(""); out.println("
"); out.println(" "); out.println(" "); } }"); out.println(" "); for(Emp emp:emps) { out.println("编号 "); out.println("姓名 "); out.println("工资 "); out.println("年龄 "); out.println("操作 "); out.println(""); out.println(" "); } out.println(""+emp.getId()+" "); out.println(""+emp.getName()+" "); out.println(""+emp.getSalary()+" "); out.println(""+emp.getAge()+" "); out.println("删除 "); out.println("修改 "); out.println("- 1
- 2
- 3
- 4
- 5
- 6
- 7
- 8
- 9
- 10
- 11
- 12
- 13
- 14
- 15
- 16
- 17
- 18
- 19
- 20
- 21
- 22
- 23
- 24
- 25
- 26
- 27
- 28
- 29
- 30
- 31
- 32
- 33
- 34
- 35
- 36
- 37
- 38
- 39
- 40
- 41
- 42
- 43
- 44
- 45
- 46
- 47
- 48
- 49
- 50
- 51
- 52
- 53
- 54
- 55
- 56
- 57
<div STYLE="page-break-after: always;">div>- 1
删除员工功能
修改Dao包下的EmpDao文件
public int delete(int id);- 1
- 2
在修改Dao包下的impl包下的EmpDaoImpl文件
@Override public int delete(int id) { try { int result = queryRunner.update(DbUtils.getConnection(),"delete from emp where id = ?;",id); return result; } catch (SQLException e) { e.printStackTrace(); } return 0; }- 1
- 2
- 3
- 4
- 5
- 6
- 7
- 8
- 9
- 10
修改service包下的EmpService
public int removeEmp(int id);- 1
在修改service包下impl包中EmpServiceImpl
@Override public int removeEmp(int id) { int result = 0; try { DbUtils.begin(); result = empDao.delete(id); DbUtils.commit(); } catch (Exception e) { DbUtils.rollback(); e.printStackTrace(); } return result; }- 1
- 2
- 3
- 4
- 5
- 6
- 7
- 8
- 9
- 10
- 11
- 12
- 13
修改JSP包的ShowAllEmpJSP文件
删除的话将页面上的当前数据删除掉,也就是说当点击删除按钮的时候需要获取到getID参数,所以需要将删除按钮修改为a标签拼接路径以get请求的方式进行拼接
printWriter.println("删除 ");- 1
<div STYLE="page-break-after: always;">div>- 1
在Controller报下删除员工RemoveEmpController
package com.qf.emp.controller; import com.qf.emp.service.EmpService; import com.qf.emp.service.impl.EmpServiceImpl; import javax.servlet.ServletException; import javax.servlet.annotation.WebServlet; import javax.servlet.http.HttpServlet; import javax.servlet.http.HttpServletRequest; import javax.servlet.http.HttpServletResponse; import java.io.IOException; @WebServlet(name = "RemoveEmpController",value = "/manager/safe/removeEmpController") public class RemoveEmpController extends HttpServlet { protected void doPost(HttpServletRequest request, HttpServletResponse response) throws ServletException, IOException { Integer id = Integer.valueOf(request.getParameter("id")); EmpService empService = new EmpServiceImpl(); empService.removeEmp(id); response.sendRedirect(request.getContextPath()+"/manager/safe/showAllEmpController"); } protected void doGet(HttpServletRequest request, HttpServletResponse response) throws ServletException, IOException { doPost(request, response); } }- 1
- 2
- 3
- 4
- 5
- 6
- 7
- 8
- 9
- 10
- 11
- 12
- 13
- 14
- 15
- 16
- 17
- 18
- 19
- 20
- 21
- 22
- 23
- 24
- 25
- 26
- 27
- 28
- 29
可以测试删除?那么为什么可以在JSP页面内中直接使用request对象呢?在jsp里面讲解
<div STYLE="page-break-after: always;">div>- 1
修改员工功能
修改Dao包下的EmpDao文件
public int update(Emp emp); public Emp select(int id);- 1
- 2
在修改Dao包下的impl包下的EmpDaoImpl文件
@Override public int update(Emp emp) { try { int result = queryRunner.update(DbUtils.getConnection(),"update emp set name=?,salary=?,age=? where id = ?",emp.getName(),emp.getSalary(),emp.getAge(),emp.getId()); return result; } catch (SQLException e) { e.printStackTrace(); } return 0; } @Override public Emp select(int id) { try { Emp emp = queryRunner.query(DbUtils.getConnection(),"select * from emp where id=?;",new BeanHandler<Emp>(Emp.class),id); return emp; } catch (SQLException e) { e.printStackTrace(); } return null; }- 1
- 2
- 3
- 4
- 5
- 6
- 7
- 8
- 9
- 10
- 11
- 12
- 13
- 14
- 15
- 16
- 17
- 18
- 19
- 20
- 21
修改service包下的EmpService
public int modify(Emp emp); public Emp showEmp(int id);- 1
- 2
- 3
在修改service包下impl包中EmpServiceImpl
@Override public int modify(Emp emp) { int result = 0; try { DbUtils.begin(); result = empDao.update(emp); DbUtils.commit(); } catch (Exception e) { DbUtils.rollback(); e.printStackTrace(); } return result ; } @Override public Emp showEmp(int id) { Emp emp = null; try { DbUtils.begin(); emp = empDao.select(id); DbUtils.commit(); } catch (Exception e) { DbUtils.rollback(); e.printStackTrace(); } return emp; }- 1
- 2
- 3
- 4
- 5
- 6
- 7
- 8
- 9
- 10
- 11
- 12
- 13
- 14
- 15
- 16
- 17
- 18
- 19
- 20
- 21
- 22
- 23
- 24
- 25
- 26
- 27
修改JSP包的ShowAllEmpJSP文件
删除的话将页面上的当前数据删除掉,也就是说当点击删除按钮的时候需要获取到getID参数,所以需要将删除按钮修改为a标签拼接路径以get请求的方式进行拼接
printWriter.println("修改 ");- 1
<div STYLE="page-break-after: always;">div>- 1
在Controller报下修改员工Controller
package com.qf.emp.controller; import com.qf.emp.entity.Emp; import com.qf.emp.service.EmpService; import com.qf.emp.service.impl.EmpServiceImpl; import javax.servlet.ServletException; import javax.servlet.annotation.WebServlet; import javax.servlet.http.HttpServlet; import javax.servlet.http.HttpServletRequest; import javax.servlet.http.HttpServletResponse; import java.io.IOException; @WebServlet(name = "ShowEmpController",value = "/manager/safe/showEmpController") public class ShowEmpController extends HttpServlet { protected void doPost(HttpServletRequest request, HttpServletResponse response) throws ServletException, IOException { Integer id = Integer.valueOf(request.getParameter("id")); EmpService empService = new EmpServiceImpl(); Emp emp = empService.showEmp(id); request.setAttribute("emp",emp); request.getRequestDispatcher("/manager/safe/showUpdateEmpInfoJSP").forward(request,response); } protected void doGet(HttpServletRequest request, HttpServletResponse response) throws ServletException, IOException { doPost(request, response); } }- 1
- 2
- 3
- 4
- 5
- 6
- 7
- 8
- 9
- 10
- 11
- 12
- 13
- 14
- 15
- 16
- 17
- 18
- 19
- 20
- 21
- 22
- 23
- 24
- 25
- 26
- 27
- 28
- 29
- 30
- 31
<div STYLE="page-break-after: always;">div>- 1
创建JSP页面
package com.qf.emp.jsp; import com.qf.emp.entity.Emp; import javax.servlet.ServletException; import javax.servlet.annotation.WebServlet; import javax.servlet.http.HttpServlet; import javax.servlet.http.HttpServletRequest; import javax.servlet.http.HttpServletResponse; import java.io.IOException; import java.io.PrintWriter; @WebServlet(name = "ShowUpdateEmpInfoController",value = "/manager/safe/showUpdateEmpInfoJSP") public class ShowUpdateEmpInfoJSP extends HttpServlet { protected void doPost(HttpServletRequest request, HttpServletResponse response) throws ServletException, IOException { Emp emp = (Emp)request.getAttribute("emp"); PrintWriter printWriter = response.getWriter(); printWriter.println(""); printWriter.println(" "); printWriter.println(" "); printWriter.println("修改员工信息页面 "); printWriter.println(" "); printWriter.println(" "); printWriter.println(" ); printWriter.println(" 编号:
"); printWriter.println(" 姓名:
"); printWriter.println(" 工资:
"); printWriter.println(" 年龄:
"); printWriter.println("
"); printWriter.println(" "); printWriter.println(" "); printWriter.println(""); } protected void doGet(HttpServletRequest request, HttpServletResponse response) throws ServletException, IOException { doPost(request, response); } }- 1
- 2
- 3
- 4
- 5
- 6
- 7
- 8
- 9
- 10
- 11
- 12
- 13
- 14
- 15
- 16
- 17
- 18
- 19
- 20
- 21
- 22
- 23
- 24
- 25
- 26
- 27
- 28
- 29
- 30
- 31
- 32
- 33
- 34
- 35
- 36
- 37
- 38
- 39
- 40
- 41
在controller下创建类
package com.qf.emp.controller; import com.qf.emp.entity.Emp; import com.qf.emp.service.EmpService; import com.qf.emp.service.impl.EmpServiceImpl; import javax.servlet.ServletException; import javax.servlet.annotation.WebServlet; import javax.servlet.http.HttpServlet; import javax.servlet.http.HttpServletRequest; import javax.servlet.http.HttpServletResponse; import java.io.IOException; //通过这个controller来对数据进行收参数处理 @WebServlet(name = "UpdateEmpController",value = "/manager/safe/updateEmpController") public class UpdateEmpController extends HttpServlet { protected void doPost(HttpServletRequest request, HttpServletResponse response) throws ServletException, IOException { //1.收参 Integer id = Integer.valueOf(request.getParameter("id")); String name = request.getParameter("name"); Double salary = Double.valueOf(request.getParameter("salary")); Integer age = Integer.valueOf(request.getParameter("age")); Emp emp = new Emp(id,name,salary,age); EmpService empService = new EmpServiceImpl(); empService.modify(emp); response.sendRedirect(request.getContextPath()+"/manager/safe/showAllEmpController"); } protected void doGet(HttpServletRequest request, HttpServletResponse response) throws ServletException, IOException { doPost(request, response); } }- 1
- 2
- 3
- 4
- 5
- 6
- 7
- 8
- 9
- 10
- 11
- 12
- 13
- 14
- 15
- 16
- 17
- 18
- 19
- 20
- 21
- 22
- 23
- 24
- 25
- 26
- 27
- 28
- 29
- 30
- 31
- 32
- 33
- 34
- 35
- 36
- 37
- 38
-
相关阅读:
Windows连接SFTP服务
Keil C51 汉字显示 BUG 解决方案
@RestControllerAdvice 统一异常处理
基于CNTK/C#实现图像分类【附部分源码及模型】
C++读写Excel有许多开源库
java毕业设计大学生学业互助与交流平台Mybatis+系统+数据库+调试部署
细数软件研发效能的七宗罪
【408数据结构】第一章 绪论
14天阅读挑战赛(趣学算法)笔记2
Molecule实现数栈至简前端开发新体验
- 原文地址:https://blog.csdn.net/WilsonDone/article/details/127559278